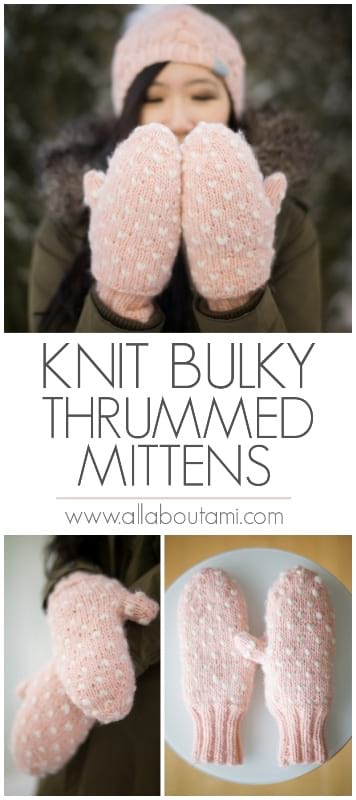
For the past several years, there has been a certain project that has been on my to-try bucket list: Thrummed Mittens. Every year around this time when the temperatures plummet and the weather gets extremely frigid, I think about making thrummed mittens and keeping my fingers warm and toasty. Thrummed Mittens originate from Newfoundland and Labrador, and they are special mittens where little whisps of unspun wool roving (called “thrums” ) are knit into the mitten. These thrums felt over time with repeated wear to form a fleece lining that keeps your hands very warm. I can’t recall how I first heard about these mittens, but every year I would go down the rabbit hole of researching how these mittens are made and debate whether I should purchase a pair made by another artisan or attempt to make my own. In the past years, I have been knee-deep in my own designs and projects, so I did not have the time to undertake this new challenge. Time would pass and I would forget about these mittens and move onto Spring projects. Then the cycle would repeat itself as the frigid weather would appear again the following January and I would remember these warm mittens and how I aspired to own a pair! We were out for a walk one weekend recently and I was warm everywhere except my hands. This inspired me to look into thrummed mittens once again, and this time I actually took the plunge and decided I would finally try to make my own. With all this at home time, I knew it was the perfect opportunity and I actually had all the needed materials sitting in my basement!
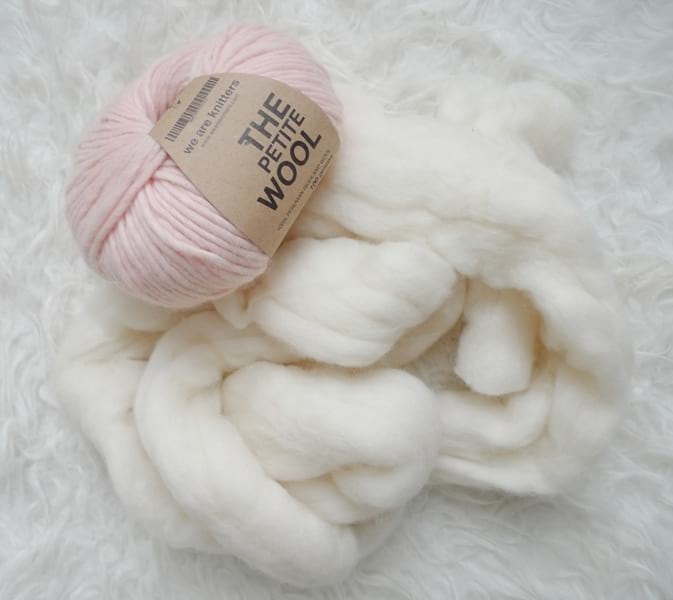
Back in 2016, I undertook another project that had been on my bucket list called the “Extreme Knitted Blanket“! I had seen those gorgeous handmade blankets made using chunky wool roving on social media, and I was very inspired to make my own. I collaborated with “Mama Knows Luxury” and had so much fun knitting my own chunky blanket using giant needles. I had some unspun wool roving left over from that project and I kept it safe in a bag in my basement. When I learned that you needed to make little thrums out of unspun wool roving for thrummed mittens, I knew that this left-over wool would be perfect (I am so glad I saved that wool). I also had some beautiful pink bulky (level 5) wool in my basement called “The Petite Wool” by We Are Knitters (I previously used this yarn for my “Braided Cable Beanie” by Prem Knits HERE). Whenever I passed by this yarn in my basement, I would always imagine them as mittens. I was happy that I already had all the materials ready to go and I did not need to purchase anything else!
I tried to look up a lot of videos and blog posts about thrummed mittens before getting started so I knew what I was getting into. There are different techniques for making thrums and how to insert them into your knitting (I will be sharing my own videos to show you what techniques I used in this blog post). There are also many different patterns available. I did a search on Ravelry to see what patterns were available using bulky yarn – most patterns I found used worsted weight yarn. I came across this free pattern called “Chroma Thrummed Mitts” by Robbie Laughlin . I printed it off, read it through, and decided that it seemed achievable, so I got started!

One thing that was holding me back in previous years from attempting to knit mittens was the magic loop. I do not own any double-pointed needles (DPN’s) and I did not want to purchase any. I used tiny 9″ circular needles for my first pair of socks that I knitted (another challenge project that was on my bucket list). I watched several videos on how to do the magic loop technique with long circular cords, and I must say that it was not as challenging as I thought! I got used to how to do the magic loop with the ribbed band using my 24″ circular cord and it felt less awkward with time having the excess cord hanging out on either end. You can watch how I use the magic loop in my knitting in the video below as I filmed a tutorial:
I was probably most intimidated by making the thrums using unspun wool roving since I had never done this before. I had a limited amount of wool roving (what was left over from my blanket) and I did not want to waste any by making mistakes. I also knew how delicate this wool roving is and how easily it can tear since it is not spun. I asked my Instagram audience if they had any tips in my stories and thankfully many people had made thrummed mittens in the past and provided advice! They advised me to make all my thrums ahead of time so that they are a consistent size (rather than making them when you need them since they might not be as uniform) and to make the thrums thinner than you think they need to be.
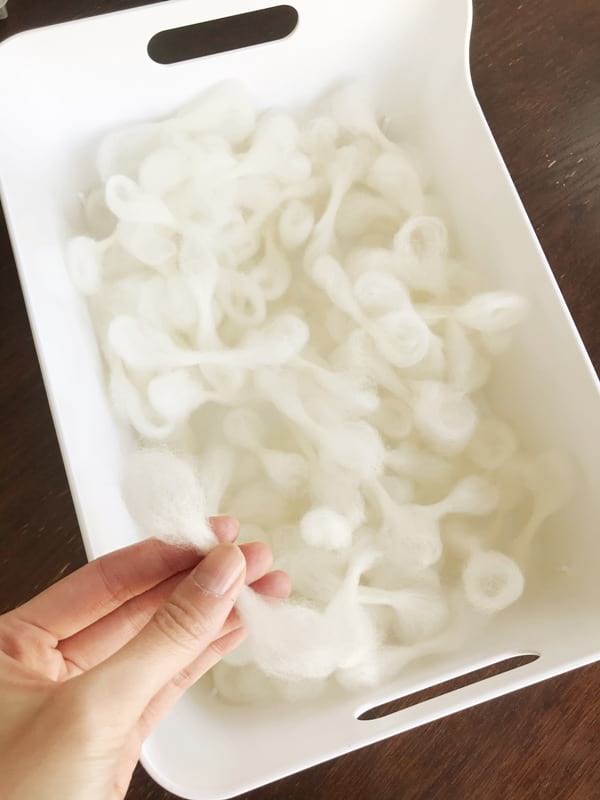
I found this video on YouTube HERE by Zenitude Fibre Arts and used it as a guide for how to make my thrums (note that I did not follow her technique for inserting the thrums as also shown in the video). You want to gently tear off a piece of wool roving and stretch it out so it becomes thinner. Overlap the ends to form a loop and then pinch it in the center so it forms a figure eight. Rub the middle part with your fingers so that it begins to felt with agitation. Roll the thrum in your palm with the edge of the other hand to agitate it some more. You want that middle felted part to be around the same thickness as the yarn you are using to knit the mitten. It was a bonus that I chose to use bulky yarn for my first pair of thrummed mittens since I did not have to make as many thrums (I still had to make about 111 thrums per mitten) and I did not have to make the thrums as thin as worsted weight (which would be more challenging). Bulky yarn also helps the project work up very quickly! You can determine how much thrum you want in your mitten- some readers said they wish they had used less thrum as theirs were too puffy, and someone said that once the thrum felted, their mitten became very oversized, and next time they would make a tighter-fitting mitten to begin with. I found it tricky trying to make those first thrums, but soon it became easier and I got into a rhythm. We watched a movie one evening and I made most of my thrums during that time. It is very helpful to have all your thrums made ahead of time so you can keep knitting your project without having to stop!
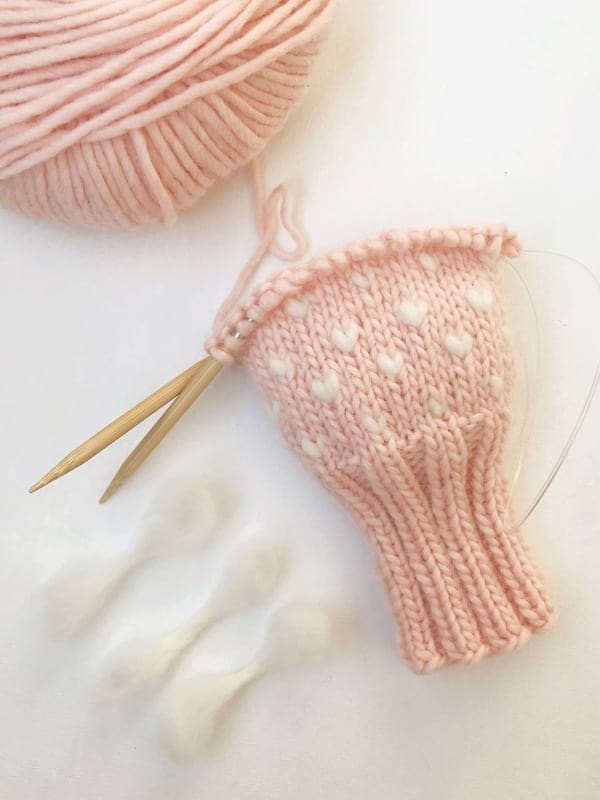
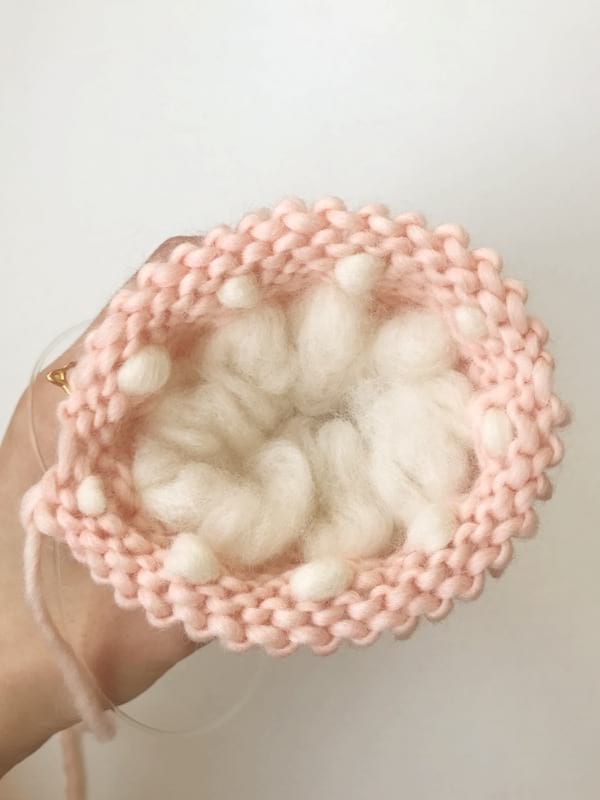
I was excited to begin adding the thrums to my mitten! I followed the instructions for adding the thrums as indicated by the pattern. To insert your thrum, you insert your right needle as if you are going to knit the next stitch. However, rather than yarning over, you fold the thrum over the right needle (I like to hold the ends of the thrum with my left hand to keep it out of the way). I also make the part of the thrum that is closer to me a little bit longer than the part of the thrum that is further away – once you knit it, it evens out. Next, wrap your working yarn around the right needle and knit both the yarn and thrum together. During the following round to secure the thrum into place, you knit the stitch and thrum through the back loop. You can watch my video below to see this in action! Note that the video includes a demonstration of how I make my thrums from unspun wool roving and how I knit the thrums into my mitten:
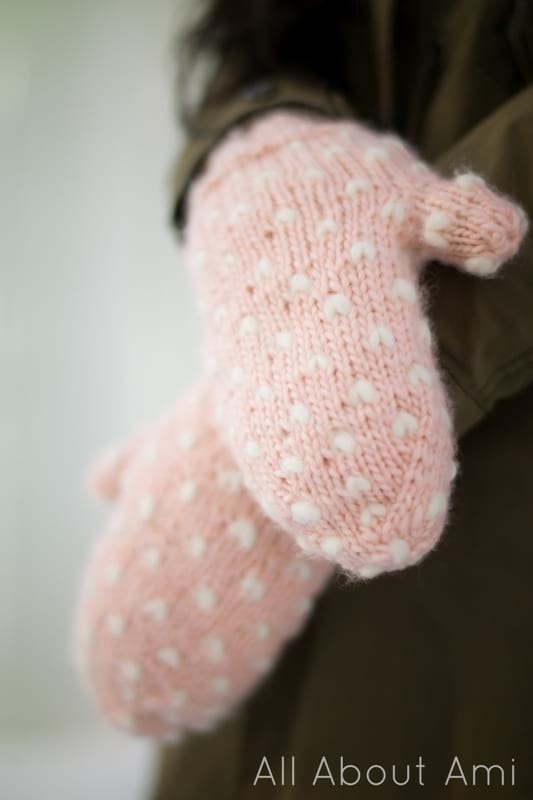
It was very fun seeing these puffy little cream hearts build up and locking them into place! I would periodically place my hand into the work-in-progress mitten and I LOVED how warm and soft it felt.
Another technique I learned was how to place an after-thought thumb! I think it is so neat how you use scrap yarn to work some stitches. After the top of the mitten is closed, you remove the scrap yarn to expose live stitches and work the thumb – such a neat technique!

I was SO INCREDIBLY EXCITED when I finished my first thrummed mitten and I quickly began working on the second one while all the techniques were still fresh in my mind! The second one worked up a lot more quickly since I knew what I was doing.
I did make some adjustments to the pattern I followed to suit my own personal preferences, and I will detail them here if you are interested:
My Notes:
- I followed the “Chroma Thrummed Mitts” pattern by Robbie Laughlin.
- I used “The Petite Wool” by We Are Knitters (I believe it was called “Nude” back when I first got this, but I think it is now called “Millennial Pink”). One 100 g ball was enough to make a pair of mittens!
- The unspun wool roving I used to make the thrums is from Mama Knows Luxury (undyed cream color). I used the left-over wool from my Extreme Knitted Blanket, and I used about 40 g to make enough thrums for two mittens (you will make approximately 111 thrums per mitten). You can search Etsy for unspun wool roving HERE and also find it on Amazon HERE. [UPDATE: After making these mittens, I found out that Lion Brand Yarn’s Fifty Fifty yarn from the LB Collection can be used to make thrums! This super bulky yarn is 50% alpaca/50% wool and is very loosely spun. You can gently split it in half and tear off pieces to make thrums. When it is split in half, the width is perfect for making a thrum as you do not need to stretch or thin it out any further. I have made thrums using this yarn for an upcoming project and I highly recommend it, especially if you are a beginner and have never worked with wool roving before. It is less intimidating as this Fifty Fifty yarn is a pencil roving, and each ball is 200 grams, so you can make plenty of thrums! Shop Fifty Fifty yarn HERE!
- I think using a bulky yarn for your first thrummed mitten project is a good option because the mitten works up more quickly, you need to make fewer thrums, and you don’t need to make the thrums as thin (compared to working with a worsted weight yarn).
- Rather than DPN’s, I used the magic loop with my 24″ circular cord.
- I wanted a longer ribbed cuff, so I did 20 rounds of ribbing.
- Remember to switch needle sizes going from the ribbed cuff to the body of the mitten. For my second mitten, I somehow mixed up the needles and ended up knitting the rest of the mitten using one 5.5 mm needle and one 6 mm needle. I was quite horrified when I discovered this at the very end of my project, but I was past the point of no return and there was no way I was redoing it. Thankfully both mittens look around the same size and you can hardly tell I made this mistake!
- I wanted a rounder top rather than a pointed top, so I worked the decreases differently. Since I did the decreases differently, I did not need the second marker.
- I used this decrease pattern (interspersed with *Knit around* rounds as indicated by the pattern):
- *K7, K2tog*, rep 4 times. (32 sts)
- *K6, K2tog*, rep 4 times. (28 sts)
- *K5, K2tog*, rep 4 times. (24 sts)
- *K4, K2tog*, rep 4 times. (20 sts)
- *K3, K2tog*, rep 4 times. (16 sts)
- *K2, K2tog*, rep 4 times. (12 sts)
- *K1, K2tog*, rep 4 times. (8 sts)
- I noticed that people on Ravelry said that they made the thumb bigger (knit more stitches using waste yarn). The thumb width fit me, but I would definitely make it bigger if you have larger thumbs. I also made the thumb taller and in retrospect I would probably have made it even taller (I went to 12 rounds).
- I used a cotton yarn as my waste yarn so that it would not get mixed up with the wool or caught in the thrum by accident.
- I left a long initial and final end when picking up stitches for my after-thought thumb. I am not too experienced with picking up stitches for the thumb, and I had holes around where the thumb emerged from the mitten. I simply closed up these holes using my long initial and final end and a darning needle!
- As indicated by the pattern, you can break up left-over fiber and stuff it into the top of the mitten and tip of the thumb for extra warmth. I definitely will be doing that since I have left-over fiber!
- You need to be careful when washing your mittens: do not throw them in the washing machine as heat and agitation will cause the mittens to felt together on the inside. From what I’ve read in other blog posts, wash your mittens by hand gently in lukewarm water with mild soap and lay flat to dry.
- If you are interested in owning a pair of these Thrummed Mittens but do not want to make your own, you can search Etsy so another fiber artist can make a pair for you HERE! There are also thrummed mitten kits that are frequently available through local artists or your specialty yarn stores as well!
- My adorable kitty stitch marker that I used throughout my project is from Firefly Notes! You can shop them HERE.
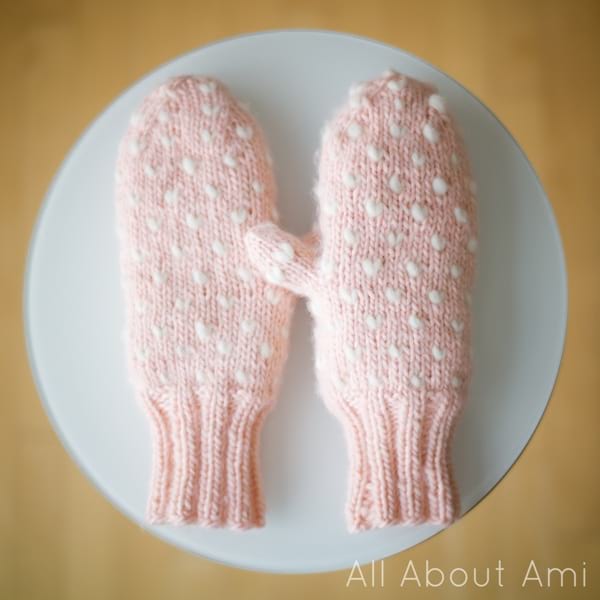
I was SO PROUD when I finished making my Thrummed Mittens! This special project has been on my bucket list for so long, and I feel so accomplished that I was finally able to make them. I learned so many new techniques along the way, such as how to use the magic loop, make thrums from unspun wool roving, how to knit the thrums into the mitten, and how to work an after-thought thumb.
It is so empowering learning new techniques, and I thoroughly enjoyed the entire process. When I shared about this project on social media, many of you had never heard of this technique and were inspired to try making these mittens as well! This warmed my heart so much as I have always wanted to inspire others through my blog and continue to be inspired myself as well. I love sharing these new techniques and projects with you!
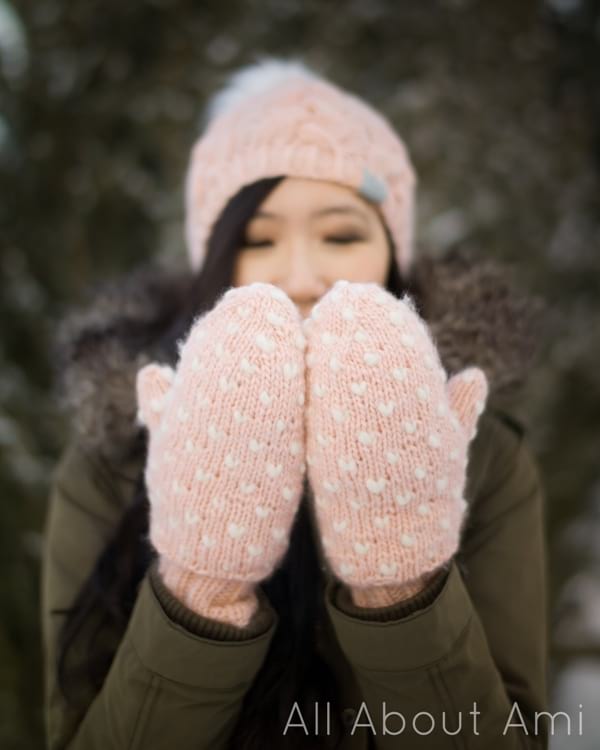
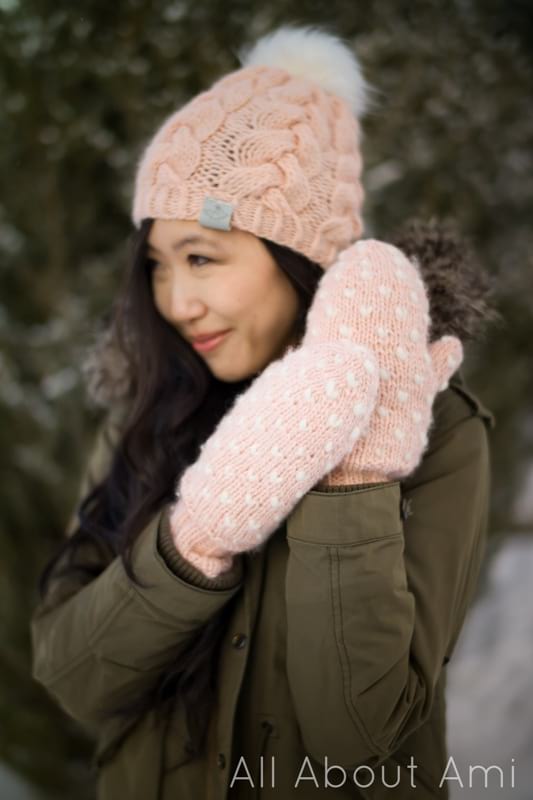
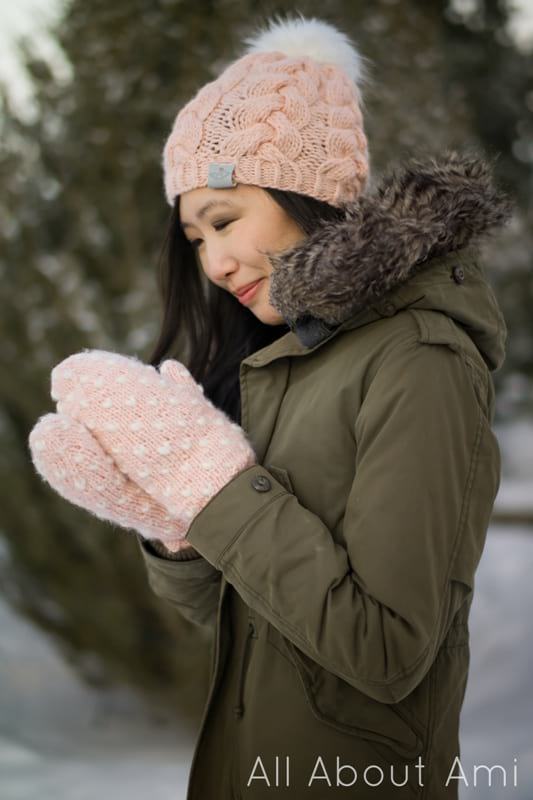
I really enjoyed making these mittens, and I love how practical they are since the layer of wool provides so much warmth. I know I will put them to great use as I finished them just in time before some very cold temperature are coming (we’re talking – 36 degrees Celsius). When we went to take these final photos, we quickly hopped into our backyard when it was -29 degrees Celsius. My hands felt SO incredibly warm and toasty! I paired these mittens with my Braided Cable Beanie that I knitted using a Prem Knits pattern – I used the exact same yarn so the hat and mittens make such a lovely set!
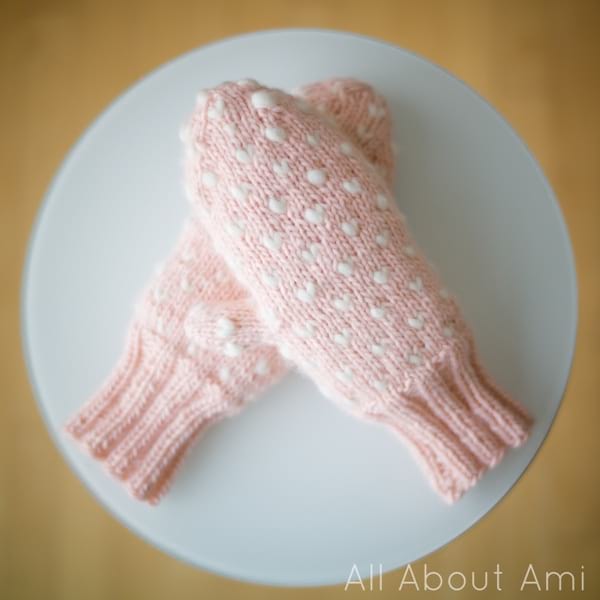
I love how we can make such practical and functional projects that help keep us warm that are also SO beautiful as well. These mittens have so much character and I love how I was able to personalize them for myself, such as using one of my favorite color combinations of pink and cream and making the ribbed cuff extra long. These mittens will no doubt keep my hands warm as we go on our winter walks for years to come, and I will think of all the love and effort that went into making them whenever I wear them!
I hope this provides you some inspiration if you were thinking of making Thrummed Mittens as well! It was very helpful for me to read others’ experiences making them and seeing these techniques in action, so I hope you find this blog post and my videos helpful! Stay warm and safe, everyone! Let’s continue challenging ourselves, learning new techniques, and crossing these special projects off our bucket lists!