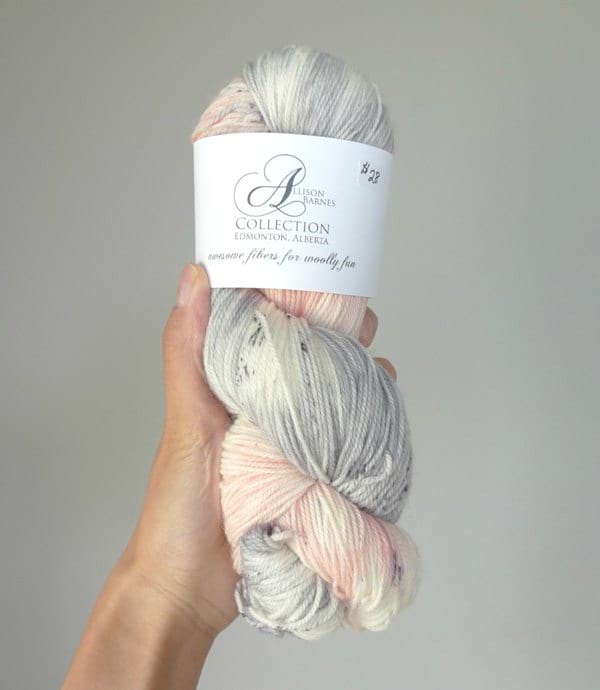
One of my goals as a fiber artist has always been to try and knit a pair of socks. Socks and shawls seem to be the beloved projects of choice for prolific knitters, and the thinner yarns required appear so delicate and fine. Knitting socks seemed very intimidating with the fingering weight yarn, tiny needles, and the sock terminology (I had no idea what a gusset was or what turning the heel meant). A year ago, I purchased this beautiful sock weight yarn from a local indie dyer named Allison Barnes. You may remember that we collaborated together to create the “Blush Bloom” colourway which I used to knit my Thick and Thin Cowl found HERE. The “Whisper” colourway is the lighter weight version with the same beautiful pinks, greys, whites and speckles- I knew I had to use Whisper for my first pair of socks! It is 80% Superwash Merino wool and 20% nylon, 3-ply fingering weight yarn (~420 yards, 115 grams). I admired this gorgeous hank of wool on my shelf for a year as I worked on other projects. I knew diving into knitting socks would require my full concentration and I wanted to be completely committed to the process. Thankfully a month ago, I mustered up the courage to start knitting my first pair of socks after finding a fabulous pattern with a full video tutorial to aid me along the way- keep reading to see which ones I used!
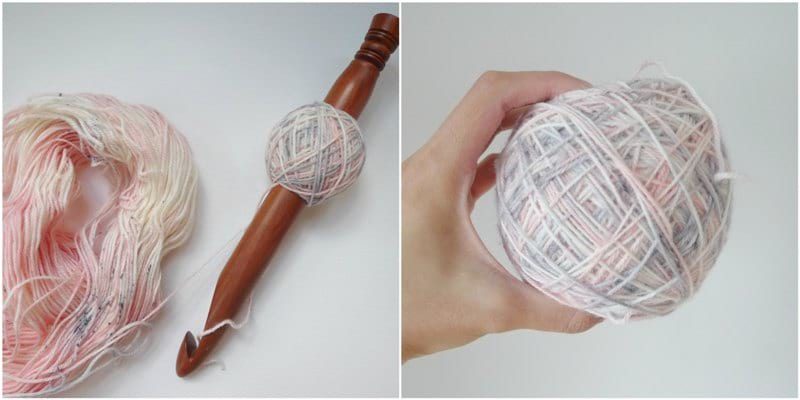
The first step in my sock knitting journey was to wind my hank of Whisper yarn into a cake! Since I do not own a winder or swift, I winded the yarn by hand using this video tutorial HERE as a guide. I used my 25 mm hook by BQueen Collection as my dowel to wind the yarn around as I lay my yarn on the floor. However, towards the end the yarn got all tangled up and it took me quite a while to wind the entire hank into a cake. When I shared this on my Instagram stories, people recommended laying the yarn around the backs of two chairs or even around your own knees after untwisting the hank to help keep the yarn from tangling. I will keep this in mind for next time! I love having my yarn wound into a cake as you can pull the yarn from the centre without having the yarn roll around.
What greatly spurred me onto trying to knit my first pair of socks was the discovery of a third alternative to the Magic Loop and DPN’s! I do not own any double pointed needles and was not interested in using or purchasing them. I watched videos of how to work the Magic Loop with socks, but having to constantly rotate the stitches, pull the cording and possibly deal with gaps seemed a bit troublesome. I was watching a Grocery Girls podcast when I heard Jodi and Tracie talk about tiny 9″ circular needles as a third method of knitting socks. They said that people who love this method REALLY love it, but it was not for everyone as they can be very tight and fiddly. This greatly intrigued me as I love knitting in continuous rounds and I had a feeling that this might be the method for me. On a visit to Calgary, I had a chance to chat with Nicole from Woolfield Studios as she knits and designs absolutely beautiful socks. When she mentioned that she uses 9″ circular needles for her socks, I knew I had to give these tiny circulars a try!
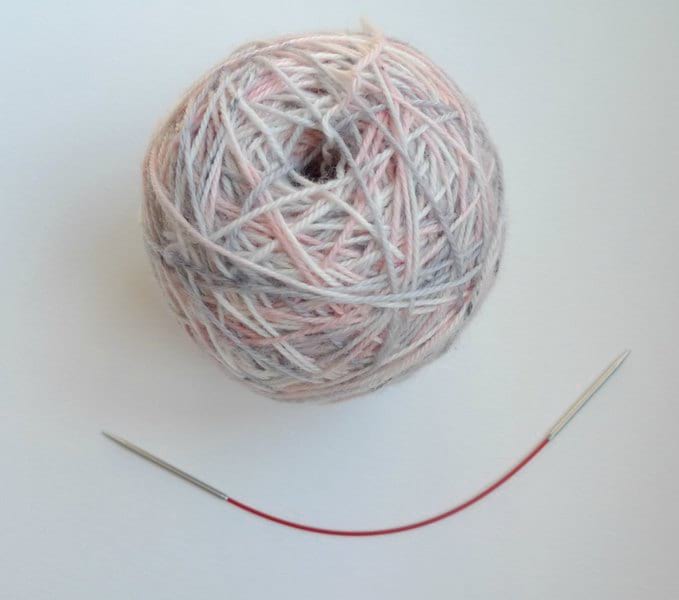
I purchased ChiaoGoo Premium Stainless Steel 2.5 mm 9″ circulars needles from their Knit Red Collection. The product features as stated on the packaging are: made of surgical-grade stainless steel; precisely machined tips and joins; flexible, multi-strand, nylon-coated, memory-free steel cable; permanently laser marked needle size; ergonomically designed to ease hand fatigue. You can purchase these on Amazon HERE (I was itching to get started so I found these needles at a local yarn shop). I am very happy that I purchased these needles as I really enjoyed working them! I can’t believe how tiny they look!

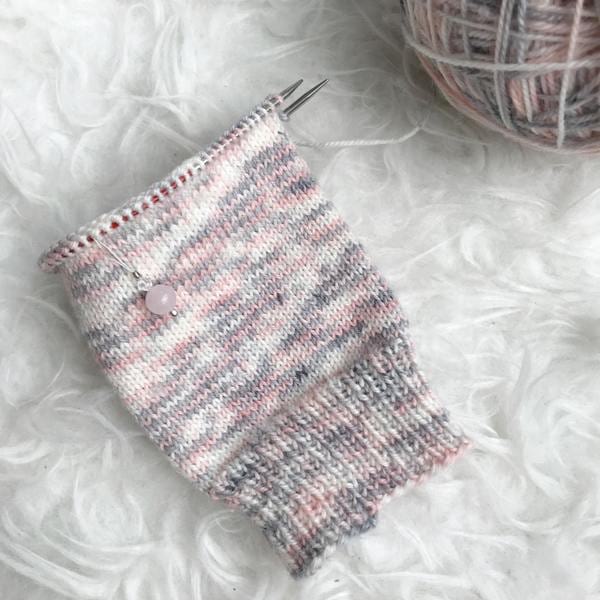
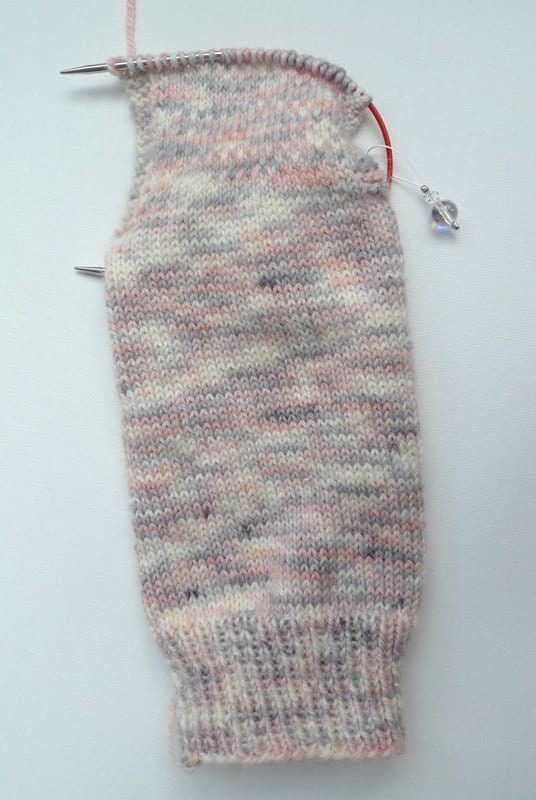
For my first pair of socks, I followed the free pattern called “My Favorite Vanilla Socks” by Meaghan Shmaltz of “The Unapologetic Knitter“. Meaghan’s pattern is very clear, well-written, and easy to follow. I usually wear a size 8.5 for shoes, and I followed the middle size. “Simply in Stitches” on YouTube has created an eight part video series in which she walks you through the entire pattern. I referenced her videos during every section and found them very helpful to visually see what to do next. I thoroughly enjoyed knitting the cuff and leg as I simply knitted in continuous rounds and got used to the 9″ circular needles. I loved seeing the various colours build up with the pretty speckles, and sometimes I would just sit back and admire the tiny little stitches!
Next it was time to knit the heel flap! For this part, I had to work in turned rows rather than working in continuous rounds.
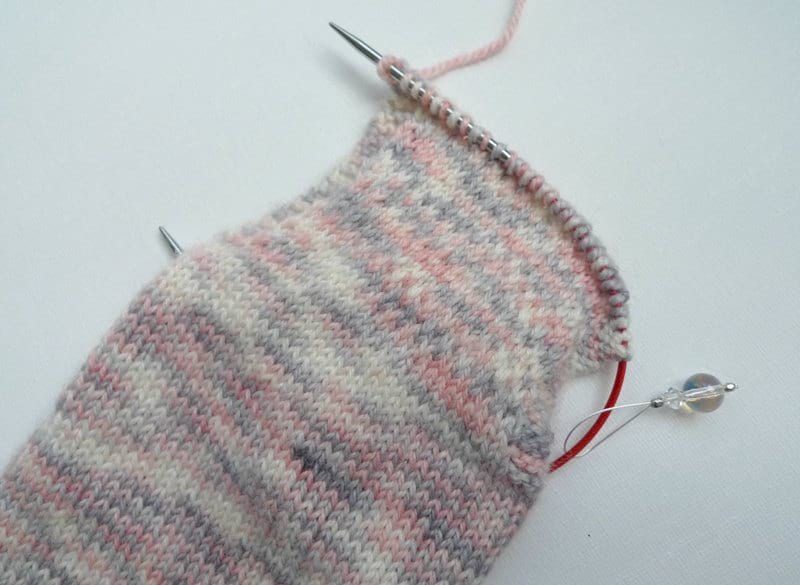
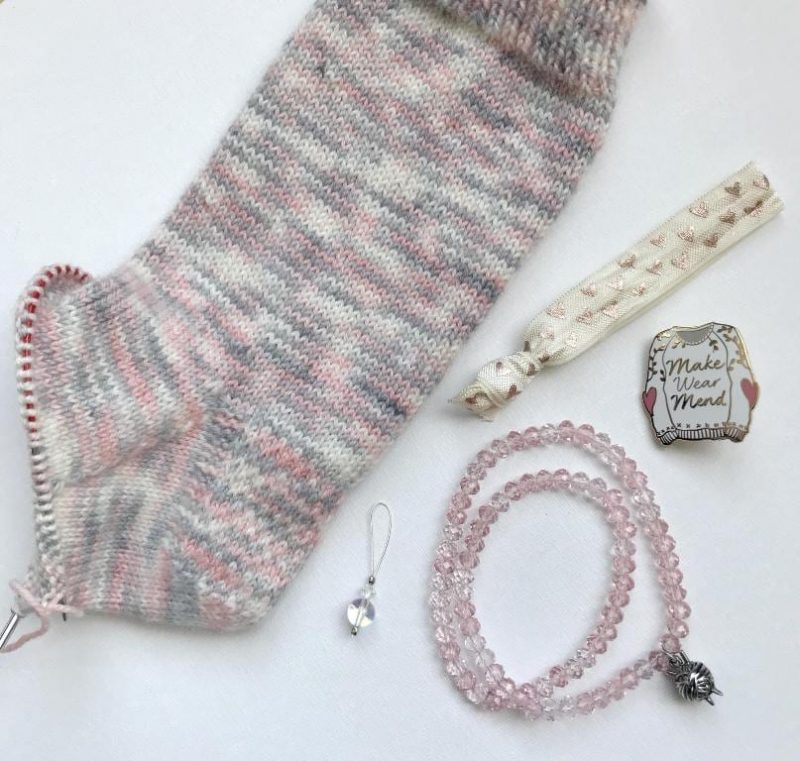
This is called a modified Eye of Partridge gusset heel, and I love how it looks with its beautiful texture!
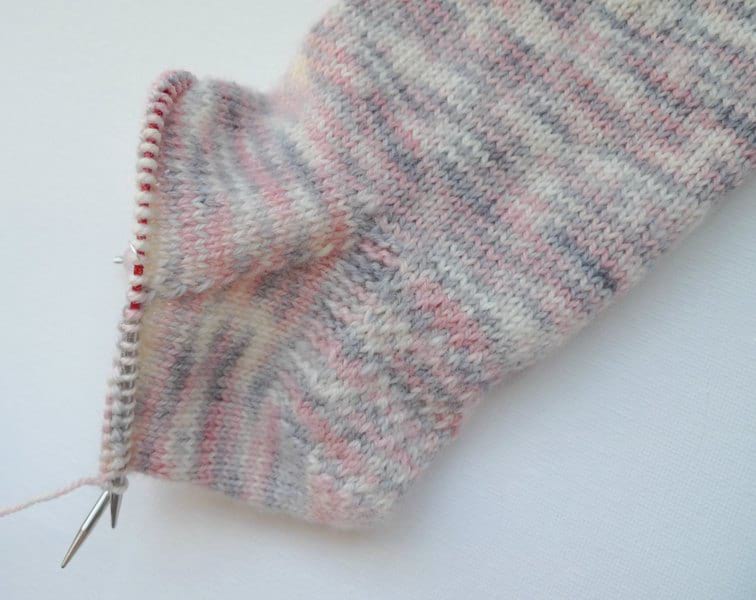
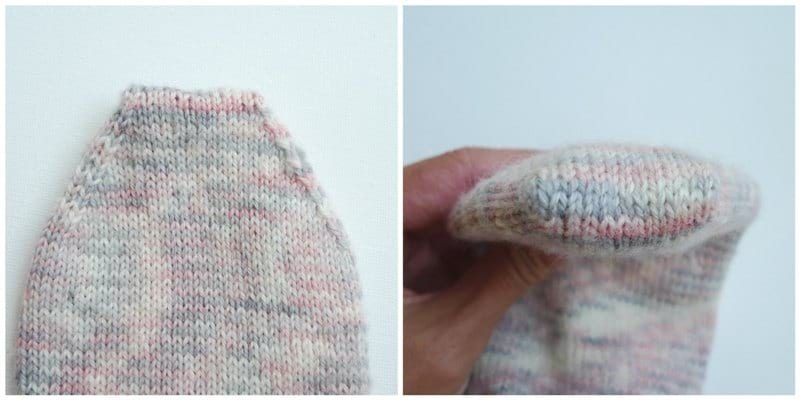
After knitting the heel flap, it was time to turn the heel! This part was so fascinating as it was my first time knitting short rows. I immersed myself in the pattern and did not realize what shape was building up. When I was done, this beautiful triangular shape was magically created!
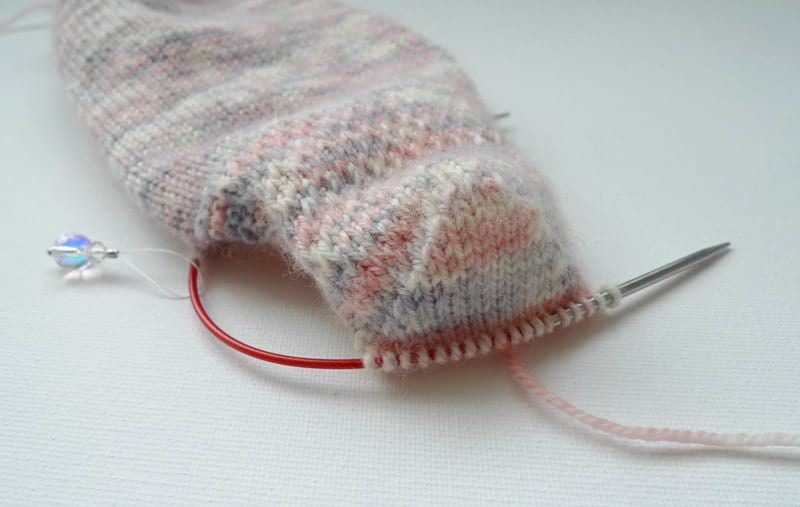
Turning the heel creates that right angle needed for when the leg transitions to the foot.
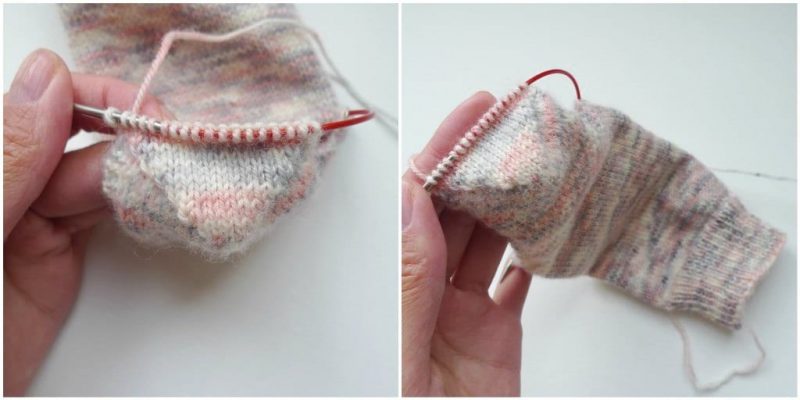
Next, I picked up stitches and worked the gusset! Picking up stitches was neat since it joined the various components together, and I loved the clean lines formed from the gusset.
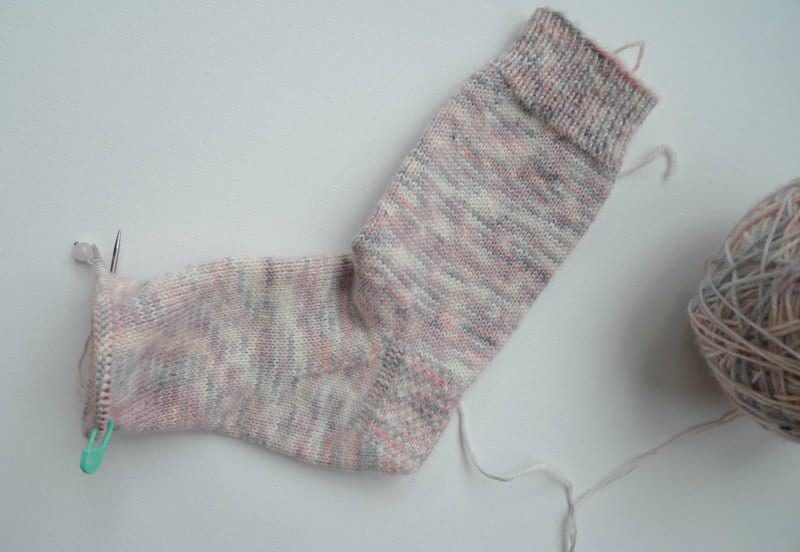
It was such a relief when it was time to knit the instep as I simply had to knit in continuous rounds! All the hard parts were complete!
Here is a video of me knitting the instep so you can get an idea of what knitting on tiny 9″ circular needles looks like! I’ve never knit such tiny stitches before!
One part I found challenging was determining how long to make the foot. I knew that I did not want to make my sock too big since it would stretch with wear and washing. Furthermore, I read that if your socks are too big, they can wear down more quickly when you wear them out since they rub against your shoes or boots. Meaghan recommends that you make the sock 10% shorter than your total foot length to accommodate for stretch. For example, if your foot is 9″ from back of heel to the tip of your longest toe, you subtract 10% and aim for your sock to be 8.1″ long. One of the downsides of knitting on 9″ circular needles is that you cannot try on your sock as you go, whereas you would be able to slip your foot in if you were doing the magic loop. You could put your stitches onto a piece of scrap yarn if you wanted to try on the sock! I ended up making my first sock a tad too small, so I added more rounds to the instep of my second sock!
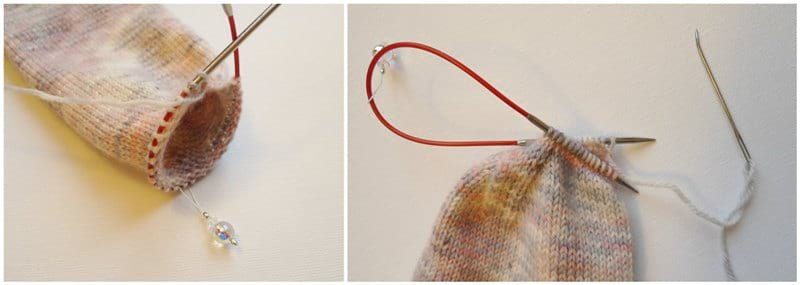
After knitting the instep, it was time to work the toe decreases! It was very exciting decreasing the number of stitches as the endpoint was nearing. However, the stitches were starting to get very tight around the 9″ circulars, and when I was nearing 40 stitches, it was nearly impossible to continue knitting around. I was unaware that we would actually need to use the magic loop method towards the end- I watched the YouTube video HERE to see how to do this. Working the magic loop was not bad at all, and I’m glad that it was possible to continue using the 9″ circulars for the entire process. Some people prefer switching to DPN’s for these last toe decrease steps, but I do not even own any DPN’s, so I was not able to switch even if I wanted to. To work the magic loop, you divide the number of stitches in half and put them on both needles. Then you pull the back needle through and work on the stitches on the front needle- I highly recommend checking out the video to see how to do this. As the finishing step, you cut the yarn and thread the tail with a tapestry needle. You then seam up the socks with the Kitchener Stitch!
The kitchener stitch is a brilliant technique that requires a methodical series of steps- it gives an invisible finish that looks just like stockinette. Below you can see the shaping with the toe decreases and where the kitchener stitch has been worked. Pretty incredible, right? It is so satisfying working the kitchener stitch and getting such a clean bind off!
I felt so accomplished when I finished knitting my first sock! It felt amazing slipping it on for the first time- hand knit socks are so cozy and warm! As soon as I finished up the first sock, I immediately casted on my second sock so that I would not fall victim to the Second Sock Syndrome (never getting around to knitting the second pair of a set- I love that there is an official name for such a problem haha). Knitting the second sock went a lot faster since I knew what to expect for each section and I was more familiar with the techniques required.
![]()
This On the Go Arm Project Bag gifted to me by Michele of Stitch & Hustle went everywhere with me as I worked on my socks in the car, at the playground, and wherever I went! I love how portable socks are and how I could keep pulling out the yarn easily from the bag while looping it around my arm.
![]()
Here are some notes and tips that I compiled:
- I did 58 rounds of the leg.
- Carry a small crochet hook around with you in your project bag (e.g. 2.25 mm)! There were several occasions when I dropped a stitch, and carefully placed them back on my needles with the help of the tiny crochet hook!
- I worked 52 rounds for the instep.
- Do not remove the original stitch marker when you are done the gusset. It is helpful to have different stitch markers while working on your project so that you can identify which one is the original one.
- Make your sock 10% less of the length of your foot to allow for stretch.
- You can slip the stitches onto some scrap yarn or a longer cord if you want to try on the sock for sizing.
After knitting my first pair of socks, I can definitely see how addictive it is. I love how the entire project is broken down into various components that keep the process interesting and varied. It is so fun completing each portion and seeing your sock build up: from the cuff, leg, heel flap, turning the heel, picking up stitches, working the gusset, the instep, toe decreases and the finishing step! I hope you enjoyed going through the entire process with me and that you feel motivated to challenge yourself with a new project….and possibly knit your first pair of socks as well!
![]()
I took videos of my sock progress of my first sock along the way and posted them to my Instagram stories. Many of you mentioned that you loved seeing my updates and that they motivated you to try knitting your own socks! I saved all these videos to my highlights on my Instagram page, so you can keep watching them there whenever you’d like. I talked about the magic loop towards the end with the toe decreases, so you can see what that looks like as well!
![]()
I’m so thankful that I got to use such beautiful wool for my first pair of knitted socks- snag your own Whisper yarn HERE! Allison Barnes and I are teaming up together for a fun giveaway so that one of YOU will get to work with some beautiful hand-dyed yarn as well! One winner will receive a skein of hand dyed Basic Sock Yarn from the Allison Barnes Collection in their choice of in stock colours!
***To enter the giveaway [NOW CLOSED], leave a comment below telling us about your sock journey (e.g. If you’ve always been wanting to knit a pair, how many you’ve made, your favourite type, etc). You can also let us know which hand dyed colourway you would love to win (check out the options HERE)! Giveaway is open to residents of the US and Canada and will close on Sunday, August 12th at 8 PM MST. You can also enter through Instagram and Facebook for more chances to win!
![]()
I had so much fun knitting my first pair of socks and I am excited to explore more techniques and try out different colourways! Thank you for following along with me on my fiber arts journey and giving me tips and advice along the way! There is always so much to learn and so many projects to try!