***You can purchase an INEXPENSIVE AD-FREE PDF of this pattern on Etsy HERE and on LoveCrochet HERE! This beautifully formatted PDF includes the step-by-step pictures and is a total of 6 pages including the cover page! You can also check out my Chinese New Year Zodiac Amigurumi Bundle HERE as it includes ALL my special zodiac designs to date at a discounted price!
***Note that this is the step-by-step blog post – the free pattern can be found HERE!
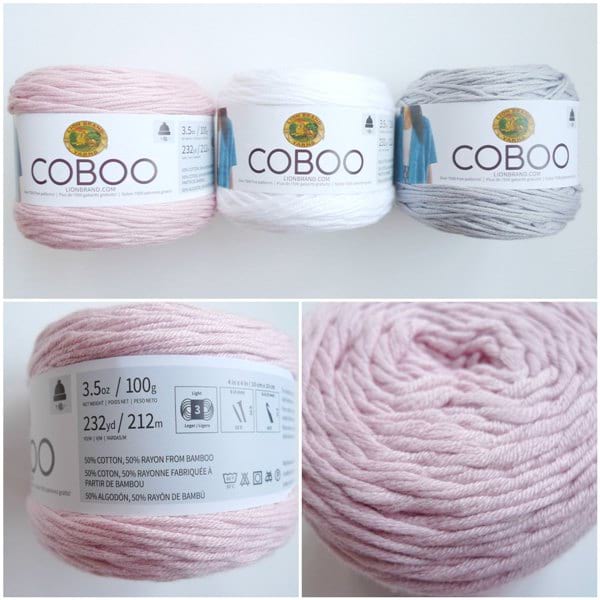
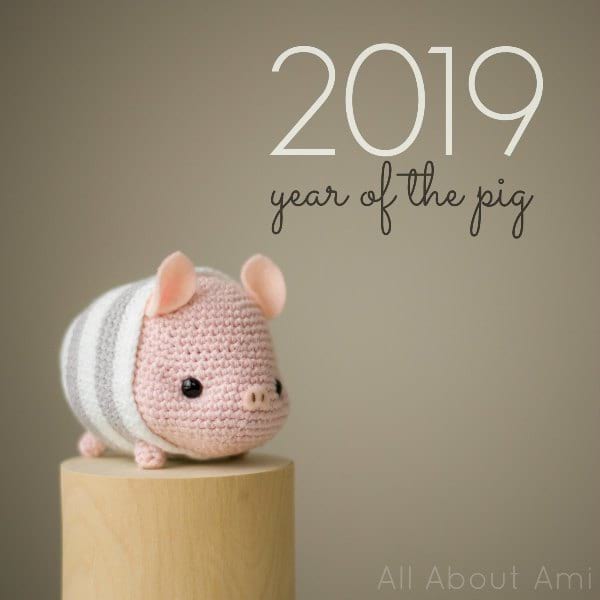
It is that time of year again as Chinese New Year is upon us! As long-time followers of my blog know, our very first original crochet design was the Chinese New Year Doll back in January 2011. As each year has progressed, Ryan and I have designed a zodiac animal for each year, and 2019 is the Year of the Pig! For this pig design, I used a brand new fibre called “Coboo” by Lion Brand Yarn which is classified as a light level 3 yarn and is 50% cotton, 50% rayon from bamboo. It is very soft and comes in these beautiful shades as pictured below: pink, white and silver! As a word of caution, this yarn does split easily (it’s comprised of 8 strands), but if you work carefully and with a hook size you are comfortable with, you can crochet with it as the end results are beautiful!
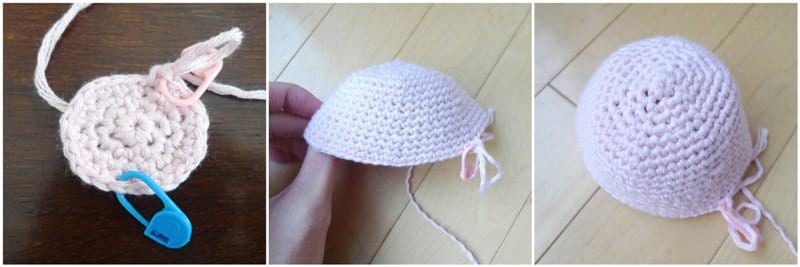
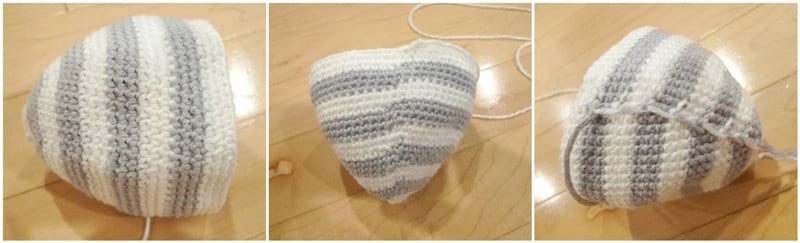
To start off, I crocheted around a magic circle and tried to stack the increases towards either end to give a slightly different shape than just a round sphere.
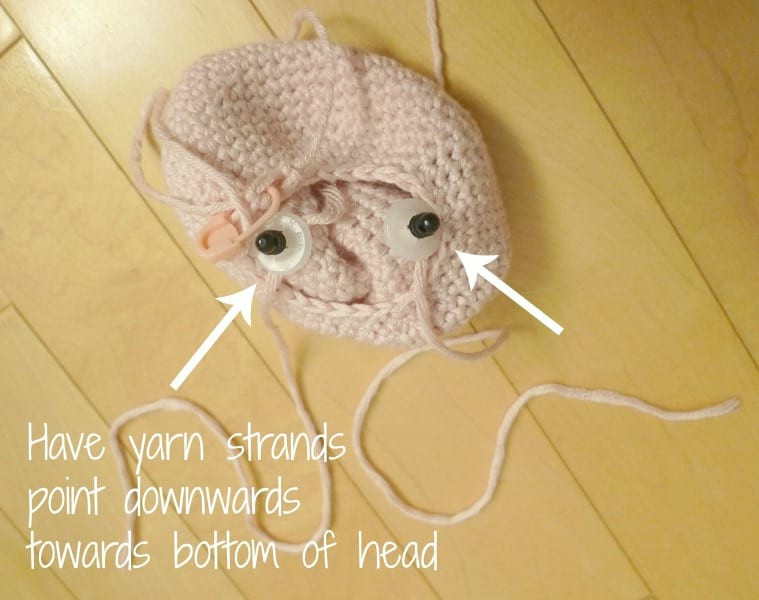
We used a technique called eye indentation when it came time to add the safety eyes. We first saw indented eyes demonstrated by Sharon Ojala of Amigurumi Freely, and we adapted the technique and used it for our Bunny Ornament HERE. Before snapping in the washers, we tied a strand of pink yarn around each post with several knots. Then, we snapped in the washer . We made sure to have the yarn strands point downwards towards the bottom of the head (so that the eyes would be pulled back at the correct angle).
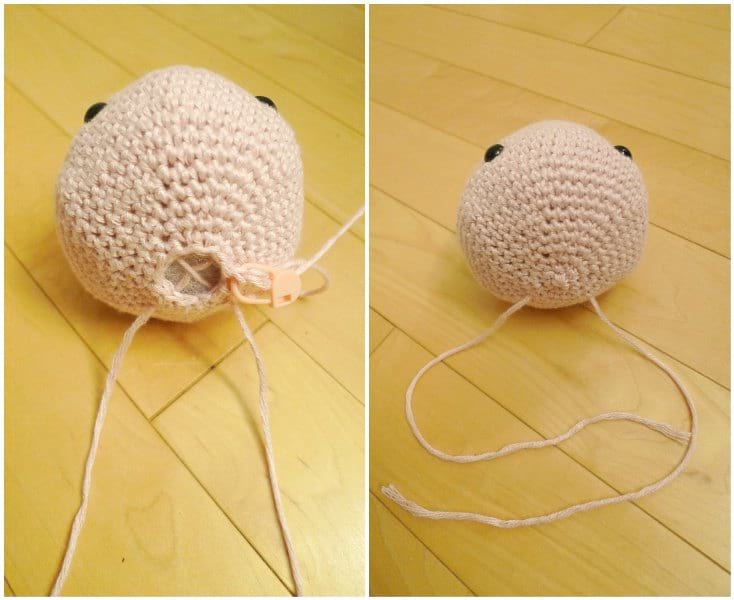
We gently stuffed the head and began working the decreases. Towards the end, we pulled each yarn strand diagonally back across the head (ensure the strands cross each other to form an X inside the head). Using my crochet hook, I picked up the strands and had them exit the head approximately between rounds 27 and 28. Before completely closing up the head, we tugged on the yarn ends to check how the eye indentation was looking and whether the stuffing was adequate (if too much stuffing, the cheeks will not protrude as much). We recommend erring on the side of caution and using less stuffing. I then closed up the head, making sure the two yarn strands were hanging out.
Here is a graphic that Ryan made showing what is happening with the eye indentation technique:
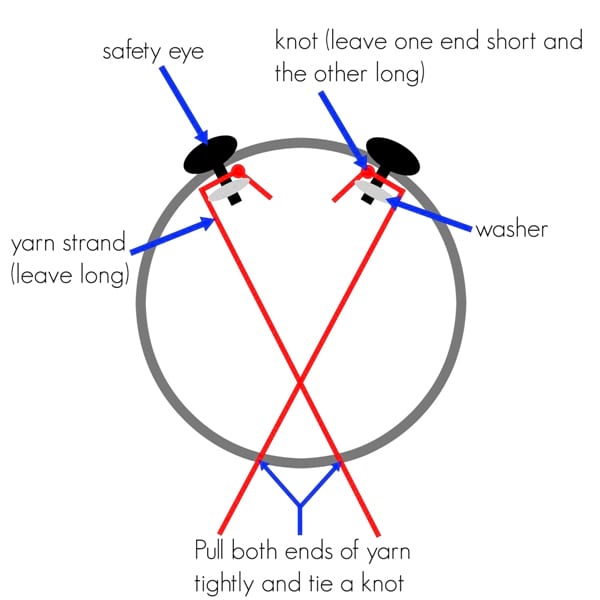
To give more definition to the face, we then pulled tightly on these two yarn strands to pull the eyes back as demonstrated in this video below. We then tied tight knots and hid the ends within the head.
As soon as Ryan knew it was the year of the pig, he immediately thought of the pigs from the game Monster Hunter since he is a big fan of the game. These pigs wear different outfits, and the classic one is a blue and white striped pajamas. We thought it would be so cute to give our amigurumi pig striped pajamas as well, and we went for a grey and white colour palette. To work the colour changes, please reference this blog post HERE. Rather than cutting and reattaching the different colours, I simply carried them along as shown below and picked up the one I needed.
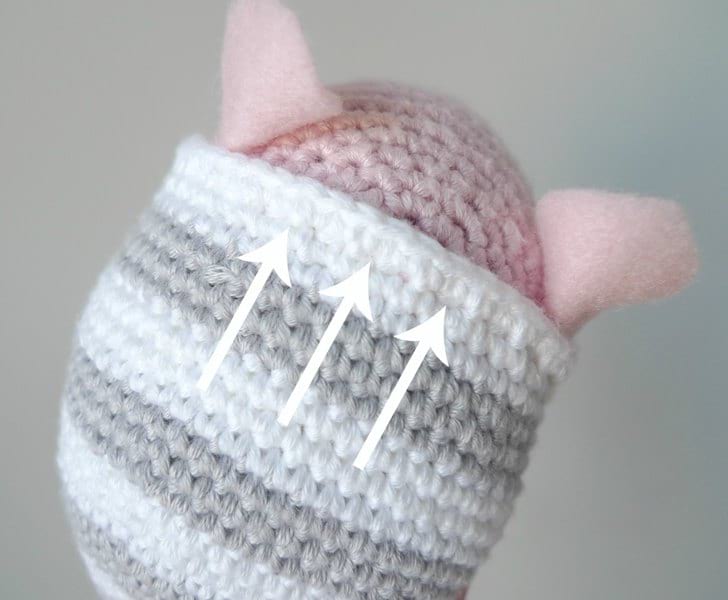
Next, we stuffed the striped pajamas gently and then placed the head into the striped pajamas. To attach it into place, Ryan used white yarn and the running stitch between the last and second last rounds as shown by the arrows below (ignore the ears in the picture below as we add them towards the end). This allowed the seaming to be invisible rather than whip stitching around the edge. As a reference point, the magic circle at the top of the head should be at the point of attachment and at the bottom, the tight knots from the eye indentation should be covered. To see where the colour changes from the striped body should be positioned on the bottom, please reference the picture showing leg placement found further below.
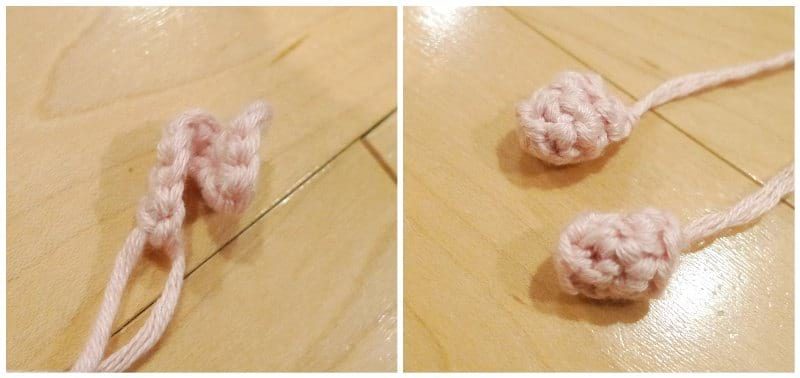
I then crocheted a curly little tail and four little legs!
Ryan sewed the four legs and the curly tail onto the striped body (the written pattern shows which rounds to attach them onto and how many stitches to space them apart). Note where the slight colour jogs are positioned as indicated by the arrow below.
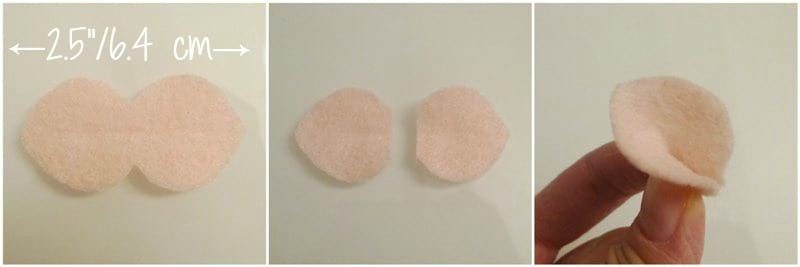
Next, it was time to add the face details using pink felt! We cut the below shape out of pink felt (approximately 2.5″ across, 1.25″ tall from highest point to lowest point). We then cut the shape down the midline to make two separate ears. Next, we pinched the flat bottom and added some glue to secure it shut. We then added some glue towards the bottom tip of the ear and tucked it into the striped pajamas on either side of the head.
The snout was created by cutting out the below shape out of felt and adding two brown lines with embroidery floss. Aren’t the little ears and snout adorable?

I love our Chinese New Year Pig’s sweet little face with the definition and felt detailing!
The eye indentation technique is such a brilliant way to pull back the eyes and make the cheeks protrude!
The striped pajamas look so cozy, and I love the swirly little tail!
Our sweet pot-belled pig is so round and chubby! I asked for name suggestions, and you came up with so many brilliant ones: I love Pablo Pigasso, Porco Rosso (Studio Ghibli fans unite!), Percy or Hamilton for a boy pig and Petunia or Penelope for a girl pig!
The girls fell in love with our pig as they saw us making him! They have requested their own- the wonderful thing is that you can customize the colours of his striped pajamas to whatever you want!
I hope you enjoy our Chinese New Year Pig design and I am so thankful for all of you who have followed this series! This little pig would make a very special gift for pig lovers and those born in the Year of the Pig!
Here is our collection to date: Dog, Monkey, Lamb, Pony, Dragon, Chinese New Year Doll, Pig, Rooster and Snake! Aren’t they all so adorable? We are running out of space on our table and will probably have to find a new place for them to stand next year…
Once again, check out the free pattern for our Chinese New Year Pig HERE! If you love all these designs, you can purchase the Chinese New Year Zodiac Amigurumi Bundle HERE! It contains all the patterns (47 pages) as shown above at a discounted price! You can also check out the All About Ami Amigurumi Pattern Bundle HERE that contains ALL the amigurumi patterns we’ve designed so far (28 patterns, 141 pages). I can’t wait to see all your special pigs- have fun crocheting them! Subscribe to my e-mail newsletter HERE and happy crocheting!