***Please note that this is the step-by-step tutorial showing the making of the Chinese New Year Roosters! The FREE PATTERN can be found HERE! You can also find the pattern as an INEXPENSIVE AD-FREE PDF on Etsy HERE and on Craftsy HERE!
It’s that time of the year again, when we unveil our Chinese New Year design! Six years ago, I published my very first original design called the “Chinese New Year Doll“, and she kicked off a tradition that we have been doing every year. Since then, we have been designing a special amigurumi to coincide with that year’s specific zodiac animal. So far, we’ve made: Dragon, Snake, Pony, Lamb/Sheep, and Monkey.
![]()
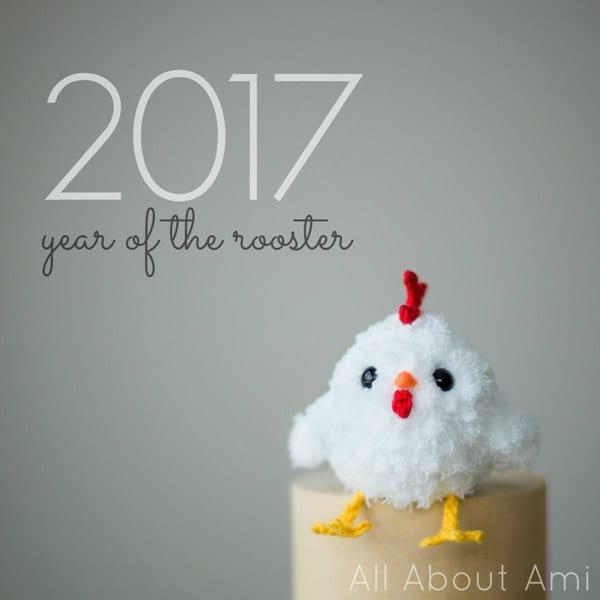
2017 is the Year of the Rooster! When I found out that we would be designing a rooster this year, I was a bit apprehensive as I do not typically think of roosters as being cute or kawaii. We brainstormed some ideas and Ryan came up with these initial sketches (Ryan drew them in the girls’ notesbooks, hence the random pen marks haha).

We knew that an egg-shaped rooster would be very adorable, and we thought it would be neat trying out a different kind of eye configuration! By using colourful safety eyes and felt, we could try and create a more animated, cartoon-y look to give him big, exaggerated eyes! As I began working on him, we were blown away by how quickly we were able to complete him due to his small size. He was definitely our quickest Chinese New Year design, and you should be able to whip one up in no time!
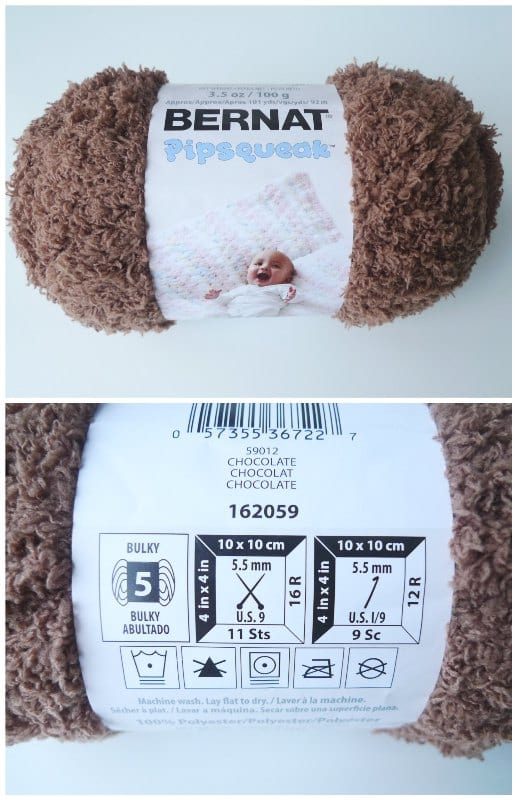
We wanted to use a fuzzy yarn for our rooster, so we went with Bernat’s Pipqueak yarn in “Chocolate” since we used Pipsqueak to make our Chinese New Year Lamb as well. We were hoping to make both a white and a brown rooster, so it was perfect that Pipsqueak came in both colours!
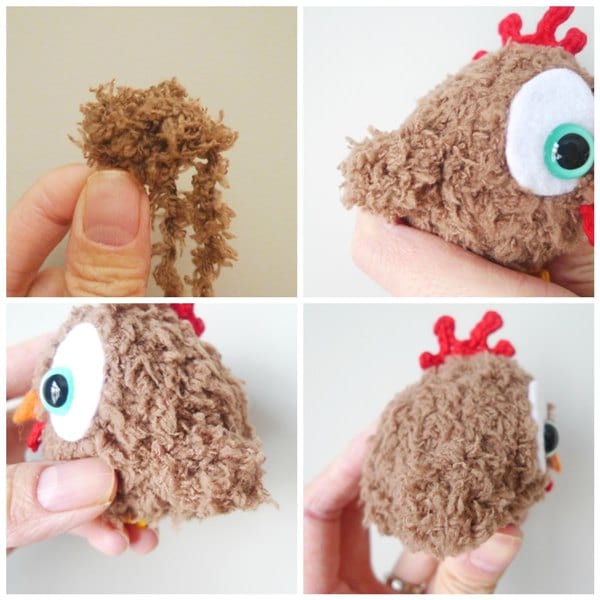
I crocheted a ball for the rooster’s head/body. Keep in mind that the “wrong side of amigurumi” is technically the fuzzier side when working with fuzzy yarn, so you want this fuzzier side to be the outside.
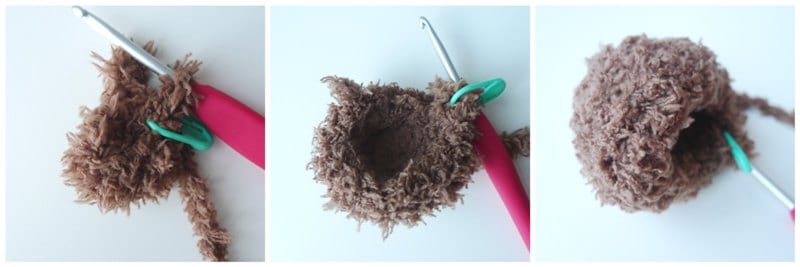
It is very difficult to see your stitches when working with fuzzy yarn. You need to “feel” for the next stitch with your crochet hook by inserting it into the next gap by faith. Another tip is to use a stitch marker (I use Clover lock ring stitch markers) so you can keep track of the beginning of each round. Below you can see that I am halfway across from my stitch marker. This full round should have 20 stitches- thus, I should have crocheted about 10 stitches (half way) by the time I reach this point across from my stitch marker. I will have 10 more stitches to go to make my way back to the stitch marker.

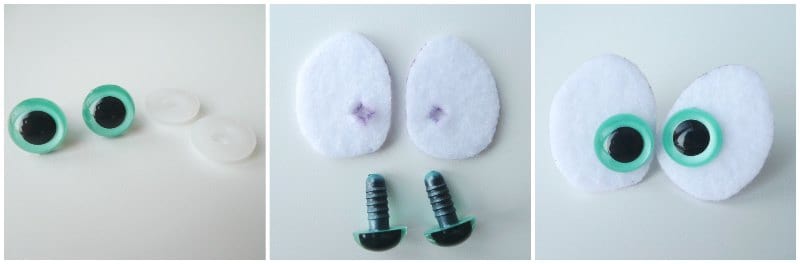
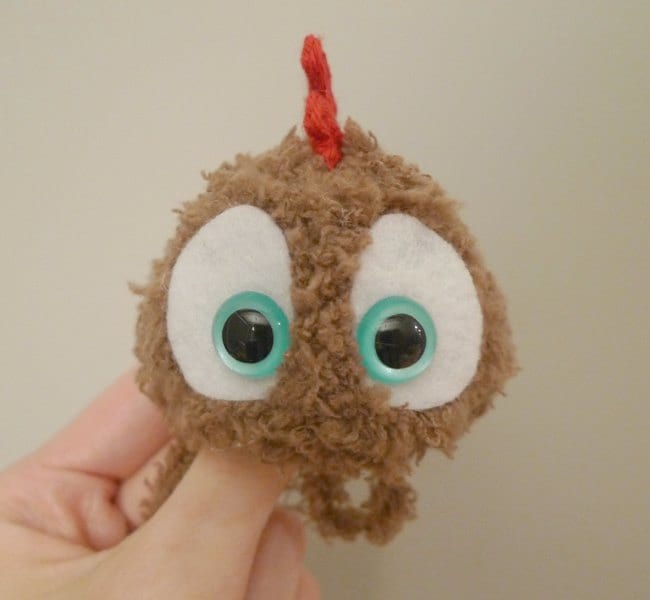
Ryan then cut out these shapes using white felt to create the eye roundies. He cut a small x towards the bottom of the eye roundies and inserted these stunning 12 mm teal safety eyes. These teal safety eyes are from the Fresh Stitches shop by Stacey Trock HERE, and you can also find similar ones on Etsy HERE. It was my first time adding colourful eyes to my amigurumi, and they give a very animated look!
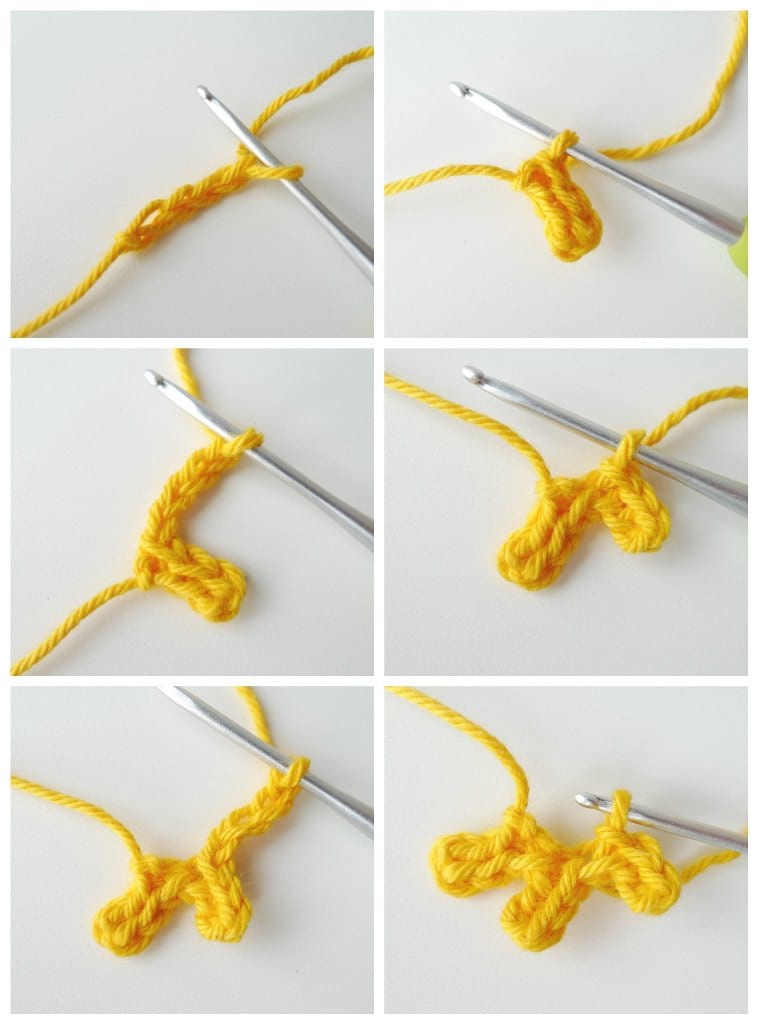
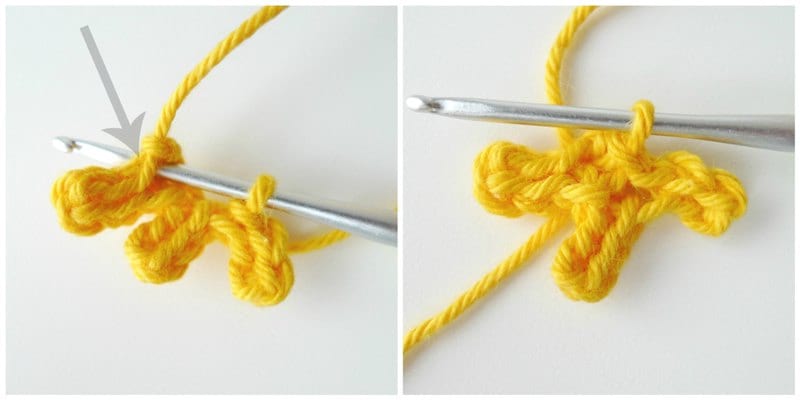
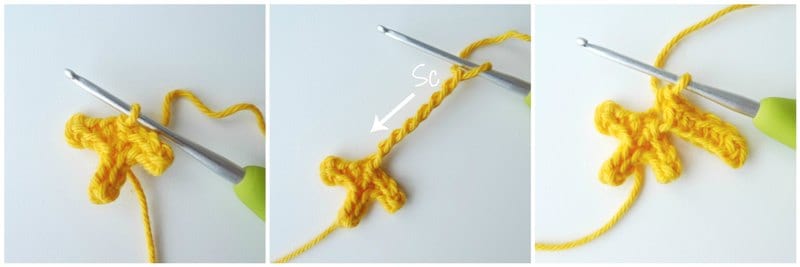
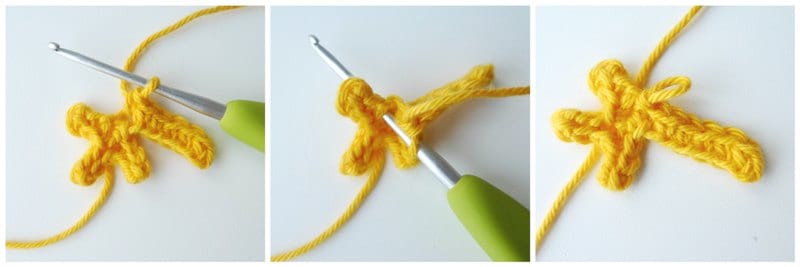
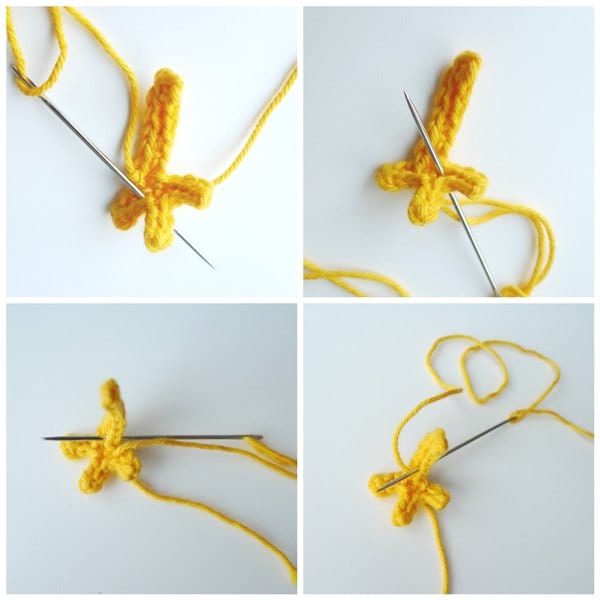
Interestingly, I learned all about the anatomy of the rooster so that I could give you the correct technical terms! I crocheted the comb of the rooster (the red part that goes ontop of the head) by using Lion Brand Yarn’s Bonbons. I created this shape by crocheting a combination of chains and slip stitches. Note that the slip stitches are worked into the “bumps” of the chains.
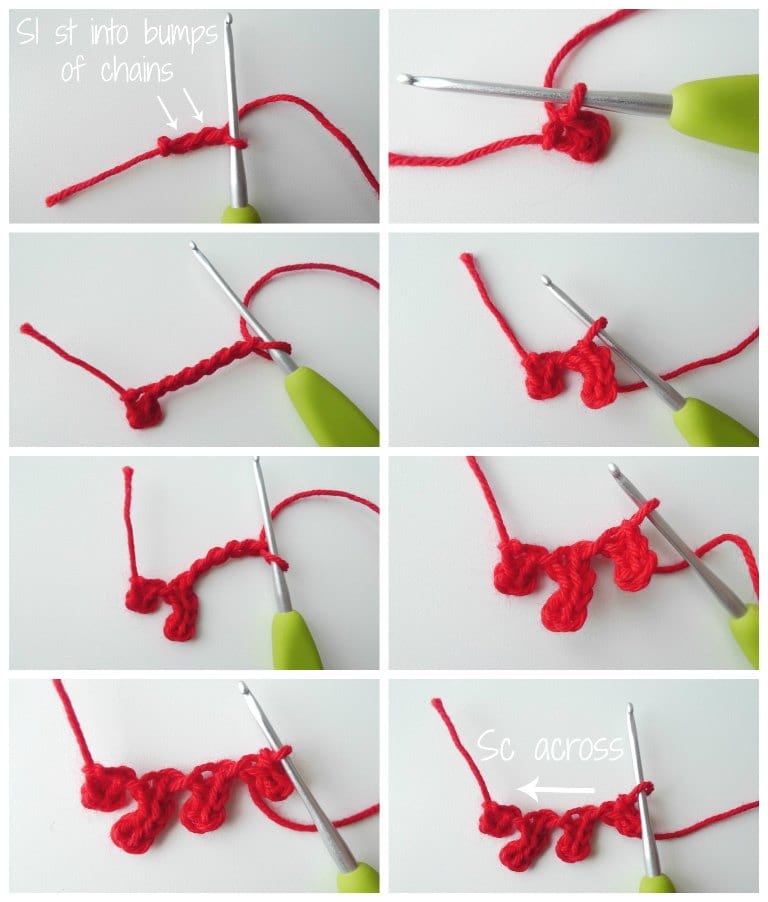
I then single crocheted across the bottom of the comb to help give it a sturdier base.
![]()
Here is our Rooster after inserting the eyes and attaching the comb onto the top of his head!
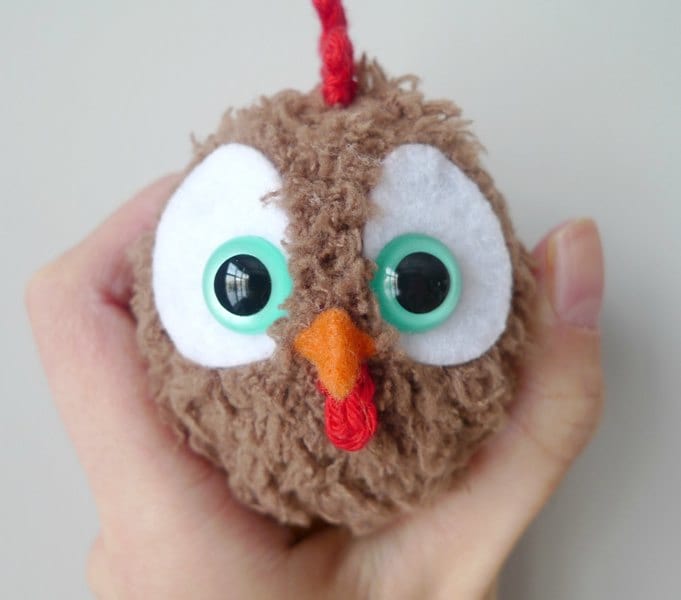
Next it was time to work on the beak. Ryan cut a triangle out of orange felt, bent it in half, and placed some glue along the midline. He then gently pinched part of it shut and trimmed the excess sides according to how small he wanted the beak.

I also used the same red yarn as the comb to crochet a tiny wattle (the part that goes under the beak). After gluing on the nose and attaching the wattle, it was finally time to stuff the head/body and close it up!
Using the same fuzzy yarn, I crocheted the wings by working stitches in a magic circle without closing it up. I created a semi-circle for the shape of the wings and attached one side of the semi-circle to the side of the body.
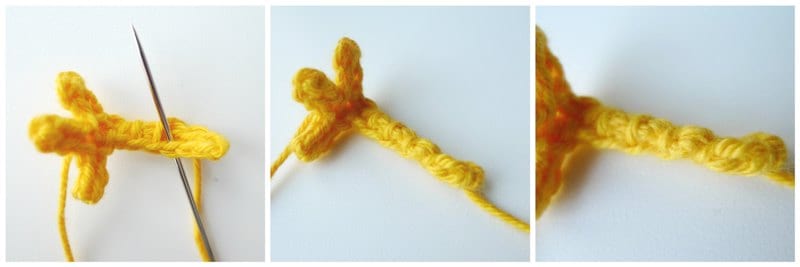
The legs and feet were an interesting challenge! I first started off by crocheting the feet with three claws by using a series of chains and slip stitches. I worked the slip stitches into the bumps of the chain stitches just as I did with the comb.
To close up the feet, I slip stitched to the first stitch as indicated below.
I then began crocheting the leg by working a series of chains and single crocheting back onto them.
I slip stitched to the stitch on the foot from which the leg originated and fastened off.
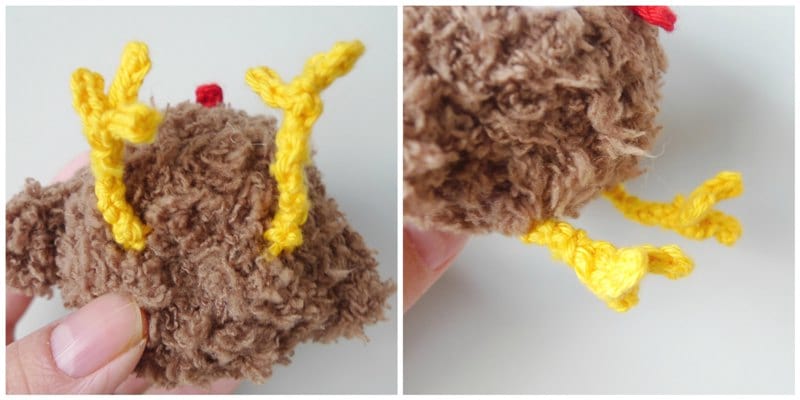
In order to make the leg stand up perpendicular to the feet, Ryan weaved the yarn needle in and out of the feet and leg as shown below:
Next, Ryan pinched the leg and whip stitched it together in order to give the legs a more rounded and sturdier feel.
Ryan then sewed the legs onto the bottom of the body! Originally we actually crocheted the feet separately from the legs and attached them together later on to make them perpendicular to one another. However, the way that I’ve just described above is a much cleaner look and design with less ends to hide!
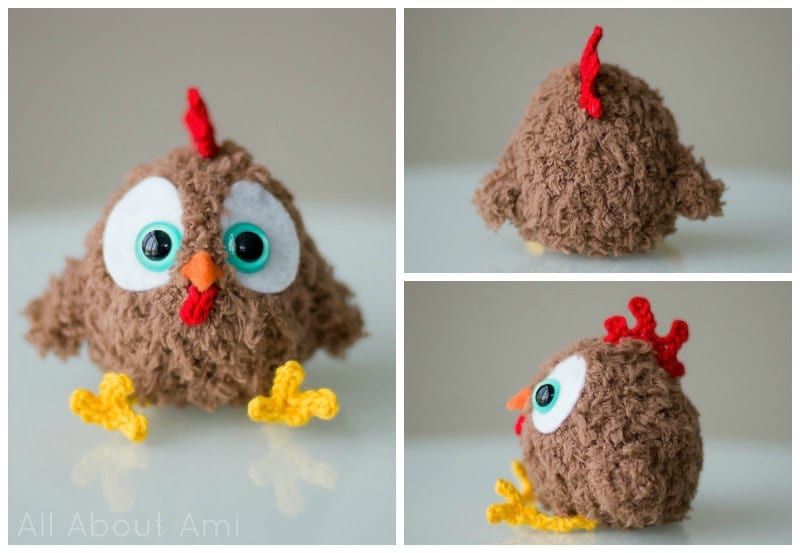
Finally, our brown Rooster was complete! How sweet is he?
![]()
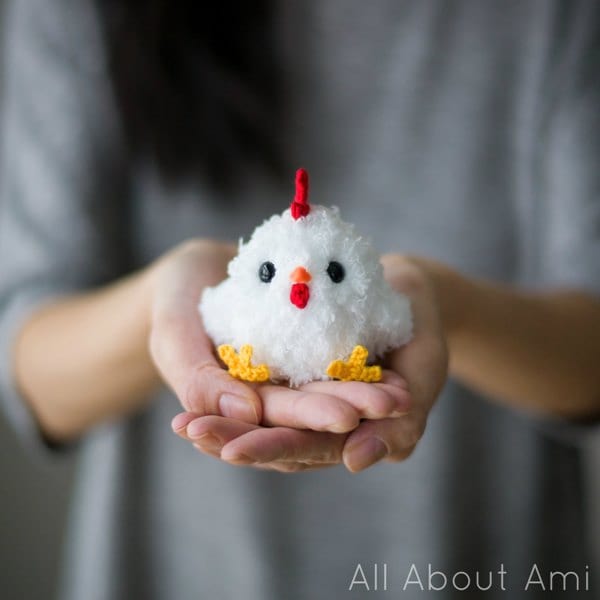
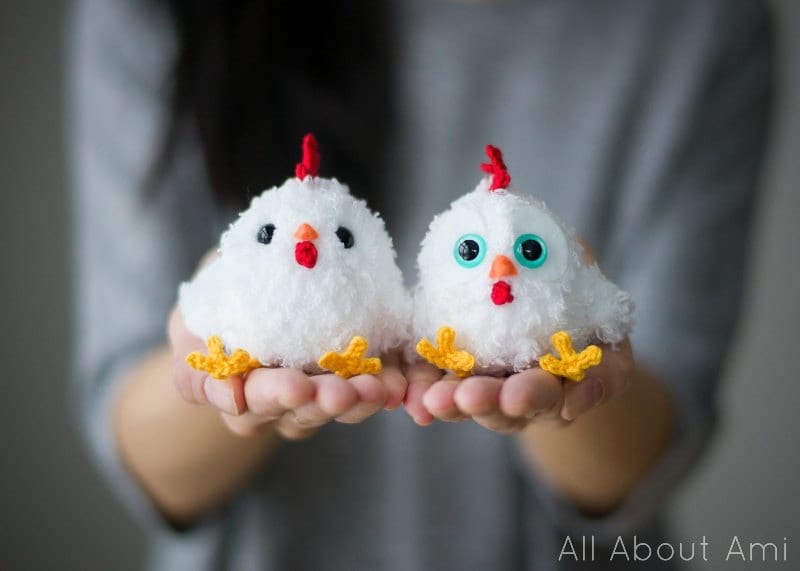
We made two roosters with these cartoony, animated eyes since roosters can be both brown and white. Everyone, meet Bruno (the brown one) and Roy (the white one)! I love how they are so tiny and cute since they fit in the palm of your hand!
![]()
The large eyes and dainty details give them so much personality! This project is so quick as it is possible to finish making him in one sitting! Yay for quick amigurumi!
We asked Myla what we should name our two roosters, and she chose Spike and Panda Chickaletta Chicken! Haha I love the imaginative names she comes up with! As soon as we were done with this photoshoot, the girls ran off with the two roosters to play with them! This is the first time that we’ve made more than one of any of our Chinese New Year amigurumi, and it’s a good thing that we did! Interesting fact: Roy went missing for a good day and a half as we couldn’t find him after Brie had played with him. After scouring our house, Ryan finally found him hidden behind a curtain on the windowsill!
![]()
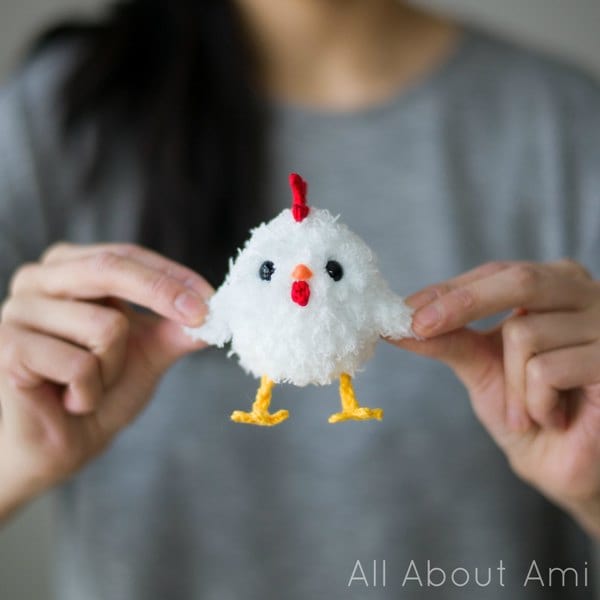
We knew that many of you would not have colourful safety eyes, so we decided to make another rooster using the traditional black safety eyes. We also placed his beak higher to give him a more kawaii look. He looks very different from the other two roosters, doesn’t he?
He reminds us of the adorable Piper from the Pixar short film! And so, we’ve named this little guy Pip- it’s fitting since the name of the yarn we used is called “Pipsqueak” too!

Isn’t it amazing how simply changing the eyes and position of the beak give a completely different look and personality to these little roosters?
Here’s another interesting fact: I envision these amigurumi as “baby roosters”, but technically a young male chicken is called a “cockerel” and an adult male chicken is called a “rooster“!
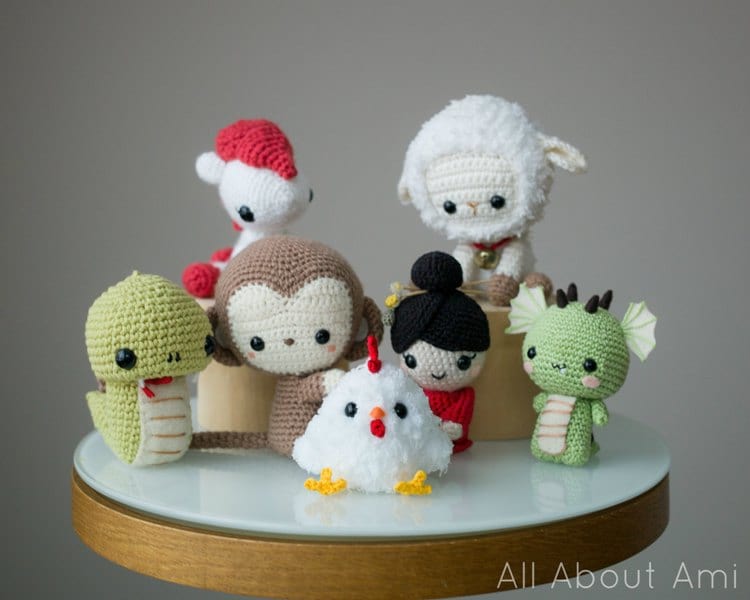
Here is Pip with the rest of the Chinese New Year gang: Pony, Monkey, Dragon, Snake, Chinese New Year Doll, and Lamb. He looks more like our regular style of amigurumi!
These roosters have so much personality! Roy and Bruno are definitely different from our regular style of amigurumi as their teal eyes really pop! Which style will you be trying? Comical eyes like Roy and Bruno, or more sweet like Pip?
We hope you enjoyed reading about our Chinese New Year Roosters! The FREE PATTERN can be found HERE! Don’t forget that you can subscribe to my e-mail list HERE if you never want to miss a post, and you can also follow me on Facebook, Twitter and Instagram to get my updates! I wish you a wonderful 2017 and Year of the Rooster ahead! Thank you for all your love and support!