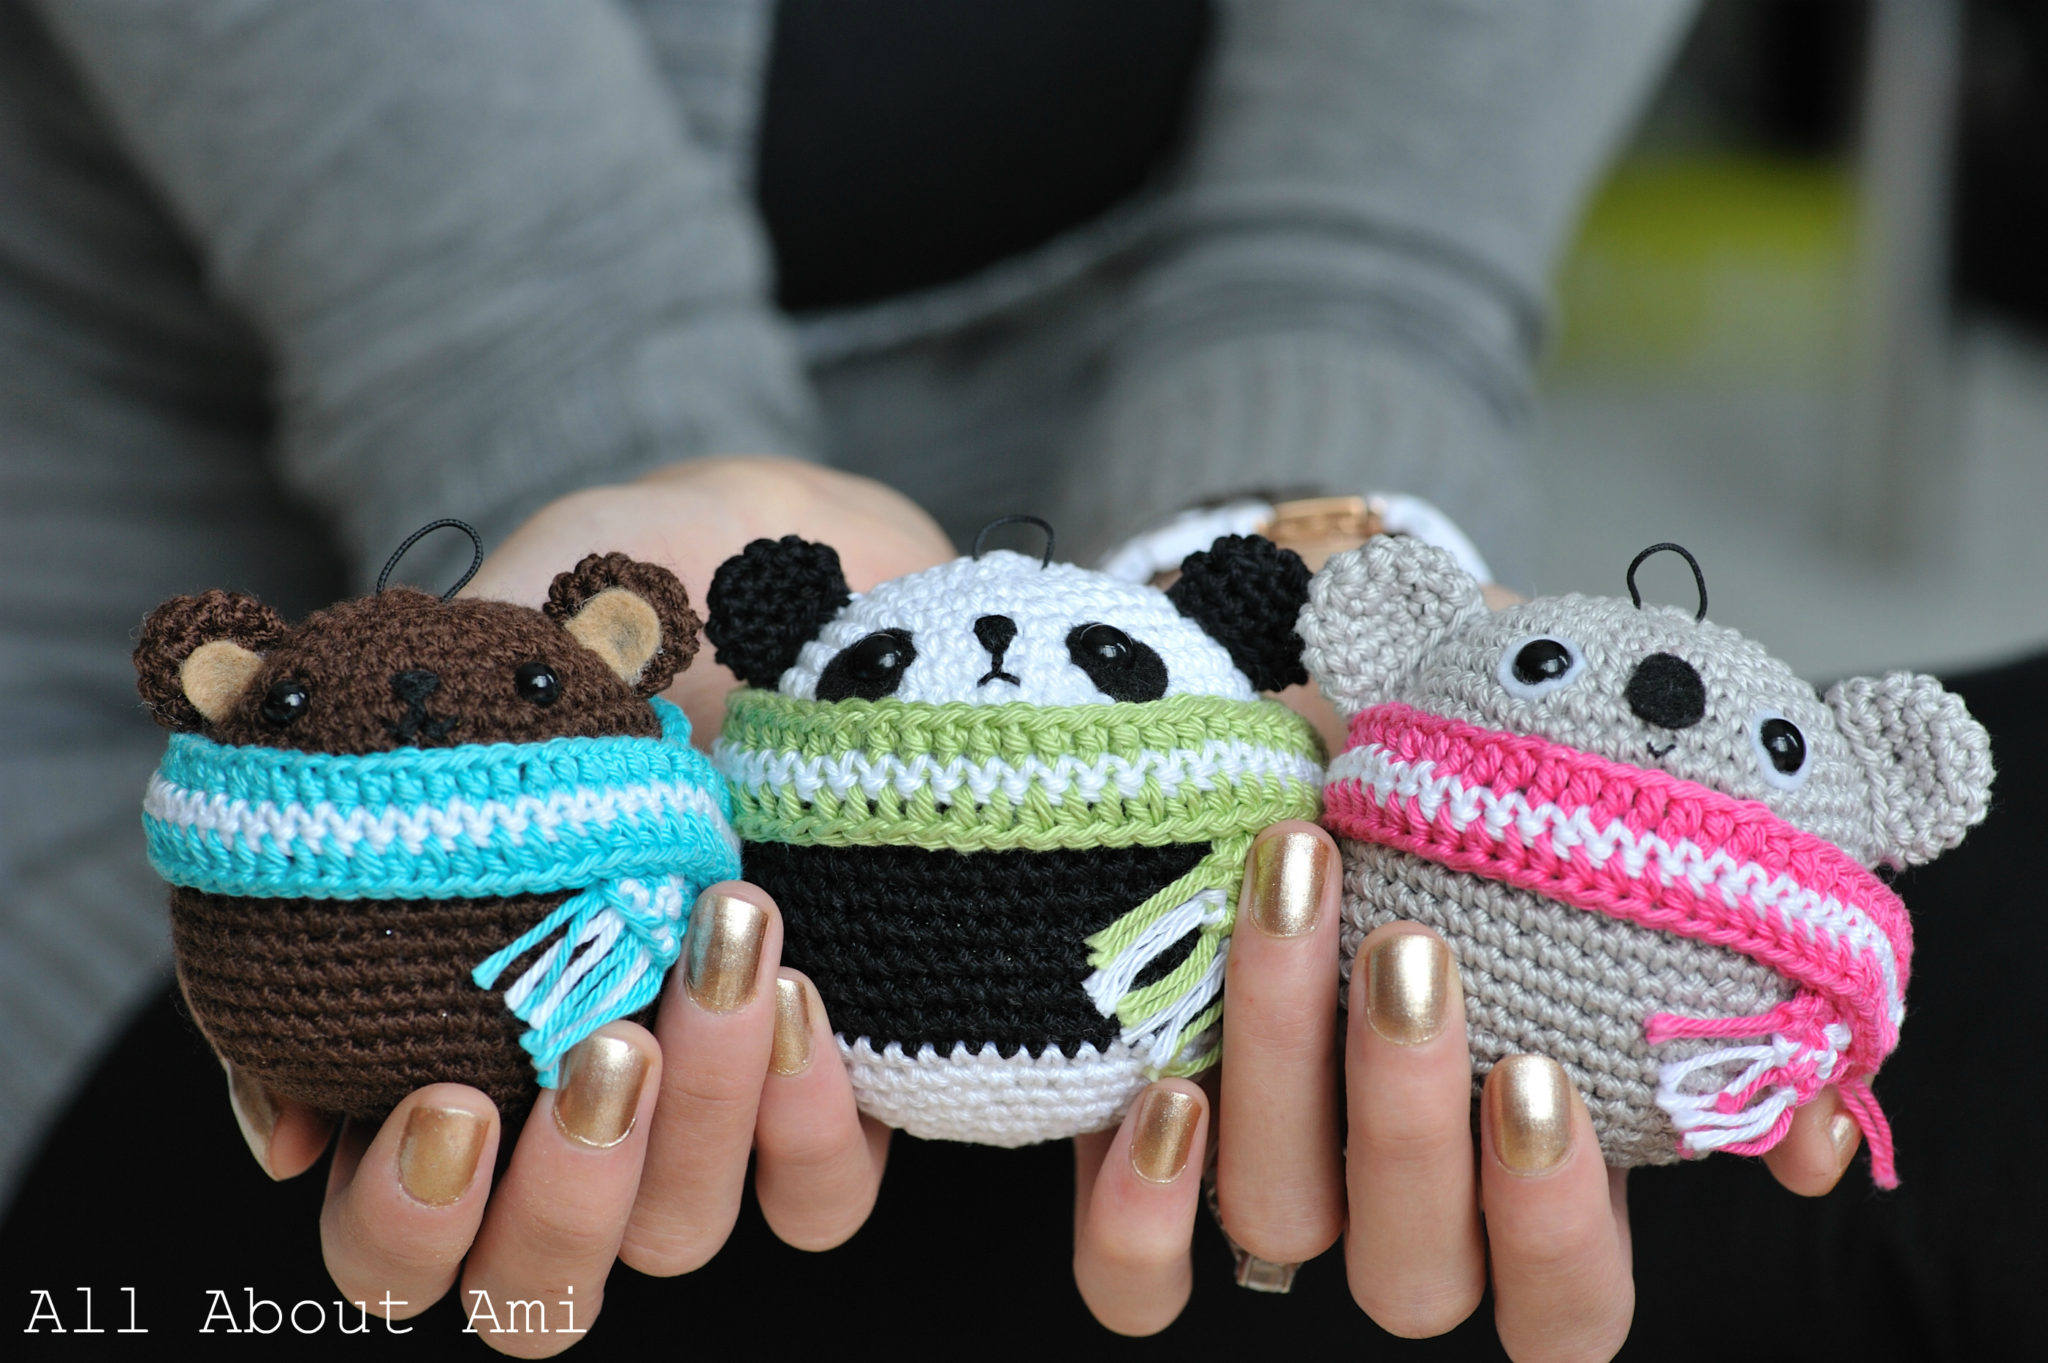
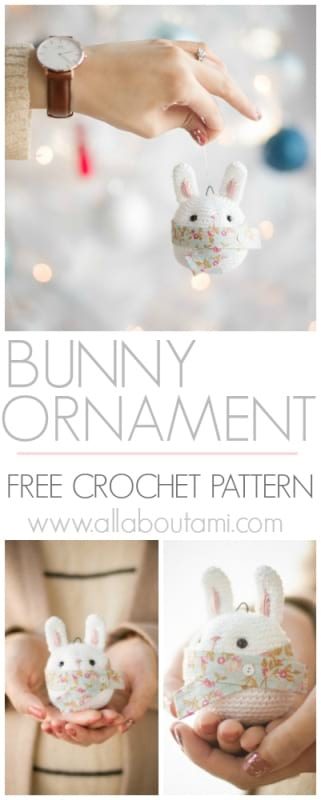
Three years ago we set up our Christmas tree for the first time in our new house, and we designed these “Teddy Ornaments” to add some crochet and amigurumi to our tree (read about them HERE). Since then, it’s been so special seeing all these round teddies being made by crafters every Christmas, and it warms our hearts knowing that they are decorating Christmas trees all over the world!
My “Amigurumi Teddy Ornaments” pattern is an extremely simple pattern as it is just a ball with two little ears and a scarf (see free pattern HERE), and I often recommend this pattern to beginners. I always thought it would be cute to adapt this pattern and make different animals simply by changing the ears and embroidering the face differently. Thus this year, we finally decided to make and add a “Bunny Ornament” to our collection!
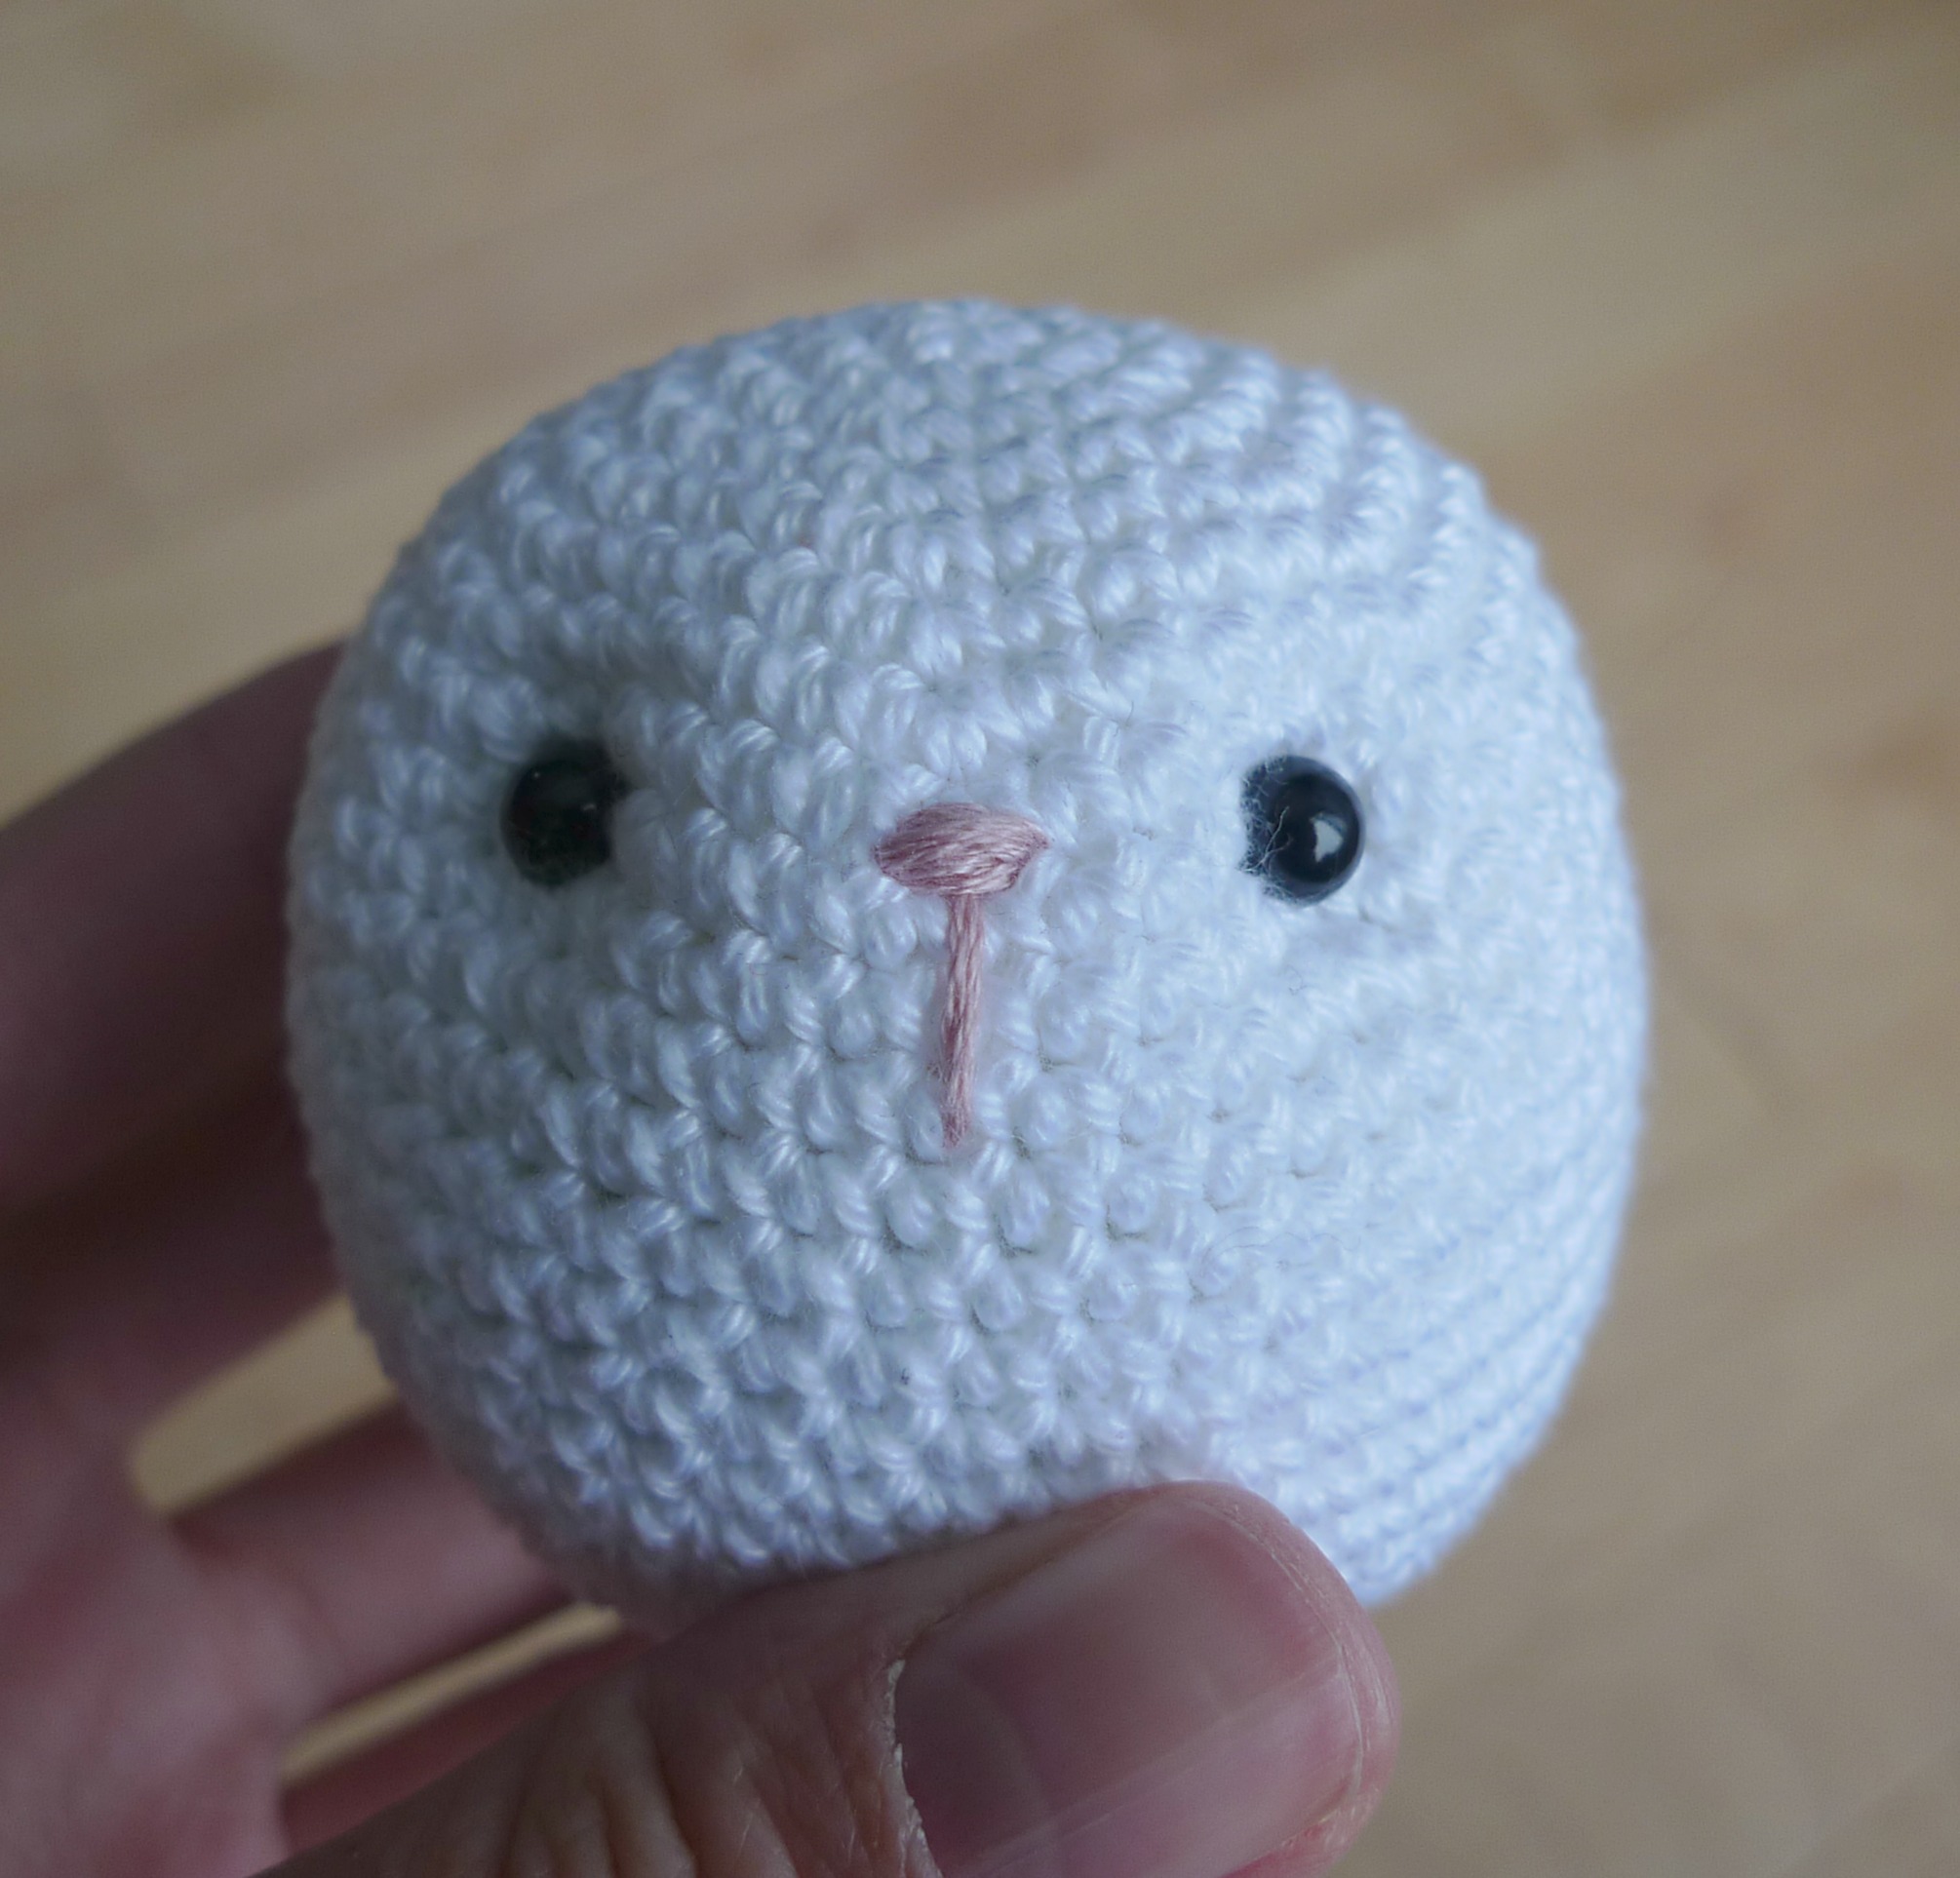
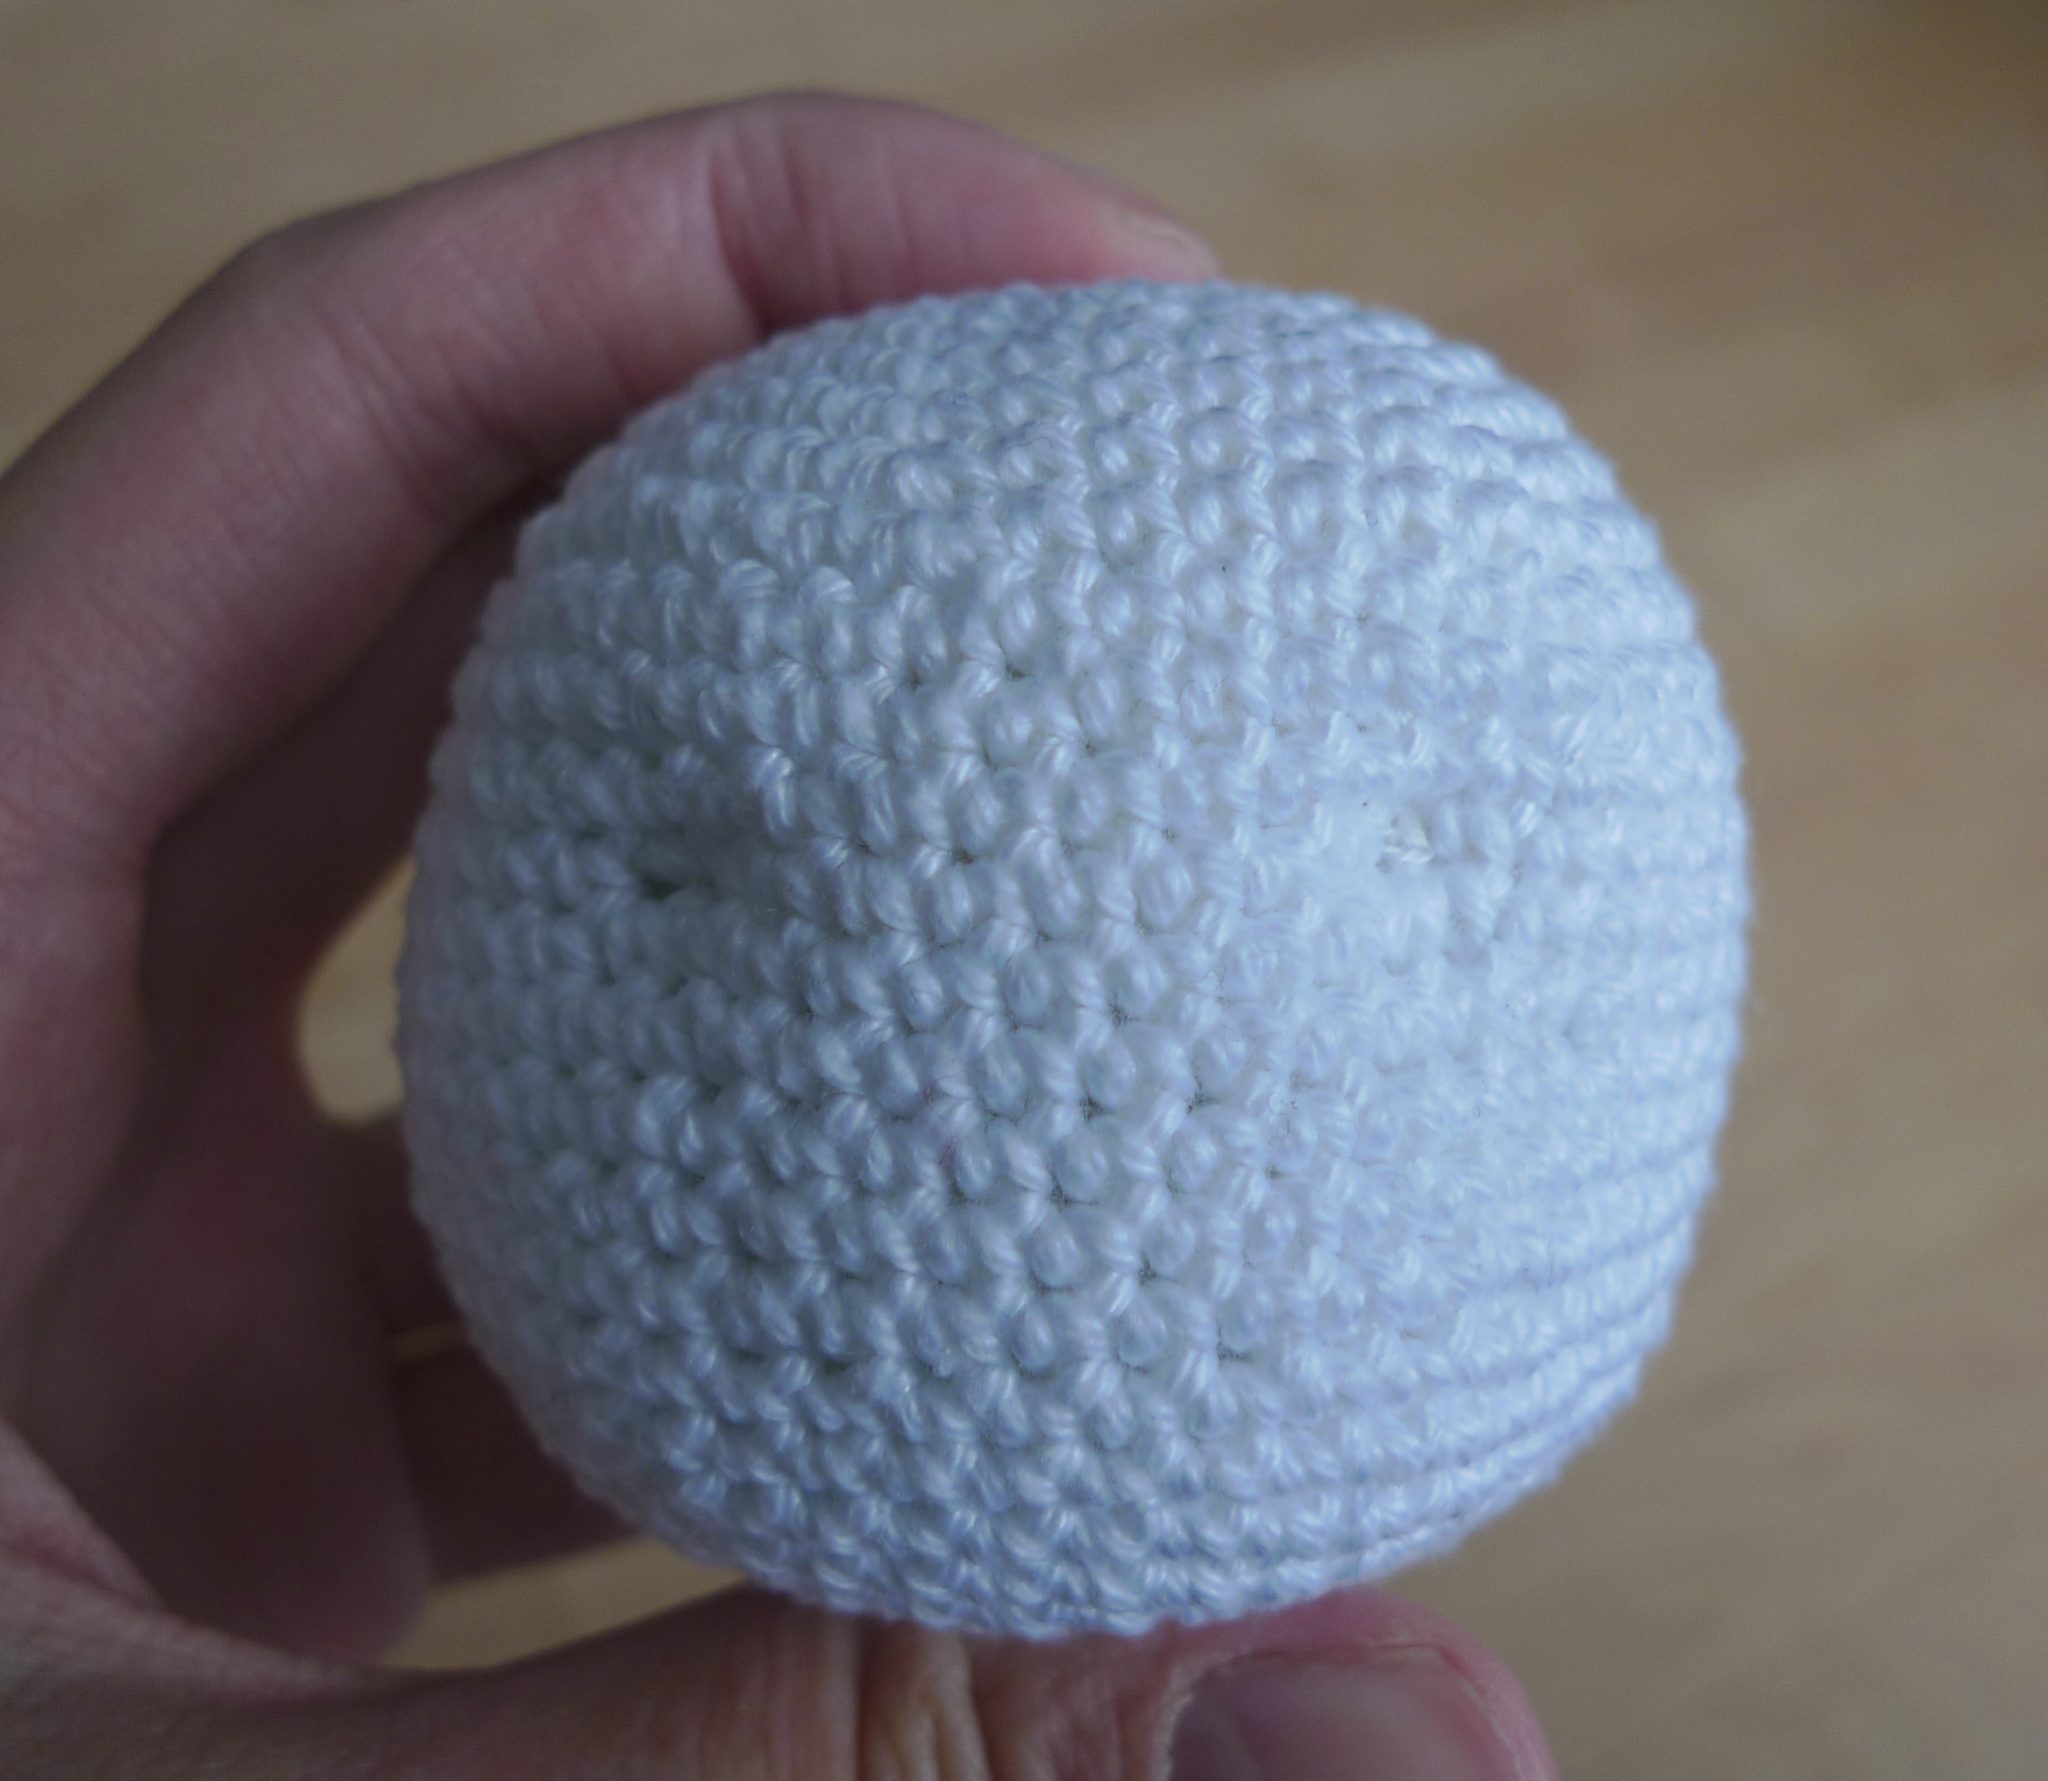
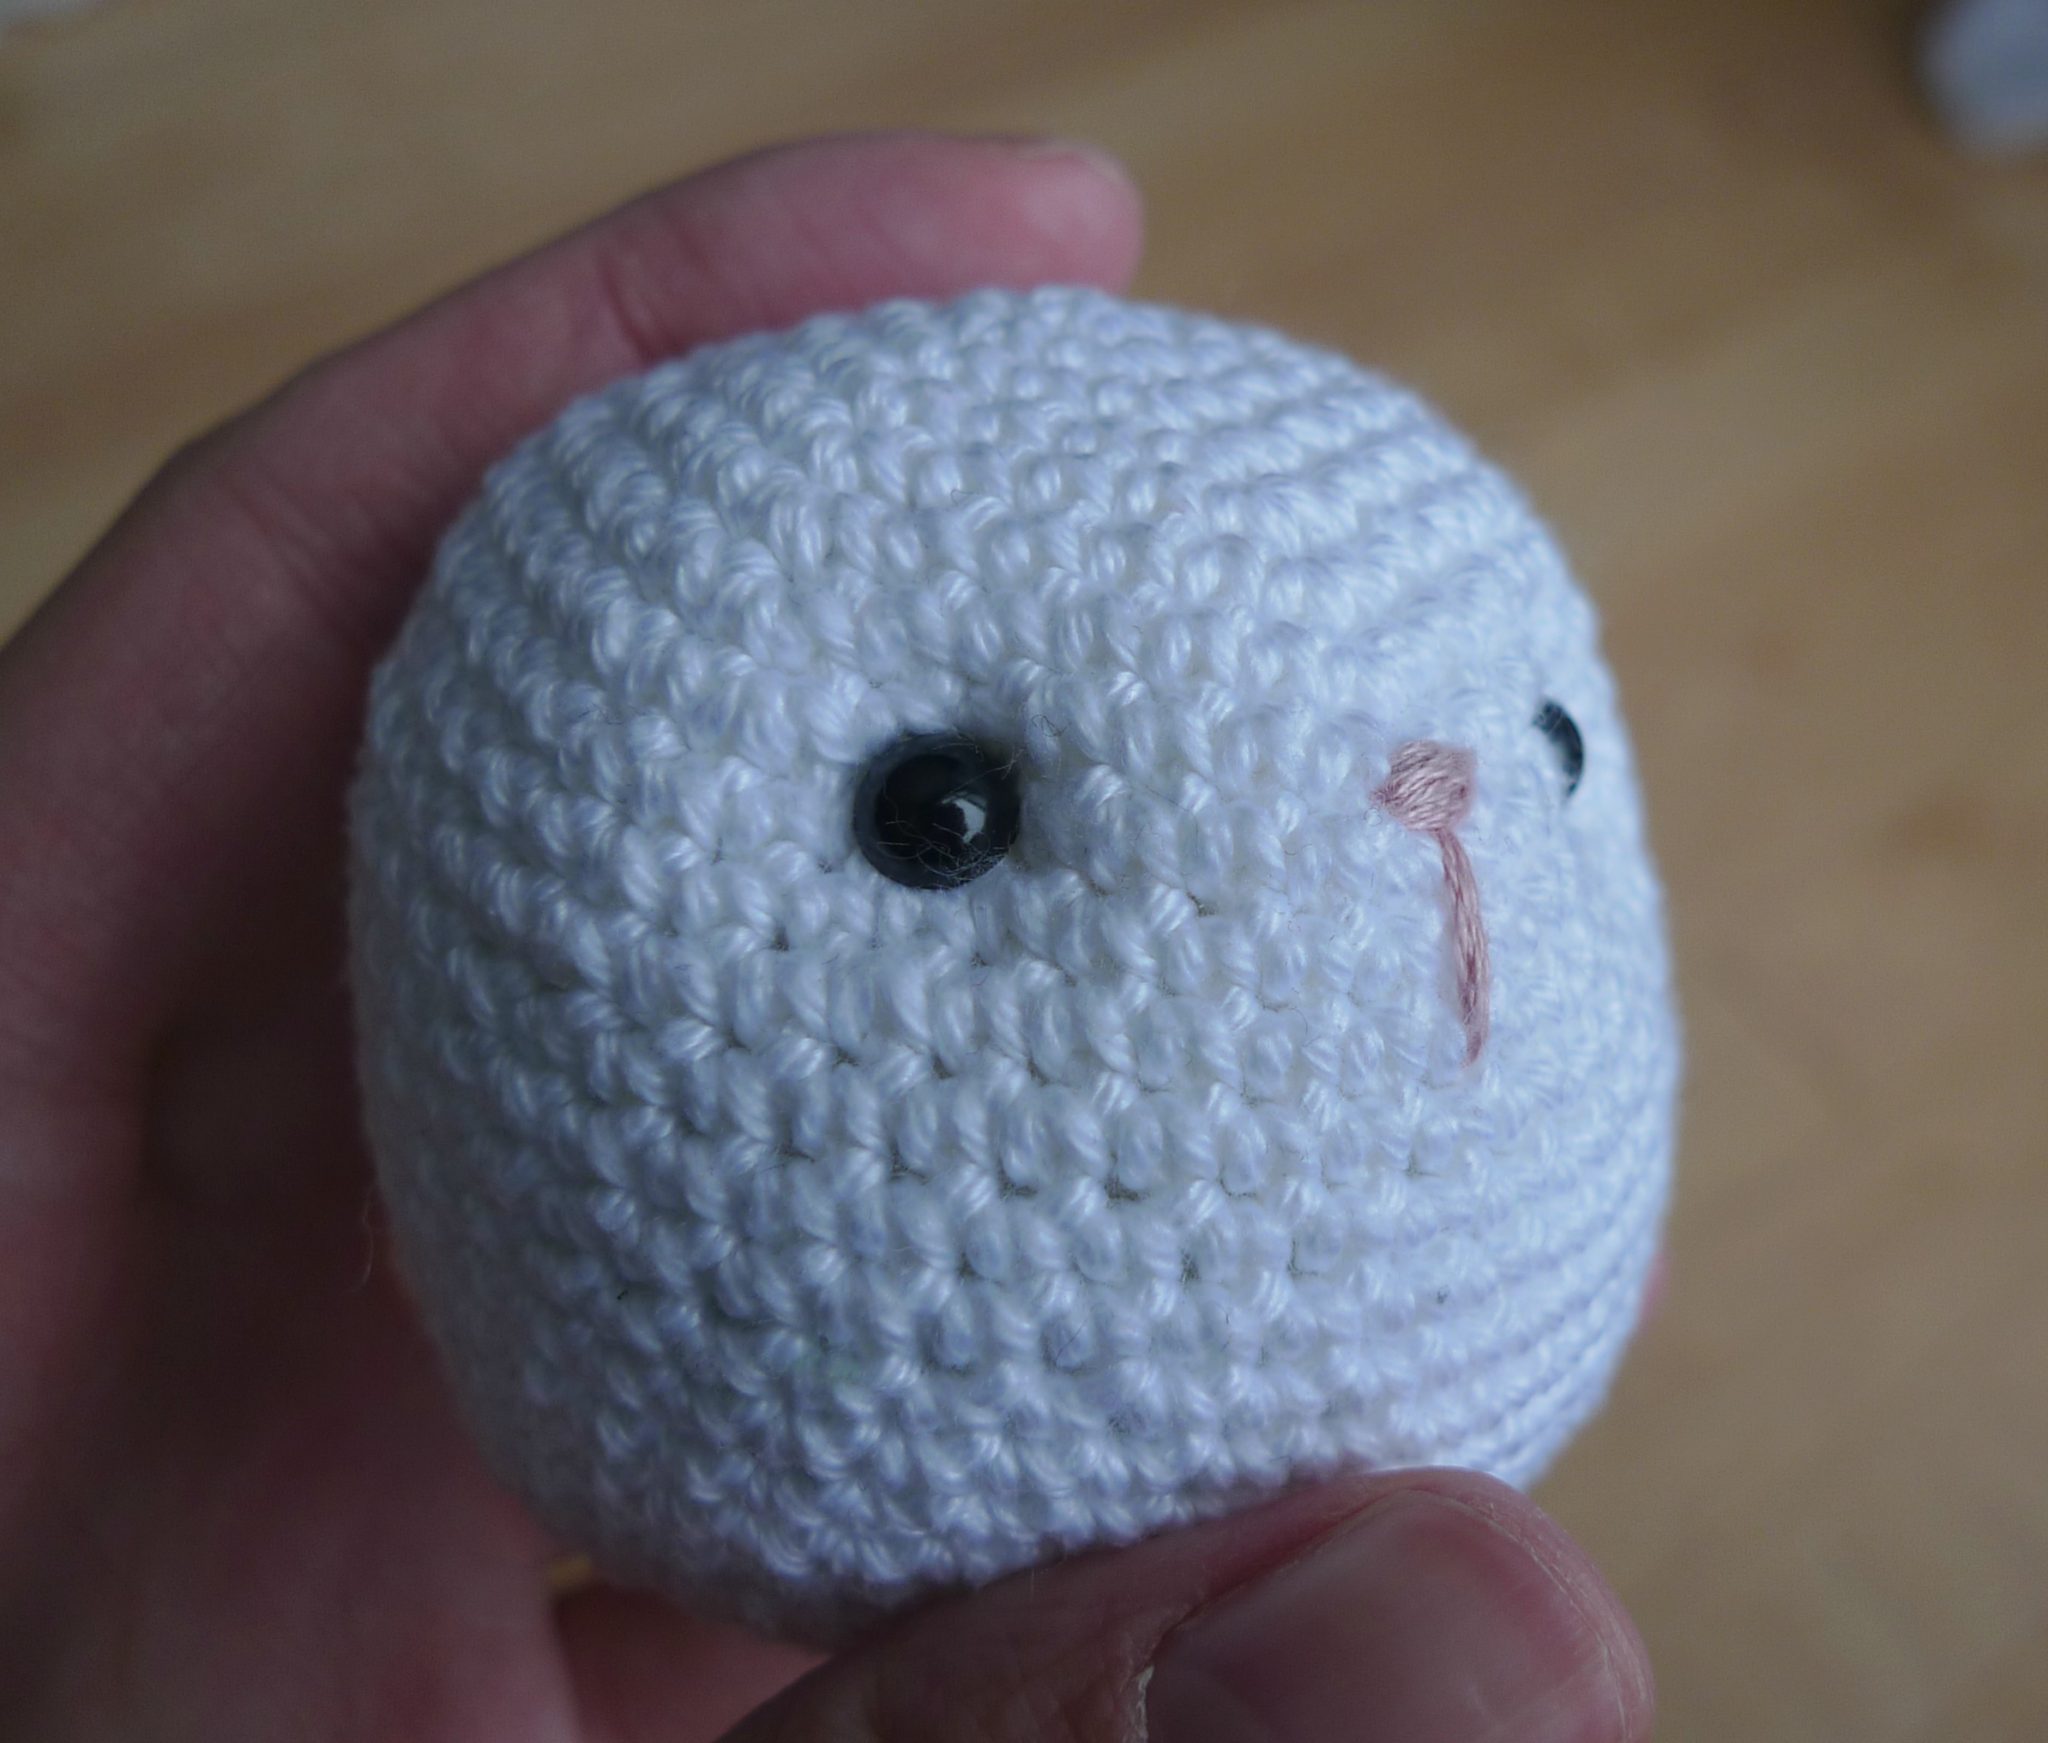
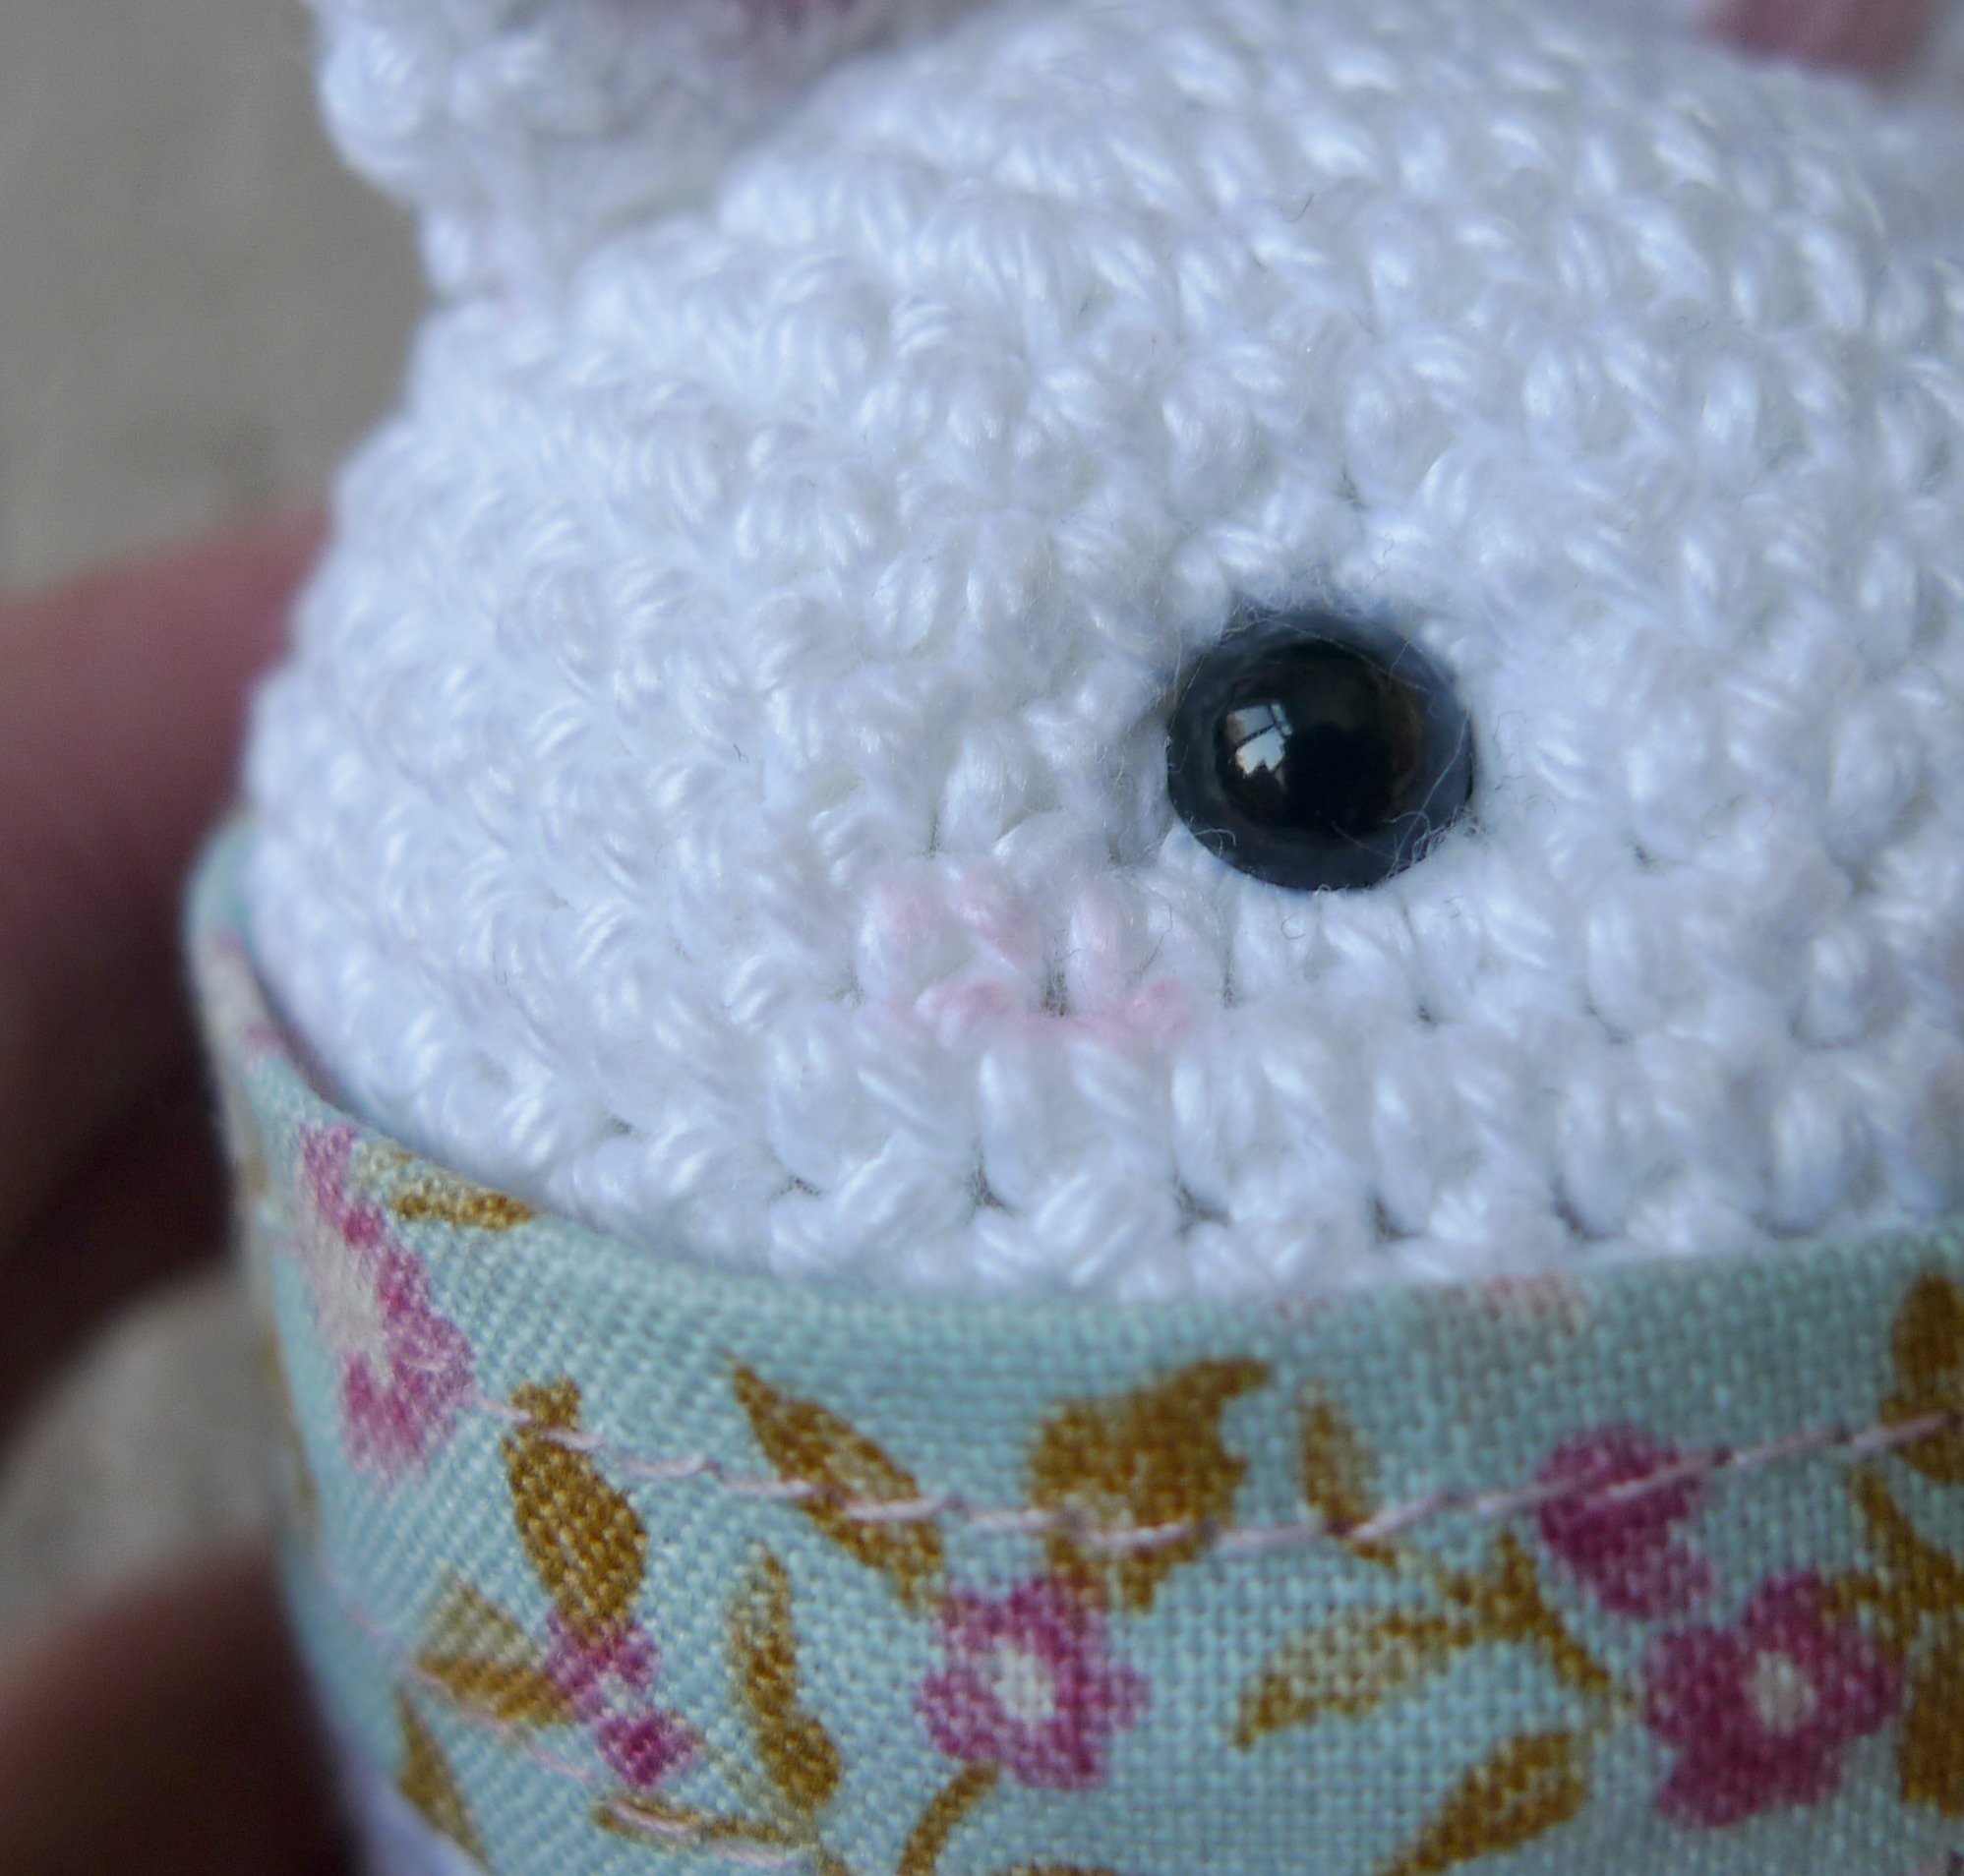
I used the same “Patons Grace” 100% mercerized cotton yarn (lightweight level 3) that I used for my panda and koala ornaments, this time in the colour “Snow”. I followed the “Head/Body” portion of the “Amigurumi Teddy Ornaments” pattern exactly but this time we decided to try something a little bit different with the eyes. Do you notice that they are more inset into the face, giving the face more definition? I first learned about the technique of doing indented eyes through Sharon Ojala of “Amigurumi Freely” in her “Crochet Along Dress Up Pig” pattern (see HERE). Sharon has a full video tutorial on how to make this pig, and if you watch it HERE, you can see how she makes the eye indentations at 1:02:12.
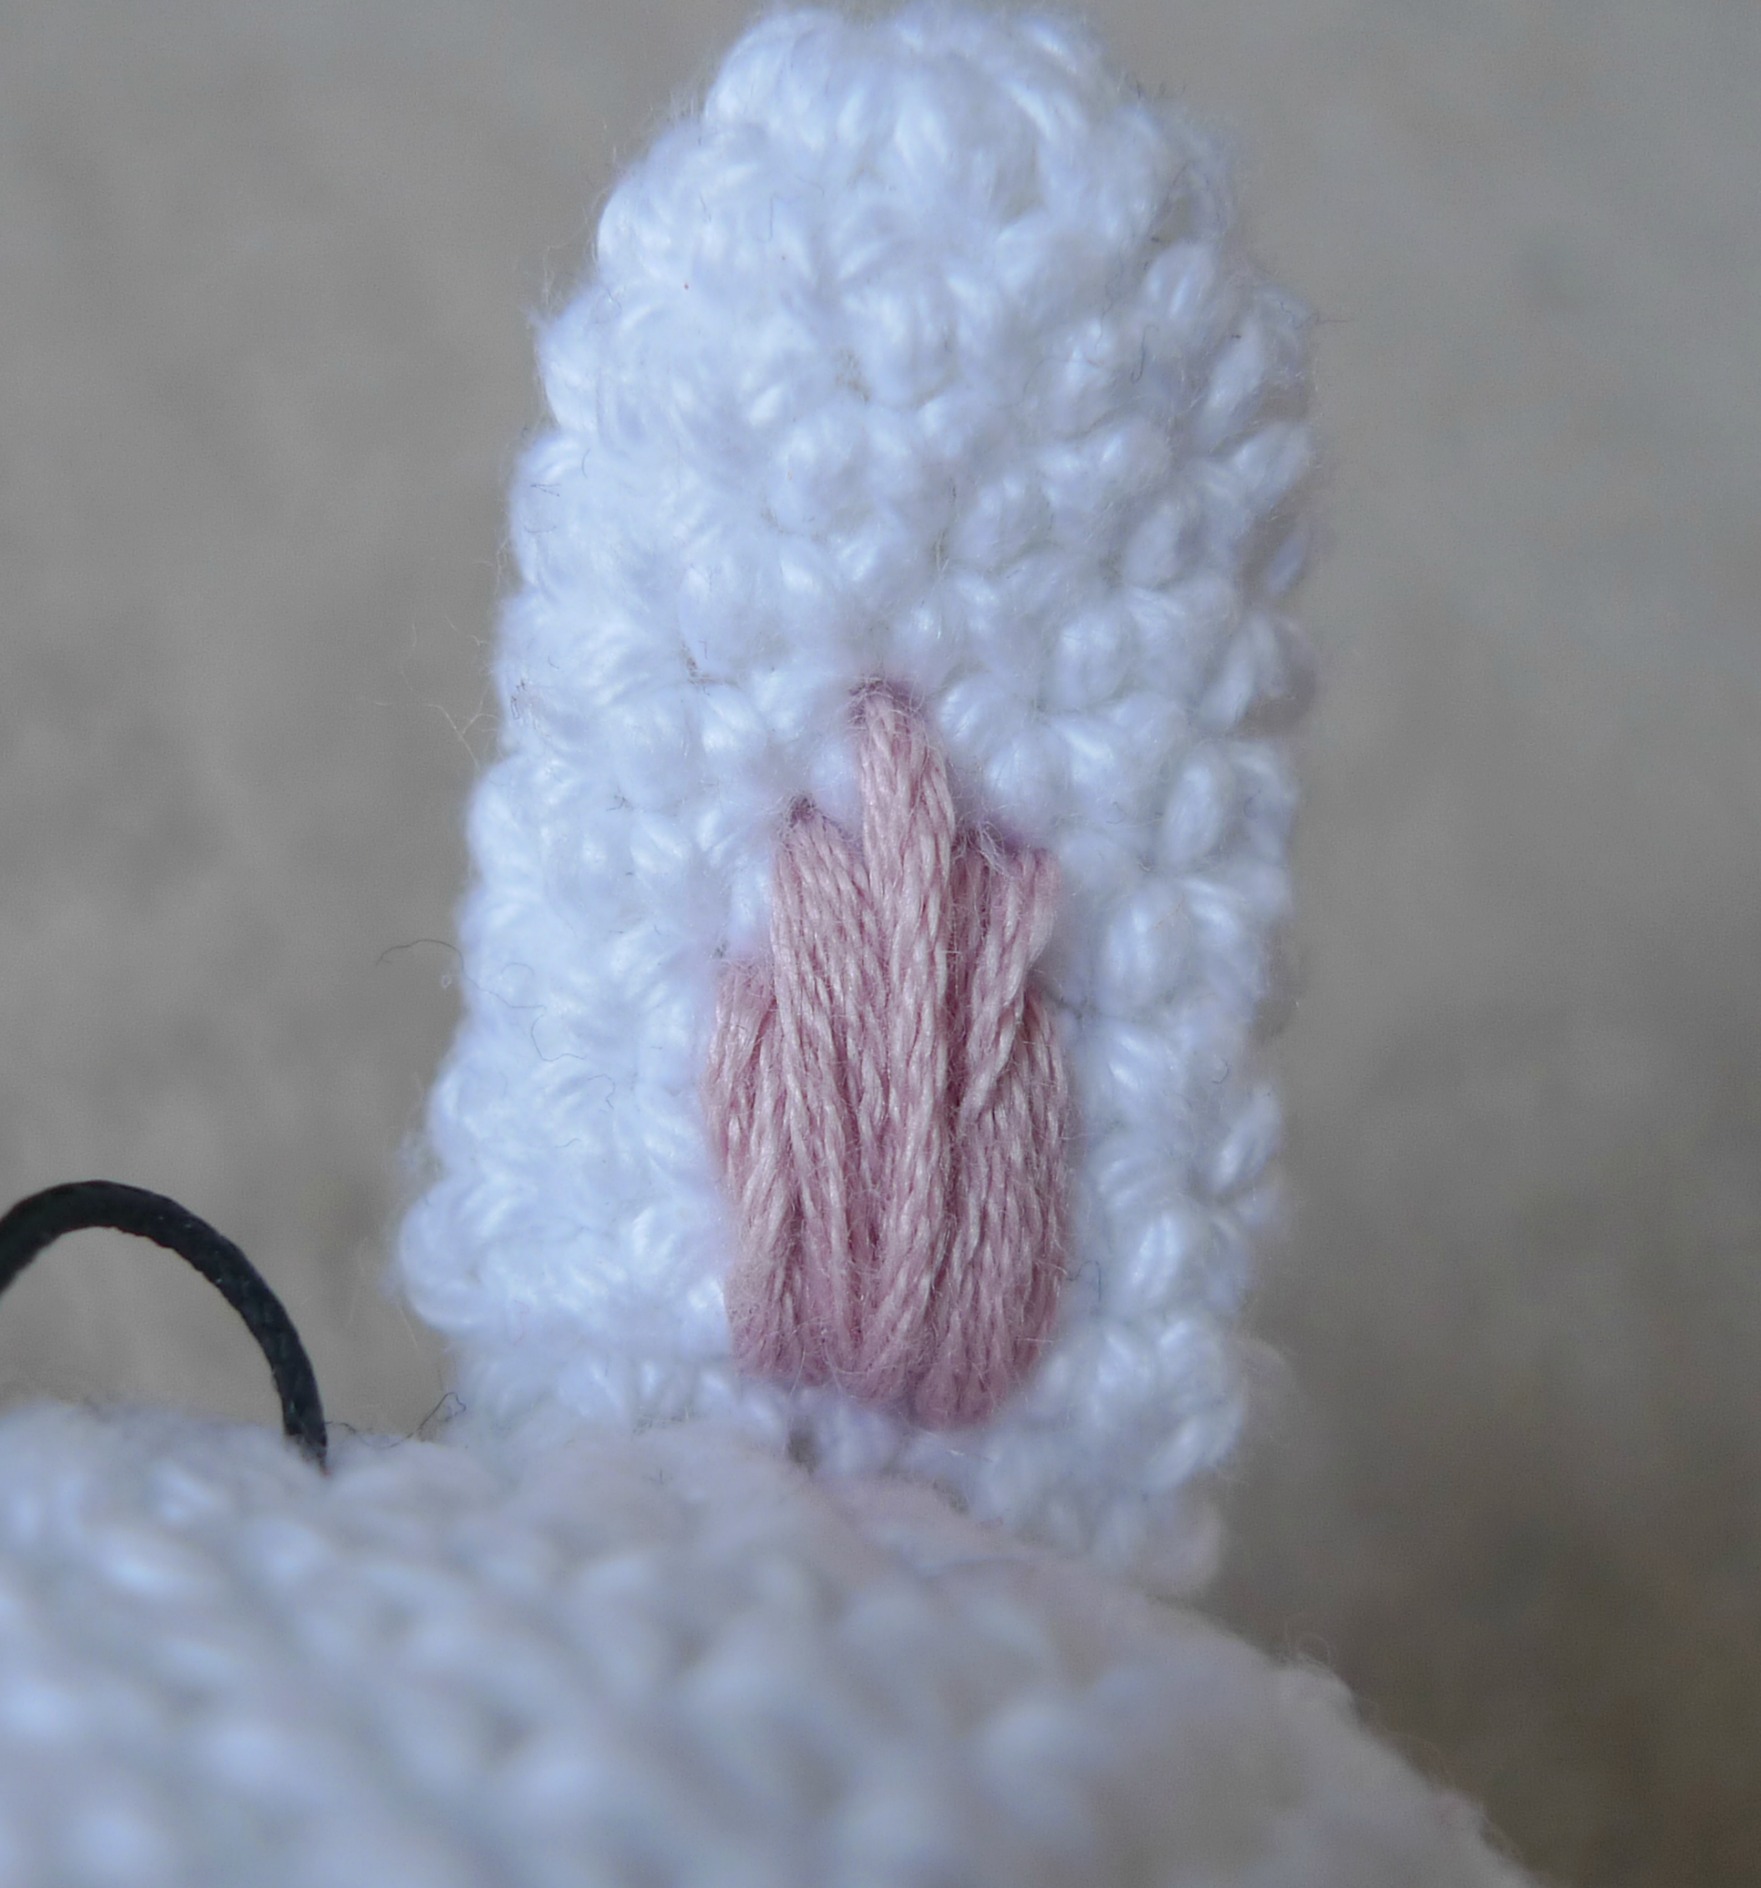
We did our indented eyes a little bit differently. Before closing up our ball after Round 23, Ryan inserted the black safety eyes between Rounds 8 and 9 (about 9 stitches apart) without attaching the washer. He then used some yarn and tied a knot around the post of each safety eye and pulled the two yarn ends diagonally back through the ball. He then secured each safety eye with its washer and filled the ball with stuffing. Please reference this diagram that we put together that visually shows this:
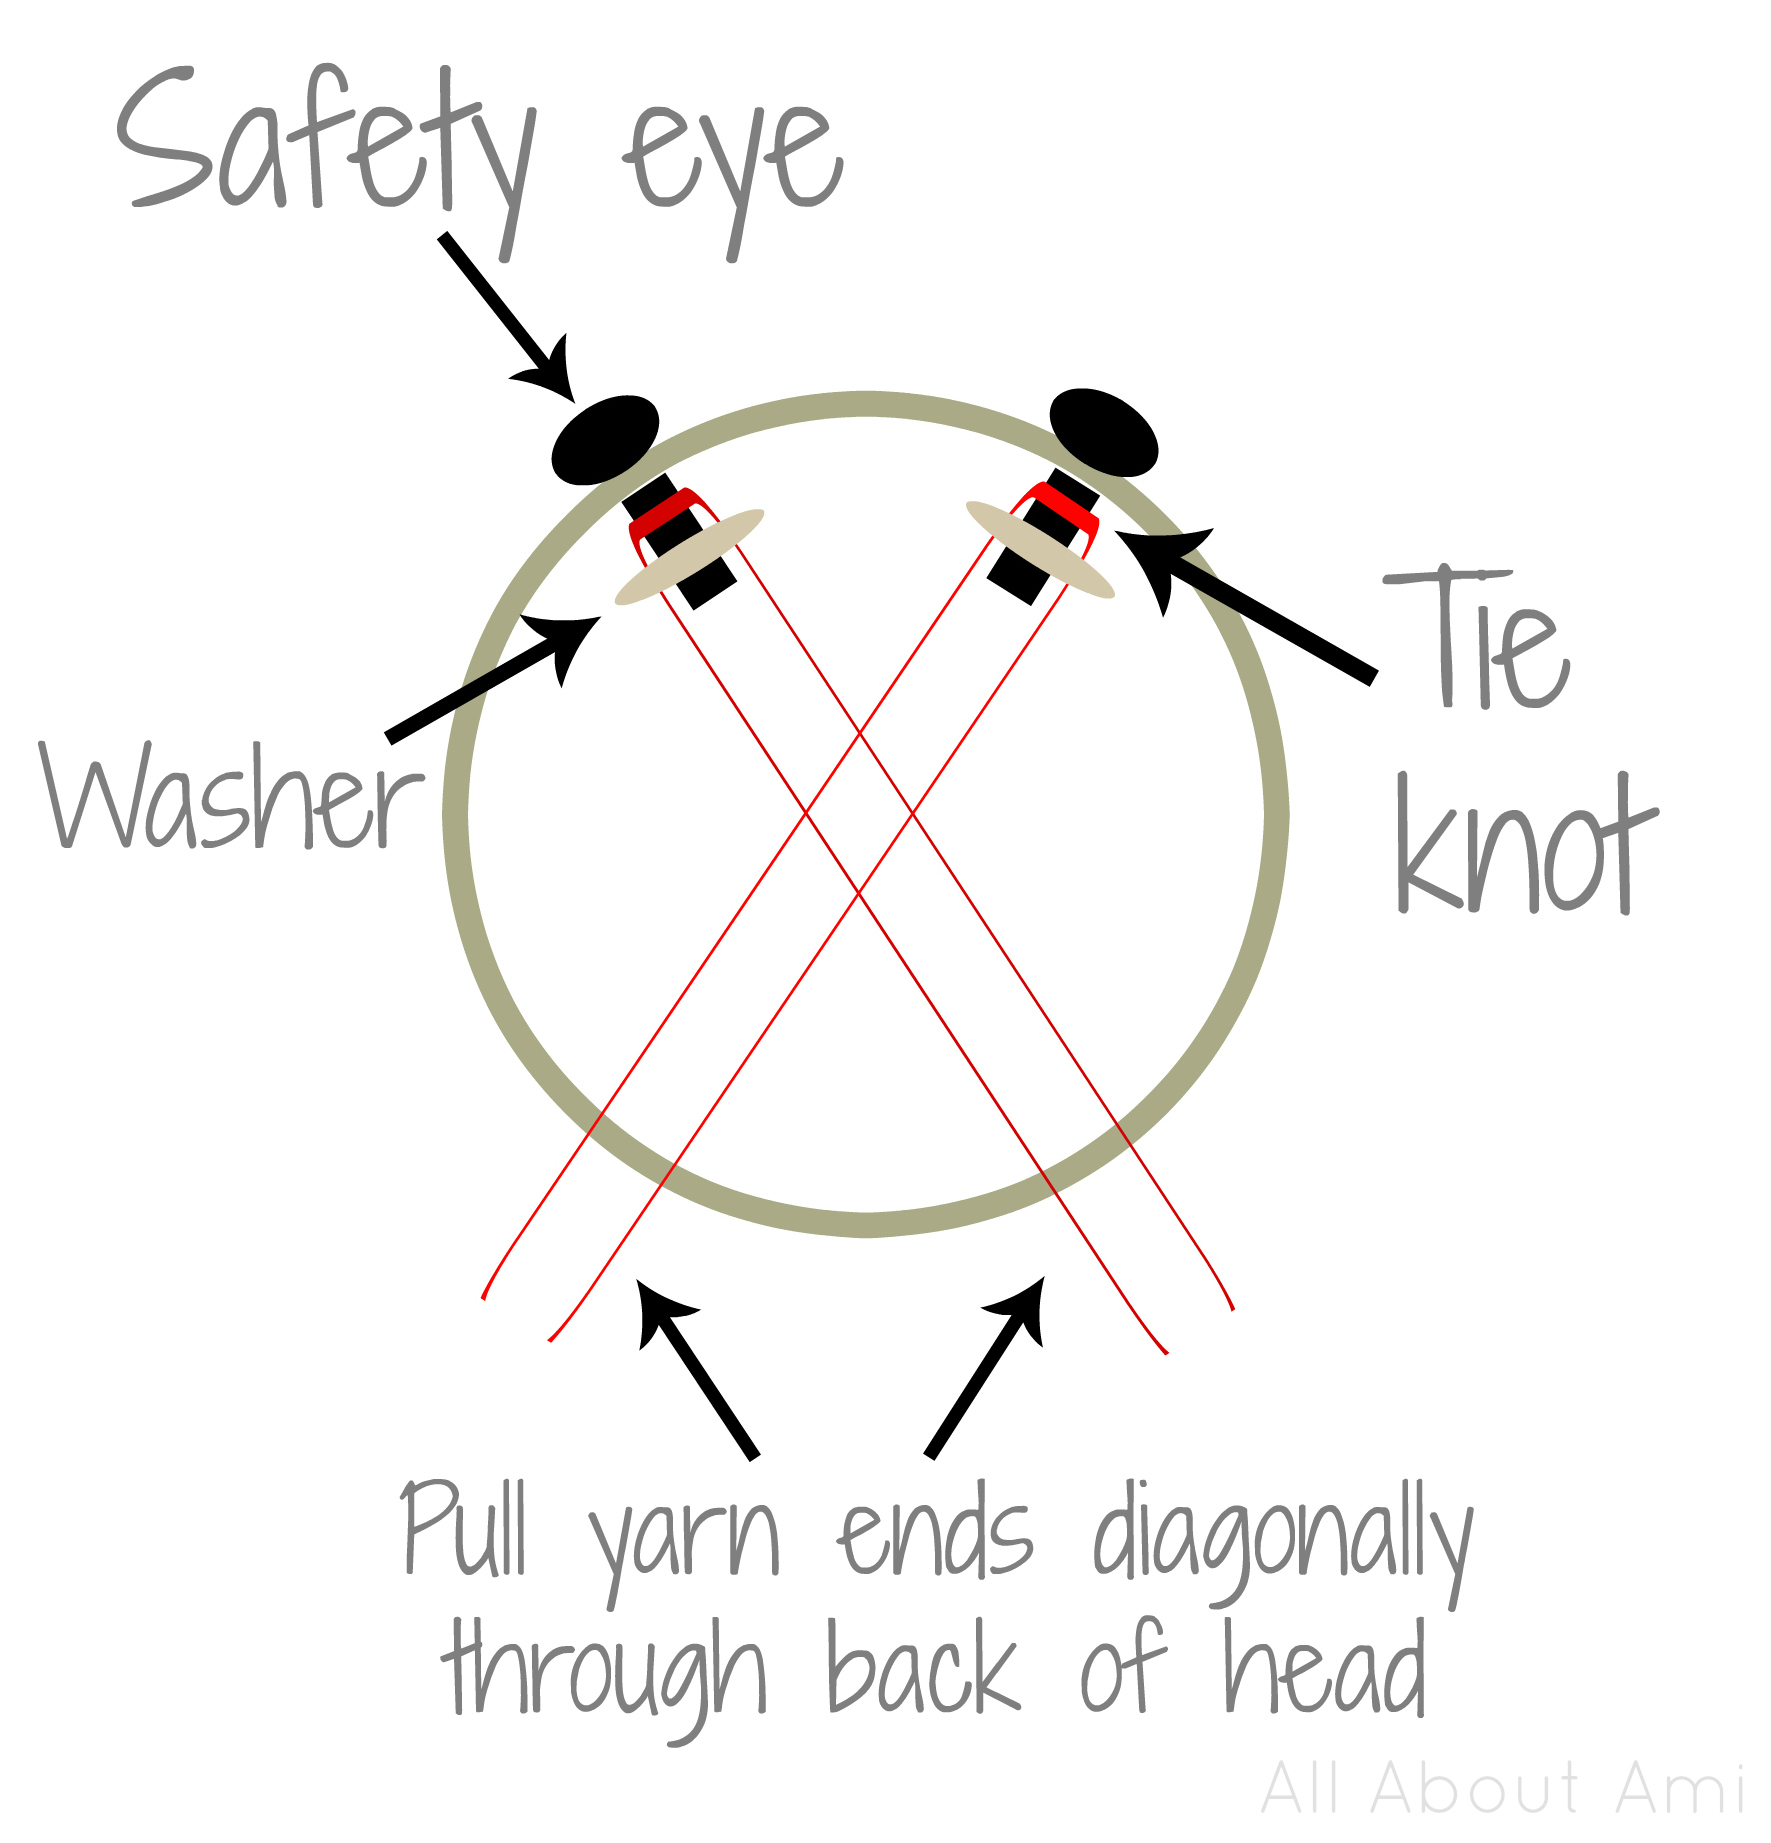
After I finished closing up the ball by doing the last four rounds, Ryan tightly pulled the yarn ends, thereby pulling the eyes inwards, and secured them by tying two firm knots. Below you can see the knots and yarn ends at the back of the head!
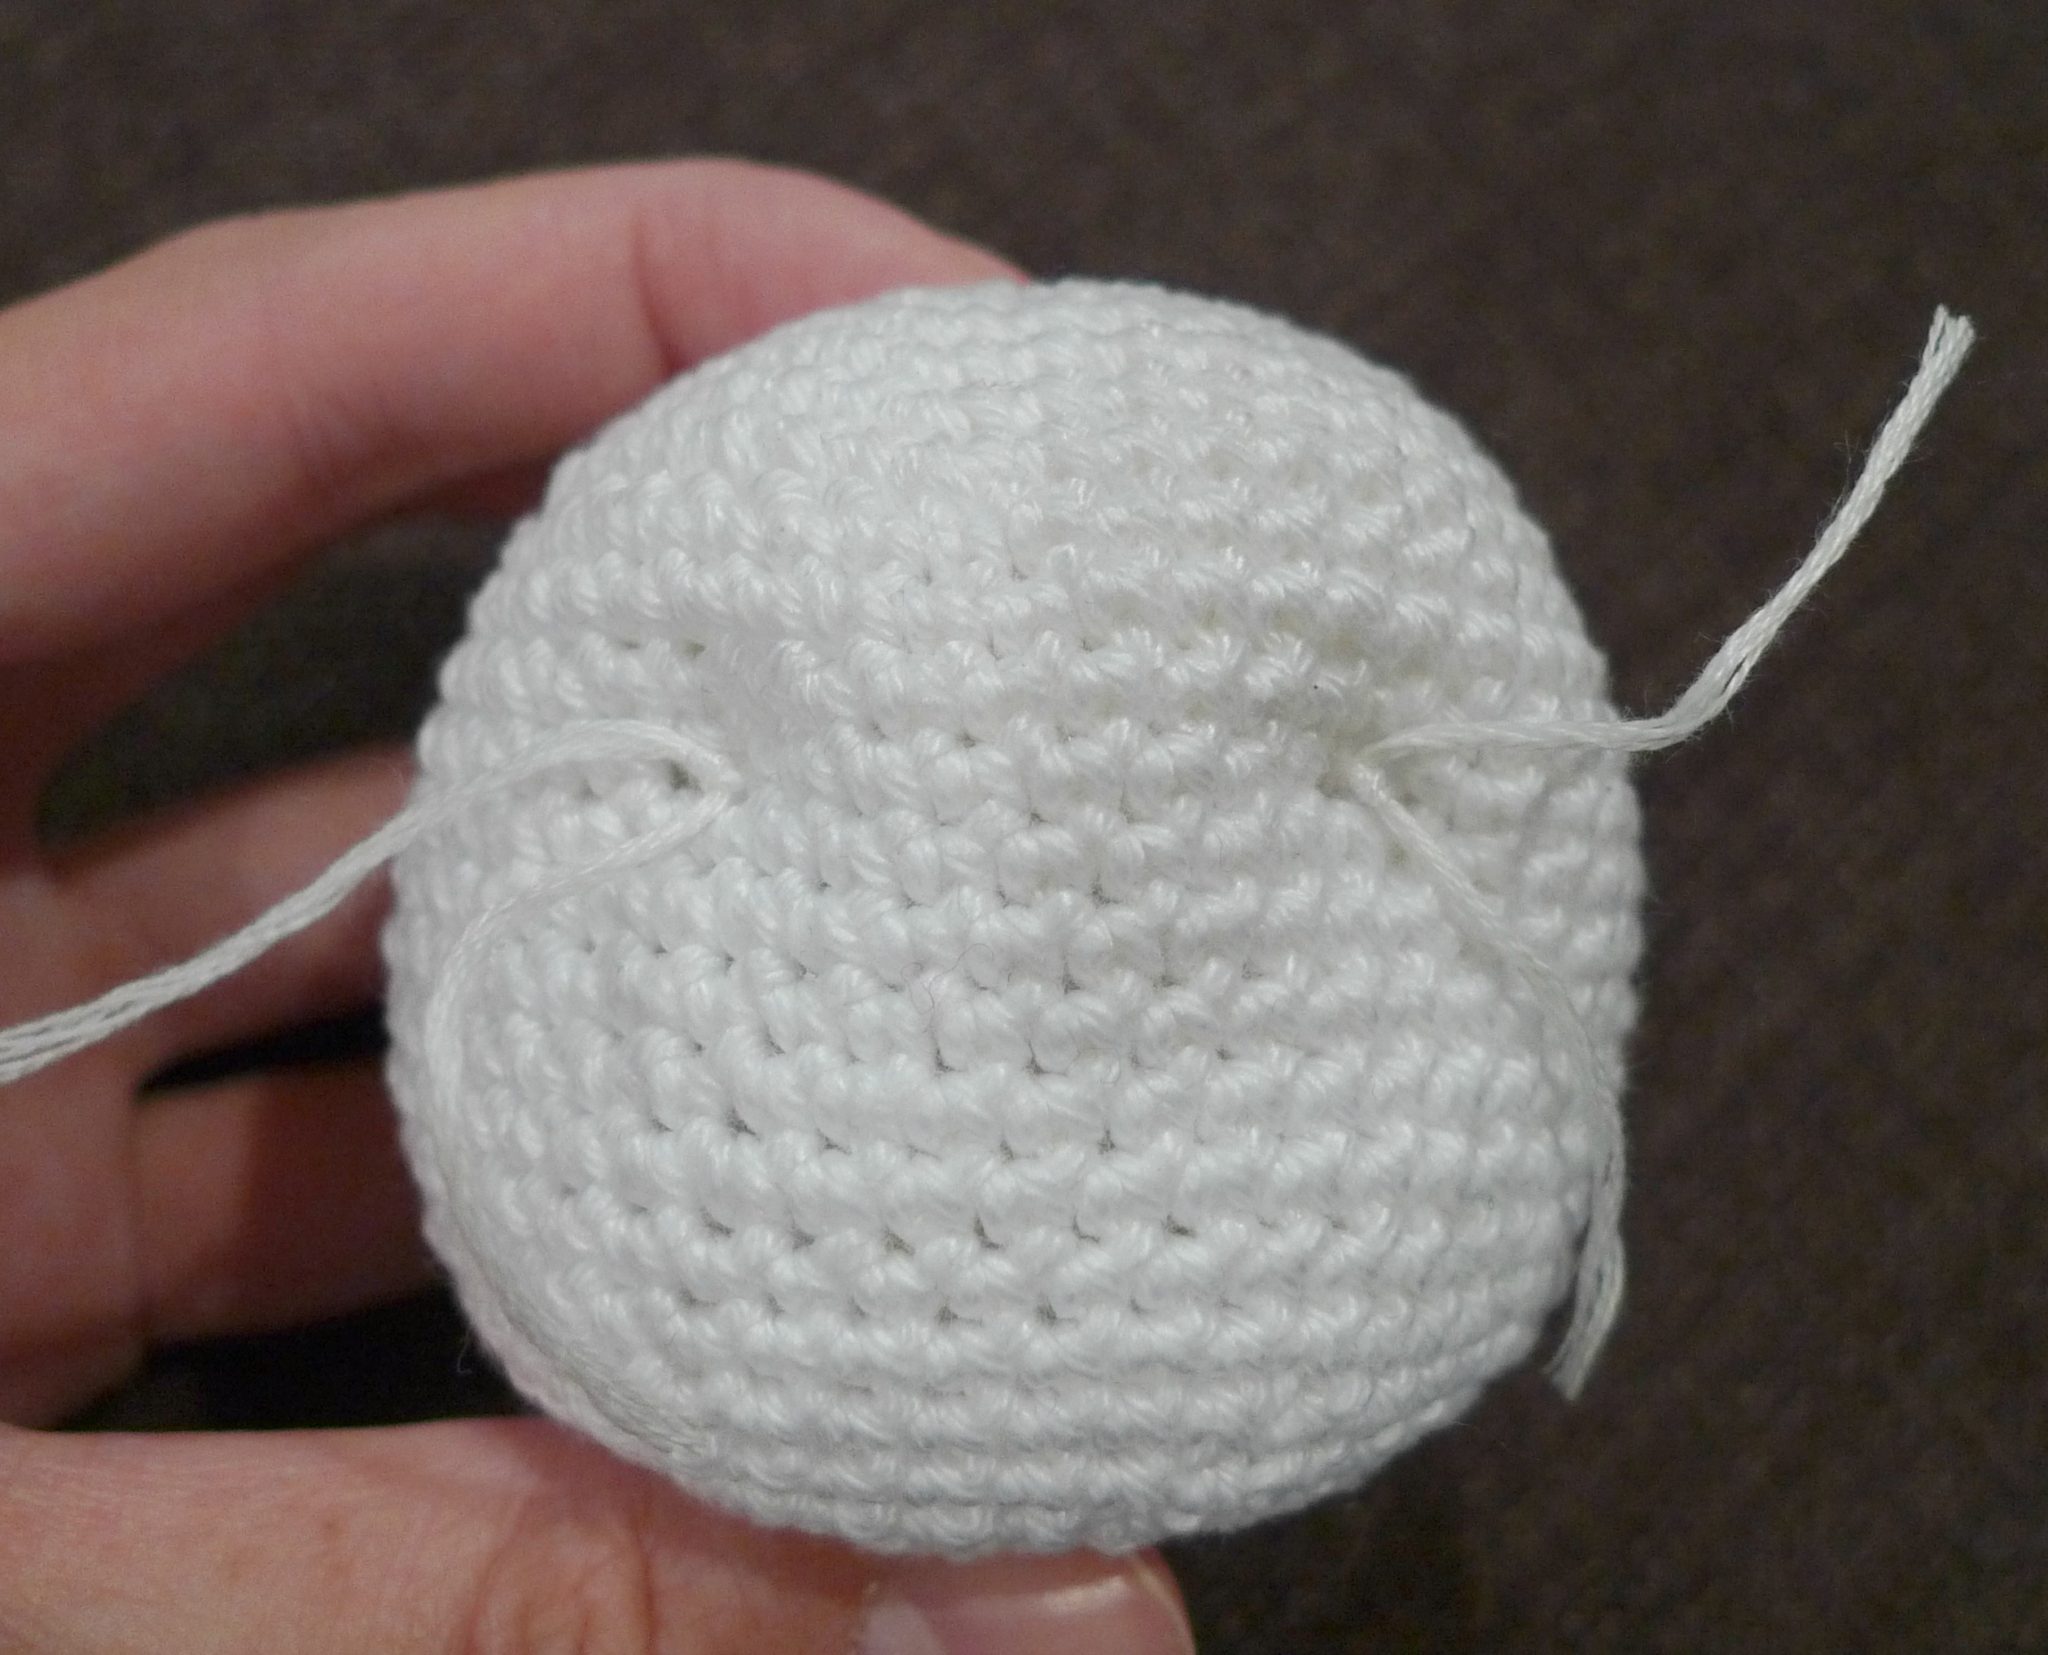
After hiding the yarn ends in the ball, we were left with this on the backside: two slight indentations. We knew this would not be an issue for this amigurumi since our bunny would be wearing a scarf! When trying out this eye indentation technique with other amigurumi where the backside would be visible, you could pull the yarn ends downward towards the bottom of the head where it meets the neck (just as Sharon did with her pig).
This eye indentation technique gives such a cute effect, and I love the definition it gives to our bunny’s face! You’ll notice that Ryan also embroidered the bunny’s nose using pink embroidery floss- be sure to check out my “Amigurumi Nose Tutorial” HERE for more tips on how to do this.
The ears were the only part that I had to crochet differently than the Teddy Ornaments! I started off with the same ear pattern but simply extended it to Round 10.
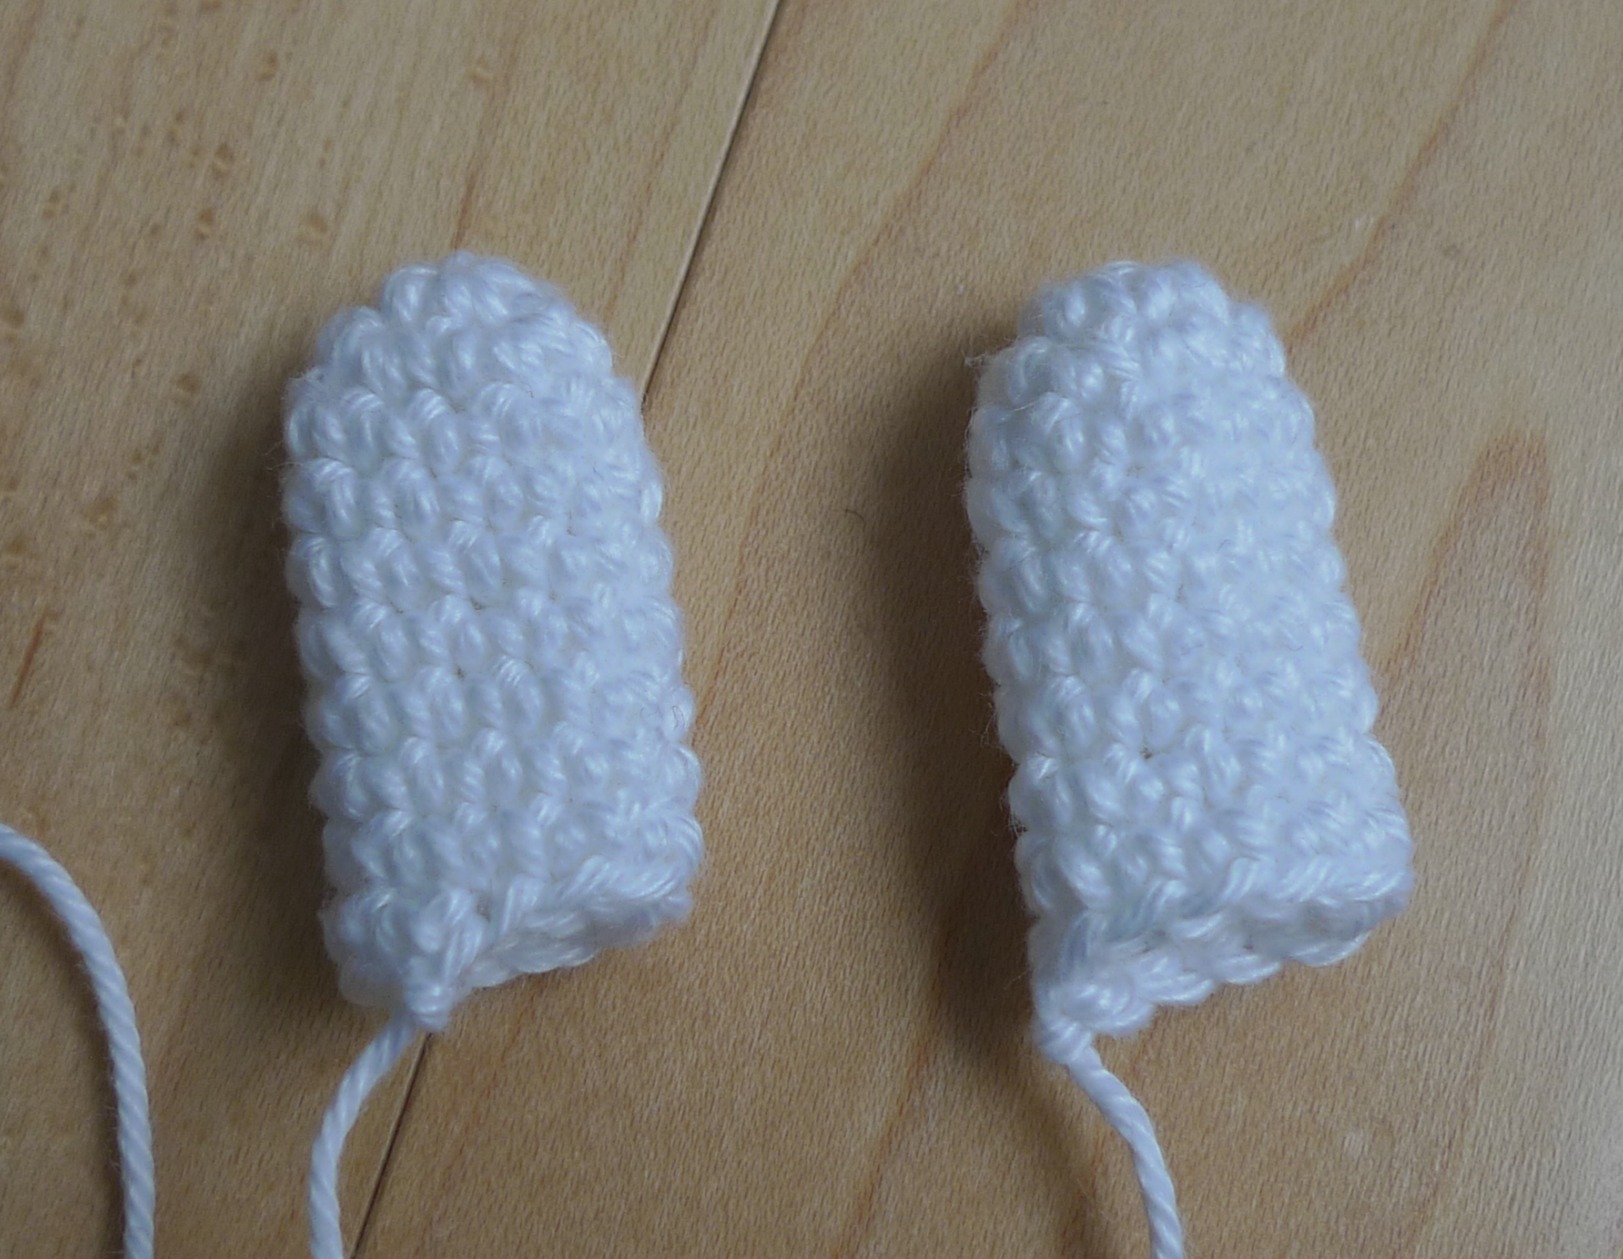
Ryan then used the same pink embroidery floss that he used with the nose to add some detailing to the ears! He simply increased and decreased the height of each stitch to create this gradated effect.
Rather than crocheting a scarf, I thought that making a fabric scarf would be a beautiful touch as I like to mix materials. Do you recognize this floral fabric? I’ve used it countless times for previous projects (lining of Spring Bunnies’ ears, Sweetheart Bunny’s bow, lining of cell phone cozy, lining of pink Elephant’s ears), and I’m so glad we still have some left! We cut out a rectangular piece of fabric, folded and ironed the sides, and hemmed all the edges with a sewing machine. To add some cute detailing, we used a white brad from my scrapbook collection since it looks like a tiny button! Ryan made a small slit in the fabric and simply inserted the brad. Of course, if you do not want to make a fabric scarf, you could always crochet one using the scarf pattern I made up for the teddies HERE! We secured the scarf onto the bunny by using hot glue.

Another new technique we used was adding rosy cheeks with pink ink! We happened to have a pink ink pad at home, and Ryan gently dabbed some pink ink onto each cheek with a light hand using a paint brush that he trimmed down. Be careful not to add too much ink if you are trying out this technique- less is more!
Here is our finished “Bunny Ornament”, complete with all her details and some new techniques such as the indented eyes, rosy cheeks, pink embroidered ears and nose and floral buttoned scarf! We used some black cord to make a little loop ontop so that we could hang her onto our tree with a metal hook, just like the other teddy ornaments.
![]()
***************************************
Bunny Ornament Pattern
***You can purchase an INEXPENSIVE AD-FREE PDF of this pattern on Etsy HERE! The printable PDF with step-by-step pictures has been condensed into a total of 5 pages including the cover page and also includes the Teddy Ornaments Pattern too!
Materials:
- Lightweight yarn (3): (I used Patons Grace mercerized cotton in “Snow”)
- 2.00 mm Clover Amour crochet hook
- Yarn needle (bent tip helpful for attaching amigurumi parts- see HERE)
- Fiberfill
- 6 mm safety eyes
- Pink embroidery floss (for ears and nose)
- Fabric (for scarf), Brad (for button/embellishment of scarf)
- Metal ornament hook
- Black cord
- Pink ink (optional) for cheeks
Note: I worked in continuous rounds (vs. joined rounds).
HEAD/BODY
Using white yarn,
R1: 6 sc in Magic Ring. (6 sts)
R2: 2 sc in each sc around. (12 sts)
R3: *Sc 1, 2 sc in next sc*, rep 6 times. (18 sts)
R4: *Sc 2, 2 sc in next sc*, rep 6 times. (24 sts)
R5: *Sc 3, 2 sc in next sc*, rep 6 times (30 sts)
R6: *Sc 4, 2 sc in next sc*, rep 6 times (36 sts)
R7: *Sc 5, 2 sc in next sc*, rep 6 times (42 sts)
R8: *Sc 6, 2 sc in next sc*, rep 6 times (48 sts)
R9-20: Sc 48
R21: *Sc 6, dec 1*, rep 6 times (42 sts)
R22: *Sc 5, dec 1*, rep 6 times (36 sts)
R23: *Sc 4, dec 1*, rep 6 times (30 sts)
Embroider nose with pink embroidery floss. Insert black safety eyes between Rounds 8 and 9, about 9 stitches apart. To make eye indentations, tie knot around each safety eye post with yarn and bring yarn diagonally backwards through head. Secure washer on each safety eye. Please reference diagram above to see this visually. Begin stuffing head.
R24: *Sc 3, dec 1* rep 6 times (24 sts)
R25: *Sc 2, dec 1*, rep 6 times. (18 sts)
R26: *Sc 1, dec 1*, rep 6 times. (12 sts)
Finish stuffing head.
R27: *Dec 1*, rep 6 times. (6 sts)
Fasten off and weave in end. Pull yarn ends from knots around safety eyes firmly to indent the eyes. Tie tight knots and weave in ends. And rosy cheeks by lightly dabbing on pink ink with paint brush.
EARS (make 2)
Using white yarn,
R1: 5 sc in Magic Ring.
R2: 2 sc in each sc around. (10 sts)
R3-10: Sc 10.
Fasten off and leave long end for sewing. Add pink embroidery detailing by making gradated stitches up and down the ear. Attach ears to head.
SCARF
Cut out desired length of fabric. Fold, iron and hem edges. Make a slit to insert brad/button and secure scarf. Slide scarf around bunny and use hot glue to secure scarf.
***************************************
![]()
We had a lot of fun working on this quick and easy amigurumi project since it’s been a while since we made our last stuffie! It feels so satisfying since this bunny ornament can be worked up so quickly and there is very minimal attaching required 🙂
![]()
I love adding these special details to our amigurumi to give them more character and bring them to life!
![]()
Here is our amigurumi ornament collection! Bunny is in good company with Koala, Brown Bear and Panda. She turned out smaller and less round than her teddy counterparts even though I followed the same pattern. I guess that goes to show you how stuffing and crocheting with different tension can create different effects!
![]()
I was so excited to hang this little sweetie on our tree! Myla was also very excited to see the completed bunny as she had seen our progress (she thought it was hilarious when Bunny was simply a round white ball with no ears).
![]()
[Nail Polish: Sally Hansen Complete Salon Manicure in “So Much Fawn” and Sephora by OPI “Flurry Up!” Top Coat; Daniel Wellington watch: Classic St. Andrews Lady in Rose Gold]
![]()
I hope you enjoyed reading about the making of this bunny and that you learned some new amigurumi techniques that you can use in the future too! I love that we can all constantly learn and share with each other as we develop our craft. This bunny ornament looks so sweet on our tree, and I think it’s incredibly special having handmade ornaments hanging on our tree during this magical time of year. These ornaments are very quick to make (don’t forget to check out the Teddy Ornaments too), and I hope that you’ll add some to your tree this year! Follow me on Facebook, Twitter and Instagram, and use the hashtag #allaboutami so that we can all see your projects too! Enjoy adding some crochet to your Christmas trees ❤
This pattern is an original pattern by Stephanie Lau of All About Ami (December 2014). Please do not claim this pattern as your own. If you wish to share this pattern, you may link to this pattern but please do not reprint it on your site. You may keep a copy for your own personal use but please DO NOT sell the pattern or distribute it.
You may sell products made from this pattern but please clearly credit the design to me, Stephanie Lau of All About Ami, and provide a link to my blog www.AllAboutAmi.com. Permission is NOT granted for mass production or factory manufacturing of any kind. Thank you for being respectful and for your understanding!