***You can purchase an INEXPENSIVE AD-FREE PDF of this pattern on Etsy HERE! This beautifully formatted PDF includes the step-by-step pictures, the full star stitch tutorial, and the patterns for BOTH pouches! It is a total of 10 pages including the cover page!
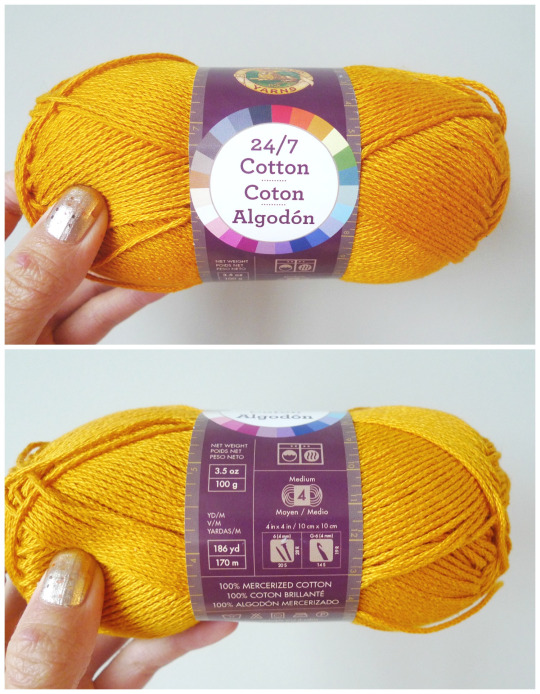
I was so excited when I first got my hands on Lion Brand Yarn’s “24/7 Cotton”! It has a beautiful sheen and luster to it as it is 100% mercerized cotton. It is categorized as a level 4 (medium) yarn, but I personally think it is closer to a level 3 (DK or lightweight) yarn. 24/7 Cotton comes in a wide array of colours, and I think they would be a great choice for amigurumi as it gives lovely stitch definition and does not split easily. This time round, I decided to use this yarn for another project I had in mind!
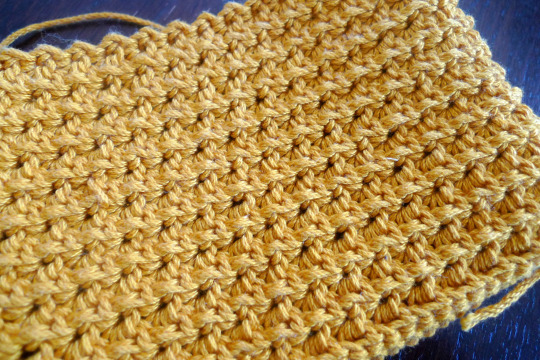
Ever since crocheting my round Zipper Pouch HERE, I had always wanted to design my own rectangular one. Thus, I began by doing a series of chain stitches with this stunning Goldenrod colour!
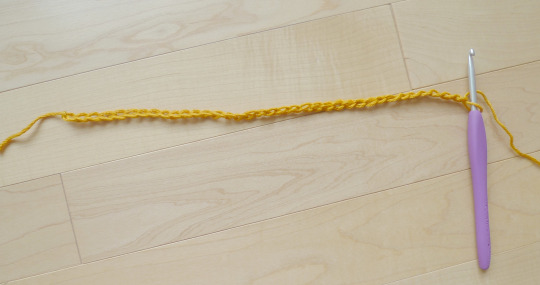
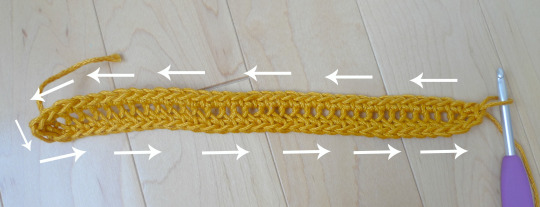
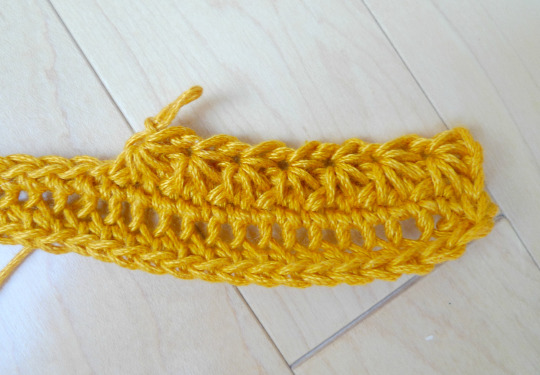
I wanted to work in a round, so my beginning chains were actually a foundation chain! First I worked single crochets in the back loops, turned my work, and then worked single crochets in the front loops. Then I slip stitched to the first stitch of the round since I wanted to work in joined rounds.
I was excited to use a new stitch that I had always wanted to learn: the Star Stitch or Marguerite Stitch! I myself learned how to do the Star Stitch through Moogly’s video tutorial HERE and I highly recommend you check out this video to see all the following steps in action. I also found the Crochet Crowd’s video HERE helpful as well! It is such a gorgeous stitch, as you’ll soon see. We will now begin the tutorial on how to crochet the star stitch! To begin the second round, chain 3.
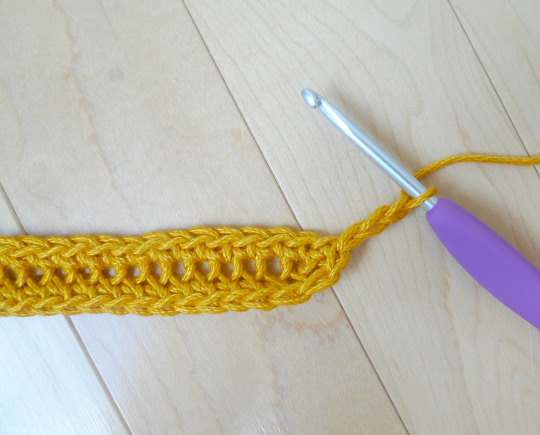
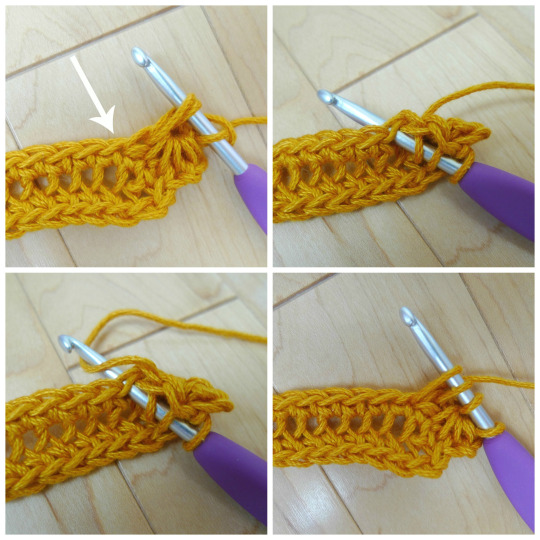
Insert your crochet hook into the second chain from the hook, yarn over, and pull up a loop. There are now two loops on my hook.
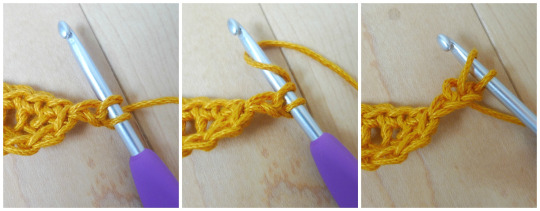
Repeat the same process in the next three stitches (insert hook in stitch, yarn over, pull up a loop).There are now five loops on my hook.

Insert your hook into the next stitch, yarn over, and pull up a loop. I now have six loops on my hook. Once you have six loops on your hook, you are almost done one complete star stitch! Yarn over, and then pull through ALL six loops, which gives that nice clustered effect. It’s important to not work too tightly when doing the star stitches, otherwise it will be very difficult for you to pull through all six loops!
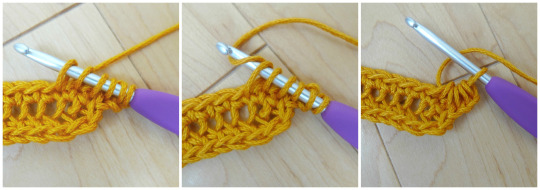
The star stitch is not quite complete yet! Yarn over and pull up a loop. This helps “seal” or finish off the star stitch. This is an important step not to forget.

This last step creates an “eye” in the star stitch as indicated by the arrow below. To begin the next star stitch, insert your hook into this “eye”, yarn over, and pull up a loop. You now have two loops on your hook.
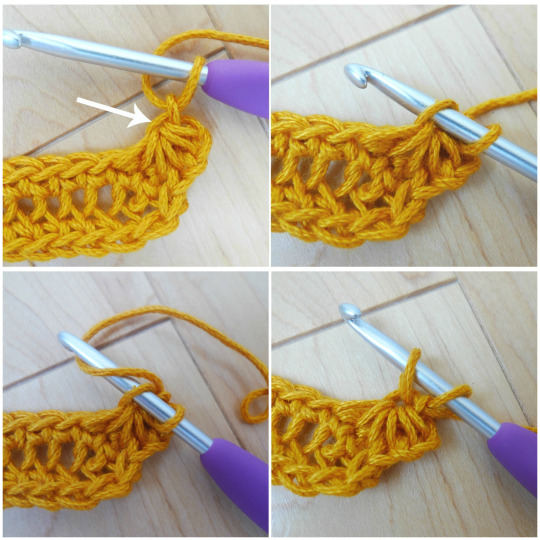
This is where it can get a bit tricky. You need to insert your hook into both loops of the last spike of the previous star stitch (the side of that last spike). You then yarn over and pull up a loop. You now have three loops on your hook.
Next, you insert your hook into the stitch where that last spike of that previous star stitch came out of. Yarn over, pull up a loop. You now have 4 loops on your hook.
You then repeat the same process over the next two stitches (insert hook into stitch, yarn over, pull up a loop). As you can see, each new star stitch only takes up two new stitches. You now have six loops on your hook, the magic number!
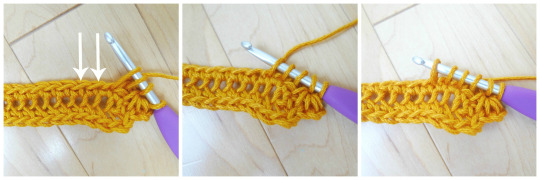
Once again, you yarn over, and pull through all six loops.
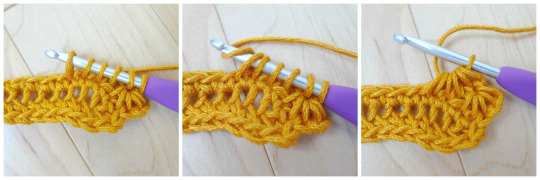
We can’t forget that last step: yarn over and pull up a loop to seal that star stitch.
You repeat this same process across the whole round.
Note that for this first round of star stitches, the last star stitch will be worked over the last stitch of the previous round (where the stitch marker is located) and the slip stitch of the previous round (the slip stitch that closed up the round).
It’s almost time to close up this first round of star stitches!

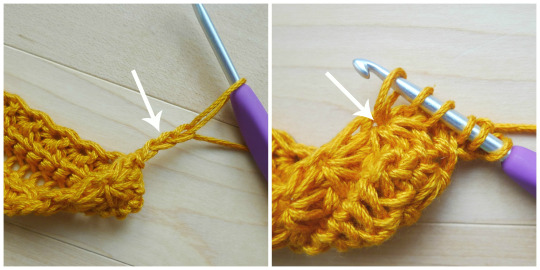
To do so, you slip stitch to the chain gap formed from those initial chains.

The first round of star stitches is complete!
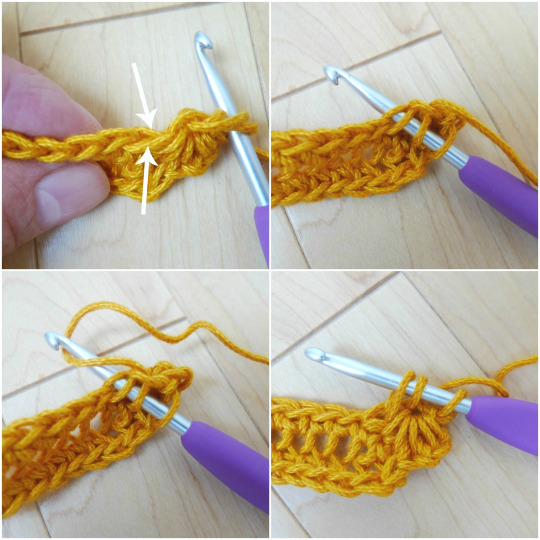
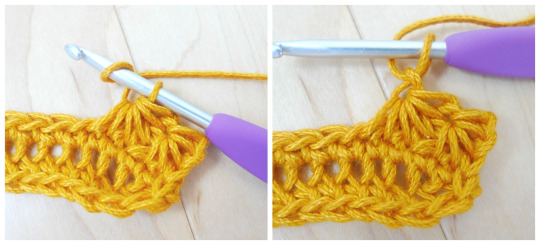
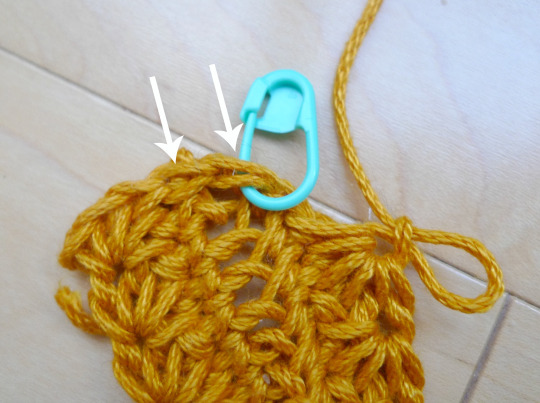
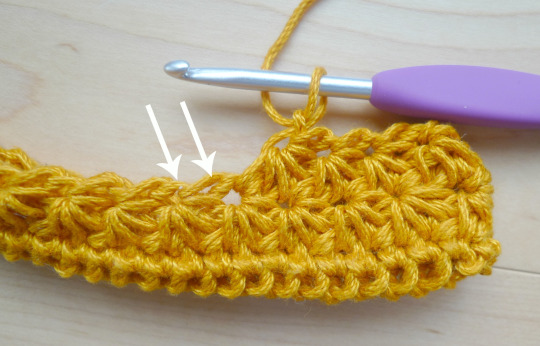
To begin the second round of star stitches, you chain 3 once again and beginning from the second chain from the hook, repeat the same process as above. The arrow on the left shows the first stitch where you insert your hook and the arrow on the right shows the last stitch where you insert your hook. Note that the last stitch is in the “eye” of the star stitch underneath.
Remember that each star stitch takes up two new stitches of the round as indicated by the two arrows below: one will be a larger stitch (formed from the spike of the star stitch) and one will be a smaller stitch (formed from the “eye” of the star stitch underneath). As you go around building star stitches, be sure to always end on the “eye” of the star stitch underneath (as indicated by the arrow on the left), otherwise your numbers will be thrown off!
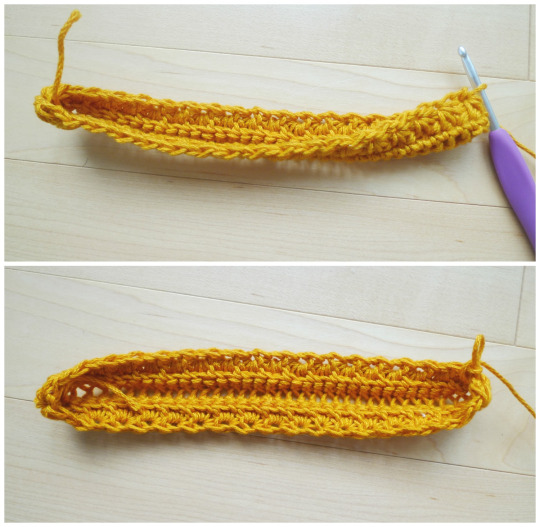
Two rounds of star stitches are complete!
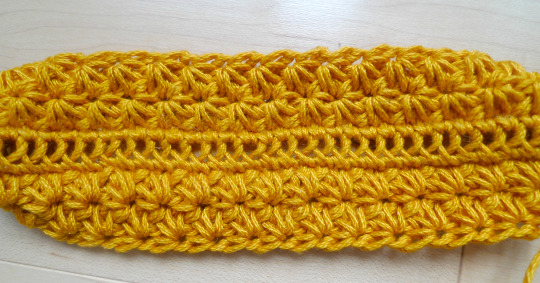
Once again, to close up the round, you slip stitch to that chain gap.

I actually began working on this project the day before we left on a family vacation to Nova Scotia. I wanted to do the first steps at home so that I could take step-by-step pictures! The rest of the crocheting was done in the car when we were driving around Nova Scotia! Once you get the hang of this stitch and form a routine, it becomes very simple, and you can work on it without too much concentration. I can’t work on projects that require too much counting or focus in the car as I get dizzy!

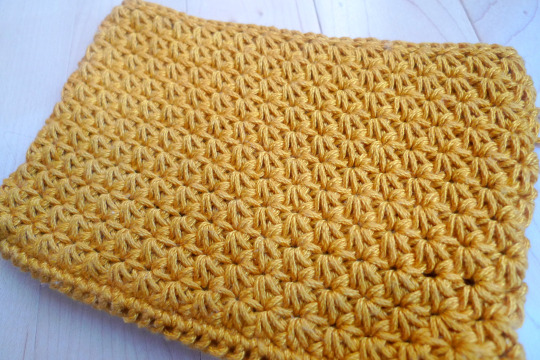
After 11 rounds of star stitches, I did a round of slip stitches for a beautiful edging!
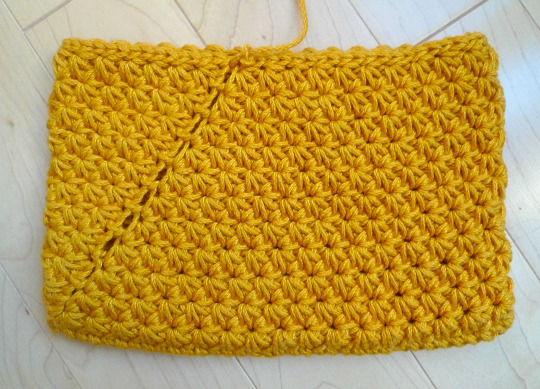
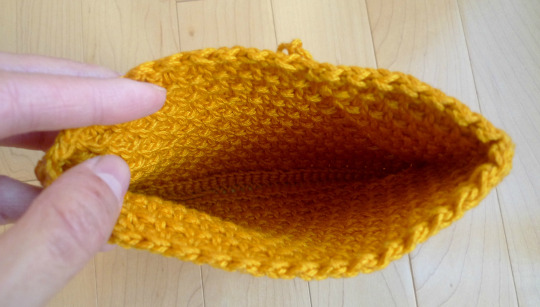
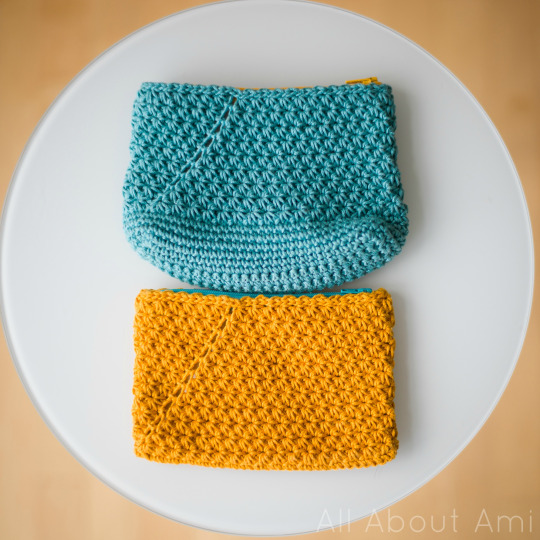
Since we are working in joined rounds, a slanted seam is formed at the back. I actually think it gives a really interesting effect! If you are not sewing a lining for your pouch, I would recommend whip stitching this seam shut to close up the gaps and ensure that nothing can fall out. If you really do not like the seam, you could try working this pouch in turned rows instead of rounds, thus eliminating the seam. See Moogly’s video HERE on working the star stitch in rows- at the end, you would just whip stitch the sides together to form your pouch!
The other side of the pouch has a really neat look and texture to it too!
Now it is time to sew the fabric lining for this pouch!
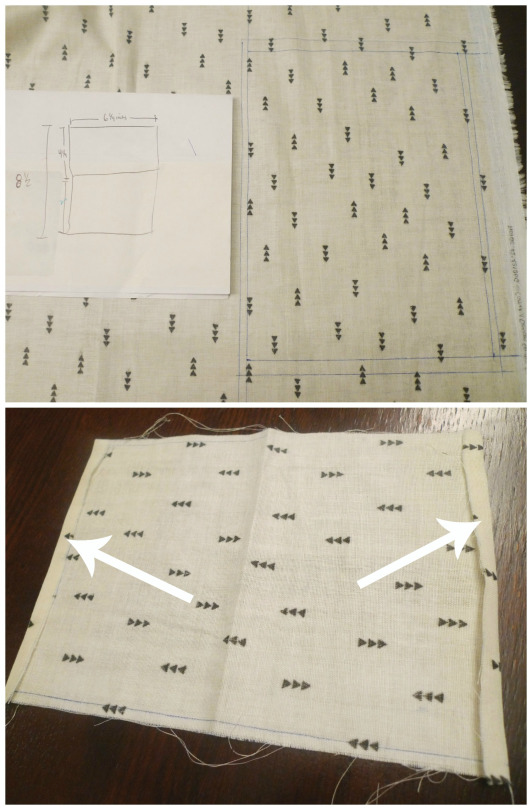
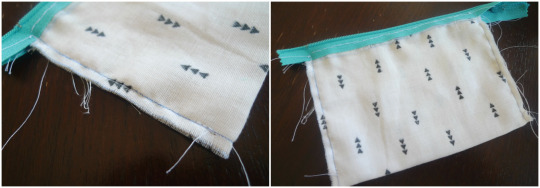
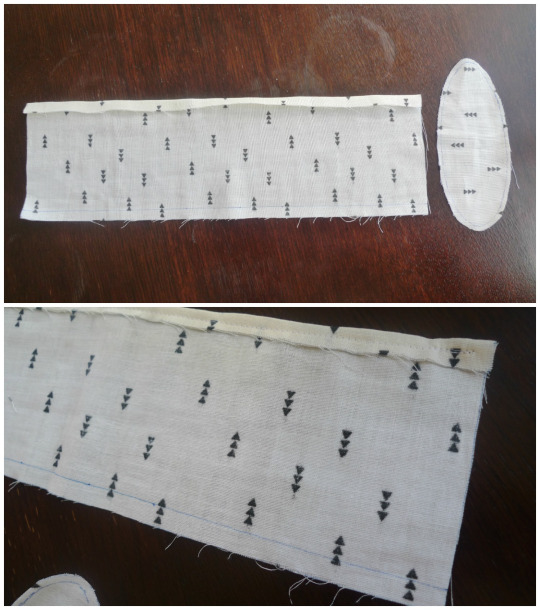
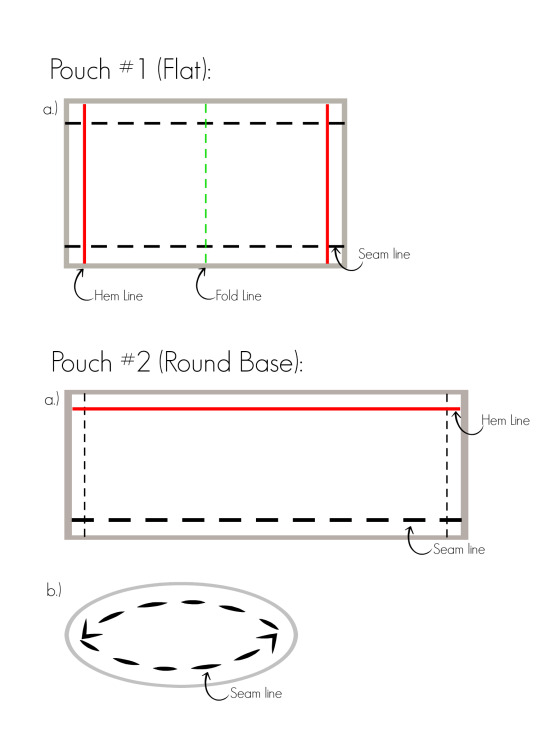
We picked up this simple and modern fabric and cut out a large rectangle based on the size of our pouch. Instead of cutting two separate pieces and sewing them together, we decided to do one large rectangle that could fold in half (fold would be at bottom of pouch). We then drew a 1 cm seam allowance within the big rectangle (seam allowance = smaller rectangle in this case) since this fabric lining would be fitting within the pouch and we didn’t want there to be too much slack. We folded and ironed the top and bottom edges of the rectangle (as indicated by the arrows) and used a sewing machine to hem these edges.
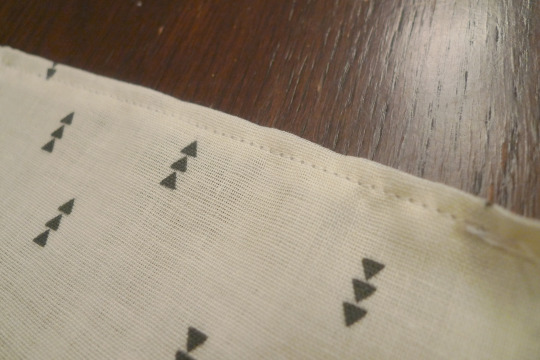
The sewing machine gives such clean lines…definitely much better than my hand sewing!
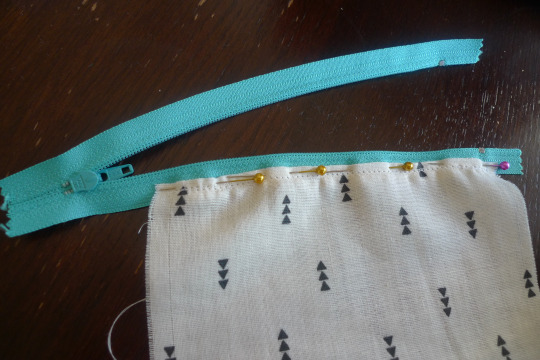
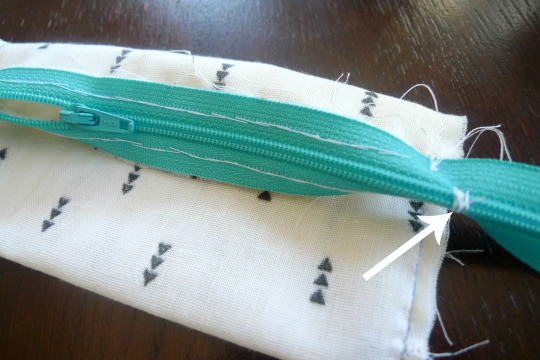
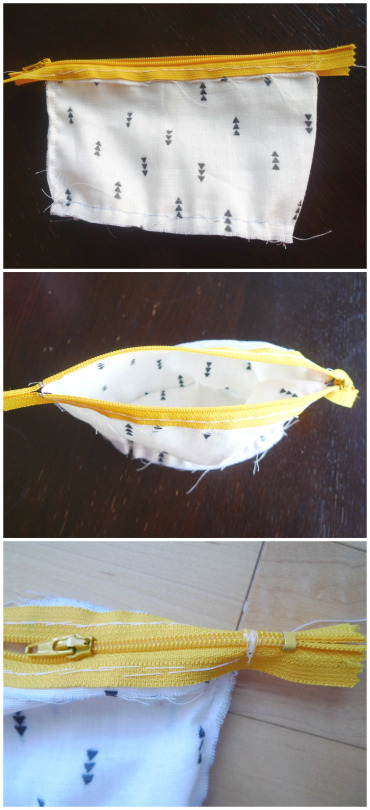
It was now time to add the zipper! We pinned the wrong side of the zipper to the wrong side of the fabric.
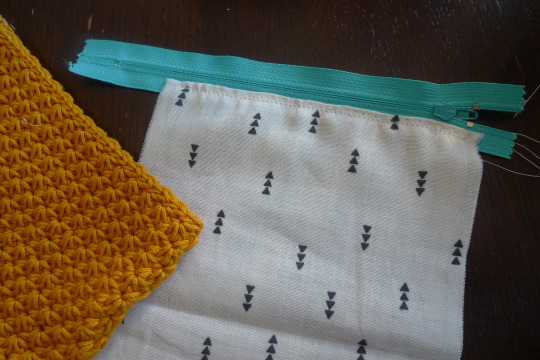
I hand sewed one side of the fabric to one side of the zipper.
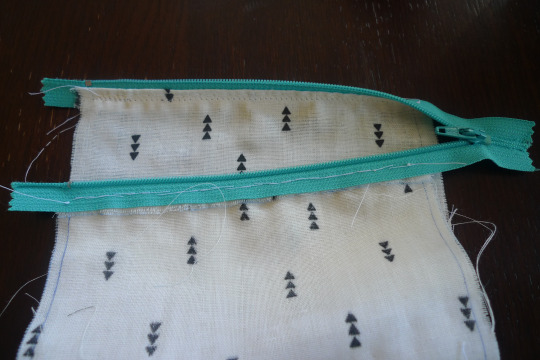
Then I unzipped the zipper and sewed the other side of the fabric to the other side of the zipper.
The inside of the pouch is indicated by the arrow below!
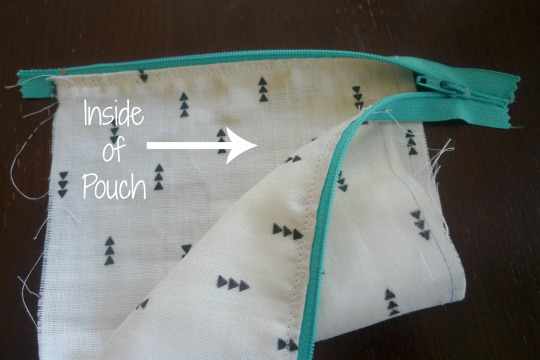
I then used a sewing machine to sew the side edges together.
Since my zipper was too long for this pouch, I sewed a stop as indicated by the arrow below. Ryan added some hot glue to make it stronger.
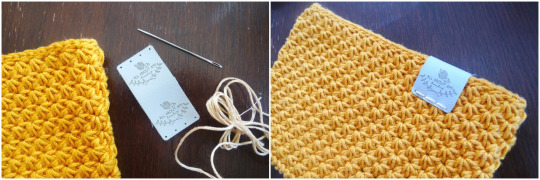
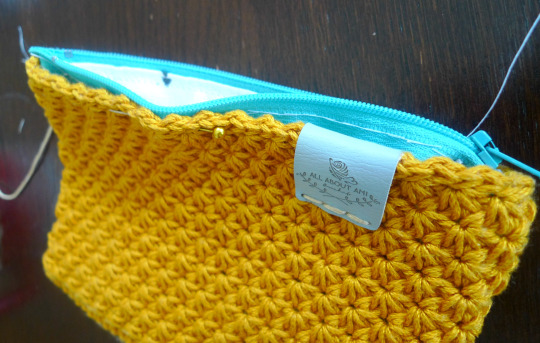
We thought a label would be a nice touch to this pouch, so I sewed my ultraleather foldover tag from BrickBubble onto my pouch!
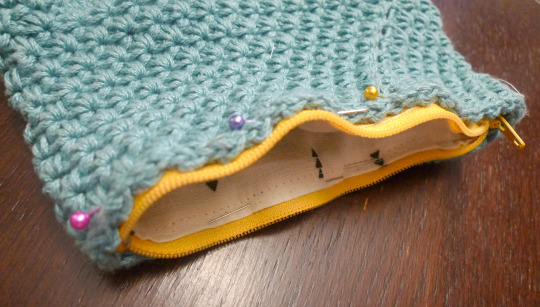
It was then time to insert the fabric lining into my crocheted pouch!
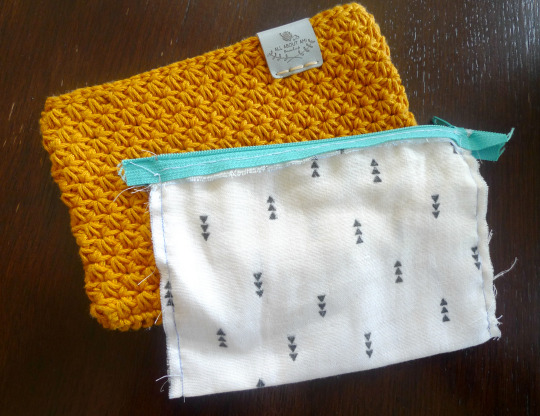
I pinned it in place and then sewed the zipper to the crochet pouch. I attached the zipper towards the top of the last round of star stitches and left the last round of slip stitches untouched for a clean look. This video HERE also shows an alternative way to add a zipper and lining.
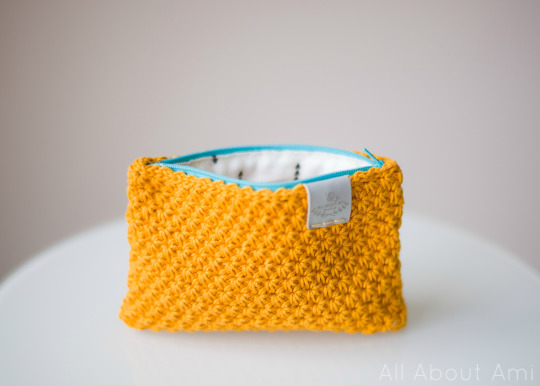
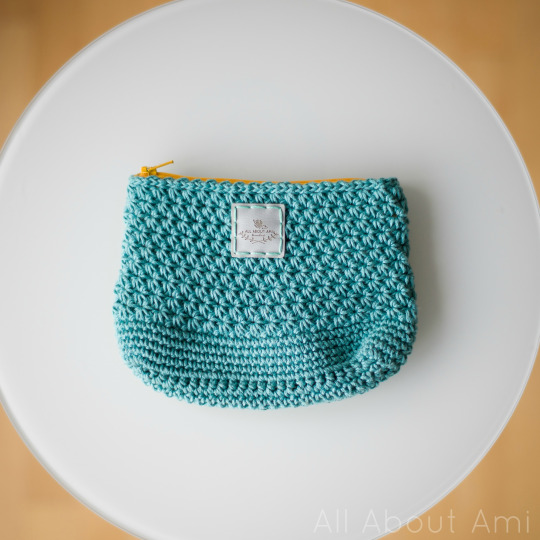
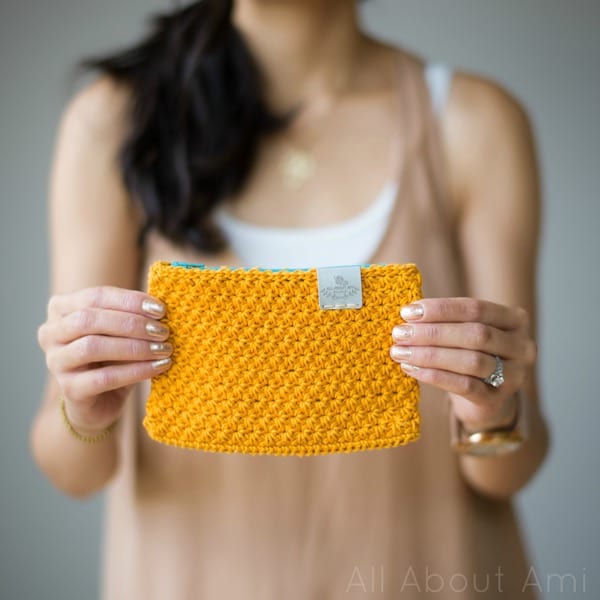
I was sooo happy when I finally completed my first star stitch pouch!
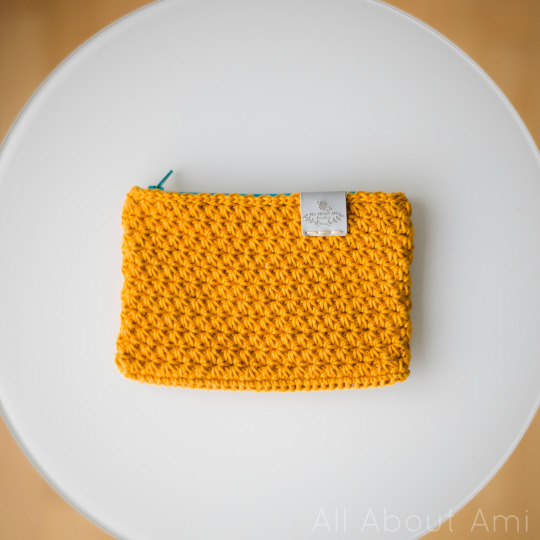
The inner fabric lining adds such a s such a polished look! More pics to follow!
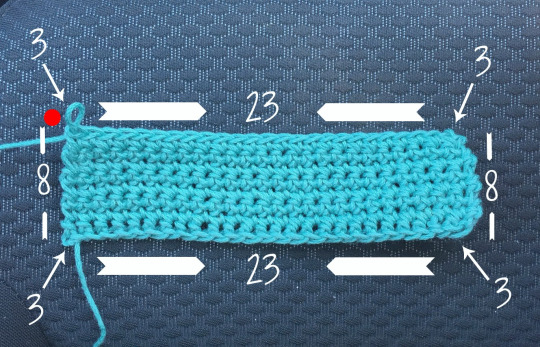
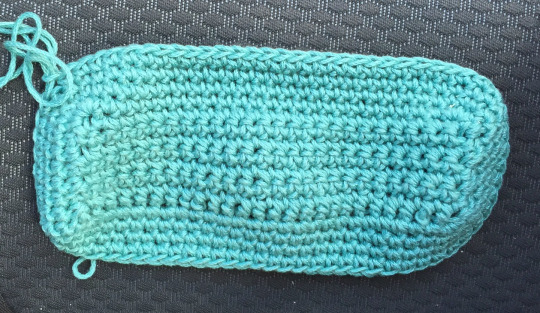
In addition to designing a flat rectangular pouch, I also wanted to design a pouch with a flat base that could stand up, similar to a makeup bag! I used this gorgeous colour “Jade” and made a rectangular base by crocheting 8 rows of single crochets. To begin working in a round, I then smoothed over this rectangle by starting at the red dot (where the working yarn is), and did the following stitches: Sc 8, Sc 3 in the corner, Sc 23, Sc 3 in the corner, Sc 8, Sc 3 in the corner, Sc 23, Sc 3 in the corner. I was left with 74 stitches.
I then worked some rounds of single crochets! You may notice the change in background of these step-by-step photos compared to our normal hardwood floor…it’s actually the seat of our rental car in Nova Scotia!
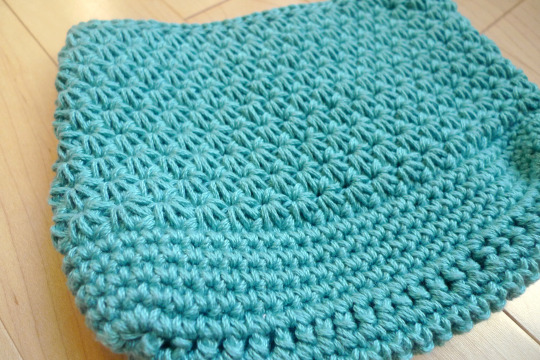
After five rounds of single crochets, I then began working star stitches as per the instructions above!

I finished the crochet portion of this Star Stitch Pouch in Halifax! I managed to sneak in some crochet time while we were playing on a rock beach and enjoying the breath-taking view. I love how this portable project came with me wherever I went in my backpack!

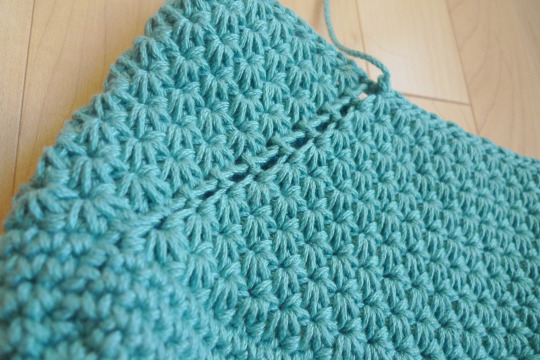
I did 9 rounds of star stitches and one round of slip stitching to complete this pouch!
Once again, the same diagonal seam was formed!
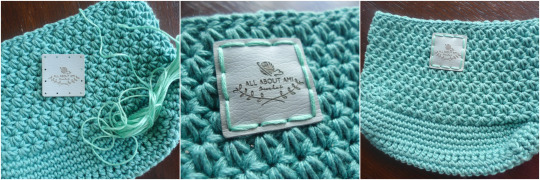
Instead of using a foldover tag, this time I decided to use one of my square tags and sew it to the top middle of this pouch!
Figuring out the fabric lining of this pouch was trickier because of its flat base. We cut out a rectangle and an oval based on the size of our crocheted pouch and drew a 1 cm seam allowance within these shapes. I used my sewing machine once again to hem only the top edge of the rectangle (the bottom edge gets sewn to the oval).
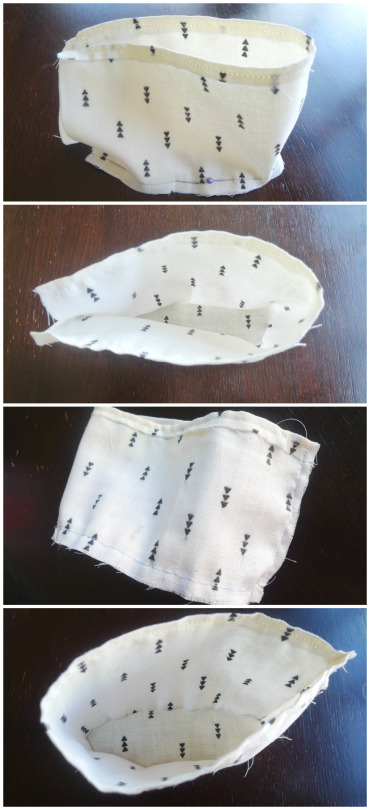
Then, I folded the rectangle around the oval so that the oval was at the bottom/base of the lining. I pinned both pieces together and carefully sewed the bottom of the rectangle to the oval and sewed up the sides of the rectangle.
I added the zipper the same way I did the other pouch by placing the wrong sides facing each other. I sewed a stop and Ryan added some hot glue to secure it once again.
I then inserted my fabric lining with zipper into my crochet pouch and pinned it into place. I then sewed my zipper to my pouch as I did above.
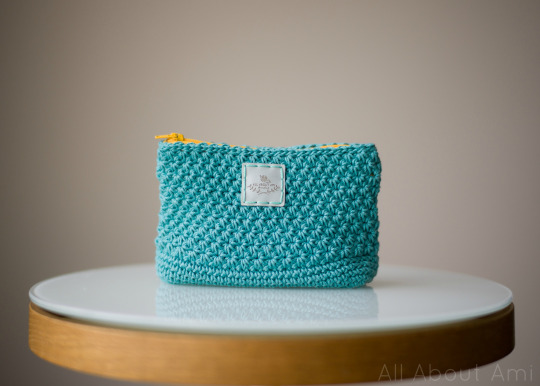
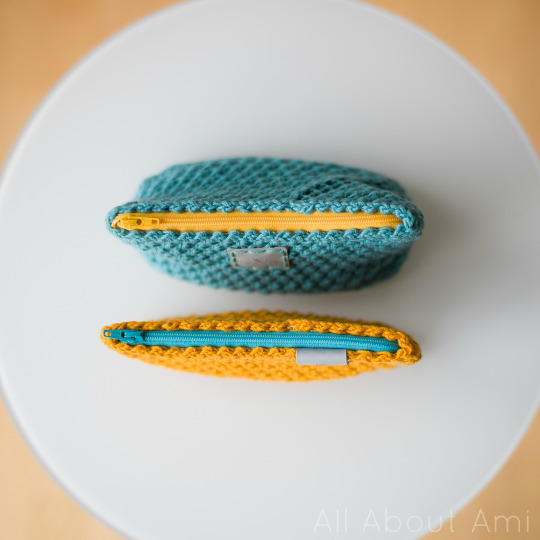
When I was finally finished all the sewing, I was over the moon! This is my Star Stitch Pouch with a round base when it is laid flat!
And this is what it looks like when it is standing up! Isn’t it adorable?
********************************
Here are the free patterns for my “Star Stitch Pouches”:
***You can purchase an INEXPENSIVE AD-FREE PDF of this pattern on Etsy HERE! This beautifully formatted PDF includes the step-by-step pictures, the full star stitch tutorial, and the patterns for BOTH pouches! It is a total of 10 pages including the cover page!
Materials:
- Lightweight or medium yarn, level 3 or 4 (I used Lion Brand yarn’s 24/7 Cotton in “Goldenrod” and “Jade”). Pouch #1 (flat) requires 46 g of yarn and Pouch #2 (round bottom) requires 57 g of yarn.
- 4 mm Clover Amour crochet hook
- Fabric lining + zipper: fabric, zipper, thread, needle, glue gun (for stop)
- Ultraleather tags (optional): I got mine from Brickbubble
Star Stitch Pouch #1 (flat)
Dimensions: 6.7″/17 cm x 4.5″/11.5 cm
Chain 36 (this is the foundation chain- see tutorial on how to crochet around a foundation chain HERE).
Round 1: Starting from second chain from hook, Sc 35 in back loops of foundation chain. Turn and Sc 35 in front loops of the foundation chain [we are making an oval by crocheting around the chain]. Sl st to first sc to close round. (70 sts)
Round 2: Chain 3. Insert hook in second ch from hook and pull up a loop. Insert hook in next ch from hook and pull up a loop. Insert hook in same st where Chain 3 was made and pull up a loop. *Insert hook in next st and pull up a loop*, rep 2 times (you should have 6 loops on your hook). Yarn over and pull through all 6 loops. Yarn over and pull up a loop (i.e Chain 1) to close up first star stitch forming the “eye” of the star.
Subsequent star stitches in Round 2: Insert hook in “eye” you just made and pull up a loop. Insert hook in both loops of the last spike of the previous star stitch (the side of that last spike) and pull up a loop. Insert hook in same st where last spike of previous star stitch came out of and pull up a loop. *Insert hook in next st and pull up a loop*, rep 2 times (you should now have 6 loops on your hook). Yarn over and pull through all 6 loops. Yarn over and pull up a loop (i.e. Chain 1) to close up the star stitch forming the “eye” of the star.
Continue working star stitches around till the end. Note that the last star stitch of Round 2 will be worked in the last stitch of the previous round and the slip stitch that closed off the round of Round 1. Slip stitch to chain 1 gap to close off the round. [35 star stitches]
Round 3: Chain 3. Insert hook in second ch from hook and pull up a loop. Insert hook in next ch from hook and pull up a loop. Insert hook in same st where Chain 3 was made and pull up a loop. *Insert hook in next st and pull up a loop*, rep 2 times (you should have 6 loops on your hook). Yarn over and pull through all 6 loops. Yarn over and pull up a loop (i.e Chain 1) to close up first star stitch forming the “eye” of the star.
Subsequent star stitches in round: Insert hook in “eye” you just made and pull up a loop. Insert hook in both loops of the last spike of the previous star stitch (the side of that last spike) and pull up a loop. Insert hook in same st where last spike of previous star stitch came out of and pull up a loop. *Insert hook in next st and pull up a loop*, rep 2 times (you should now have 6 loops on your hook). Yarn over and pull through all 6 loops. Yarn over and pull up a loop (i.e. Chain 1) to close up the star stitch forming the “eye” of the star. Note that the last stitch you insert your hook into for each star stitch will always be the “eye” of the star stitch underneath.
Continue working star stitches around till the end. Slip stitch to chain 1 gap to close off the round. [35 star stitches]
R4-11: Repeat Round 3.
Round 12: Slip stitch around. Fasten off and weave in end.
Add fabric lining:
– Cut rectangle out of fabric based on size of pouch (rectangle folds in half to form lining instead of two separate pieces). Measure 1 cm seam allowance within rectangle. Fold and iron top and bottom edges of rectangle. Hem top and bottom edges.
– Pin wrong side of zipper to wrong side of fabric. Sew each side of fabric to side of zipper.
– Sew sides of fabric rectangle together.
– Sew stop on zipper if needed and add hot glue.
– Add foldover tag.
– Insert fabric lining into crocheted pouch. Pin in place and sew zipper to crochet pouch. Attach zipper towards top of last round of star stitches and leave last round of slip stitches untouched for a clean look. This video HERE also shows an alternative way to add a zipper and lining.
Star Stitch Pouch #2 (round bottom)
Dimensions: 7″/18 cm x
4.5″/11.5 cm
We still start by crocheting in turned rows to form the flat base of the pouch.
Row 1: Foundation single crochet 25 or to desired length. (25 sc) {See how to do foundation single crochets HERE!}
Row 2:
Chain 1. Turn. Sc in 2nd st from hook and in each st across. (25 sc).
R3-8: Repeat Row 2.
We will now begin working in joined rounds to smooth over the rectangle created and to build up the height/body of the pouch.
Round 1:
Sc 8, Sc 3 in the corner, Sc 23, Sc 3 in the corner, Sc 8, Sc 3 in the corner, Sc 23, Sc 3 in the corner. Sl st to first sc to close. (74 sc)
Round 2-5: Chain 1, work first sc in same st where Chain 1 was worked. Sc in each stitch around. Sl st to first sc to close. (74 sc)
We will now begin working our star stitch rounds!
Round 6: Chain 3. Insert hook in second ch from hook and pull up a loop. Insert hook in next ch from hook and pull up a loop. Insert hook in same st where Chain 3 was made and pull up a loop. *Insert hook in next st and pull up a loop*, rep 2 times (you should have 6 loops on your hook). Yarn over and pull through all 6 loops. Yarn over and pull up a loop (i.e Chain 1) to close up first star stitch forming the “eye” of the star.
Subsequent star stitches in Round 6: Insert hook in “eye” you just made and pull up a loop. Insert hook in both loops of the last spike of the previous star stitch (the side of that last spike) and pull up a loop. Insert hook in same st where last spike of previous star stitch came out of and pull up a loop. *Insert hook in next st and pull up a loop*, rep 2 times (you should now have 6 loops on your hook). Yarn over and pull through all 6 loops. Yarn over and pull up a loop (i.e. Chain 1) to close up the star stitch forming the “eye” of the star.
Continue working star stitches around till the end. Note that the last star stitch of Round 6 will be worked in the last stitch of the previous round and the slip stitch that closed off the round of Round 5. Slip stitch to chain 1 gap to close off the round. [37 star stitches]
Round 7: Chain 3. Insert hook in second ch from hook and pull up a loop. Insert hook in next ch from hook and pull up a loop. Insert hook in same st where Chain 3 was made and pull up a loop. *Insert hook in next st and pull up a loop*, rep 2 times (you should have 6 loops on your hook). Yarn over and pull through all 6 loops. Yarn over and pull up a loop (i.e Chain 1) to close up first star stitch forming the “eye” of the star.
Subsequent star stitches in round: Insert hook in “eye” you just made and pull up a loop. Insert hook in both loops of the last spike of the previous star stitch (the side of that last spike) and pull up a loop. Insert hook in same st where last spike of previous star stitch came out of and pull up a loop. *Insert hook in next st and pull up a loop*, rep 2 times (you should now have 6 loops on your hook). Yarn over and pull through all 6 loops. Yarn over and pull up a loop (i.e. Chain 1) to close up the star stitch forming the “eye” of the star. Note that the last stitch you insert your hook into for each star stitch will always be the “eye” of the star stitch underneath.
Continue working star stitches around till the end. Slip stitch to chain 1 gap to close off the round. [37 star stitches]
R8-14: Repeat Round 7.
Round 15: Slip stitch around. Fasten off and weave in end.
Add fabric lining:
– Cut rectangle and oval out of fabric based on size of crocheted pouch and measure 1 cm seam allowance. Hem top edge of rectangle.
– Fold rectangle around oval so that oval is bottom/base of lining. Pin both pieces together and carefully sew bottom of rectangle to oval. Sew up sides of rectangle.
– Add zipper to fabric as above.
– Sew tag onto top middle of bag..
– Insert fabric lining with zipper into crochet pouch and pin into place. Sew zipper to pouch as above.
Here is a diagram that Ryan created to show how we constructed the fabric linings:
Notes:
– Increase the size of Pouch #1 by increasing the number of chains in your foundation chain- you can increase by any number (i.e. 1, 2, 3, 4, 5, etc). Each star stitch requires two stitches, but you can increase by any number because this number will end up being doubled when crocheting around the foundation chain (i.e. an increase of 1 chain will result in 2 more stitches in the pouch, an increase of 3 chains will result in 6 more stitches in the pouch, etc).
– Increase the size of pouch #2 by increasing your number of foundation single crochets or the number of rows.
– Do not crochet too tightly when working star stitches otherwise it will be hard to pull through all six loops.
– If not adding a fabric lining, whip stitch the diagonal seam together to reduce the gaps/spaces.
– I used the backstitch when sewing all the components together (i.e. fabric, zipper, crochet pouch).
– If you do not like the seam, you can work the star stitch in turned rows to crochet a rectangular piece. At the end, you can whip stitch the sides together to form your pouch.
– Alternatives to zipper closure include button or velcro closure. You could also add a zipper without doing the fabric lining (see HERE). If you do not have ultraleather labels, you could use ribbon or fabric for a lovely accent on the outside of the pouch!
– You can make many different sized cases by adjusting your numbers, such as a sunglasses case, laptop case, coin purse, pencil case, etc. This stitch would be lovely for a little girl’s purse with straps too!
– If you want the flat pouch to comfortably hold pencils and hooks, I would recommend increasing your foundation chain by 3-5 stitches.
********************************
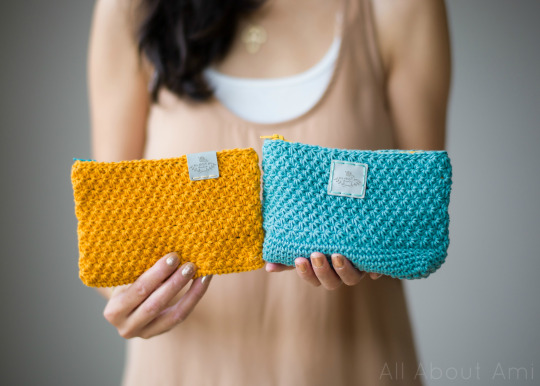
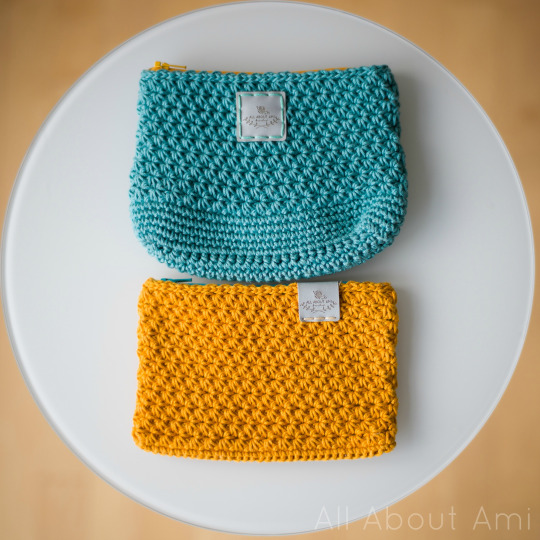
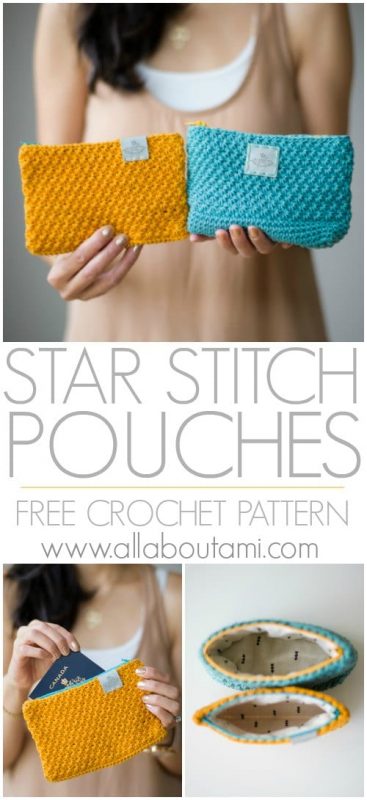
These Star Stitch Pouches have such gorgeous texture!
The backs look really neat too with their diagonal seams! I think they add a lot of character.
It was fun choosing the zipper colours, and I love how we went with complementary ones! They really add a fun pop of colour!
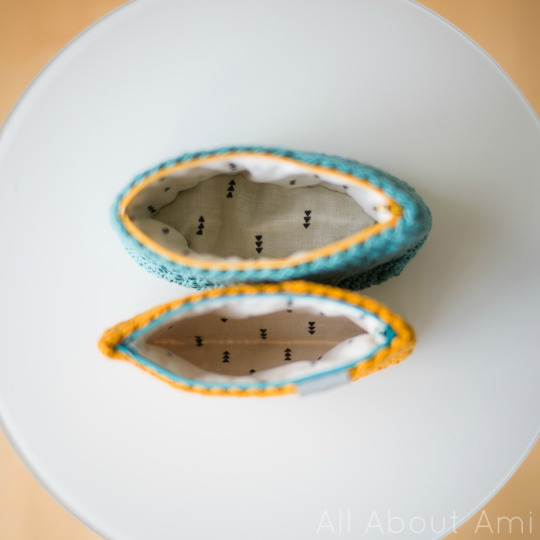
I adore the fabric we chose for the inner lining. The arrows are so clean and modern!
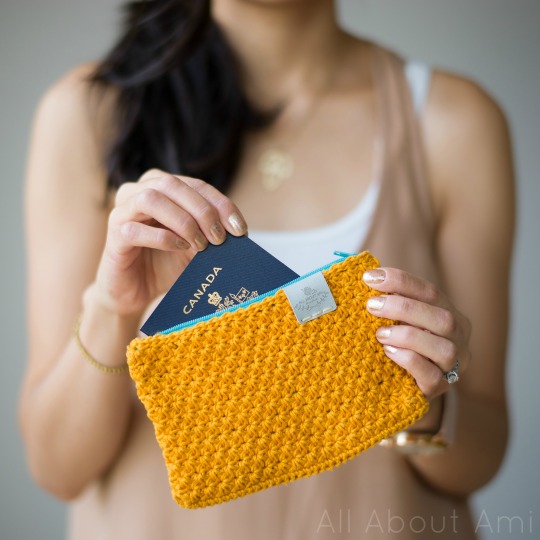
This little pouch is a great size for my purse and can hold cards…
…and my passport! Crochet hooks and pens do fit, but it’s a snug fit. I would definitely make it a bit bigger if you want to make it a pencil case for back to school!
My second star stitch pouch with a round bottom can hold more!
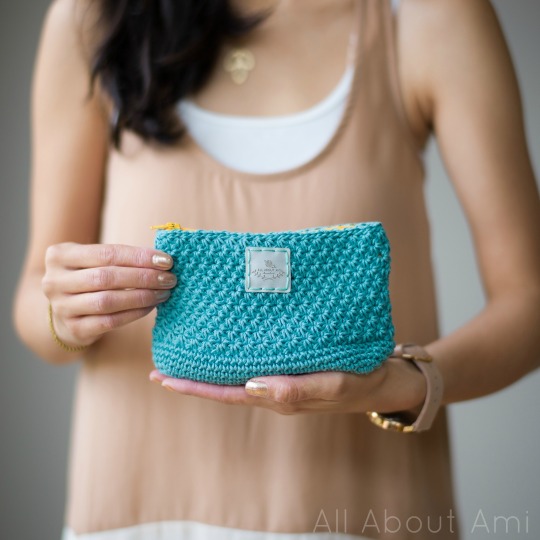
I think it would make such a cute make-up bag! These pouches work up so quickly (minus the handsewing for me :P) and would make beautiful and unique Christmas gifts! You can never start planning too early! They require less than one skein of yarn each, and you can even make TWO flat pouches with just one skein!
![]()
Star stitches are stunning, aren’t they? I love being able to personalize my pouches with my beautiful BrickBubble ultraleather labels too! These washable labels come in three colours: Camel, Medium Brown, and Cement. I got a variety of all the colours as these neutrals will match with all my projects!
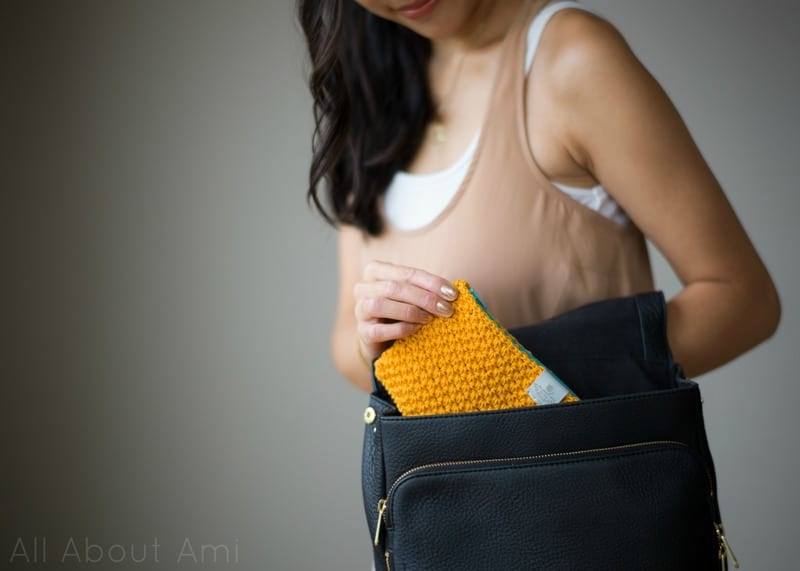
I adore being able to carry handmade items with me all the time. These pouches can help you carry your essentials and make such a beautiful statement when you pull them out! You can see a short video of me showing these pouches in action with all the items they can carry below!
I am so happy that I learned how to do this fun stitch and that I found the perfect yarn to showcase them! I hope you have fun making your own star stitch pouches and that you’ll put them to great use! These projects are quick to whip up and very portable- I’ll always remember these Star Stitch Pouches as my Halifax/Maritimes project! Thanks for reading through this very long post! Enjoy the rest of your summer, everyone!
{This post is sponsored by Lion Brand Yarn! I’ve loved working with their yarn throughout the years and I’m thrilled that I get to collaborate with them every month!}
This pattern is an original pattern by Stephanie Lau of All About Ami. Please do not claim this pattern as your own. If you wish to share this pattern, you may link to this pattern but please do not reprint it on your site. You may keep a copy for your own personal use but please DO NOT sell the pattern or distribute it.
You may sell products made from this pattern but please clearly credit the design to me, Stephanie Lau of All About Ami, and provide a link to my blog www.AllAboutAmi.com. Permission is NOT granted for mass production or factory manufacturing of any kind. Thank you for being respectful and for your understanding!
Amazon Affiliate Link: