**You can purchase an INEXPENSIVE AD-FREE PDF of this pattern on Etsy HERE or LoveCrochet HERE! This beautifully formatted PDF includes the step-by-step pictures and is a total of 17 pages including the cover page. This pattern is also available in the “Daisy Granny Square Crochet PATTERN BUNDLE” which includes all my lovely daisy designs at a discounted price – check out the bundle HERE! Lion Brand Yarn has put together a convenient kit HERE that contains all the yarn you need to make this gorgeous chunky cardigan (choose any color combination you want)!
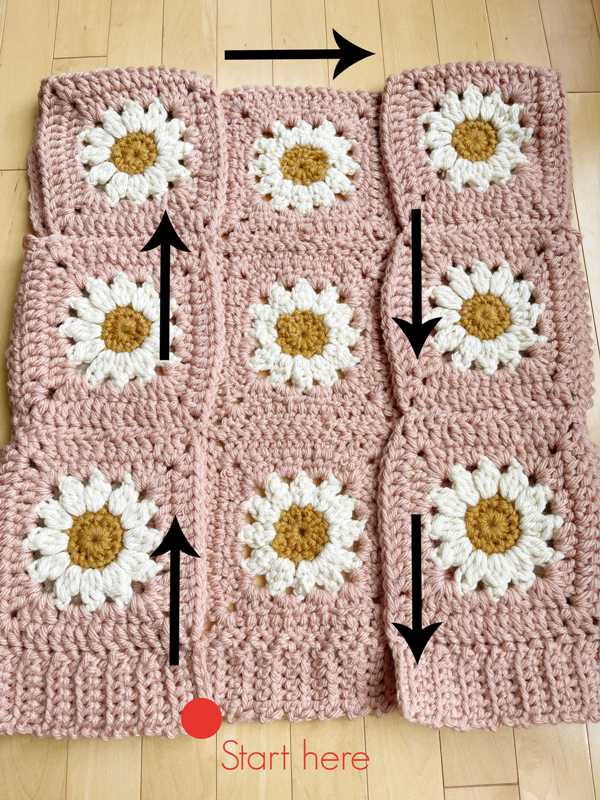
Note that this is Part 2 of the pattern that contains instructions for the bottom ribbing and collar. Part 1 HERE includes all the materials, notes and instructions for the back and front panel assembly. Part 3 HERE includes the instructions on how to crochet the sleeves!
You can reference this YouTube video HERE or the embedded video below to see how to crochet this cardigan! This video shows how to whip stitch the granny squares together, the assembly, bottom ribbing, collar, sleeves, felting the yarn ends in and steaming the final cardigan:
Bottom Ribbing:
Using 7 mm hook,
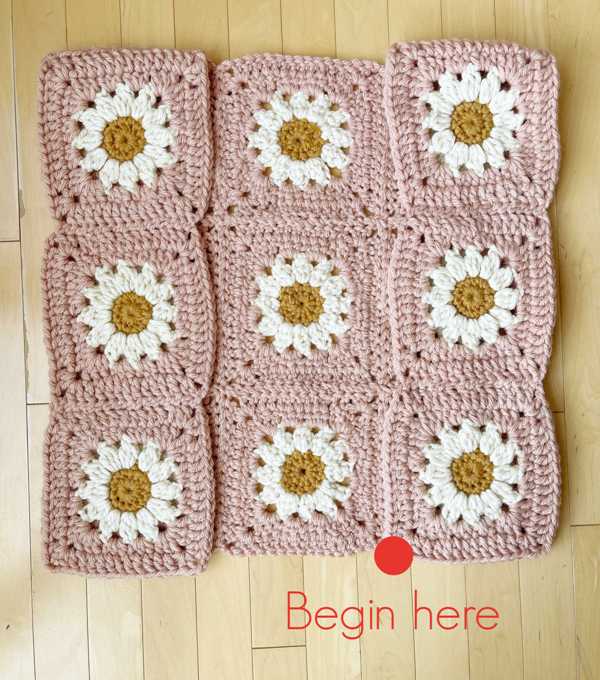
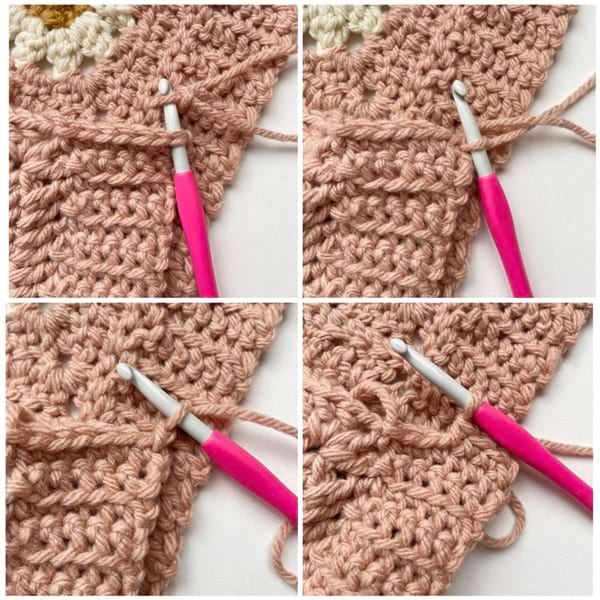
We will be joining the yarn in the bottom right corner of the cardigan when the right side is facing you.
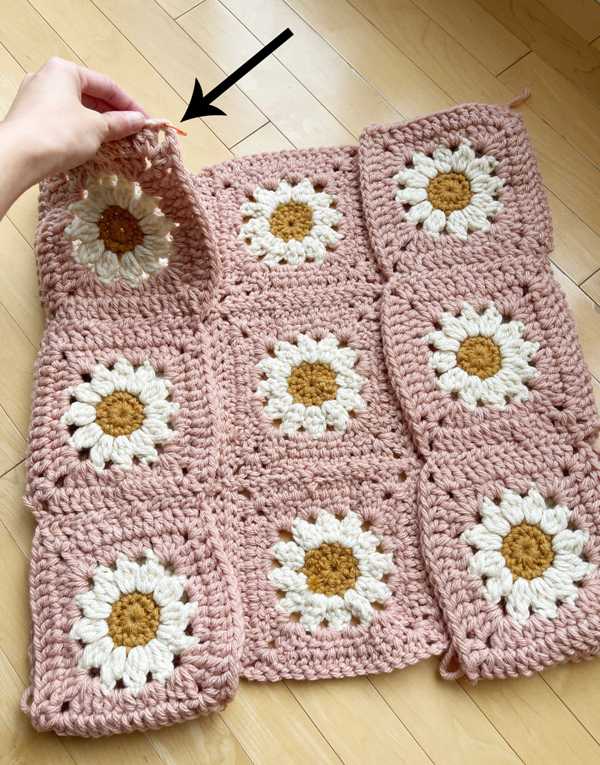
When the cardigan is flipped upside down, we will be rejoining the yarn at this point:
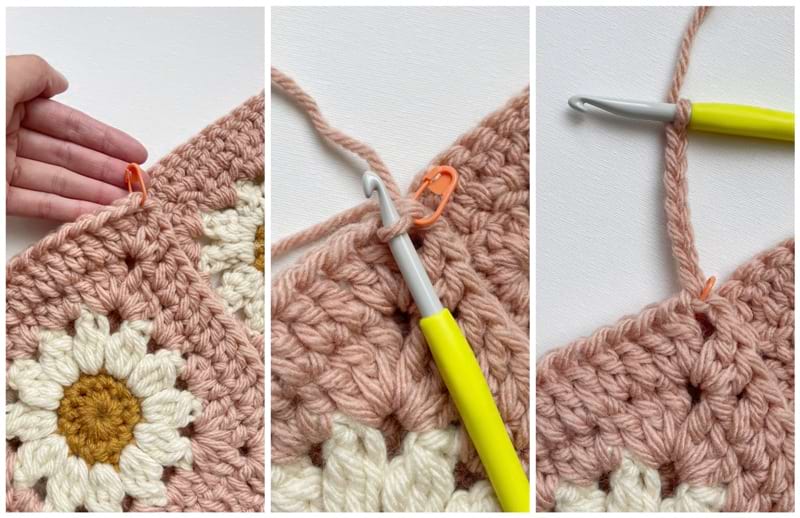
Make a slipknot. Insert hook in stitch (this will be a chain 1 stitch if no length has been added):
Chain 7 (adjust number as necessary – my bottom ribbing measured 2.5”/6 cm in height).
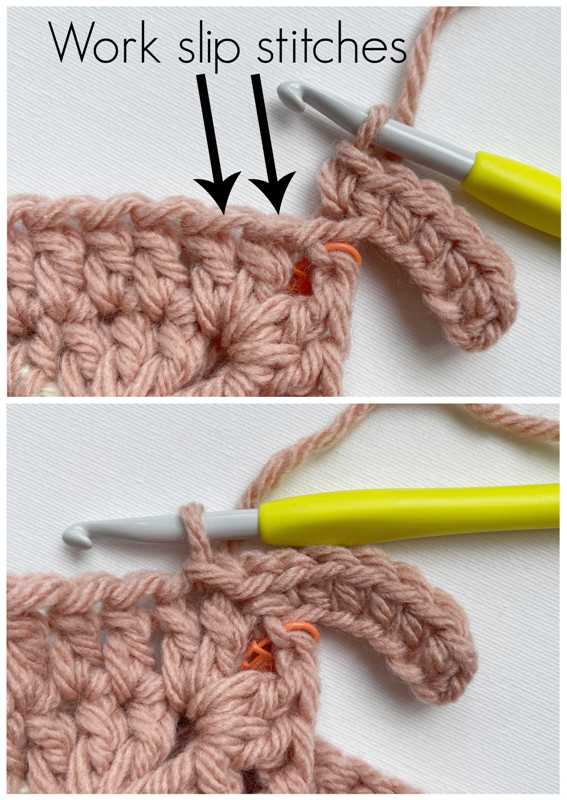
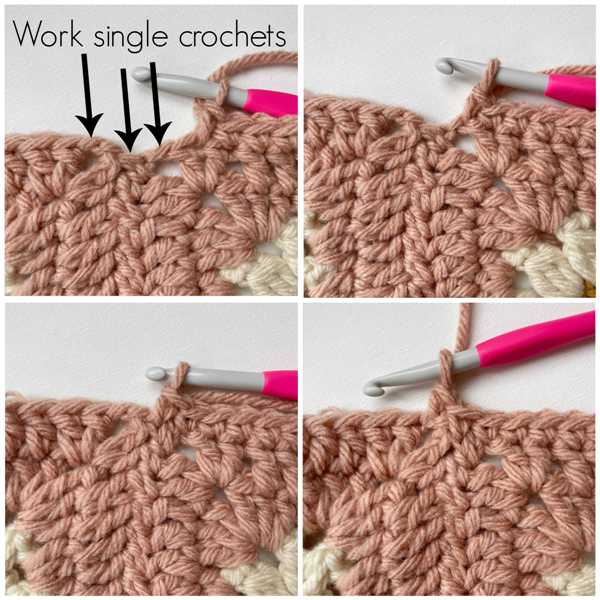
Row 1: Starting in second st from hook, sc in back bumps. Slip stitch to next stitch along bottom edge of body. Slip stitch to following stitch, turn.
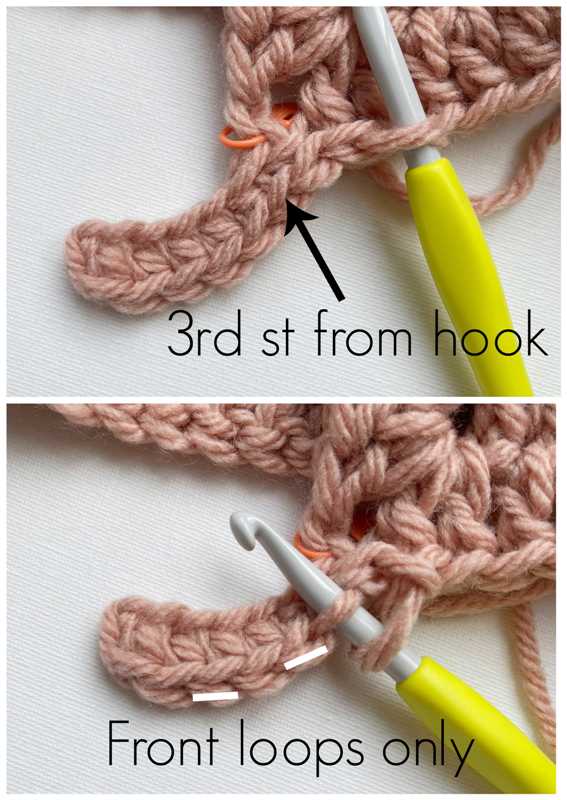
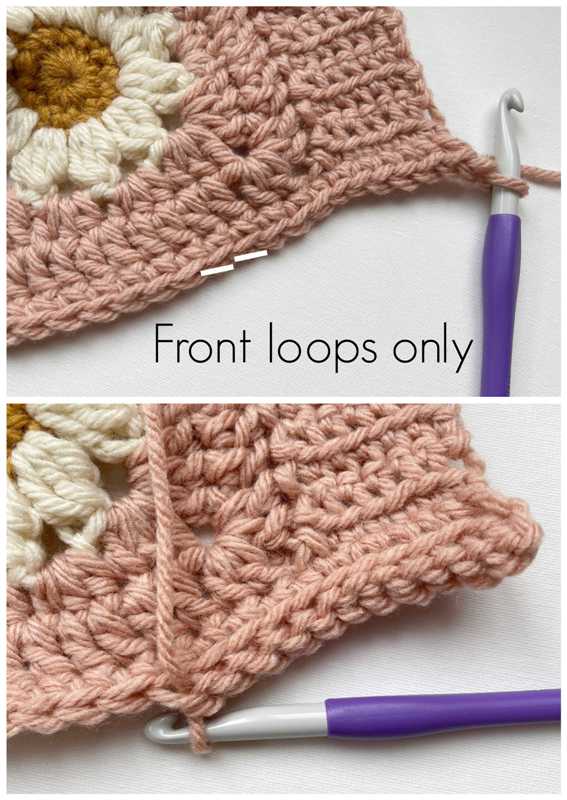
R2: Starting in third st from hook (or first single crochet st), sc 6 across in front loops only.
R3: Chain 1, turn. Starting in second st from hook, sc 6 in FLO. Slip stitch to next stitch along bottom edge. Slip stitch to following stitch, turn.
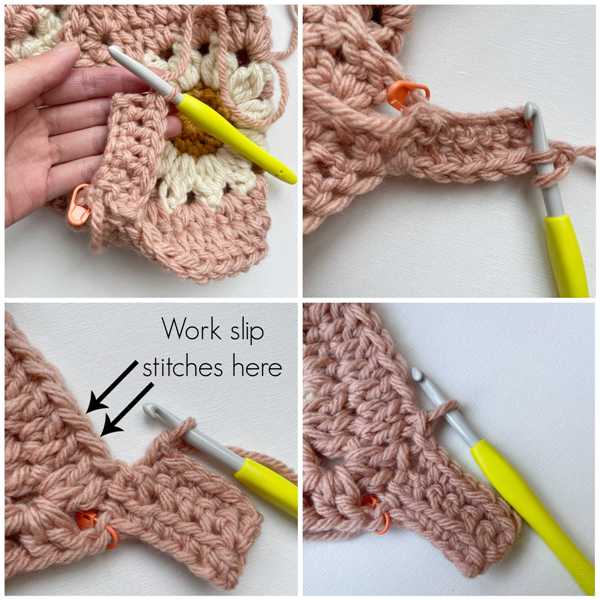
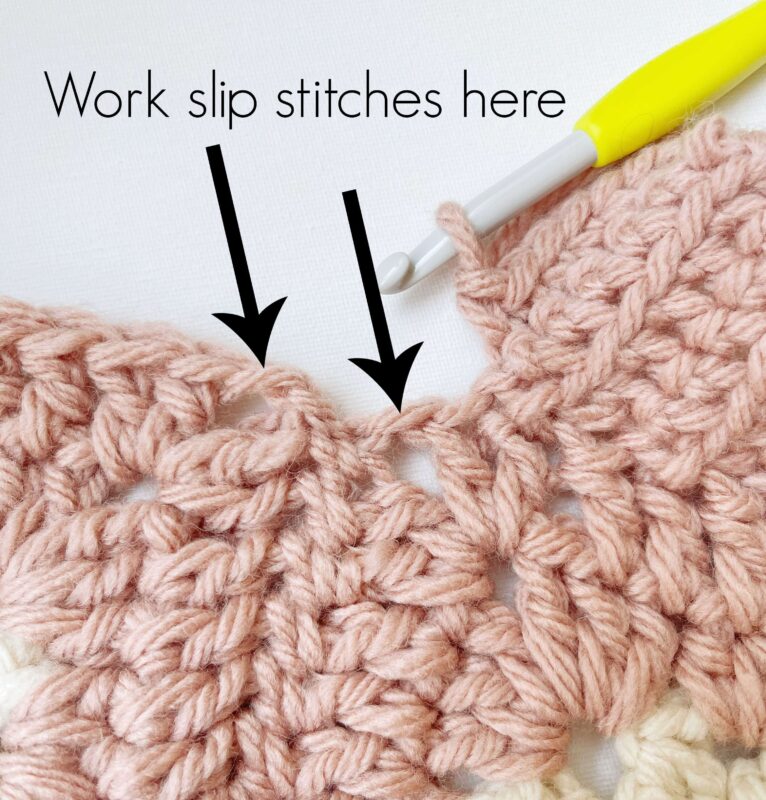
Keep repeating R2 and R3 across entire bottom of cardigan. Be sure to work slip stitches in the chain stitches in the gaps as well. Do not work slip stitches in the seams between the granny squares.
For the sizes with added rows of double crochets to increase the width of the front and back panels, work 1 stitch for each row of double crochet stitches.
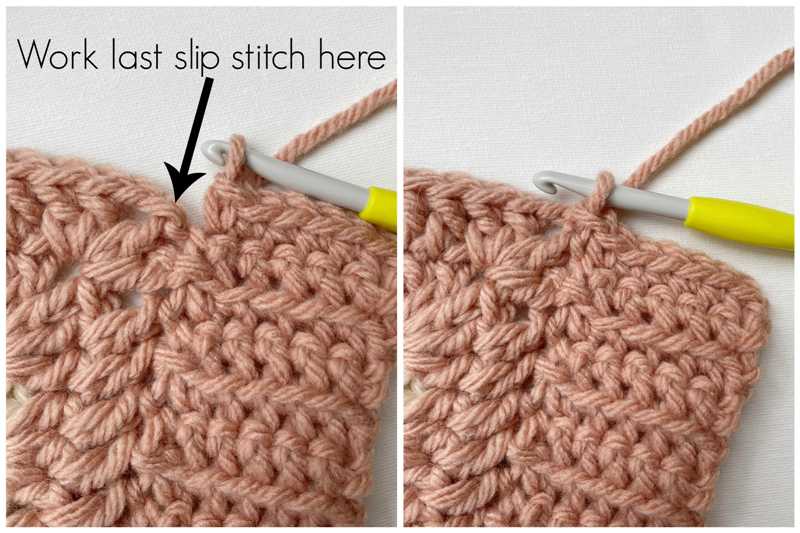
For the last row (R3 repeat), slip stitch to chain 1 of corner stitch (or last stitch along bottom of cardigan) and fasten off and weave in end.
Collar:
We will now be picking up stitches along the length of the first front panel, across the back panel, and down the length of the other front panel to create a beautiful collar. The right side of the cardigan should be facing you when working the collar.
Using 8 mm hook,
Row 1: Starting in bottom left corner, pick up single crochet stitches around. Insert hook, pull through, chain 1. Sc in next st and in all stitches around.
Work sc in chain 1’s and extended single crochets in areas between the granny squares to make the height of the stitches the same as the rest of the stitches (to help fill in the “dips” between the granny squares). Work a sc whenever there is a seam (e.g. back panel to front panel).
Switch to 10 mm hook,
R2: Chain 1, turn. Starting in second st from hook, work slip stitches in FLO across.
R3-5: Repeat R2.
If a thicker collar is desired, continue repeating R2 (my collar measured about 1.5”/3.8 cm in width). End off on an odd number row. Fasten off and weave in end.

Continue to Part 3 HERE to see how to crochet the sleeves!
{This post is sponsored by Lion Brand Yarn! I’ve loved working with their yarn throughout the years and I’m thrilled that I get to collaborate with them every month!}
This pattern is an original pattern by Stephanie Lau of All About Ami. Please do not claim this pattern as your own. If you wish to share this pattern, you may link to this pattern but please do not reprint it on your site. You may keep a copy for your own personal use but please DO NOT sell the pattern or distribute it.
You may sell products made from this pattern but please clearly credit the design to me, Stephanie Lau of All About Ami, and provide a link to my blog www.AllAboutAmi.com. Permission is NOT granted for mass production or factory manufacturing of any kind. Thank you for being respectful and for your understanding!