**You can purchase an INEXPENSIVE AD-FREE PDF of this pattern on Etsy HERE or LoveCrochet HERE! This beautifully formatted PDF includes the step-by-step pictures and is a total of 17 pages including the cover page. This pattern is also available in the “Daisy Granny Square Crochet PATTERN BUNDLE” which includes all my lovely daisy designs at a discounted price – check out the bundle HERE! Lion Brand Yarn has put together a convenient kit HERE that contains all the yarn you need to make this gorgeous chunky cardigan (choose any color combination you want)!
Note that this is Part 3 of the pattern which shows how to crochet the sleeves! Please reference Part 1 HERE to see the materials, notes and instructions for the back and front panel assembly. Part 2 HERE contains the instructions for the bottom ribbing and collar!
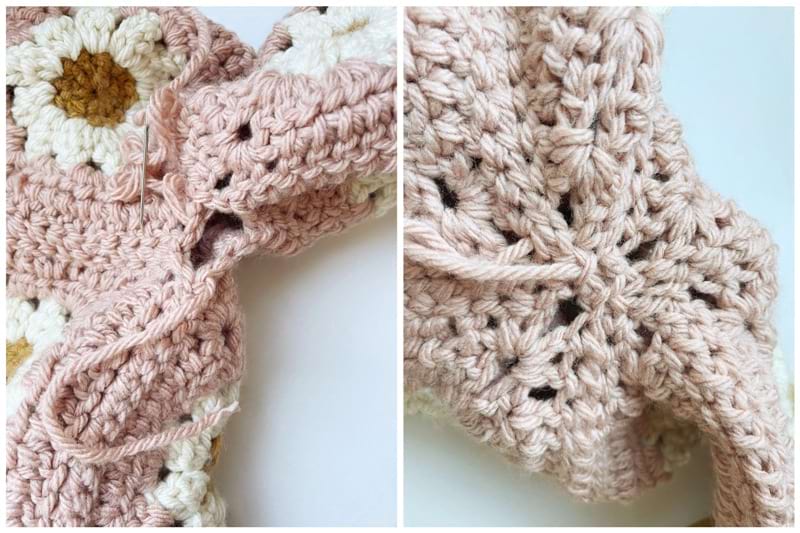
You can reference this YouTube video HERE or the embedded video below to see how to crochet the rest of the cardigan! This video shows how to whip stitch the granny squares together, the assembly, bottom ribbing, collar, sleeves, felting the yarn ends in and steaming the final cardigan:
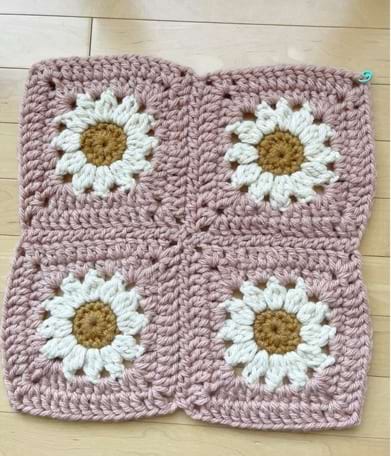
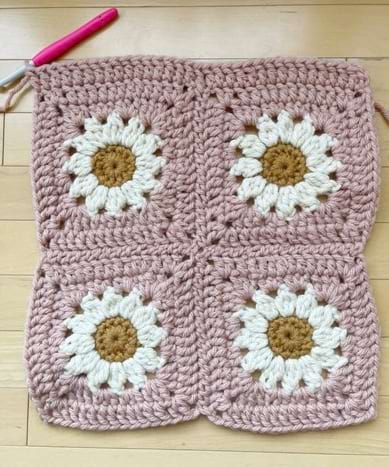
Sleeves (make 2):
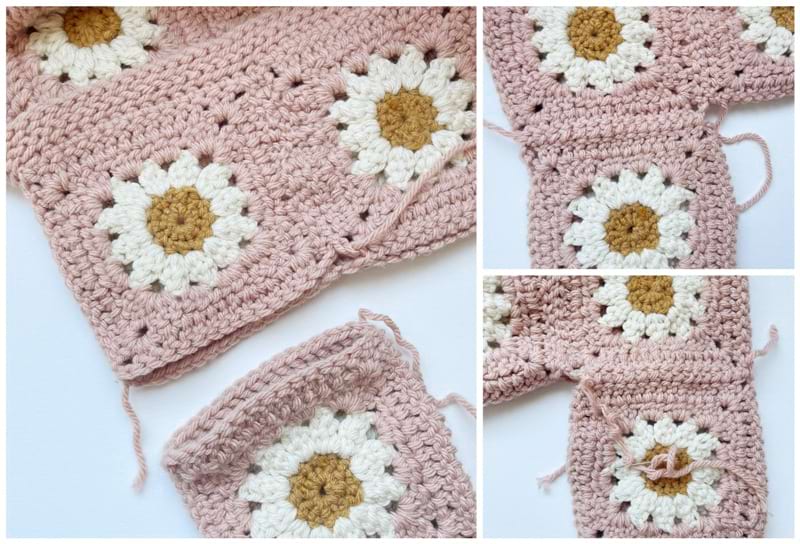
For all sizes, arrange 4 granny squares in a 2 x 2 square layout for each sleeve. Whip stitch them together.
Adding Width to the Sleeves
For certain sizes, rows of double crochet stitches will be added to each side of the sleeve to increase the width. Add these rows in the same manner you did for the back panels and front panels.
Please find your size below to see how many inches/number of rows you will add to each side of the sleeve:
Small & Medium: None
L & XL: 1
2X & 3X: 2
4X & 5X: 3
Sleeve Width Alternative:
Wrap the sleeve around your arm to ensure you like the width and that it will fit you. If more width is needed but you DO NOT want to add more width to the bottom of the sleeve (where ribbed cuff will be worked), you can work this alternative. This option adds width to the top of the sleeve (upper arm) but not to the bottom of the sleeve (lower arm and wrists). 1”/2.54 cm is added to either side of the upper granny squares (arm hole height increases by 1”/2.54 cm) while the width of the lower granny squares remain the same.
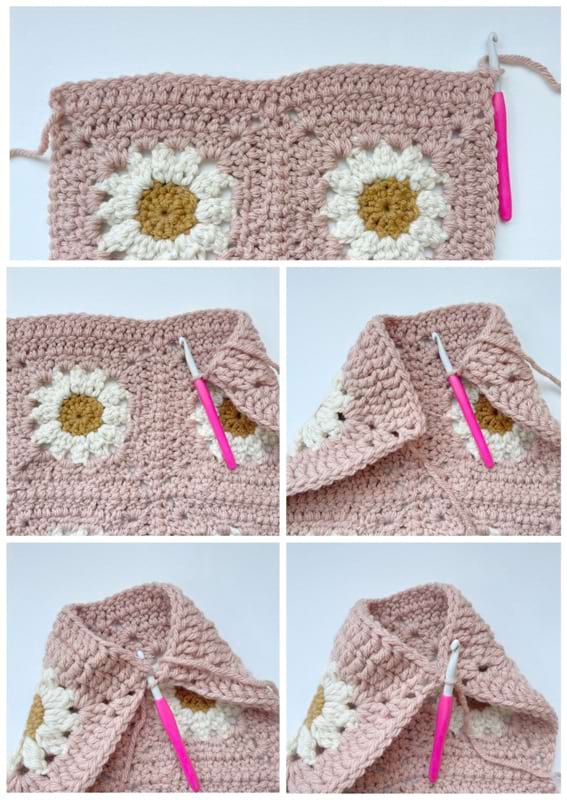
We will rejoin the yarn in one of the chain stitches of the chain 2 gap corner of the upper granny square with the right side of the sleeve facing you. Make a slip knot, insert hook in chain and pull through.
R1: Chain 2 (counts as 1 dc). Work 7 dc, 4 hdc, 4 sc. (16 sts) Slip st to next st. Fasten off.
Flip sleeve so wrong side is facing you. Rejoin yarn in one of the chain stitches of the chain 2 gap corner of the upper granny square.
Make a slip knot, insert hook in chain and pull through.
R1: Chain 2 (counts as 1 dc). Work 7 dc, 4 hdc, 4 sc. (16 sts) Slip st to next st. Fasten off.

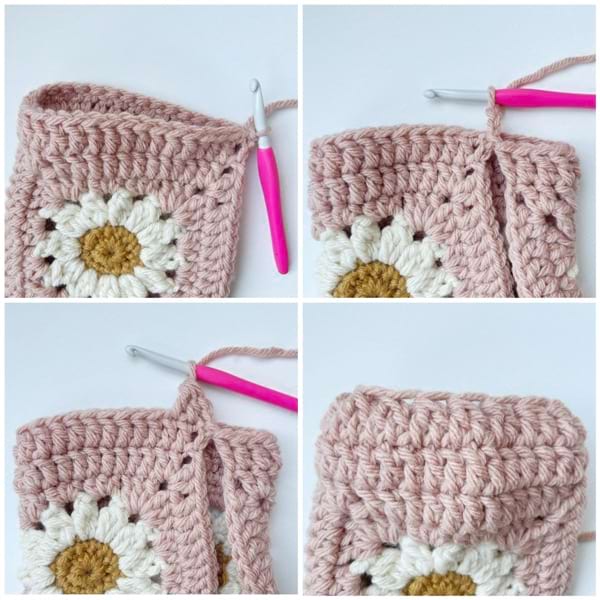
Adding Length to the Sleeves:
We will now add length to the bottom of the sleeves and prepare for the ribbed cuff.
Using 8 mm hook,
Row 1: With right side of sleeve facing you, join yarn to right corner (make a slipknot, insert hook and pull through). Chain 2 and work dc in next st and each stitch across, including dip between squares. For the sizes with added width, pick up 1 stitch for each row of double crochet stitches. (33, 33, 35, 35, 37, 37, 39, 39)
If more length is desired for the sleeve, add more rows of double crochet stitches at this point.
We will now join the sleeve in a round and worked in joined rounds. To taper off the sleeve and prepare for the ribbed cuff, we will work decrease stitches.
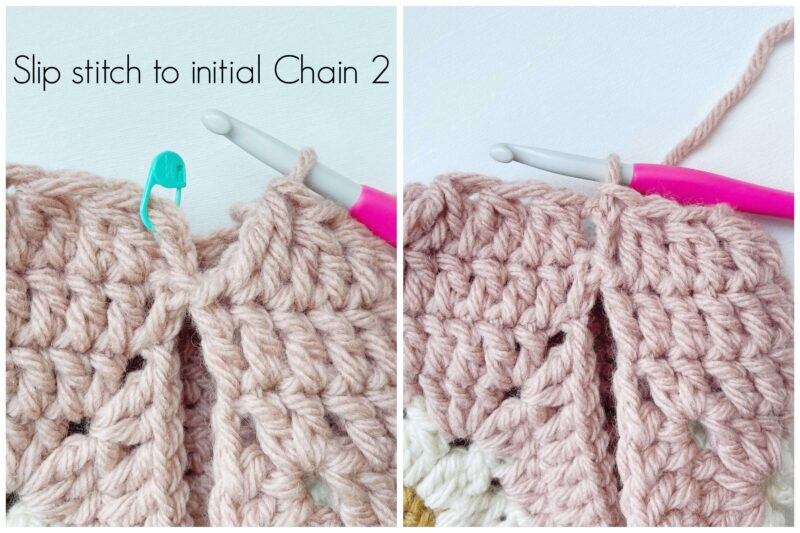
Round 1: Slip stitch to initial chain 2 of Row 1. Chain 2 (this chain 2 does not count as 1 dc). *Dc decrease* around. Slip stitch to initial chain 2. (16, 16, 17, 17, 18, 18, 19, 19 sts)
Do not cut the yarn. We will now begin crocheting the ribbed cuff which is worked in turned rows and worked clockwise around the sleeve end.
Ribbed Cuff:
Using 8 mm hook,
Chain 7 (adjust number as necessary – my ribbed cuff measured 2.25”/5.7 cm in height).
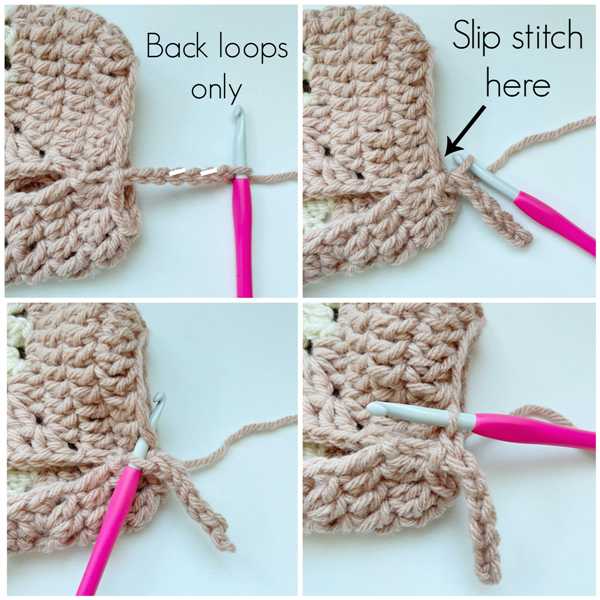
Row 1: Starting in second st from hook, work sl st in back loop only across (6 slip stitches). Slip st in next st of sleeve end and turn.
Row 2: Starting in second st from hook, sl st in BLO (6 sts). Chain 1, turn.
Row 3: Starting in second st from hook, sl st in BLO (6 sts). Sl st in next st of sleeve end and turn.
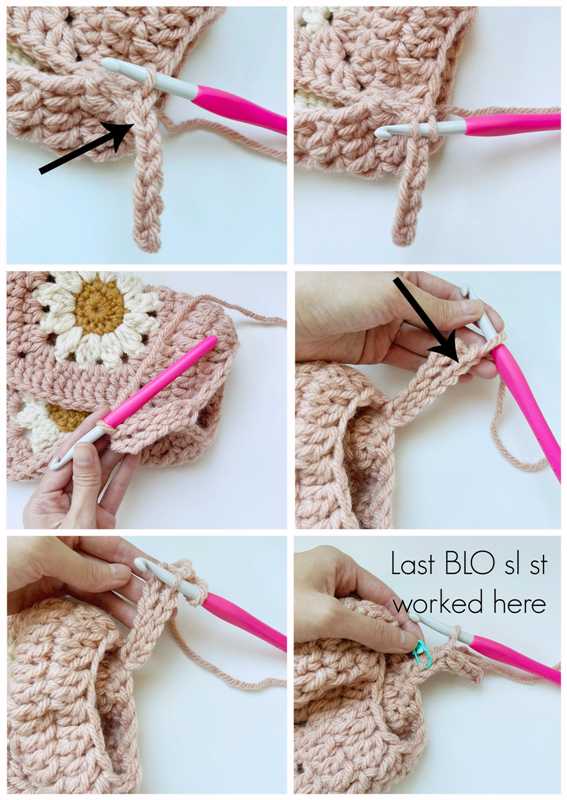
Repeat Rows 2 and 3 around sleeve end.
For the last Row 3 repeat, slip stitch in last st of sleeve end (do not repeat Row 2). Do not cut yarn.
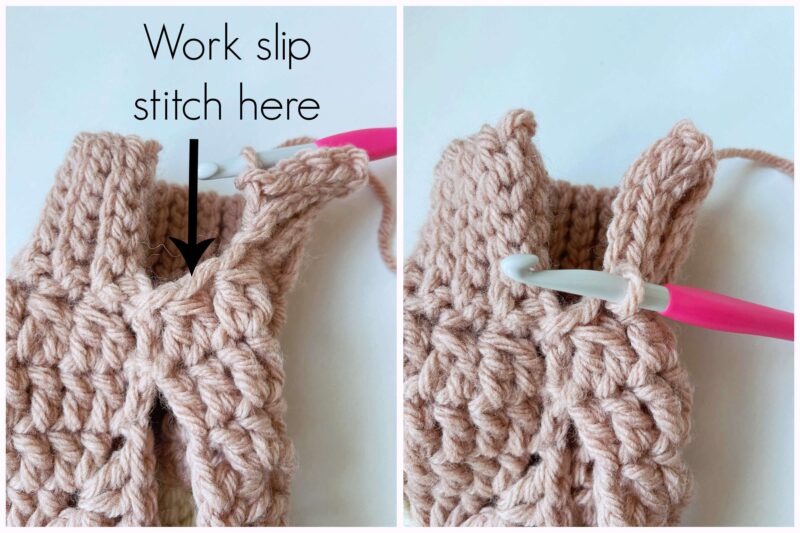
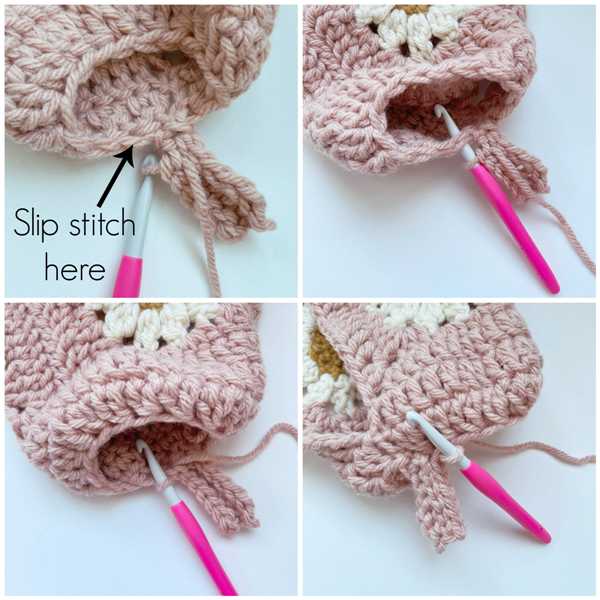
We will now seam the ribbed cuff together: Insert hook in remaining loop of first row of ribbed cuff and front loop of last row of ribbed cuff. Work a slip stitch. Continue working slip stitches across in this manner to seam the cuff together. Fasten off and weave in end.

Final Sleeve Seaming
Use long strand of yarn to seam length of sleeve together and then sleeve to arm hole (I used a 98”/249 cm long strand of yarn). Do not pull too tightly when seaming or else the cardigan will bunch up.
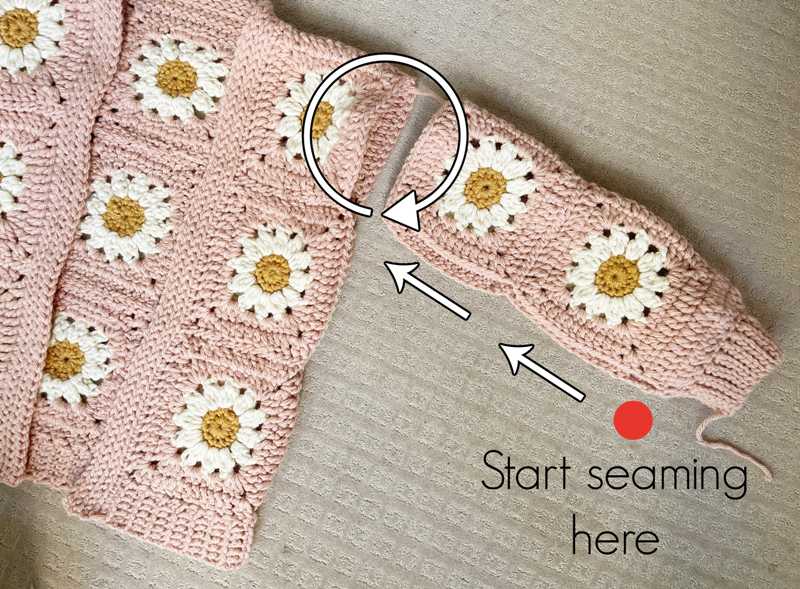
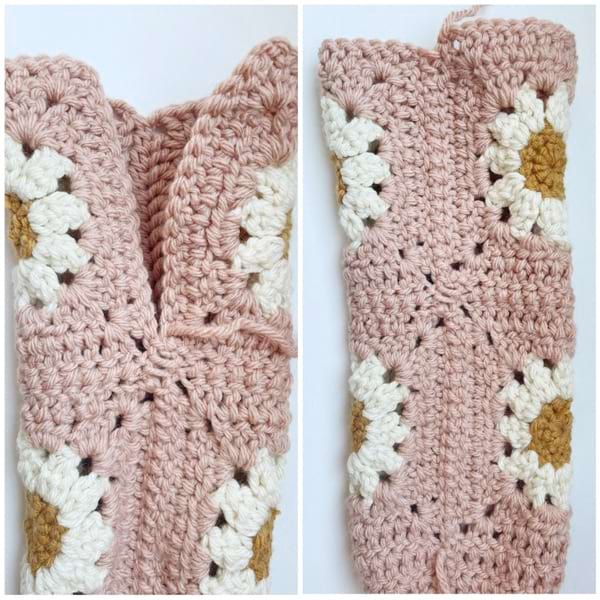
You can add extra seams around the armpit area in case there are holes and for added security. When seaming the sleeve to the arm hole, the seam of the sleeve should run along the bottom.
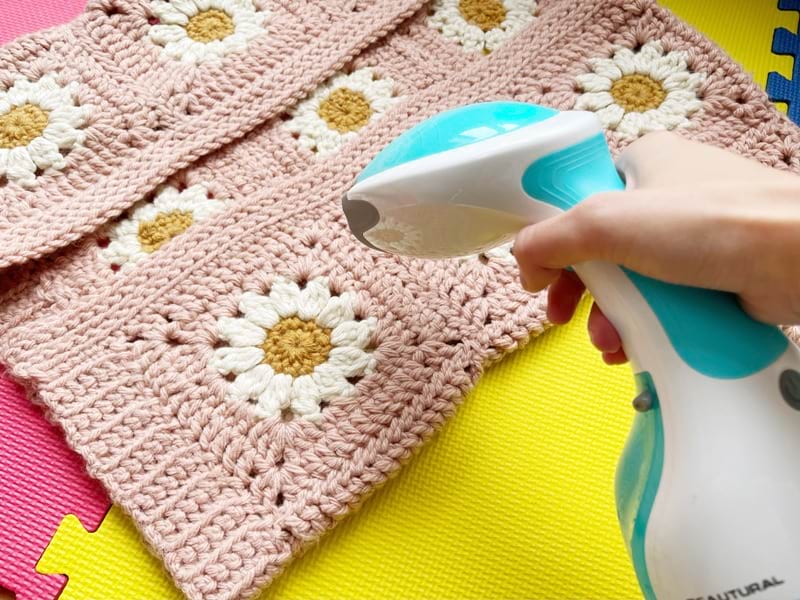
Steam block the entire cardigan including all the granny squares, seams, bottom ribbing, ribbed cuff and collar!
***************************
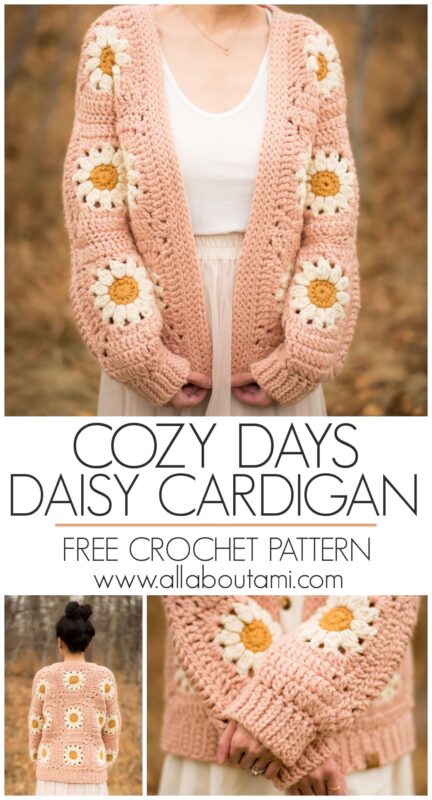
Ever since crocheting my “Cozy Days Daisy Blanket“, I have always wanted to design a cardigan using the same granny squares! I am in love with how this design turned out, and I think it is so whimsical and romantic!
This is actually the first crochet garment that I have designed using bulky level 5 yarn, and it works up so quickly using large crochet hooks! In fact, one of my pattern testers crocheted TWO of these cardigans within a span of two weeks!
I love all of the details, from the bottom ribbing and the collar to the ribbed cuffs of the sleeves. I hope you enjoy crocheting all the different sections too!
Hue + Me yarn comes in many beautiful shades, so I hope you enjoy coming up with your own color combinations for your chunky cardigans! You can choose to use only one color or perhaps use a contrast color for the bottom ribbing or collar. I am tempted to make another Cozy Days Daisy Cardigan in a single color as some of my pattern testers did this, and their cardigans turned out so beautifully!
Once again, you can purchase the convenient Lion Brand Yarn kit HERE (they frequently have sales so you can try to get a discount) or purchase my 17 page PDF HERE in my Etsy shop! Thank you for supporting my work, everyone, and I hope you enjoy this new design! I spent a lot of time on this one, and I am thrilled to have it out in the world now!
{This post is sponsored by Lion Brand Yarn! I’ve loved working with their yarn throughout the years and I’m thrilled that I get to collaborate with them every month!}
This pattern is an original pattern by Stephanie Lau of All About Ami. Please do not claim this pattern as your own. If you wish to share this pattern, you may link to this pattern but please do not reprint it on your site. You may keep a copy for your own personal use but please DO NOT sell the pattern or distribute it.
You may sell products made from this pattern but please clearly credit the design to me, Stephanie Lau of All About Ami, and provide a link to my blog www.AllAboutAmi.com. Permission is NOT granted for mass production or factory manufacturing of any kind. Thank you for being respectful and for your understanding!