Ever since I started my blog, it has been wonderful connecting with people from a wide variety of backgrounds in crochet. Some have been crocheting for years but have never tried crocheting stuffed animals. Some used to crochet but gave it up as life got too busy. Some have never picked up a crochet hook before in their life but are interested in learning! Crocheting is easy to learn and now there are so many resources out there on-line. I learned how to crochet from a book when I was younger, but now with the existence of YouTube, I think it is easier to learn from videos as you can see it all in action. I’ve received e-mails from people who have been inspired to learn how to crochet after seeing how cute amigurumi are, and they’ve written to me about their successes and proudly showed me pictures of their handmade stuffed animals. I would encourage any of you who have thought about picking up a new hobby to try crocheting. It’s inexpensive, therapeutic and portable- I love how you can work on projects while waiting for the bus or on road trips. With today’s mass consumerism, there’s just something so special about making a unique stuffed animal with your own two hands from scratch that feels organic.
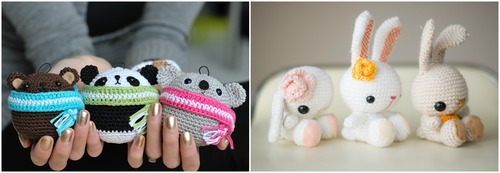
In this blog post, I have compiled some helpful resources that I recommend to people who want to learn how to make amigurumi but do not know where to begin. We will go through important crochet techniques for building shapes, crochet abbreviations you need to know in order to read a pattern, and the materials necessary for amigurumi. Let’s begin!
Almost all parts of an amigurumi (e.g. head, arms, legs, body) are formed by crocheting around a circle. I recommend using the “Magic Circle” technique when beginning amigurumi (see my step-by-step tutorial HERE or watch the video below). The Magic Circle gives a clean beginning with no initial holes or gaps compared to the Chain 2 method.
Please watch this video that I made below demonstrating how I work the Magic Circle with both regular and fluffy yarn:
Once you’ve got your basic circle, it is now time to increase around the circle with single crochets. The video below shows you how to a single crochet. Increasing the stitches around a circle involves doing more than one single crochet into one stitch (e.g. going from 6 stitches in the Magic Circle to 12 stitches in the next round, or two single crochets in each stitch). Increasing the stitches allows the crocheted piece to expand outwards into a ball. Once you’ve mastered the single crochet, you are pretty much set as almost all amigurumi uses this basic stitch!
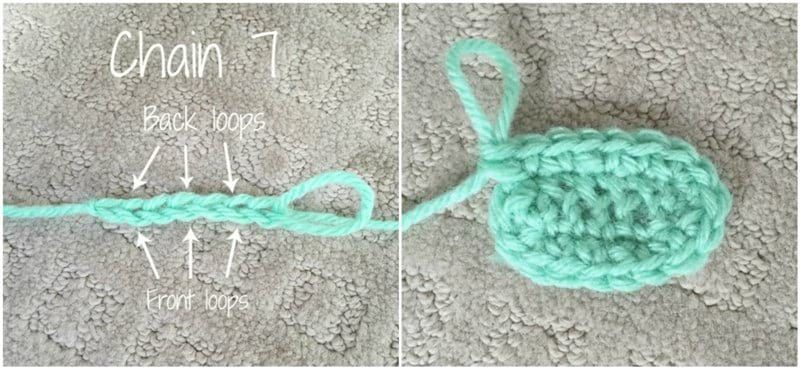
In some patterns, you may need to create an oval by crocheting around a foundation chain. Please see my detailed step-by-step tutorial HERE to see how to create this shape!
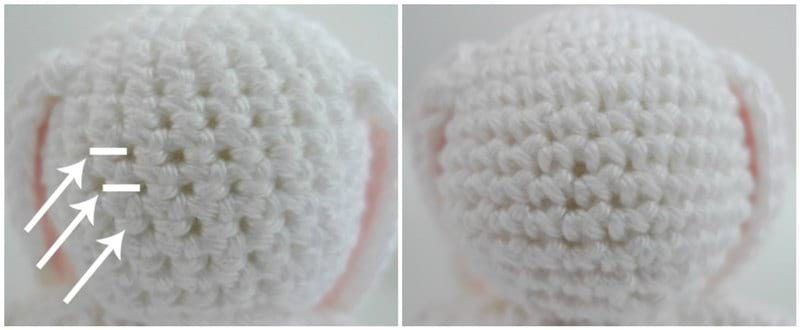
Once you have crocheted many rounds to form part of a sphere, it will soon be time to decrease your stitches. You can follow my step-by-step tutorial HERE to use the “Invisible Decrease” technique, or watch the video below. The Invisible Decrease is a fantastic technique to reduce the number of holes or gaps while you are closing up your shapes!
It is important to note that there is technically a “right” and a “wrong” side to amigurumi. Initially, I made my amigurumi all inside-out until a few readers informed me of the difference. Check out my full blog post HERE to see pictures and a more detailed description of the “right side” (right photo in collage below) vs. the “wrong side” (left photo in collage below). Both sides are very different, and it is your choice deciding which side you want facing outwards!
Once you have crocheted all the body parts of your amigurumi, you will need to attach and sew them together. You can read Planet June’s tutorial on “Joining Amigurumi” here. You can also check out the following helpful videos, the first by Roxycraft showing you how to attach limbs and the second by Planet June showing you how to do the amigurumi seamless join:
In order to crochet amigurumi, you will need to learn how to follow and read crochet patterns (check out some of mine HERE to see what they can look like). I’ve written a “How to Read Amigurumi Patterns“ post in which I break down what each line means, round by round. Be sure to check it out HERE! Some important abbreviations that you might encounter are explained in the table below. Of course, there are many other crochet stitches and abbreviations out there, so if you would like to see a more extensive list, click here (there is a printable version you can download too).
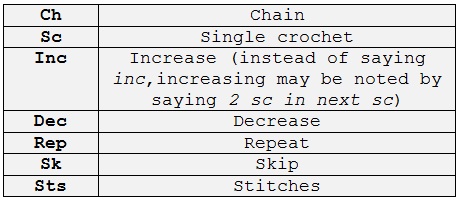
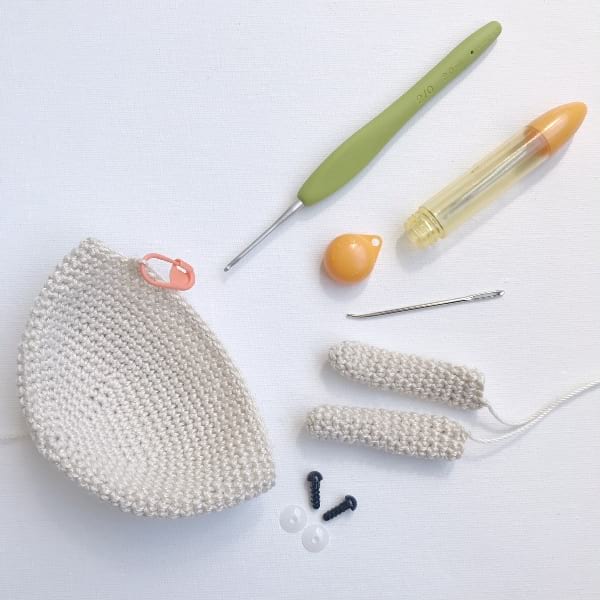
When you are just beginning to make amigurumi, these are some basic materials that will you need, pictured and explained below:
1. Crochet hooks: When I first started crocheting, I used aluminum crochet hooks. However, my all-time favourite crochet hooks are now Clover Amour hooks as they have aluminum tips with elastomer rubber handles. They are extremely comfortable, lightweight, and ergonomic to use and I can crochet much longer using these hooks. Having a comfortable handle is especially important when you are crocheting with such small crochet hooks. You can find them HERE on Amazon and read my full review about these hooks HERE It is recommended that you use a hook 2-3 times smaller than that recommended for your yarn when crocheting amigurumi. I almost always use my 2.00 mm crochet hook as using a smaller crochet hook allows me to have a tighter gauge with clean stitches and fewer gaps.
2. Yarn: There are so many different types of yarn out there in a wide range of beautiful colours. Most people like to use worsted weight acrylic yarn so that the stuffies are more durable and don’t get too fuzzy. Of course, there are times when you might want to fuzz up your amigurumi (see my Valentine Teddy), so yarn with some natural fibres (like wool) are useful. I also really enjoy using mercerized cotton as it is strong and lustrous (see my Bonbon Bears and Amigurumi Bees made using mercerized cotton). Sooner than you know it, you will be building up your yarn collection as so many different colours are required for different patterns!
3. Scissors: Invest in a good, sharp pair of scissors to make clean cuts in the yarn. My scissors pictured above are beautiful and very sharp, and they can be found HERE!
4. Yarn needles: These needles are used to attach the body parts of your amigurumi together. We use yarn to stitch them together, not thread, which is why bigger needles are required. My bent tip tapestry needles shown above are ergonomic and make picking up stitches so much easier since you are not working perpendicularly at a sharp right angle. These needles make attaching limbs and amigurumi parts much easier, and I adore how they come in a handy little case for storage. You can buy Clover Bent Tip Tapestry Needles HERE on Amazon!
5. Needle Threader: A threader helps you put the yarn or embroidery floss through the eye of a needle. Sometimes I do not need to use a needle threader, but it’s helpful to have on hand in case you need one.
6. Safety eyes: When I first started making amigurumi, I used beads instead of safety eyes (see example here). However, using safety eyes is so much easier and much more visually appealing as well. You attach the safety eyes when you are almost finished crocheting the head with plastic washer backings (see close-up picture here). I buy my safety eyes from 6060 on Etsy (I tend to use 6, 9, and 12 mm eyes most frequently). As an alternative to safety eyes (in case you are making a stuffed animal for a baby or small child), you could embroider the eyes with a French knot or lines (e.g. upside down “V” for a kawaii expression).
7. Lock ring stitch markers: We usually work in a spiral or continuous rounds in amigurumi so that there is no visible seam. This means that we do not join each round with a slip stitch, so it is easy to lose track of the number of stitches or what round you are on. I like to use these lock ring stitch markers to hep me indicate the beginning of the round and to also hold my stitch in place when I am putting my project down for a break. You can read about more about different ways to use stitch markers here. I have used these Clover lock ring stitch markers throughout the years, and not a single one has broken on me- you can purchase them HERE.
8. Polyester Fiberfill Stuffing: This is what you use to stuff your amigurumi. They come in big bags and once again, one bag goes a long way. Be sure to stuff your amigurumi appropriately: too little results in a limp amigurumi, but too much might result in the stuffing bursting through! Wolfdreamer has an in-depth post where she provides a lot of great tips on how to stuff your amigurumi here. You can find the polyester fiberfill that I use on Amazon HERE!
9. Embroidery floss: We use embroidery floss in amigurumi to stitch the noses and mouths (see my nose tutorial) and sometimes as accents or decorative pieces too (e.g. bear paws, tassel). Black embroidery floss is helpful to have on hand!
10. Felt: Felt is often used for the noses (cut oval shapes) and for the lining of ears, hands and feet. I buy my felt at the dollar store, and one sheet goes a long way. I tend to use my white, brown, beige and black felt the most.
11. Dog slicker brush: This is an optional item which I purchased later on. If you would like to make fuzzy amigurumi (see this post), then you can buy one of these to brush your amigurumi to agitate the fibers in order to get that brushed fur look!
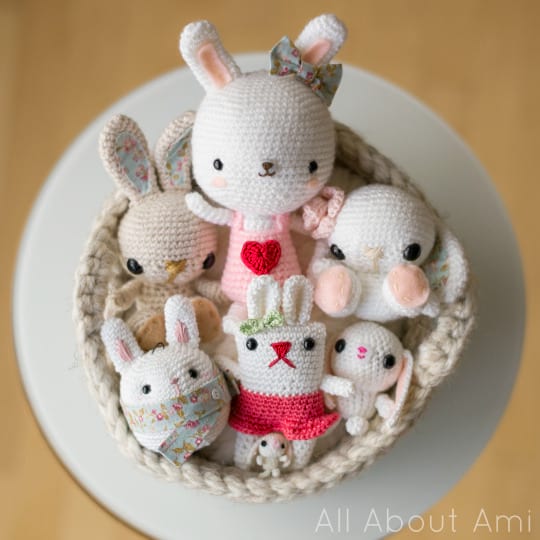
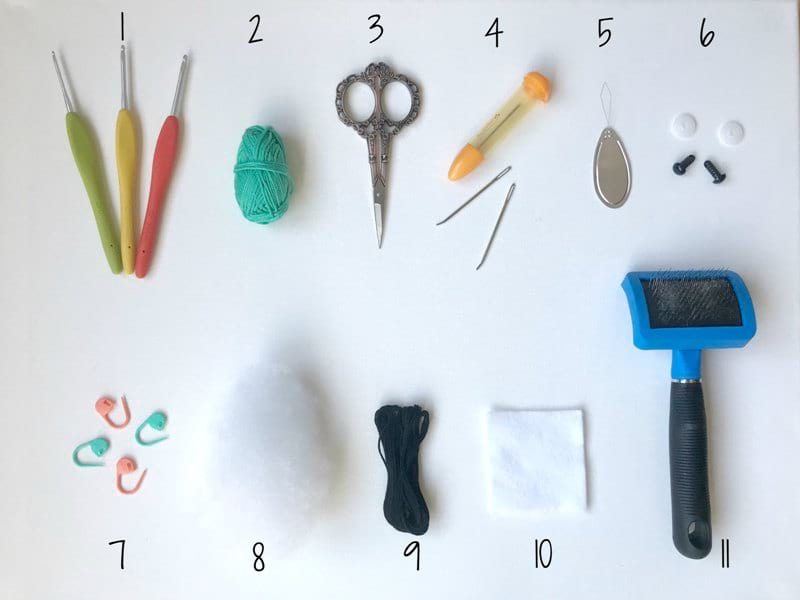
If you are interested in using some of my patterns for your first amigurumi projects, I recommend checking out my ”Teddy Ornaments“ or my ”Spring Bunnies“ as they are constructed of basic amigurumi shapes that are not too tricky! Be sure to reference the step-by-step blog posts as well as the free patterns for extra help and plenty of pictures! I would also recommend you sign-up for a Ravelry account as it is a huge database of both crochet and knit patterns (free and paid), and you can search for specific patterns that you want to make! If you are interested in amigurumi books, I would recommend Ana Paula Rimoli’s books found HERE (I worked through all of her simple and adorable books when I was first starting out) and also the new “Whimsical Stitches” by Lauren Espy found HERE.
I hope this post is helpful to those who are interested in learning how to make amigurumi or who are just starting out. I wanted to have one place where I could direct people when they asked me where to begin! Thanks again for all your support and for your lovely comments. I love hearing about your crochet experiences and seeing your work! Don’t forget to send along any photos of amigurumi or pieces you’ve made using my patterns and tutorials, and never hesitate to ask me any questions or send a quick hello! Comment below if you have any tips that you think people beginning to make amigurumi should know 🙂 If you would like to keep up-to-date with my work and get my latest amigurumi patterns and posts sent straight to your e-mail inbox, sign up for my newsletter HERE!
{Note: This post contains affiliate links to products that I love and use all the time!}