***You can purchase an INEXPENSIVE AD-FREE PDF of the Chunky Braided Cabled Blanket pattern on Etsy HERE and on Craftsy HERE! This beautifully formatted PDF includes the cabling tutorial, step-by-step pictures and pattern, and is a total of 7 pages including the cover page!
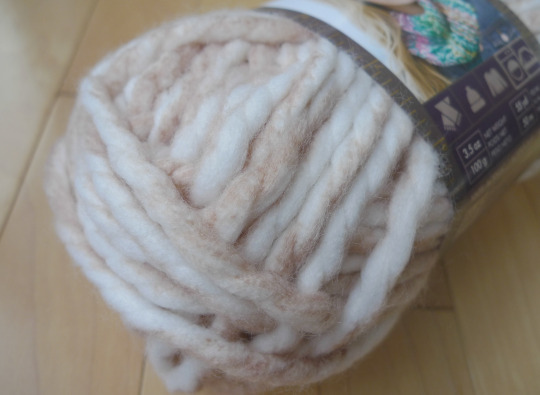
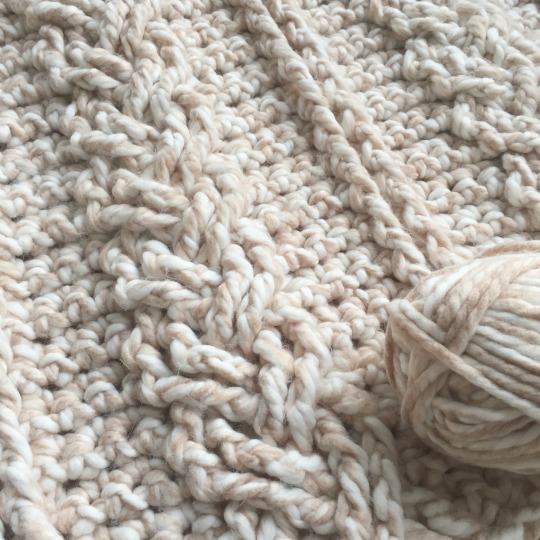
Way back in February 2016, I was inspired to make a cabled blanket of some sort after the popularity of my “Cabled Slouchy Beanie” and since I was designing my “Cabled Legwarmers” at the same time. It was around this time that I also began my partnership with Lion Brand Yarn, so I excitedly browsed through their website to determine which yarn I wanted to use for this blanket. I came across their “Color Clouds” that they had just launched, and it looked very intriguing! It is classified as a Jumbo level 7 yarn, a brand new weight class that has been added due to the popularity of very thick yarns and arm knitting. It is 100% acrylic and machine washable.
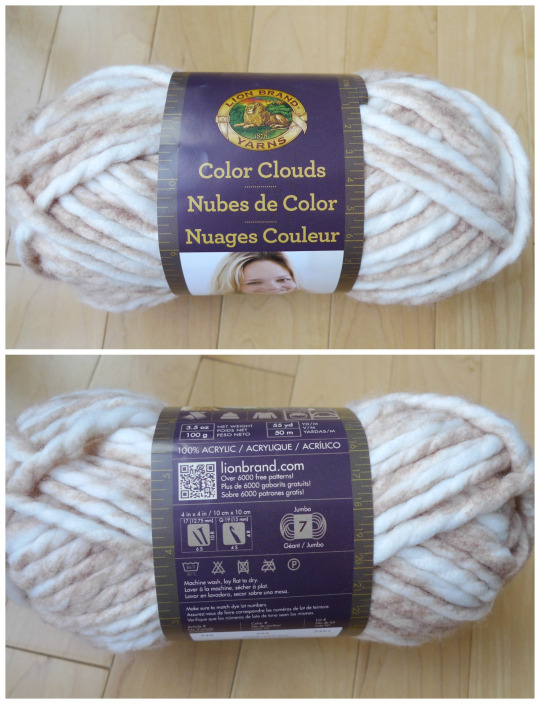
I decided to go with the “Travelers Tan” colourway as I loved the blend of tan and white, and of course I always gravitate towards neutrals. I knew cables would look gorgeous in this colourway!
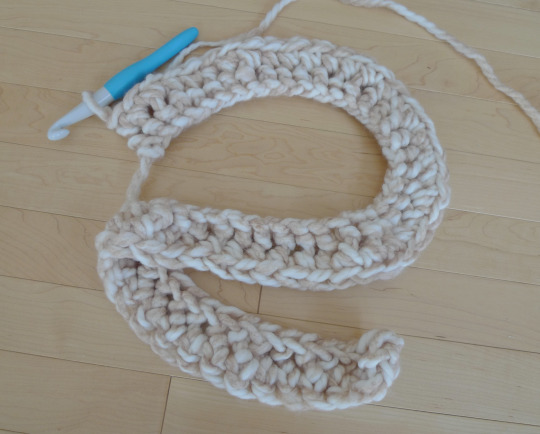
I was inspired to learn new cabling methods when a reader sent me a message through Ravelry and told me to check out these “Cable Crochet Squares” by Elizabeth Ham. In her free Ravelry download and post HERE, Elizabeth details how to do various crochet cables and has accompanying YouTube videos as well. I was drawn to the “Single Plaited Square” as it had a braided look to it, and I decided to use this technique to design my blanket! I would HIGHLY recommend checking out her Youtube tutorial HERE to see the braided cables in action as this is how I learned how to do it (be sure to check out all three videos as Elizabeth has divided the tutorial into three parts)! I started off by doing a series of foundation single crochets (see how to do this stitch HERE) with my Clover Amour 15 mm hook.
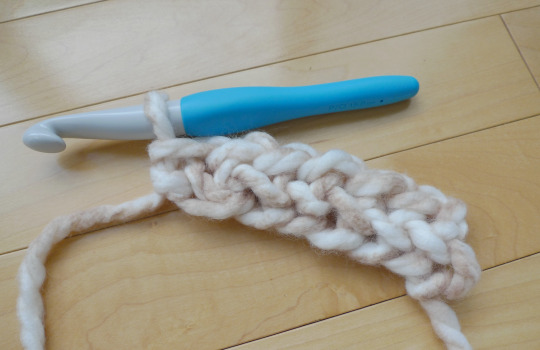
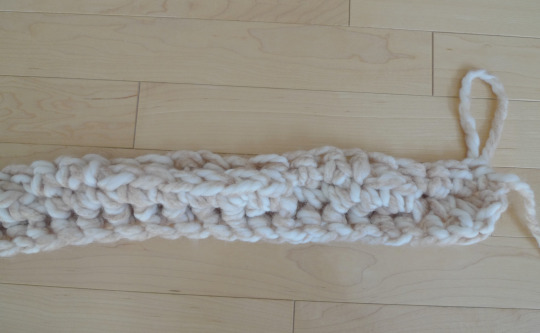
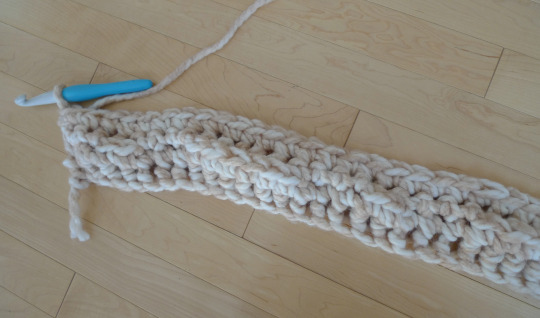
I drew up my design, determining how many stitches I would need to have three braided cables, front post stitches framing these cables, and three stitches in between each cable and frame. I was done the first row of my blanket after doing 50 foundation single crochets.

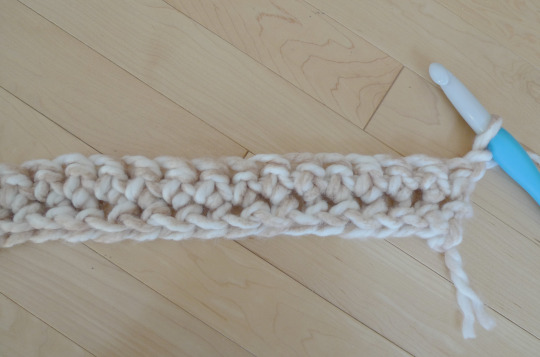
Next, I worked single crochets across for Row 2. It is important to note that ALL EVEN ROWS are worked the same, by working single crochets across.
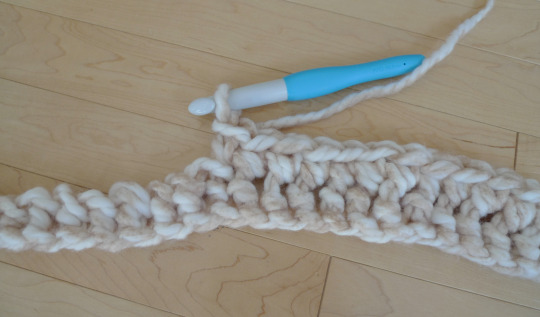
Row 2 is complete!
Row 3 is when the cabling begins!
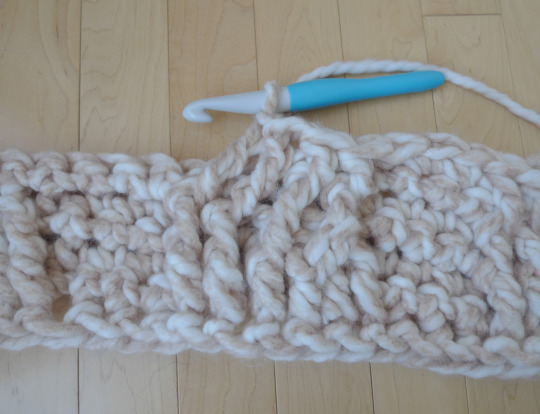
To begin Row 3, I did three single crochets in the first three stitches. Next, I worked two Front post double crochets (Fpdc) in the next two stitches 2 rows below (of Row 1, where the arrow is pointing).
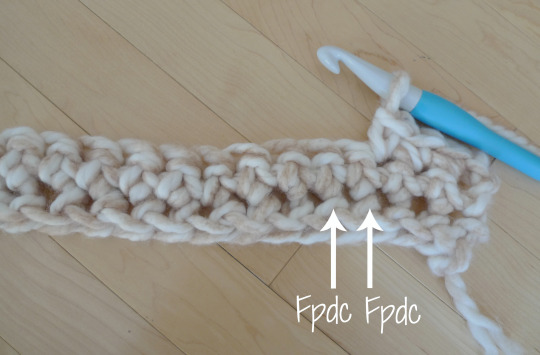
The Front post double crochets have been worked. See how they bump out?
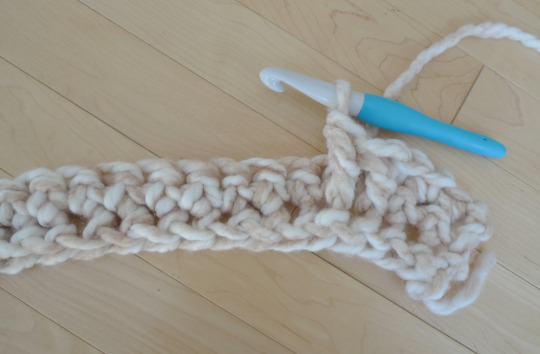
After the two Fpdc’s, I then single crocheted three stitches. Next, I did six Fpdc’s across the next six stitches 2 rows below.
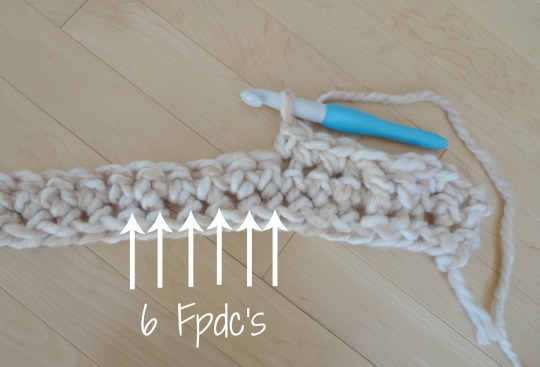
The six Fpdc’s have been worked!

I then did three single crochets across the next three stitches. I then repeated the pattern again until the end (i.e. two Fpdc’s, three sc’s, six Fpdc’s across).
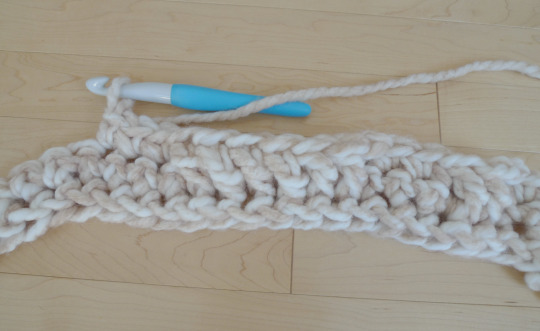
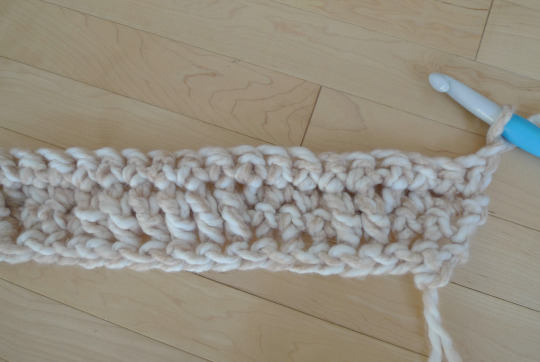
Row 3 is complete!

I then flipped my work and began Row 4. Remember that all even rows are worked the same: by working single crochets across.
The even rows work up quickly since you’re just single crocheting along!
Row 4 is complete!
I then turned my work and began working Row 5.
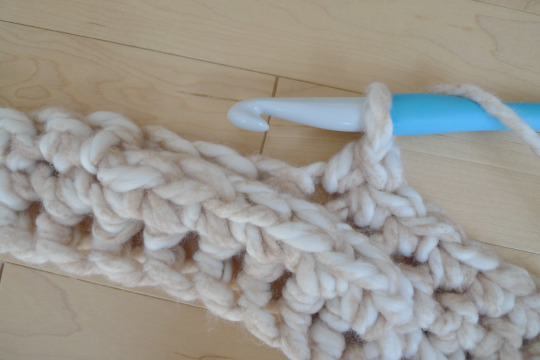
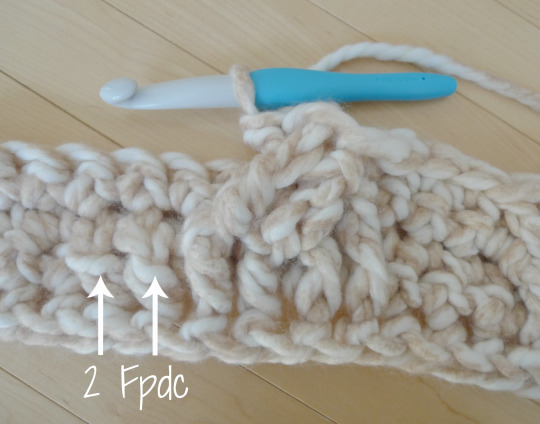
I started Row 5 by once again doing three single crochets. Then, I worked 2 Fpdc’s across the next two post stitches from two rows below (the previous Fpdc’s from Row 3) as indicated by the arrows.
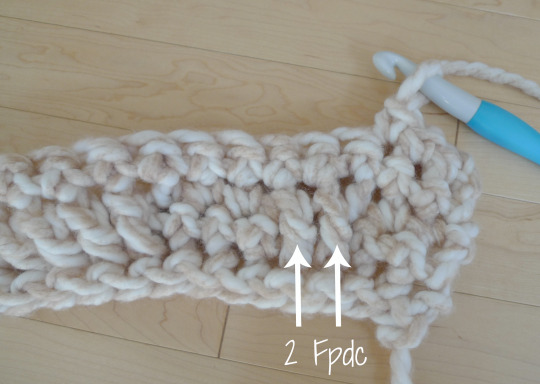
These Fpdc’s really help frame the braided cables as you’ll see later on. Working around the posts from two rows below helps to build the framing upwards!
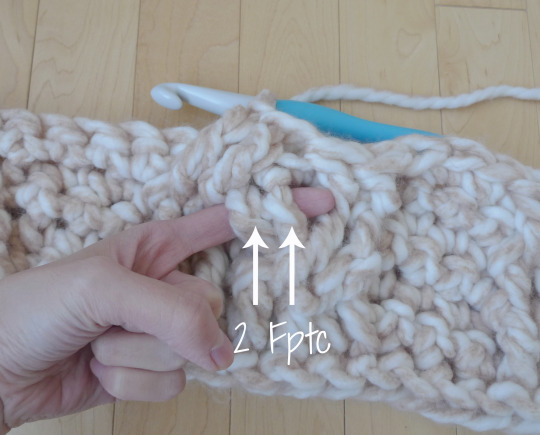
Next, I skipped two post stitches (1 and 2 in photo below) and worked two Front post triple crochets (Fptc) in the next two post stitches (3 and 4 in photo below).
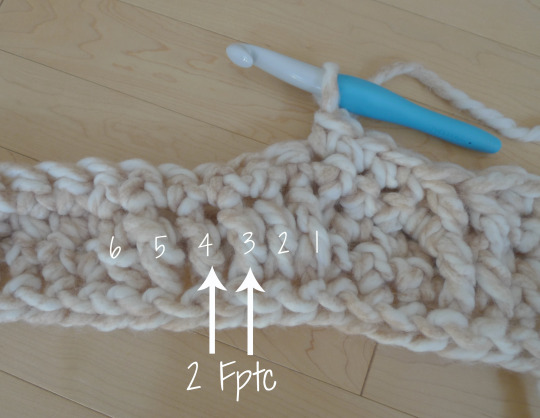
Below you can see I’ve worked Fptc’s across the third and fourth posts. Next, I need to work BEHIND the post stitches I just made and work 2 Fptc’s in the two skipped post stitches (1 and 2 in the photo above).
I’ve placed my fingers behind the post stitches to show where you need to insert your crochet hook.
Thus, your crochet hook goes behind the posts and works Fptc’s around those initial skipped posts.
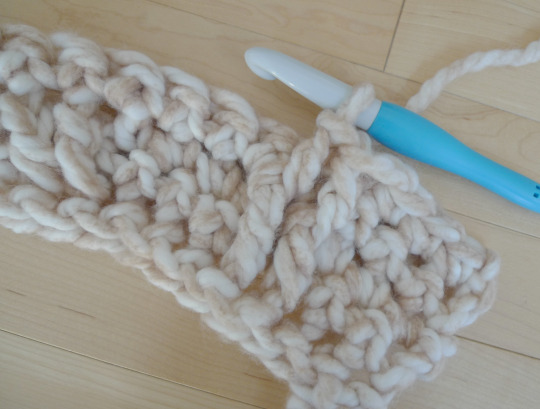
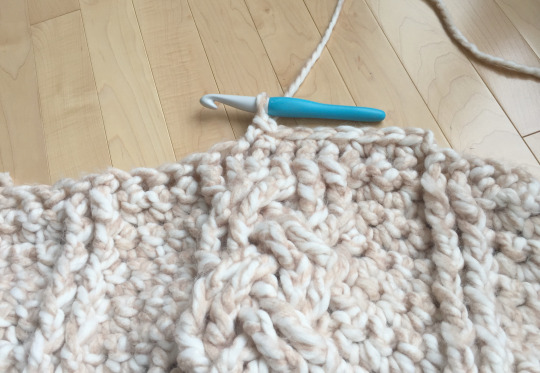
Now four Fptc’s have been worked. You then work 2 Fpdc’s across the next two post stitches.
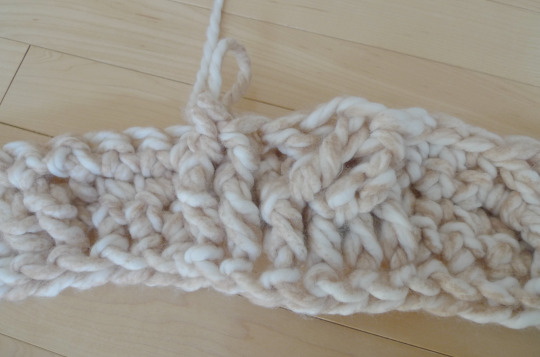
Your initial set of cabling is complete! Now you repeat the same process across!
For Row 6, you once again single crochet across. Now we will begin Round 7!

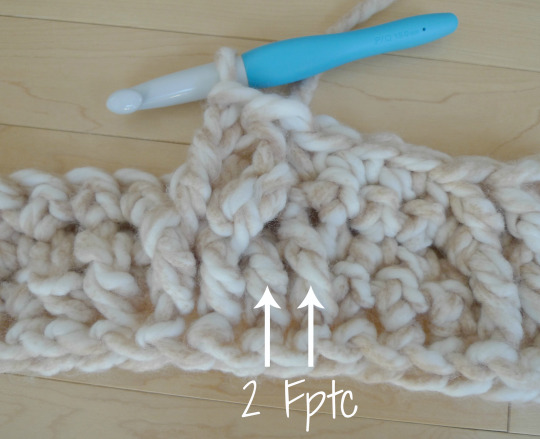
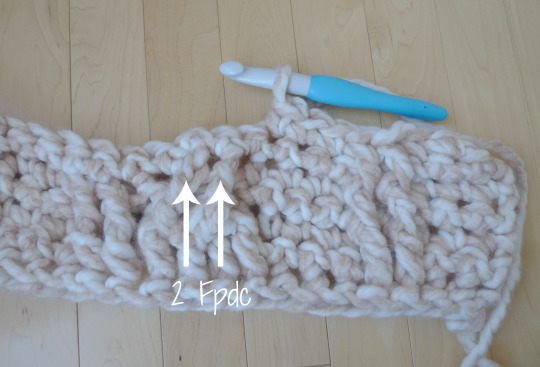
The beginning of Row 7 is worked the same as the beginning of Row 5 where you do three single crochets, two front post double crochets, and three single crochets. Now we will approach the cabling! You work two Front post double crochets in the next two post stitches as indicated below.
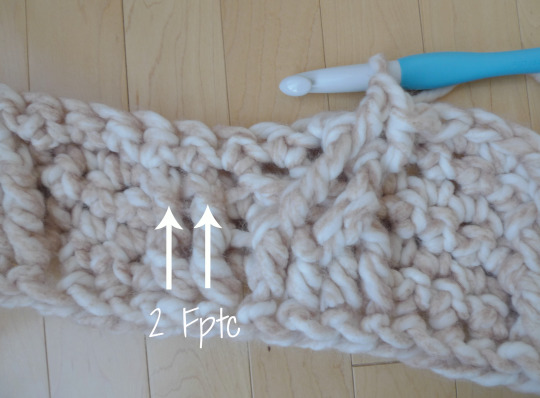
You then skip 2 post stitches and work two Front post triple crochets in the next two post stitches as indicated below.
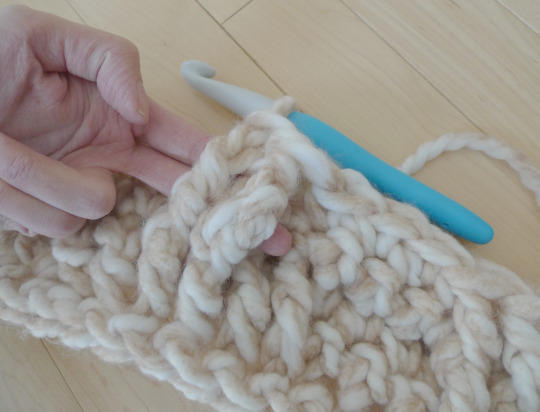
Now it gets a little tricky. You need to work IN FRONT of the post stitches you just made and work two Front post triple crochets around the two skipped posts. These two skipped posts are hard to see in the picture below!
In the picture below, I am showing you where those “hidden” stitches are that we skipped. It is around these stitches that you need to work your two Front post triple crochets (note that the orientation of my finger is NOT how you would insert your hook- I’m just demonstrating where the stitches are).
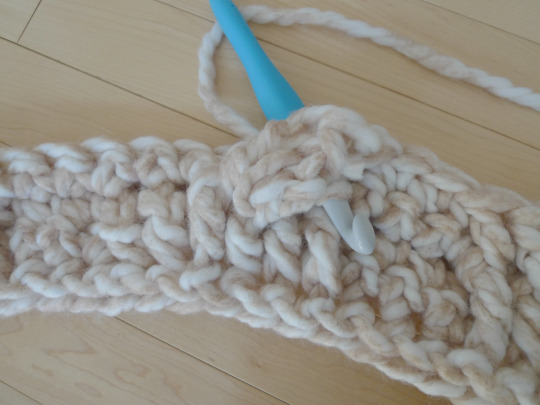
Thus, you swing your crochet hook in front of the stitches you just made, and work your front post triple crochets in the indicated stitches.

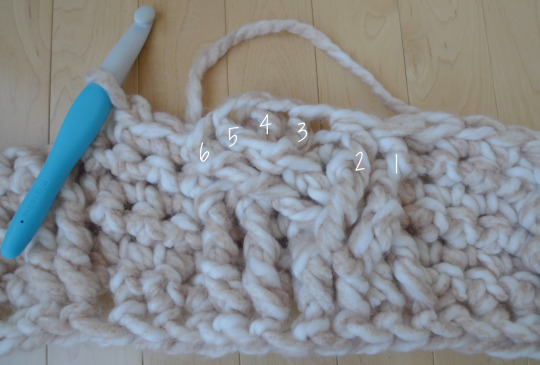
You keep repeating this pattern across for Row 7. Below I’ve indicated the order of the stitches so you can see where all six stitches of the cabling are located for subsequent rows as you build up the cabling!
You keep repeating rows 4-7 until Row 77! It’s amazing watching your beautiful braided cables build up!
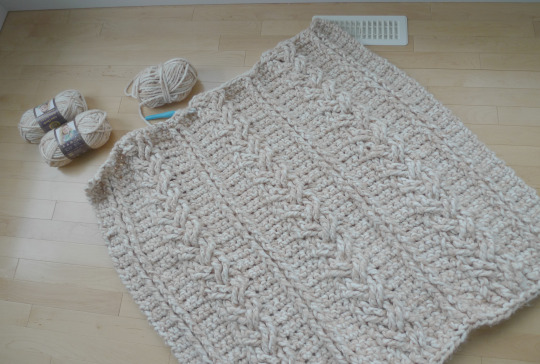
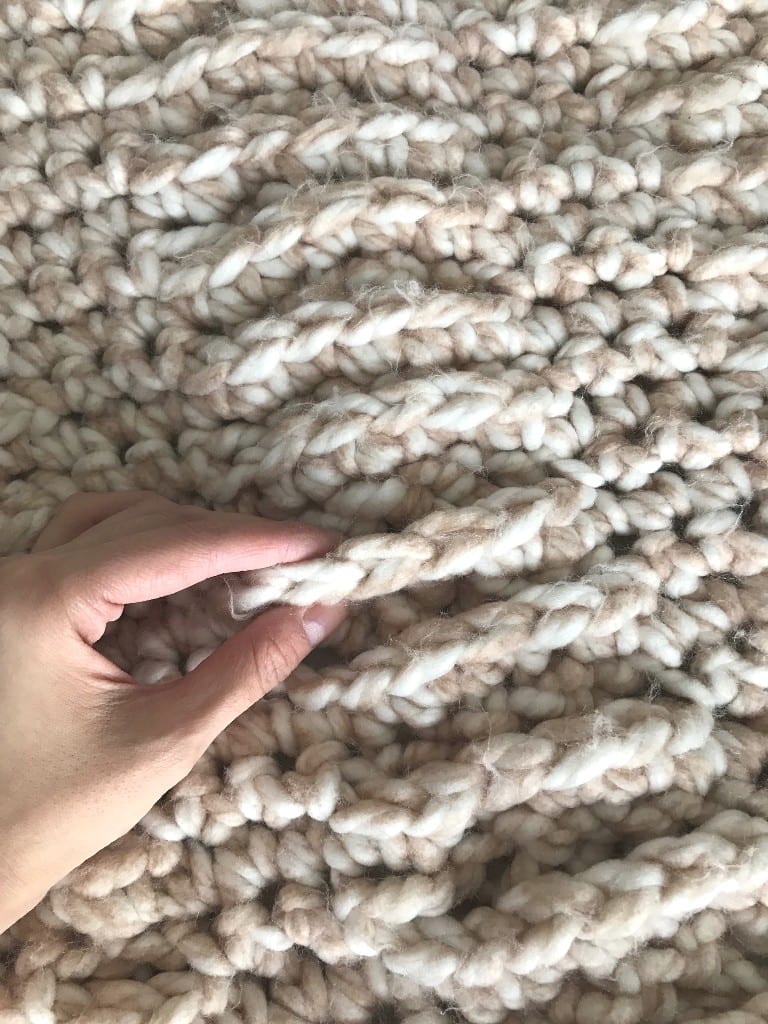
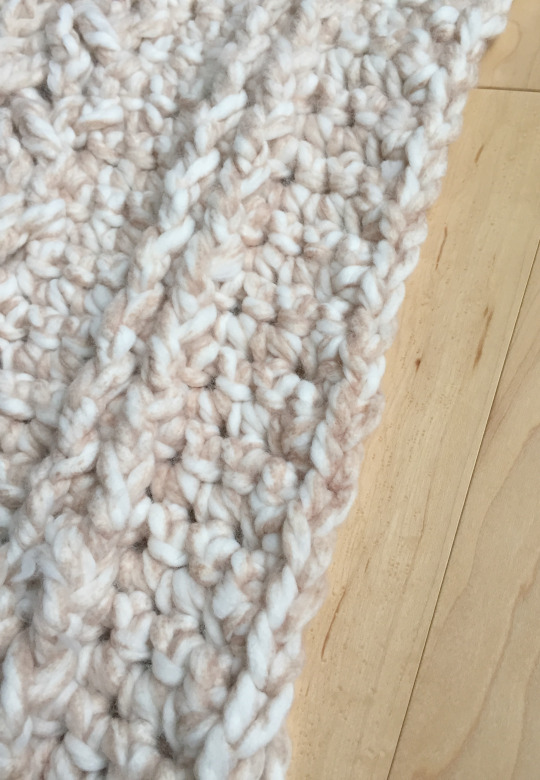
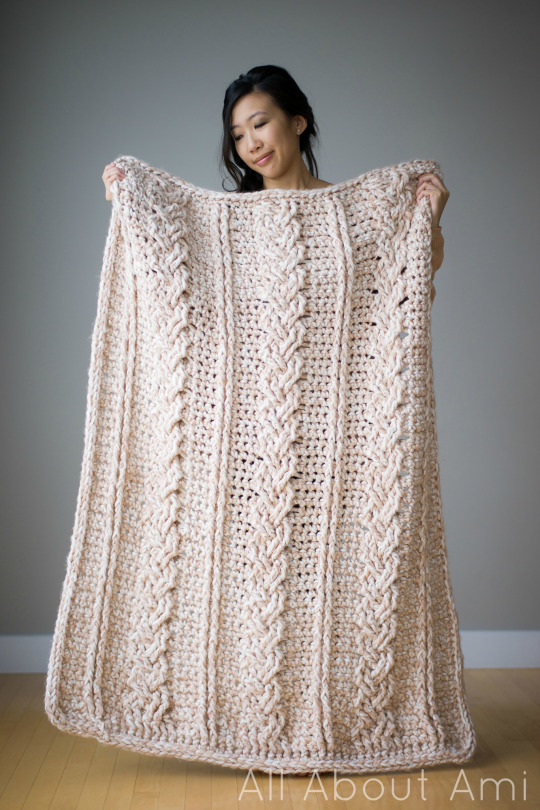
Don’t these braided cables look gorgeous? The texture is stunning, and the light colours really help show off the intricacy of the design!
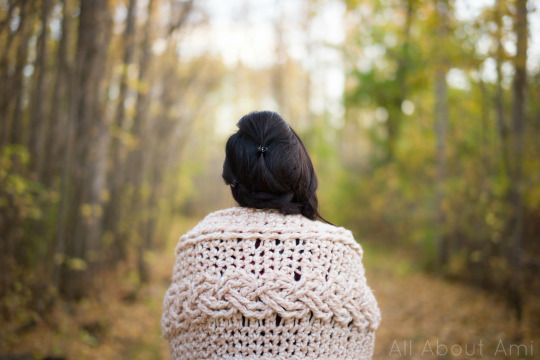
In case you’re curious, this is what the blanket looks like from the back- it has a very interesting and unique texture!
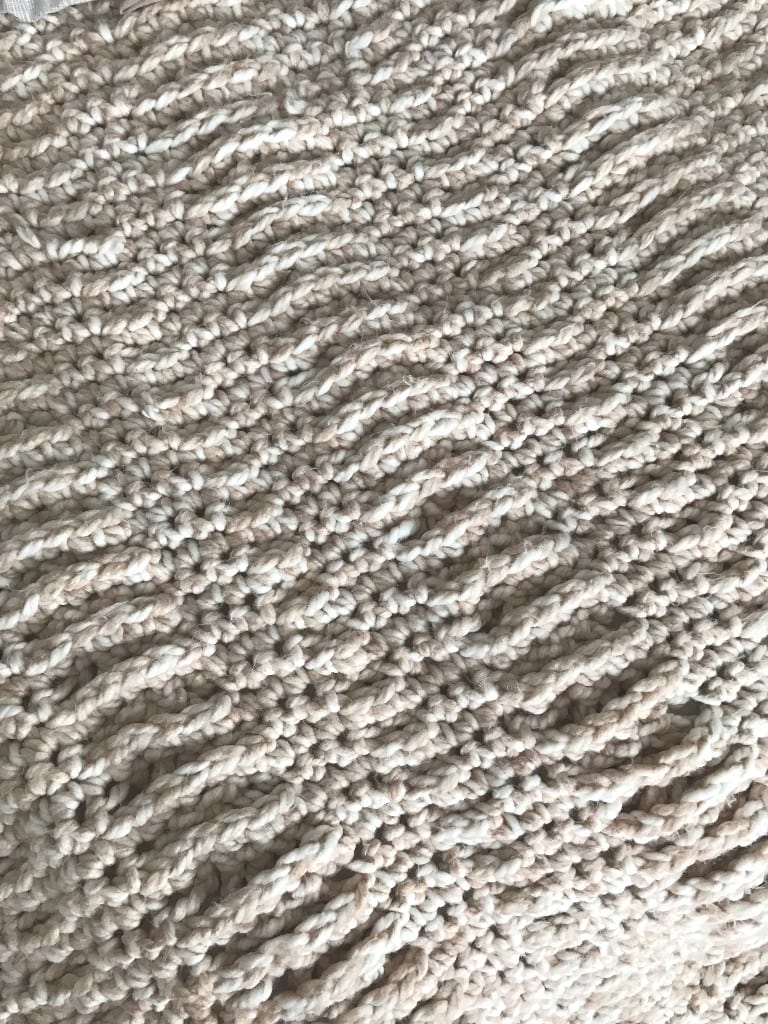
These ridges are formed due to the cabling in the front and how some of the post stitches are worked several rows below.
I had so much fun working up my blanket as it kept me warm as I was crocheting it. Repeating rows of these gorgeous braided cables was very relaxing!

I started a couple of afghan projects as a pre-teen when I was first learning how to crochet, but I never ended up finishing any of them. Thankfully, this blanket works up very quickly since it uses jumbo yarn and such a large crochet hook!
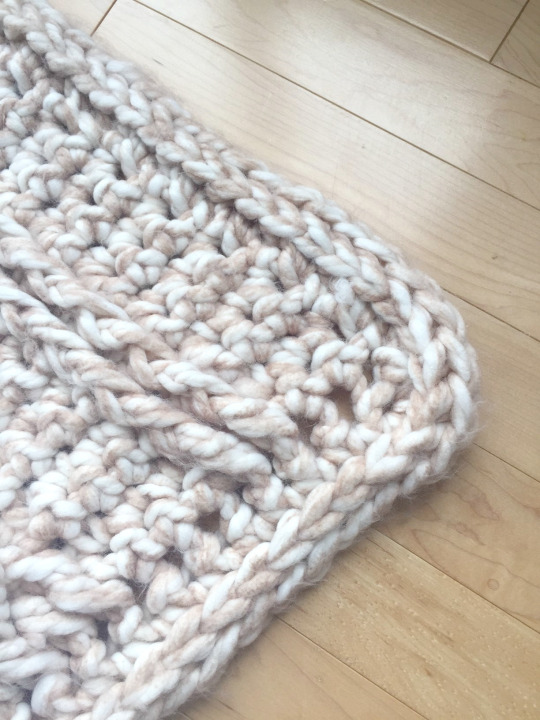
For the edging of my blanket, I joined my working yarn at any point and began single crocheting around.
I worked three single crochets in each of the four corners.
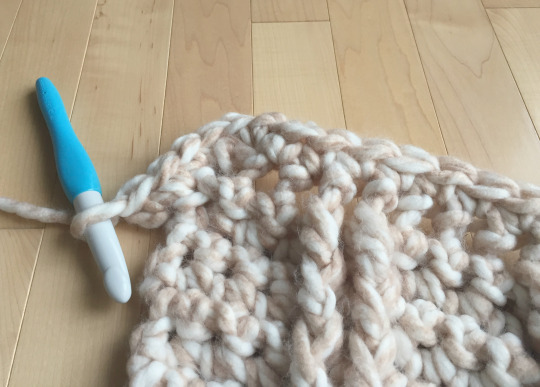
Single crocheting around helps finish off the edges!
I then slip stitched to close my round and began working back post single crochets around to really help define the border and give it beautiful edging!
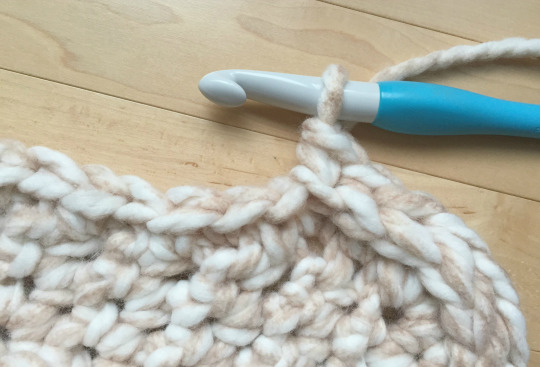
You work back post single crochets by inserting your crochet hook in front of the post of the stitch!
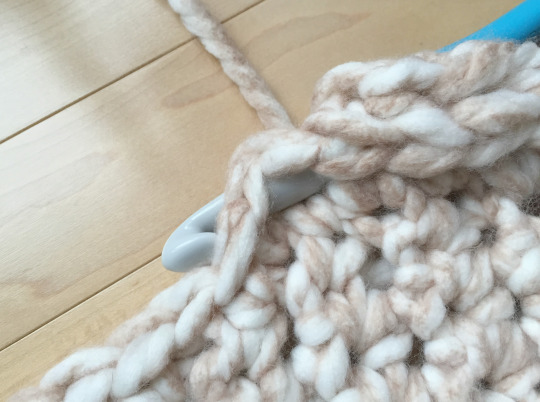
Doesn’t this border edging look beautiful? It has an almost braided look to it too!
*************************************
Here is the free pattern for the “Chunky Braided Cabled Blanket”!
***You can purchase an INEXPENSIVE AD-FREE PDF of this pattern on Etsy HERE and on Craftsy HERE! This beautifully formatted PDF includes the cabling tutorial, step-by-step pictures and pattern, and is a total of 7 pages including the cover page!
Materials:
- 15 mm Clover Amour hook
- Jumbo Yarn (I used Lion Brand Yarn’s “Color Clouds” in “Travelers Tan”, 20 balls. Each skein of Color Clouds is 55 yd/50 m for reference.) In total, I used 1100 yards of Color Clouds for my blanket.
Special stitches:
- Front Post Treble Crochet (Fptc): Yarn Over (YO) twice, insert hook behind post of stitch (insert hook from front to back). YO and pull up a loop, [YO and draw through 2 loops on hook] 3 times.
- Front Post Double Crochet (Fpdc): YO, insert hook behind post of stitch (insert hook from front to back of stitch), YO, pull up a loop, YO, (pull through 2 loops) twice.
- Back Post Single Crochet (Bpsc):Insert hook in front of post of stitch (insert hook from back to front of stitch), YO and pull up loop, YO and draw through two loops on hook.
Notes:
- All even rows are single crochet rows.
- All Fptc’s and Fpdc’s are worked in indicated stitches 2 rows below.
- To increase the width of this blanket with more cable cycles, ADD MULTIPLES OF 14 STITCHES.
- Try holding two strands of super bulky yarn (level 6) together as a substitute for the Jumbo level 7 yarn.
- To see videos of the Braided cables, see Elizabeth Ham’s very helpful 3-part YouTube tutorial HERE!
Row 1: Foundation single crochet 50. (50 sts)
Row 2 & all even rows: Ch 1, turn. Starting in second st from hook, sc in each st across.
R3: Ch 1, turn. Sc 3, Fpdc in next 2 sts 2 rows below, sc 3. *Fpdc in next 6 sts 2 rows below, sc 3, Fpdc in next 2 sts 2 rows below, sc 3*, rep 3 times.
R5: Ch 1, turn. Sc 3, Fpdc in next 2 post sts, sc 3. *Skip 2 post sts, Fptc in next 2 posts, working BEHIND post sts just made, Fptc in 2 skipped post sts. Fpdc in next 2 post sts, Sc 3, Fpdc in next 2 post sts, sc 3*, rep 3 times.
R7: Ch 1, turn. Sc 3, Fpdc in next 2 post sts, sc 3. *Fpdc in next 2 post sts. Skip 2 post sts, Fptc in next 2 post sts. Working IN FRONT of post sts just made, Fptc in 2 skipped post sts. Sc 3, Fpdc in next 2 post sts, Sc 3*, rep 3 times.
Repeat Rows 4-7 until Row 77.
Border:
Row 1: With cabled side of blanket facing you, Sc around perimeter, making sure to do 3 sc in each corner. Sl st to first sc.
Row 2: Chain 1, Back post single crochet around. Sl st to Chain 1 and fasten off.
Finished Dimensions: 42″/107 cm x 53″/135 cm
*************************************
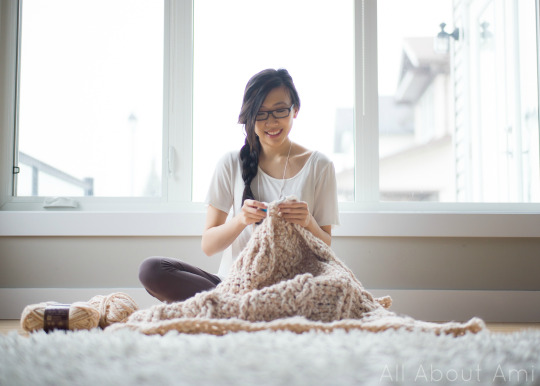
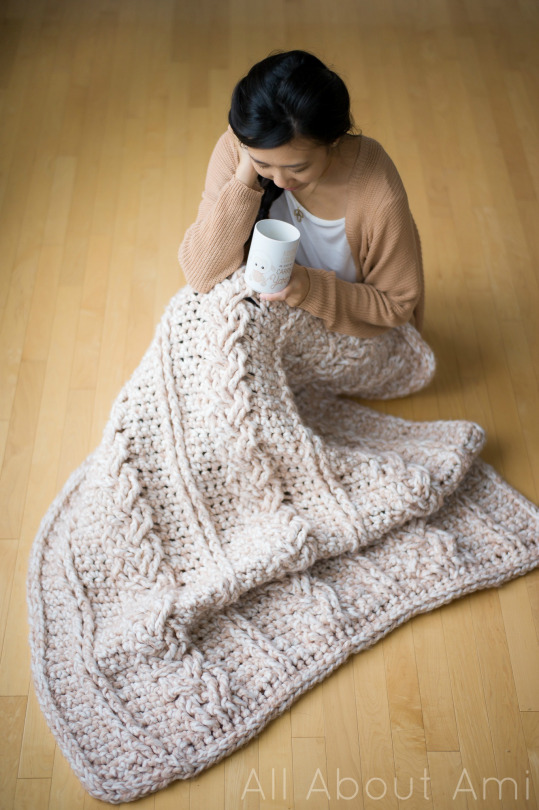
I love the luxurious look of my Chunky Braided Cabled Blanket! Even though I finished this project in March, I thought I would wait to post about it in the fall/winter when everyone is picking up their crochet hooks again and getting ready for the dip in temperature. T’is the season for cuddling up in warm blankets whilst sipping hot chocolate and apple cider!
Note that this blanket is more of a throw blanket with its sizing. I underestimated how much yarn I would need to complete my blanket as I originally thought I would only need 10 skeins of Color Clouds. However, as I started working up the pattern, I could quickly tell that I would need much more. Keep in mind that each skein of Color Clouds is 55 yards/3.5 oz, compared to a skein of Wool-Ease Thick & Quick which is 106 yds/6 oz. In the end, I needed 20 skeins to complete my project. Out of all the crochet projects I’ve worked on, this definitely used up the most skeins of yarn. You can try playing around with the sizing and possibly hold two strands of super bulky (level 6) yarn as a substitute for the jumbo (level 7) yarn. Always keep an eye out for sales, and jumbo yarn can sometimes be found on clearance too, especially at the end of the season!
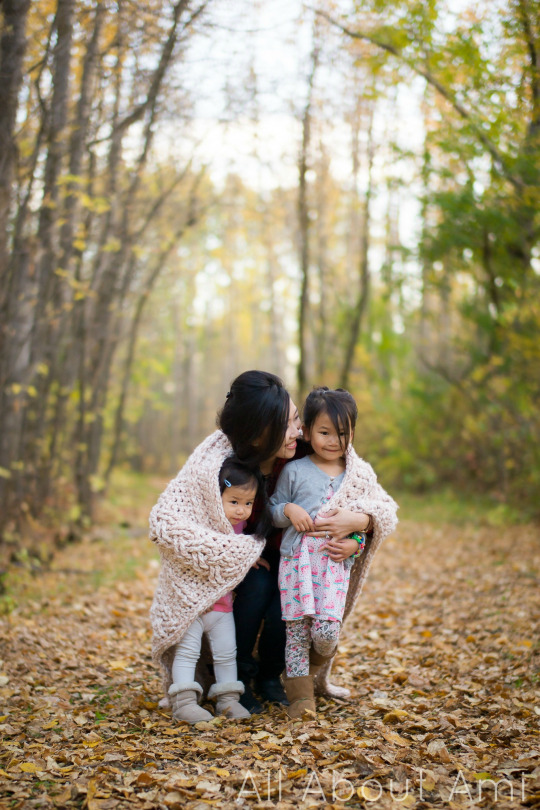
While we were out during a family walk enjoying the beautiful fall landscape, I brought my blanket along so we could snap some pictures! I love snuggling the girls and I make sure I get enough cuddles with them each and every day! Just look at their adorable expressions!
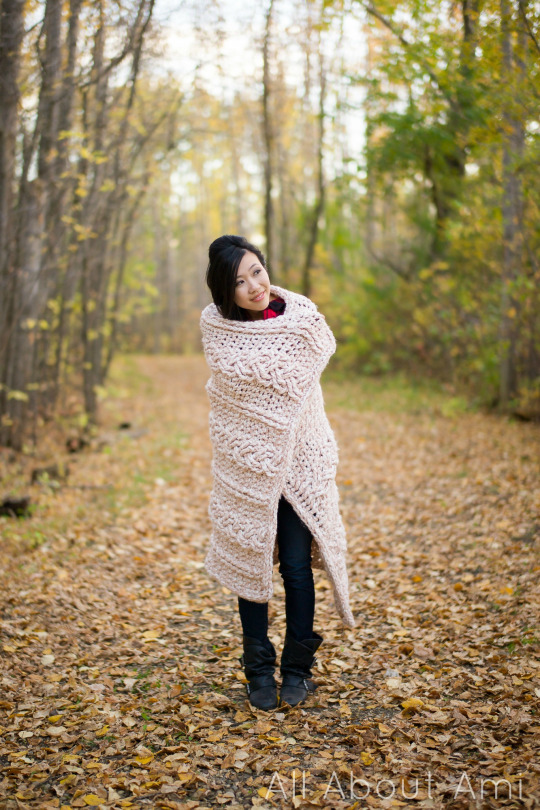
Here I am wrapped in my blanket! Wouldn’t the braided cables make a gorgeous sweater or wrap? I think the girls ran off to play with leaves along the side and I was trying to peek at them and see what they were up to!
I am so glad I learned the technique of braided cables as they are simply stunning! It was so much fun seeing the braided cables build up, and I am in love with my finished blanket. If you are a knitter, be sure to check out Jessica of Mama in a Stitch’s “Endless Cables Chunky Knit Throw Pattern” as she also used Color Clouds in the same colourway! We thought it was so funny when we were working with the exact same yarn…and using it for cabled blankets! It’s neat seeing the different looks of crochet and knit cables, and I hope to learn the technique of knitting cables one day. Keep up to date with my work through my Facebook page, Twitter (@AllAboutAmi) and Instagram (@AllAboutAmi)! I know many of you are looking for a good blanket project to tackle, so I hope this inspires you to try a cabled one!

[UPDATE: I have designed a matching Braided Cabled Cowl & Slouchy Beanie set that uses this same braided cabled design! If you love this pattern and would like to try and crochet some wearable items, check out the free patterns for the cowl and beanie!]
![]()
{This post is sponsored by Lion Brand Yarn! I’ve loved working with their yarn throughout the years and I’m thrilled that I get to collaborate with them every month!}
This pattern is an original pattern by Stephanie Lau of All About Ami. Please do not claim this pattern as your own. If you wish to share this pattern, you may link to this pattern but please do not reprint it on your site. You may keep a copy for your own personal use but please DO NOT sell the pattern or distribute it.
You may sell products made from this pattern but please clearly credit the design to me, Stephanie Lau of All About Ami, and provide a link to my blog www.AllAboutAmi.com. Permission is NOT granted for mass production or factory manufacturing of any kind. Thank you for being respectful and for your understanding!
Amazon Affiliate Link: