Note: This is Part 3 of the step-by-step photo tutorial of the Wildrose Backpack. We will crochet the interior cell phone pocket and the strap, and make the decorative tassel.
- The free crochet pattern with exact written numbers and row/round counts can be found HERE.
- The beautifully-formatted, inexpensive PDF containing the written-out pattern and all the step-by-step pictures (total of 19 pages) can be found on Etsy HERE and on LoveCrochet HERE!
- The convenient Lion Brand Yarn KIT containing all the required 24/7 Cotton Yarn (available in 4 different colors) can be found
- Part 1 of the step-by-step tutorial explaining how to crochet the granny square, triangles, and backpack sides can be found HERE.
- Part 2 of the step-by-step tutorial explaining how to crochet the top and bottom edging and the sturdy bottom of the backpack can be found HERE.
- Join our Wildrose Backpack Crochet-Along on Facebook HERE!
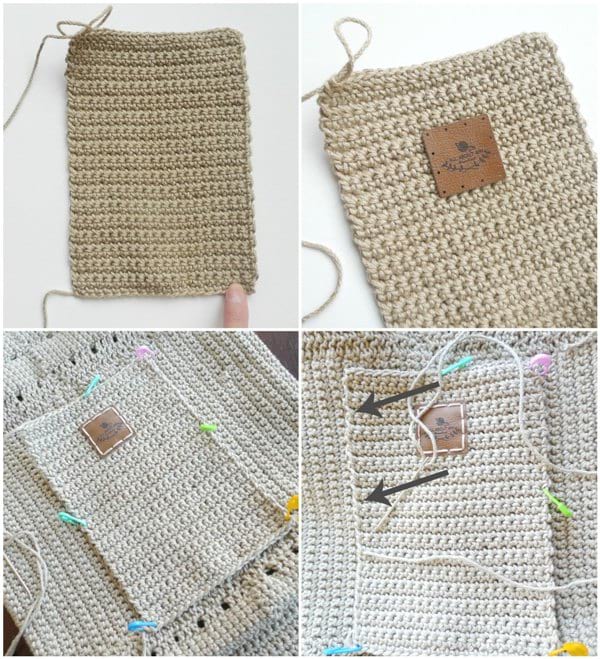
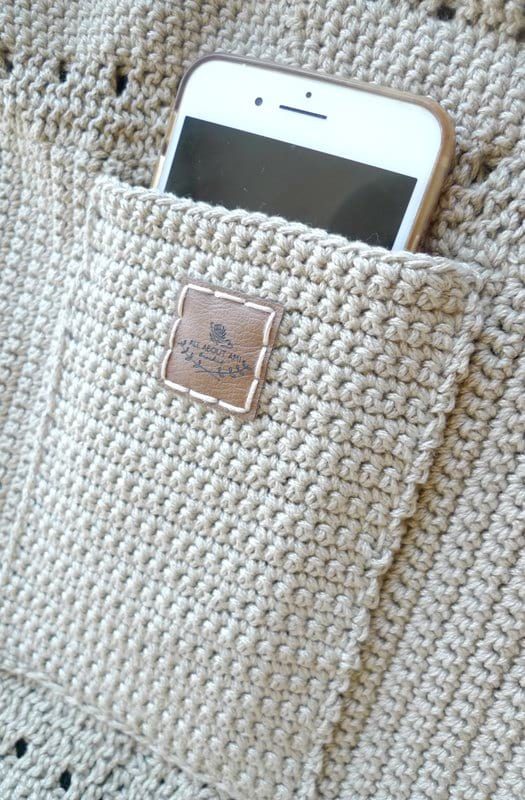
It is always nice having a special designated area for your cell phone in any bag or backpack! I crocheted this pocket to specifically fit my phone (the iPhone 7 Plus), but you can adjust this pattern as necessary to fit your own cell phone! Crochet a rectangle by working in turned rows. I sewed my square ultraleather garment tag from Brickbubble onto the pocket using embroidery floss. Use the running stitch and attach the cell phone pocket to the inside of the back panel, attaching down one side, along the bottom, and up the other side. The running stitch (as indicated by the arrows) is less visible than whip stitching the sides.
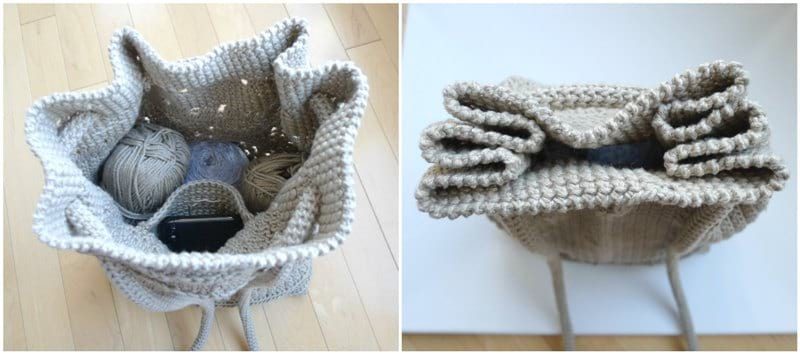
My cell phone fits perfectly inside!
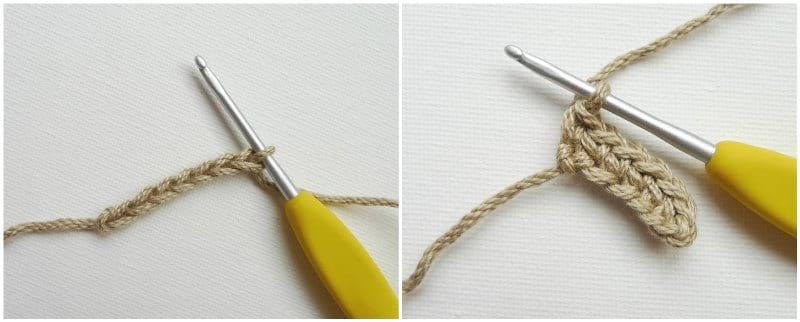
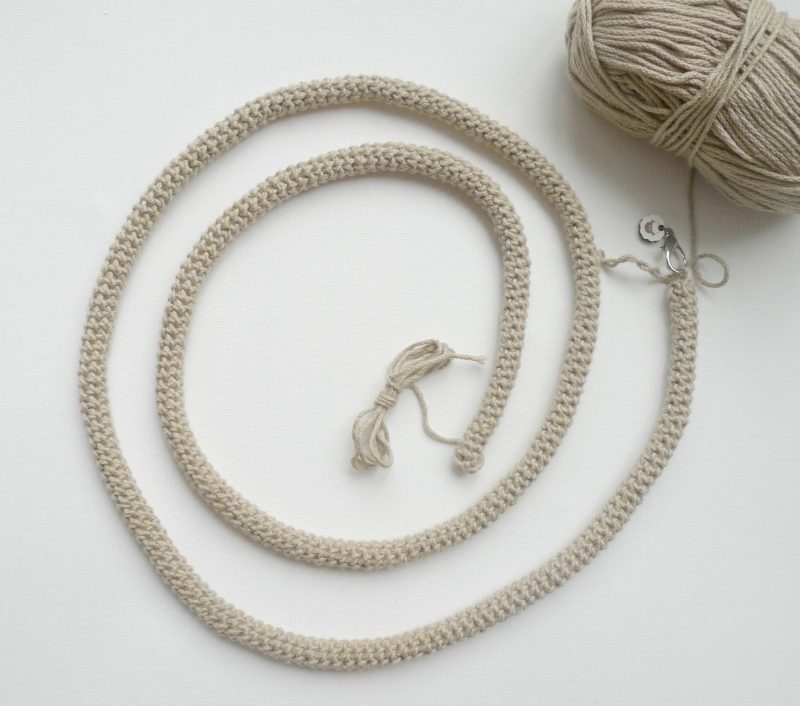
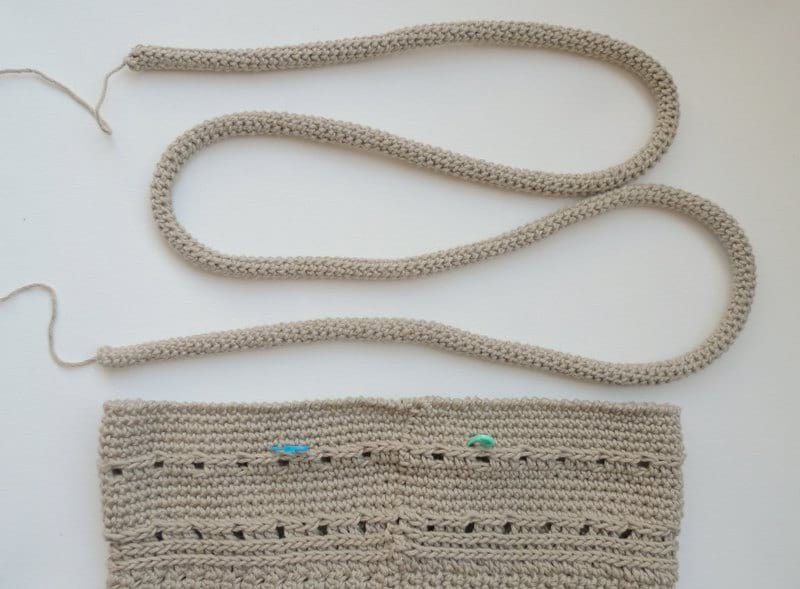
Next it is time to crochet the sturdy strap. Using a 2.75 mm hook and leaving a long initial end of 37″/94 cm, chain 7. Starting in the second chain from the hook, single crochet 6.
We will now begin crocheting in continuous rounds. Ensure that the wrong side is facing outwards, so we will be working counter-clockwise. Notice that the wrong or back side of single crochets has horizontal bars (these horizontal bars are not visible on the right or correct side of the stitches). Rather than working in the front or back loops as we typically do, we will be working in these horizontal bars.
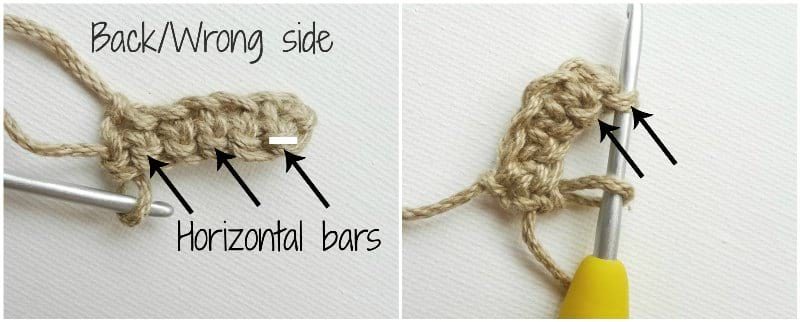
Continue single crocheting in these horizontal bars around until your strap measures 55.5″/147 cm. Once the desired length has been achieved, fasten off and leave a long 37″/94 cm end.
I have filmed this video below to demonstrate how to locate the horizontal bars on the wrong/back side of crochet! Take a look to see this technique in action- keep in mind that the first few rounds will be trickier, but once you get going, it will become easier!
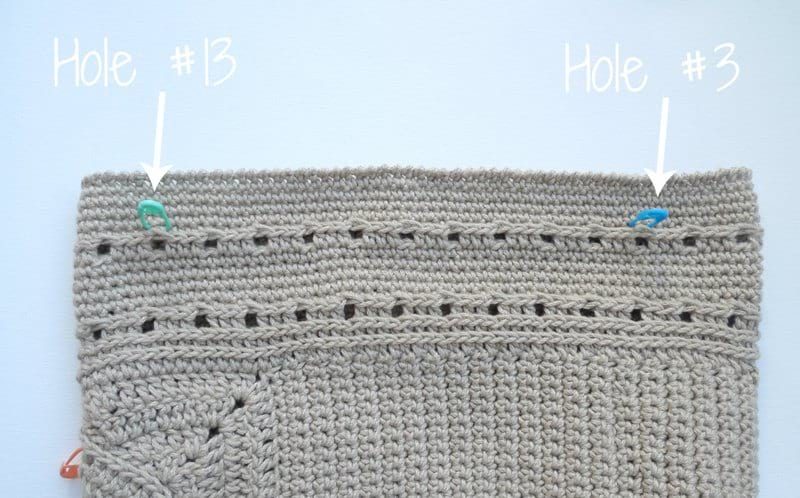
It is now time to weave in the strap through Round 9 of the top edging! In Round 9, there are 28 holes or Chain 1 spaces. Starting from the center back (where each round begins and ends with slip stitch), and working clockwise, place a stitch marker above the following holes: 3, 13, 17, and 27. In the picture below are Hole #17 and Hole #13 which are visible from the front.

Hole #13 and Hole #3 are visible from the side of the backpack.
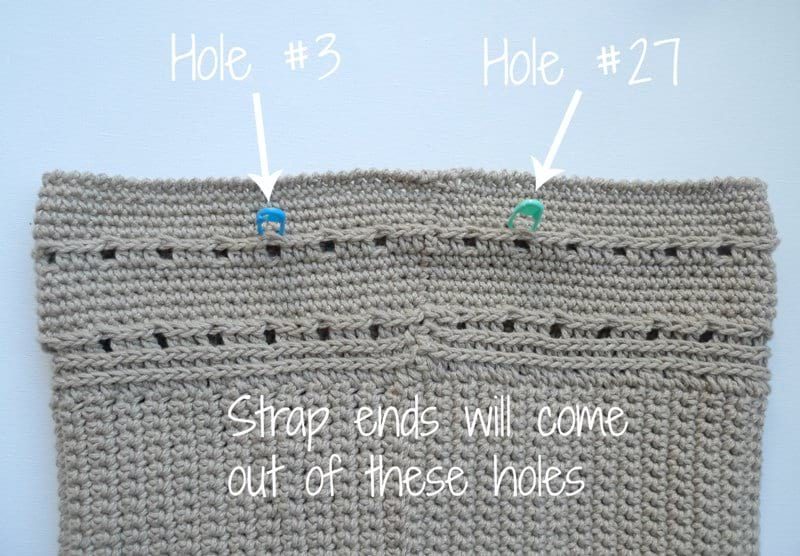
Hole #3 and Hole #27 are visible from the back of the backpack. Note that the strap ends will come out of these holes.
After placing the stitch markers above the indicated holes, get ready to weave in the strap!
When the front of the backpack is facing you, insert each end of the strap through the 13th and 17th hole. Weave each end through every second hole. Each end will permanently exit the backpack (so ends are facing outwards) at the 3rd and 27th hole.
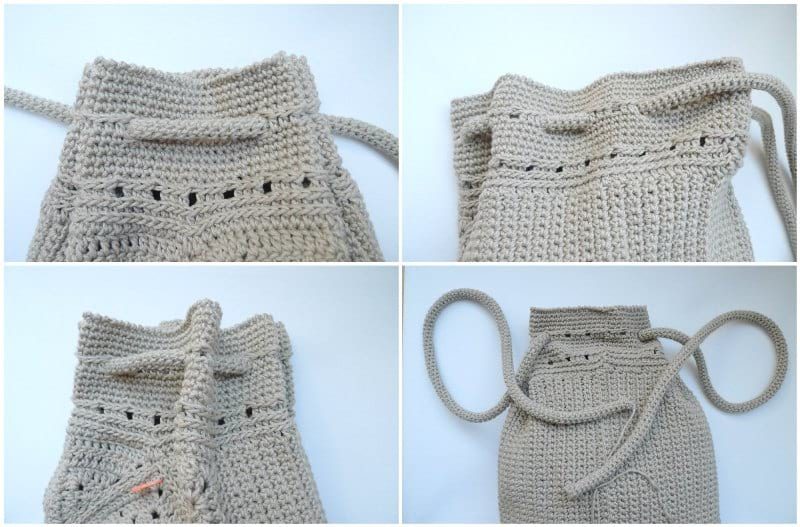
This is what the top of the backpack looks like after the strap has been woven in. The sides fold beautifully, and I love how the straps form the closure of this backpack design.
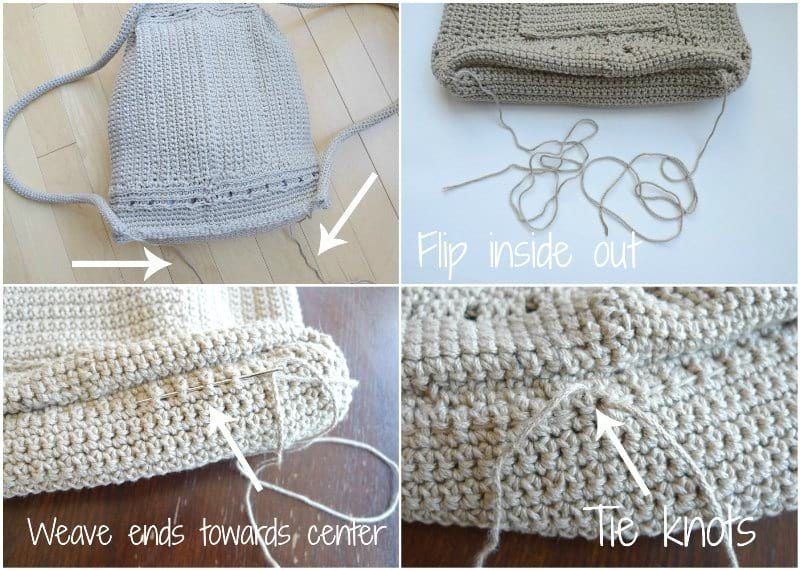
Using the long initial ends, whip stitch each end of the strap to the bottom left and right corners of the backpack securely. Attach them at the point where the bottom rectangles were whip stitched to the bottom edging.

For extra security, flip the backpack inside out. Use a yarn needle and weave both strap ends through the bottom rectangles so they meet at the center. Tie multiple knots and weave in ends.
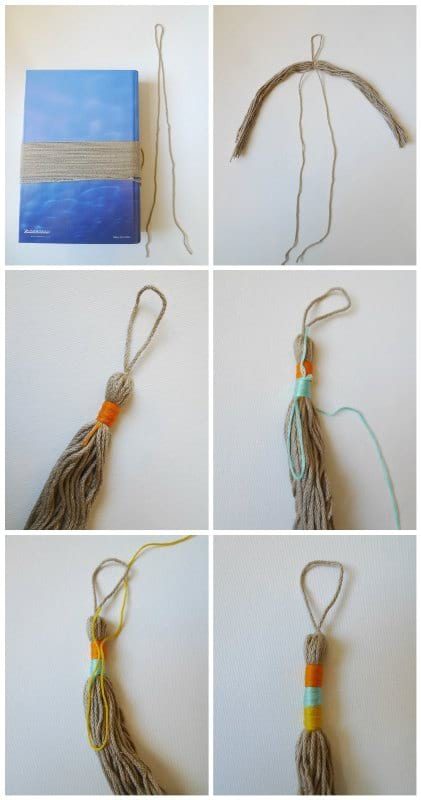
Now it is time to make the decorative tassel (optional). Cut 25 strands of yarn approximately 16″/41 cm in length (can wrap around hardcover book to get consistent lengths). Fold strands in half. Cut 20″/51 cm strand of yarn and tie top of tassel to form a loop extending from the top (so tassel can be attached to backpack later on) and hide ends with rest of strands. Wrap various colors of embroidery floss along the strands to add pops of color, leaving 0.75″/2 cm at top. We wrapped 3 different colors approximately 0.4″/1 cm in length each. Please reference this video tutorial HERE to see how to wrap embroidery floss around the tassel and how to hide the ends neatly.
Wrap packing tape around the bottom of the tassel and cut along edge of tape to trim edges. Loop tassel through strap.

You have now completed the interior cell phone pocket, the strap, and the decorative tassel! Check out the free, written-out pattern for the Wildrose Backpack HERE!