Note: This is Part 1 of the step-by-step photo tutorial of the Wildrose Backpack. We will cover the granny square, triangles, and backpack sides.
- The free crochet pattern with exact written numbers and row/round counts can be found HERE.
- The beautifully-formatted, inexpensive PDF containing the written-out pattern and all the step-by-step pictures (total of 19 pages) can be found on Etsy HERE and on LoveCrochet HERE!
- The convenient Lion Brand Yarn KIT containing all the required 24/7 Cotton Yarn (available in 4 different colors) can be found HERE.
- Part 2 of the step-by-step tutorial explaining how to crochet the top and bottom edging as well as the bottom base can be found HERE.
- Part 3 of the step-by-step tutorial explaining how to crochet the inner cell phone pocket, strap, and how to make the decorative tassel can be found HERE.
- Join our Wildrose Backpack Crochet-Along on Facebook HERE!
When we were vacationing in Disneyland, we were waiting in the Dumbo ride line-up when we spotted the person in front of us wearing a beautiful crocheted backpack in a gorgeous neutral shade. As the line-up winded around and around, Ryan and I found ourselves constantly staring at the backpack and dreaming up our own version. We vowed that we would try to crochet our own backpack in the future, and I am so glad that we went through with our idea as we are thrilled to show you our new Spring/Summer design!
The Wildrose Backpack is very fun to crochet as it utilizes different stitches and is comprised of different sections. I have taken many step-by-step photos along the way to try and explain the construction as thoroughly as possible. Thus, I have split up the step-by-step tutorial into three different sections. In Part 1, we will go through the center granny square, the triangles, and the sides of the backpack. Please reference my detailed Wildrose Granny Square tutorial HERE as I show you how to work this beautiful square round by round. This granny square uses puff stitches, clusters, and double crochets- isn’t it gorgeous?
***Please watch the “Wildrose Granny Square” video tutorial below that shows you how to crochet the 6 rounds in this pattern (be sure to follow the Round 5 used for the Wildrose Backpack)! Note the following timestamps:
1:33 Round 1
3:08 Round 2
5:24 Round 3
8:46 Round 4
11:20 Round 5 (Wildrose Shoulder Bag)
13:16 Round 5 (Wildrose Backpack & Wildrose Market Bag)
15:18 Round 6 (Wildrose Backpack & Wildrose Market Bag)
18:20 Round 7 (Wildrose Market Bag)
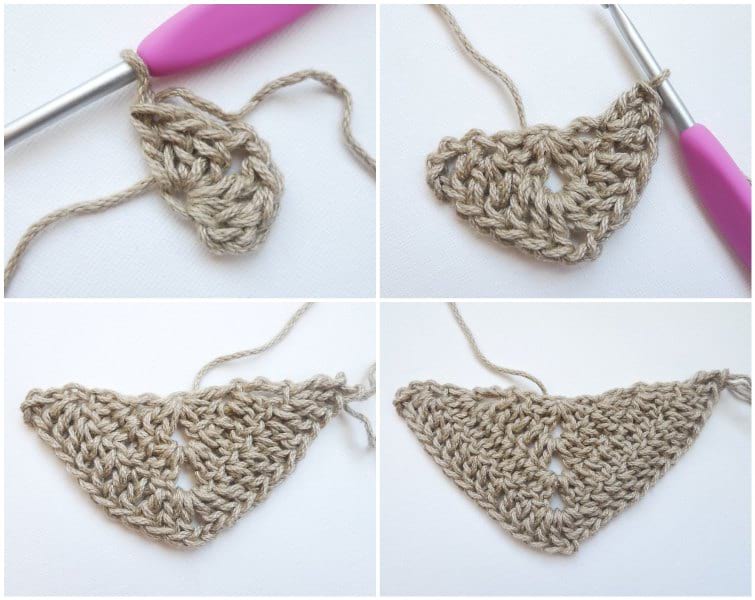
After crocheting the granny square, it is time to crochet the four triangles. Start off by working double crochets in a Magic Ring. These triangles are worked in turned rows. The triangle expands with subsequent rows by working three double crochets in the first and last stitch and *2 dc, ch 2, 2 dc* in the corner space (once again, exact numbers can be found in the full pattern HERE). After four rows, the triangle is complete.
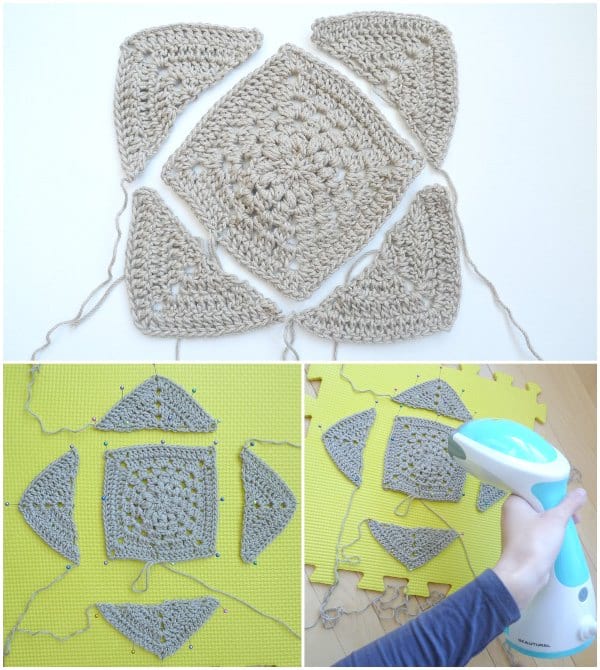
To give the granny square and triangles better shape with sharper edges and definition, you can block the pieces. I pinned them into place on a foam mat from the dollar store and blasted them with hot steam from my Beautural steamer (I bought this affordable steamer on Amazon HERE and I love it). After the pieces have been blocked, it is time to attach them together. Position the center granny square so that it is a diamond (one corner is pointing upwards and one corner is pointing downwards). Position the four triangles on the diagonal edges of the granny square so that when put together, they form one large square.
Flip the pieces upside down so that the attachment will be less visible. Whip stitch the triangles to the granny square, leaving the front and back loops of the centre granny square untouched so that they will be visible from the front. Locate the horizontal bars on the back side of the granny square as indicated by the arrows, and attach the triangles to these bars.
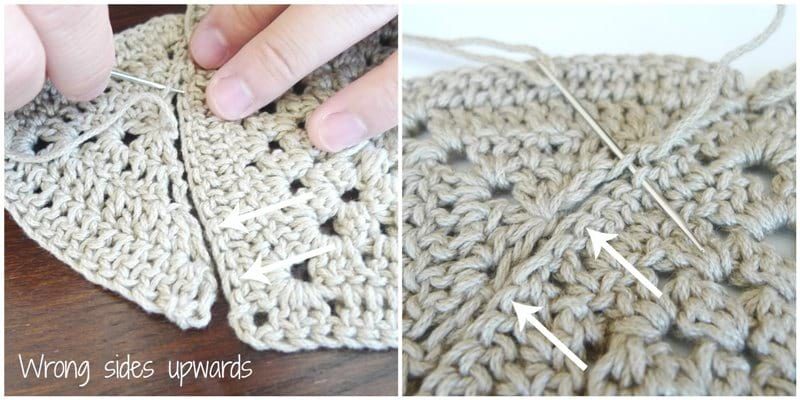
Keep going around, attaching all four triangles to the granny square. To help anchor each triangle, you can use the ends from the triangles and tie knots at each corner of the granny square.
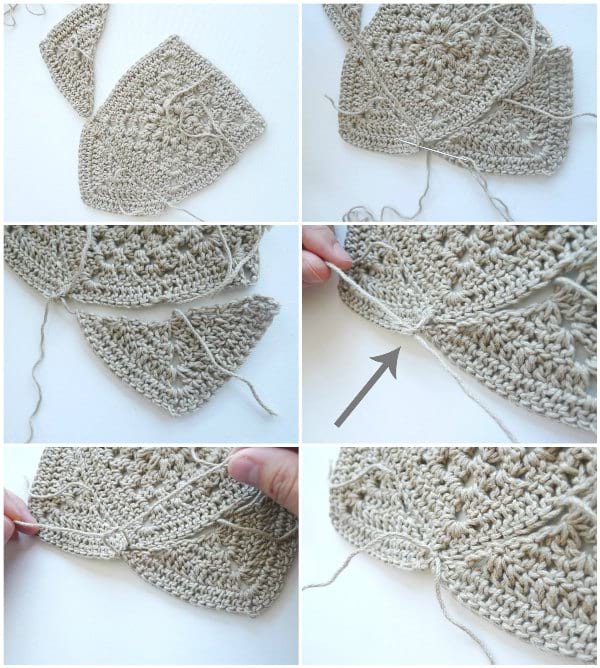
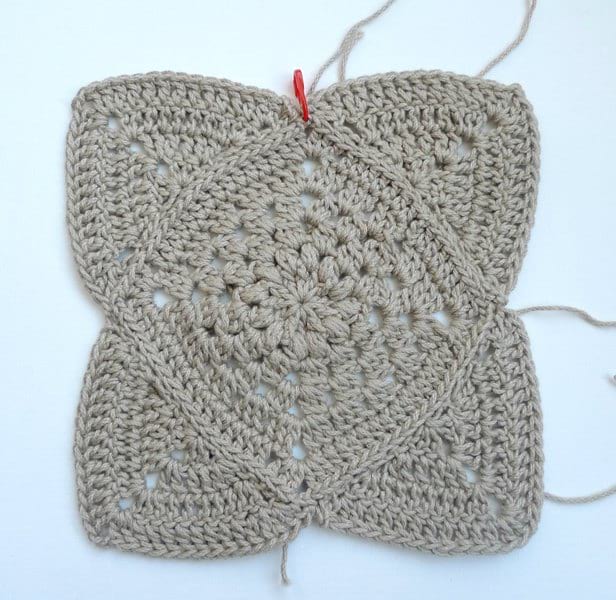
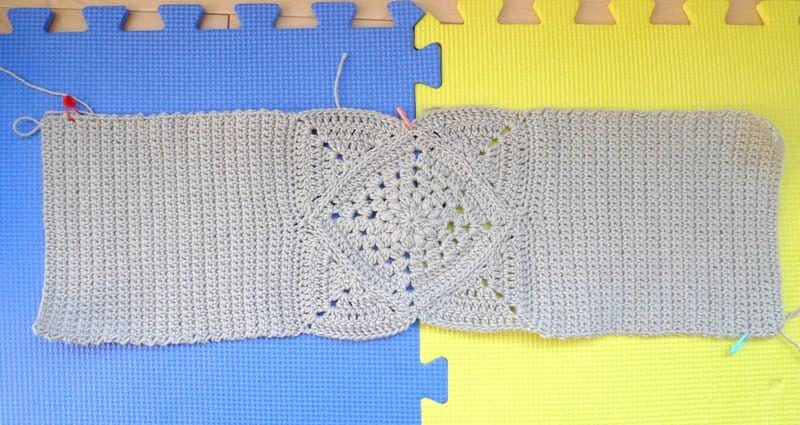
All four triangles have been attached to the center granny square! I chose which orientation I liked the best and placed a red stitch marker to show that I wanted this to be the top of the backpack.
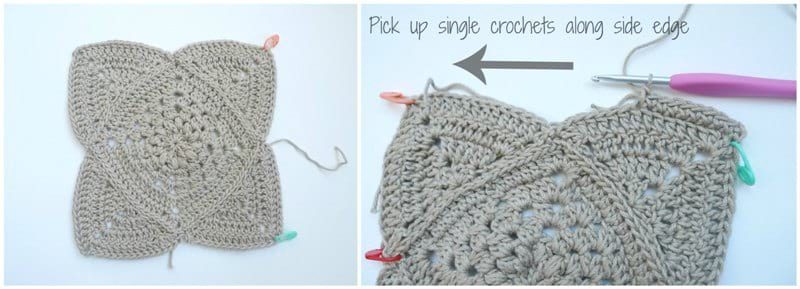
Next, we will crochet the backpack sides by picking up stitches along the sides of the large square. Starting from the right corner (green stitch marker working towards the peach stitch marker), pick up single crochets. To do so, make a slip knot. Insert your crochet hook into the right corner. Add the slip knot and pull through. Yarn over and chain 1. Insert your hook into an adjacent space, yarn over, and pull up a loop. Yarn over and pull through both loops to work a single crochet. Keep repeating this process to pick up 32 single crochets along the side edge of the large square.
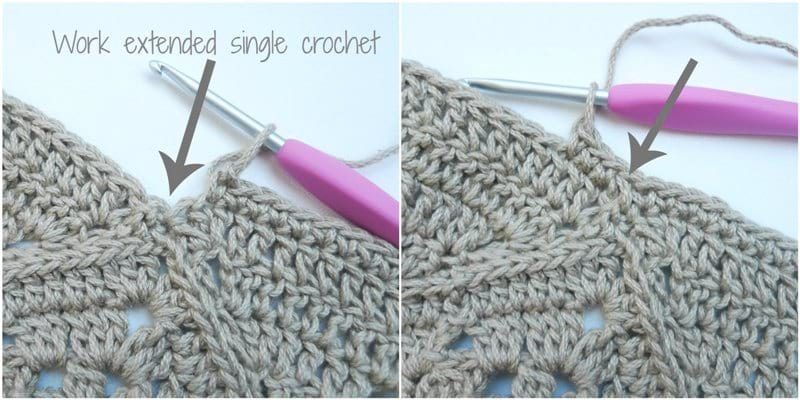
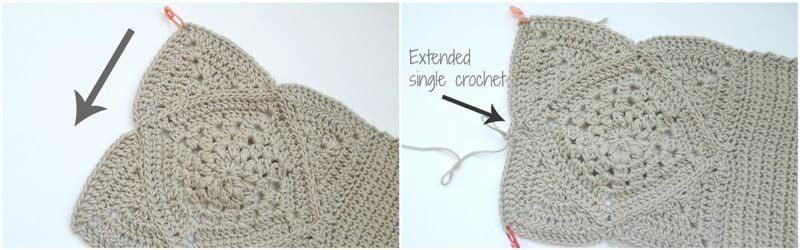
Notice how there is a dip in each corner of the granny square between the two triangles. Work an extended single crochet in this dip to help extend the loop to the desired length so that it matches the height of the rest of the stitches.
Keep working single crochets in turned rows to form one side of the backpack. Next, pick up stitches along the other side of the large square to begin the other side of the backpack (note: I used a new skein of yarn to crochet the second side). Once again, do not forget to work an extended single crochet in that dip.
Both sides of the backpack have been crocheted and the desired width has been achieved!
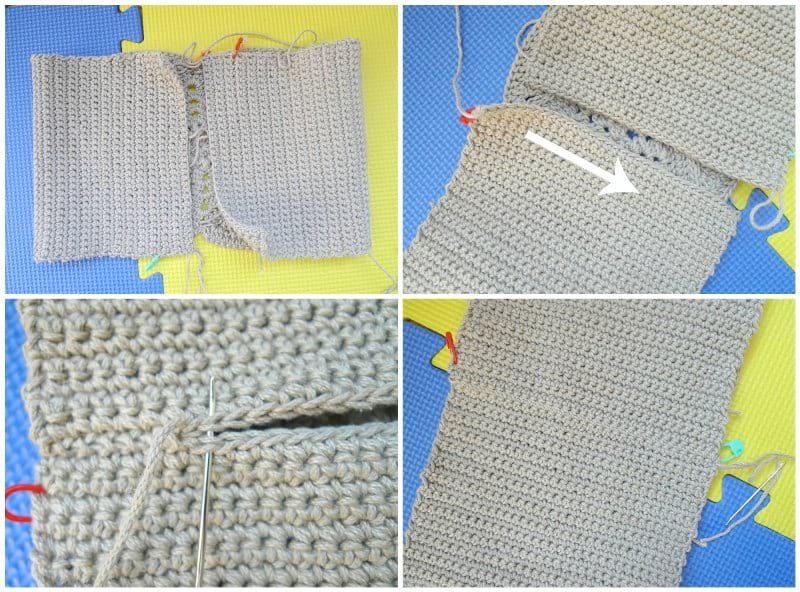
Flip the entire piece inside out, cut the top yarn, and whip stitch the edges together from the top to the bottom. Go through both the front and back loops when whip stitching the edges together. Leave the working yarn on the bottom (do not cut) as this can be used when working the bottom edging later on. A tube has been formed. Flip the tube right side out so that the correct side is facing.
You have now completed the granny square, triangles, and backpack sides! Continue to Part 2 HERE where we will tackle the top and bottom edging, and the sturdy bottom of the backpack!