Note: This is Part 2 of the step-by-step photo tutorial of the Wildrose Backpack. We will crochet the top and bottom edging and the sturdy bottom/base.
- The free crochet pattern with exact written numbers and row/round counts can be found HERE.
- The beautifully-formatted, inexpensive PDF containing the written-out pattern and all the step-by-step pictures (total of 19 pages) can be found on Etsy HERE and on LoveCrochet HERE!
- The convenient Lion Brand Yarn KIT containing all the required 24/7 Cotton Yarn (available in 4 different colors) can be found
- Part 1 of the step-by-step tutorial explaining how to crochet the granny square, triangles, and backpack sides can be found HERE.
- Part 3 of the step-by-step tutorial explaining how to crochet the inner cell phone pocket, strap, and how to make the decorative tassel can be found HERE.
- Join our Wildrose Backpack Crochet-Along on Facebook HERE!
We will now begin crocheting the top edging of the backpack. Pick up stitches along the top edge of the tube, starting at the back seam where we whip stitched the side edges together. Note that we will be working in joined rounds for the edging.
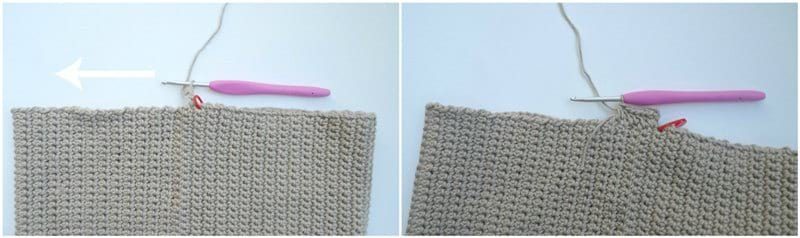
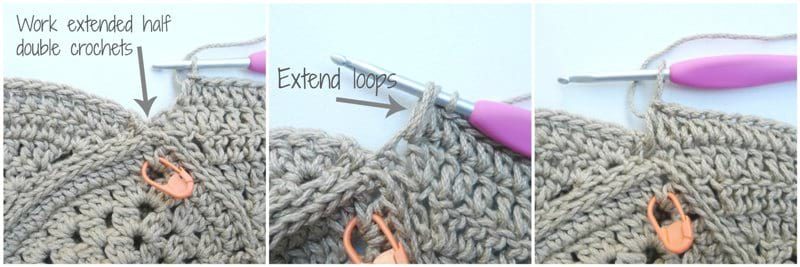
Pick up half double crochets along the top edge. When you approach the dip of the granny square corner between the two triangles, work three extended half double crochets to help even out the height of the round. Pick up 114 half double crochets, trying to space them as evenly as possible.
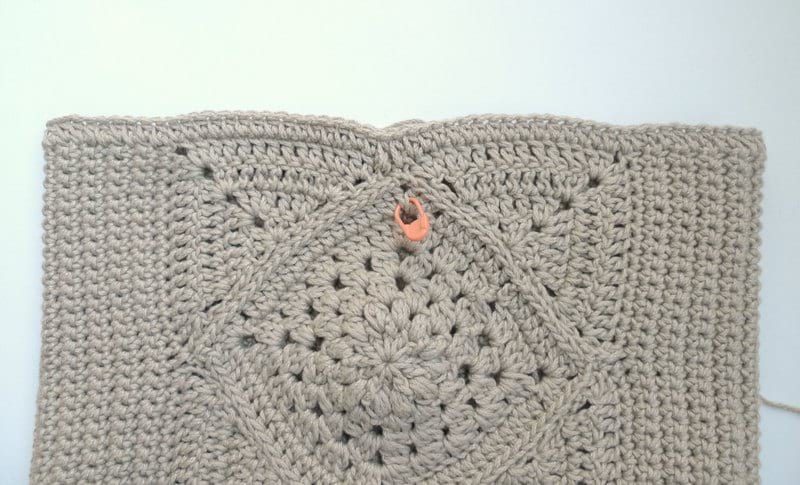
The first round of half double crochets is complete!
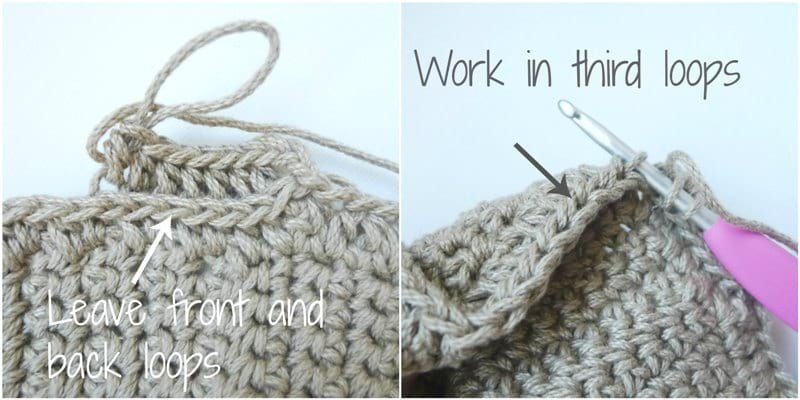
For Round 2, we will be working half double crochets in the third loops. Leave the front and back loops untouched and work in the third loops found behind the front and back loops.
For Round 3, we will be working in the third loops once again. Work 3 half double crochets, chain 1, then skip 1 to create this beautiful pattern.
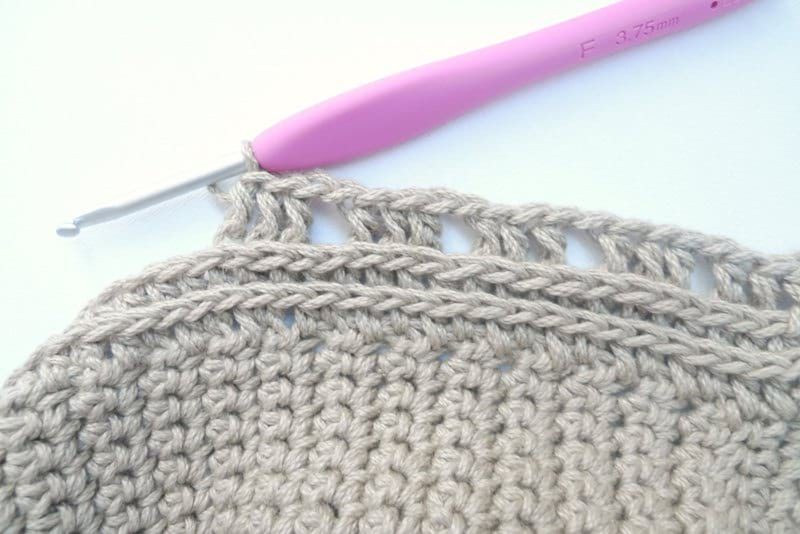
Next, you will crochet some rounds of single crochets, and then work the round with half double crochets interspersed with chain spaces once again (this is Round 9). Round 9 is where we will be weaving our straps in later on. Then, more single crochet rounds will be worked, and at the very end, you switch to a 2.75 mm hook and work reverse single crochets (also known as crab stitch) for the very last round.
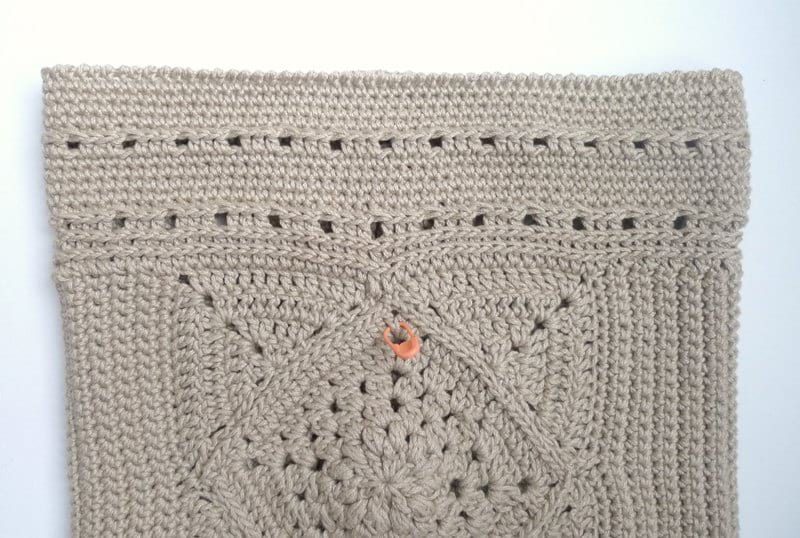
It is now time to work the bottom edging (you can continue using the yarn you left from the backpack side). Flip the backpack upside down and repeat Rounds 1-8 of the top edging (do not work last reverse single crochet round). Do not cut the working yarn at the bottom edging as we will be using this yarn to slip stitch the bottom edging to the bottom of the backpack.
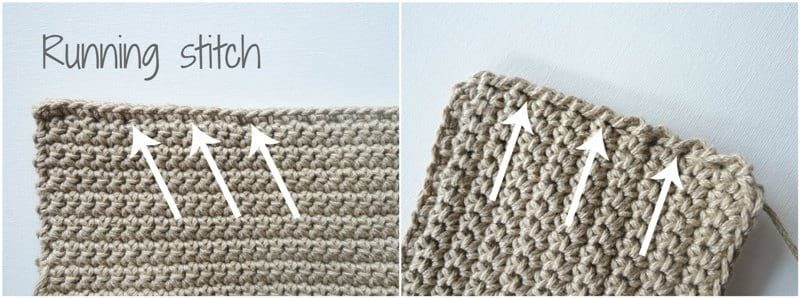
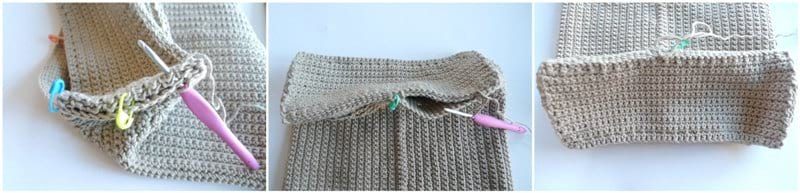
Now it is time to crochet the sturdy bottom of the backpack which is composed of two rectangles worked in turned rows. Seam the two rectangles together along the four sides using the running stitch.
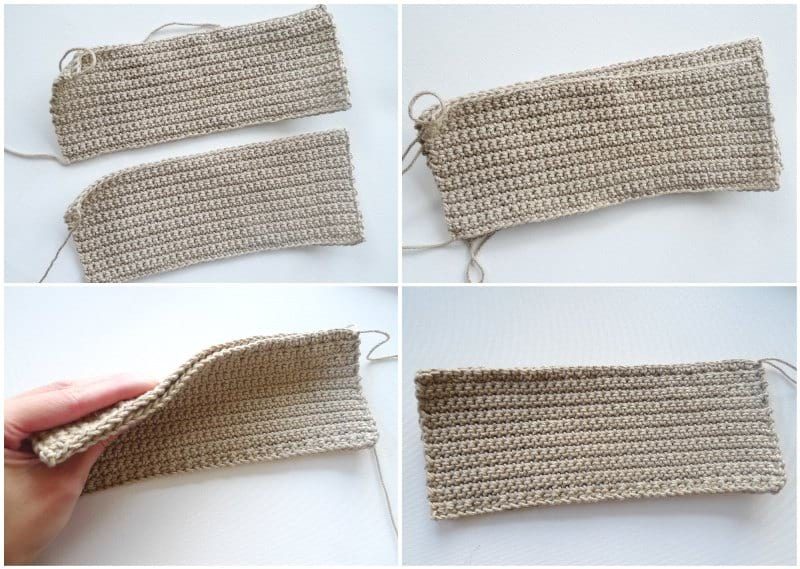
Leave the front and back loops of the long edges untouched (for these sides, work running stitch under first row of stitches).
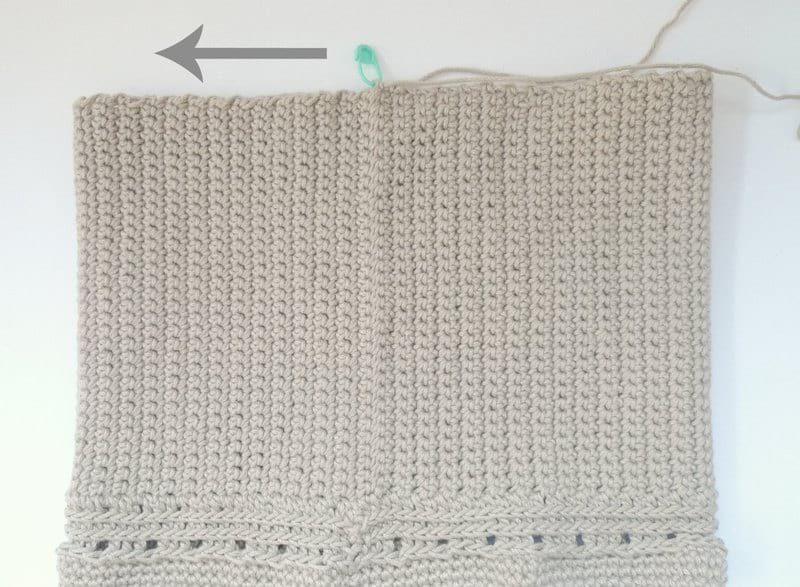
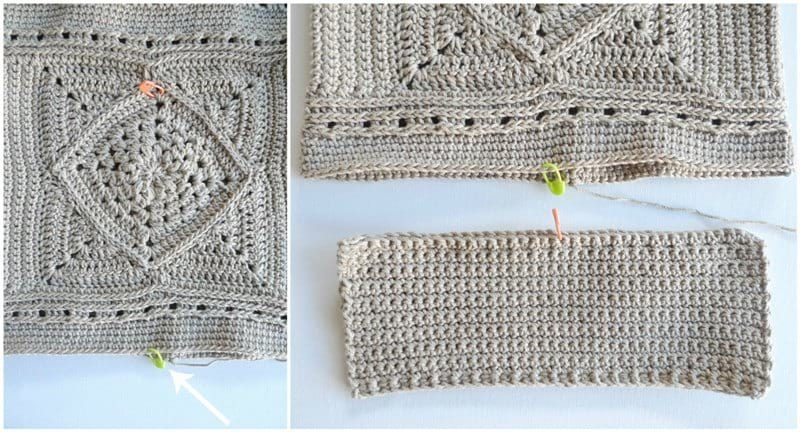
It is now time to attach the bottom of the backpack to the bottom edging. Locate the middle stitch of the tube (use the center of the granny square as a guide) – this middle stitch is indicated by the light green stitch marker and arrow in the picture below. Attach stitch markers to both the front and back centers of the tube. Locate the 21st stitch of the rectangle (both top and bottom as this is the exact center of the rectangle).
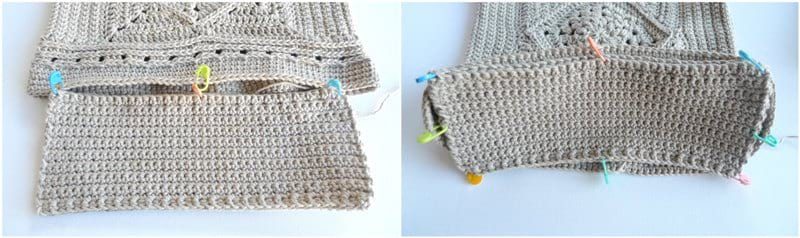
Attach the center of the tube to the center of the rectangle on both sides. Count 20 stitches away from the center stitch marker and attach corners of rectangle to corresponding stitches of the tube (repeat for all 4 corners). Add 2 more stitch markers to attach short edges of rectangles to short edges of backpack.
Using working yarn from bottom edging, begin slip stitching bottom rectangles to bottom edging, matching up stitches along the way. Insert crochet hook through front and back loops of bottom edging and front and back loops of both rectangles, yarn over, and pull through all loops.
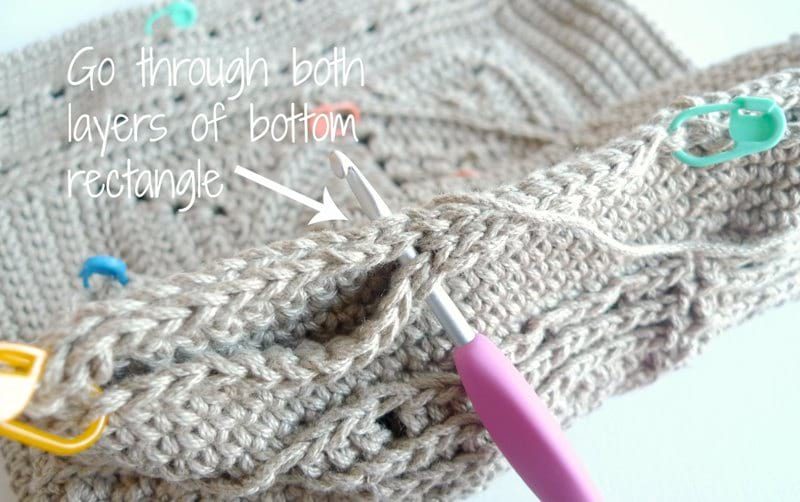
Continue in this manner around until entire perimeter of rectangle has been attached to the tube.
You have now crocheted the top and bottom edging and the sturdy bottom of the backpack! Check out Part 3 HERE where we will crochet the strap, the inner cell phone pocket, and make the decorative tassel!