***You can purchase an INEXPENSIVE AD-FREE PDF of this pattern on Etsy HERE! and on LoveCrafts HERE! This beautifully formatted PDF includes the step-by-step pictures and is a total of 8 pages including the cover page! The free full written-out pattern for this cardigan can be found HERE! You can also find this pattern in my Easy & Modern Knits Pattern Bundle found HERE (includes over 20 of my knit patterns at a discounted price)! The Lion Brand Kit HERE includes the pattern and all the Coboo yarn needed to make this cardigan!
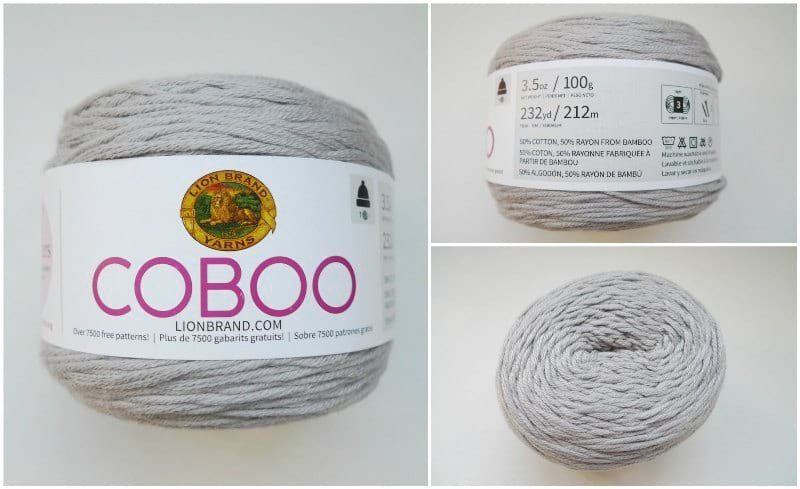
My love of knitted cardigans has led to the Midtown Cardigan and the Downtown Cardigan, designs that many of you have made and loved as well! Cardigans are so versatile as they can be dressed up or down, and they are such a wonderful layering piece. The Midtown Cardigan used a superwash merino wool while the Downtown Cardigan used a bulky acrylic yarn. I wanted to design a longer cardigan that could be worn year-round with a fibre that those in warmer climates or those allergic to wool could use. I knew Coboo was the perfect yarn since it is a soft lightweight level 3 yarn that is made of 50% cotton/50% rayon from bamboo – cotton and bamboo are very breathable and wick moisture away from the skin. I love this classic Silver colour since it matches with everything – Coboo comes in 16 different colours, so you have many options! As a word of caution, Coboo does split easily, but the end result is definitely worth it!
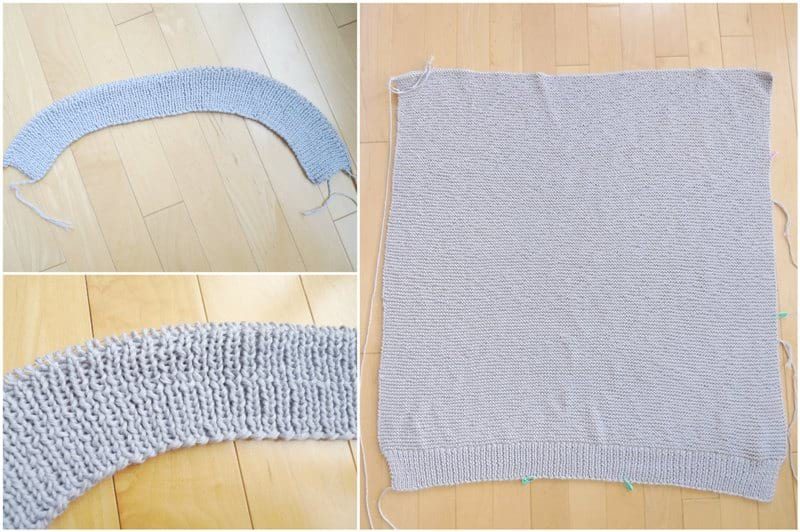
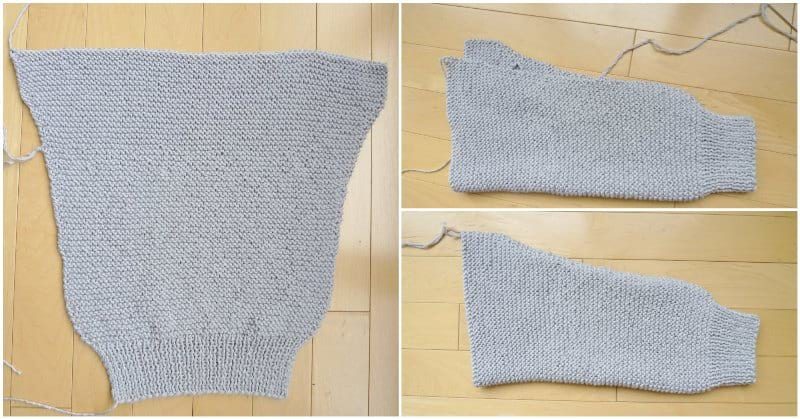
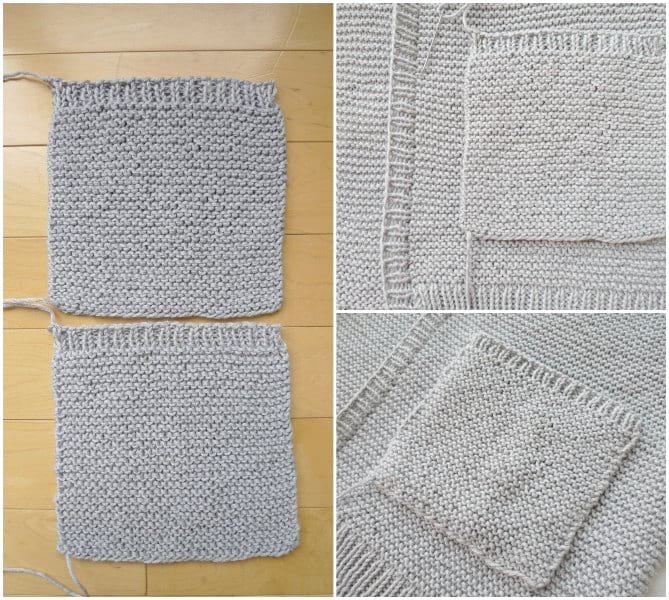
To begin, I knitted the back panel starting with the ribbing and then moving to garter stitch. The garter stitch is so relaxing and requires no focus or concentration. This is the perfect travel project or project to work on while watching television or movies since there is no increasing or decreasing for the panels! If you need a refresher on the garter stitch, check out my detailed “How to Knit the Garter Stitch” tutorial HERE!
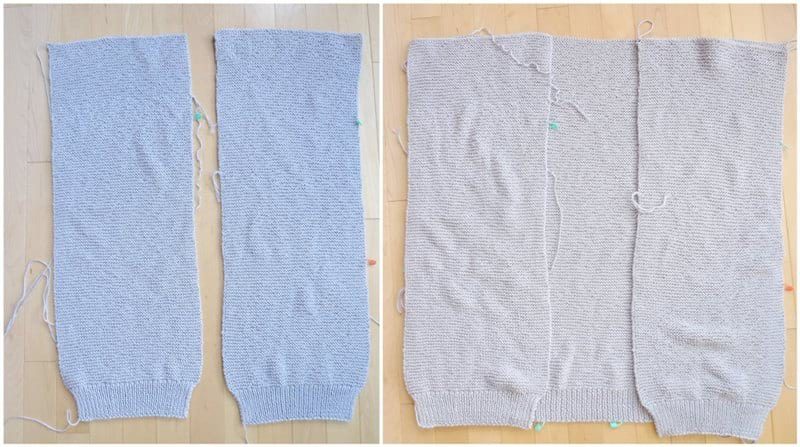
Next, I knitted the two front panels – they go by quite quickly compared to the back panel!
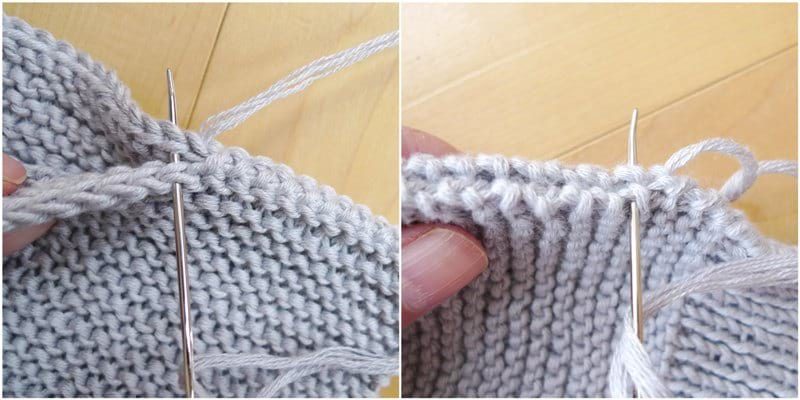
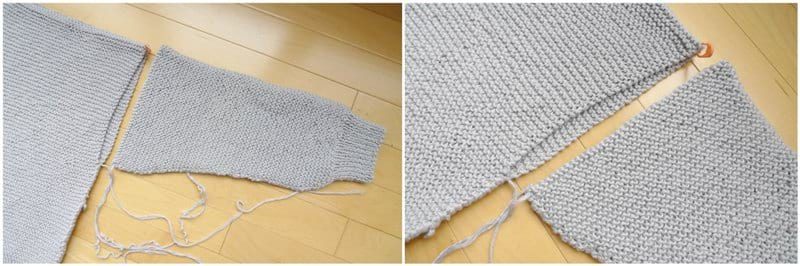
I seamed the front panels to the back panel by whip stitching the tops together, making sure to go through both the front loops and back loops (as shown in the picture on the left). When seaming the sides of the panels together, I liked to whip stitch the garter bumps together. I made sure to leave a gap for the arm hole where the sleeves would be attached later on!
I shaped the sleeves by starting off with a ribbing and then working increase rows throughout. After the sleeve was complete, I whip stitched the edges together. Note that I always whip stitch the wrong sides together as this leaves a cleaner seam on the right side.
Next, I whip stitched the sleeve to the front and back panels where the arm hole was left!
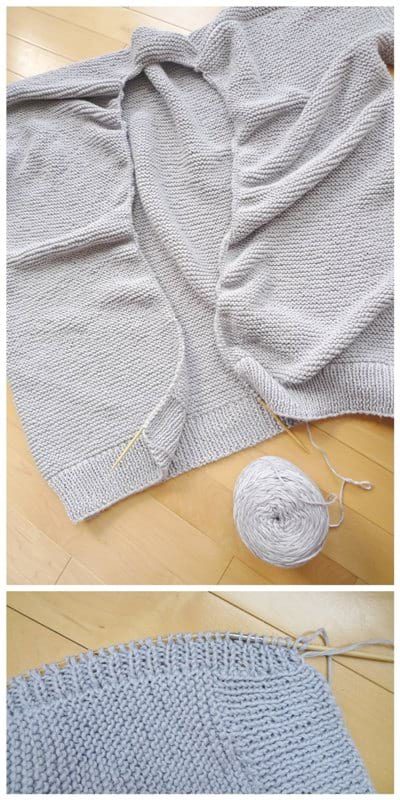
Here is the cardigan with the back panel, front panels, and sleeves all assembled!

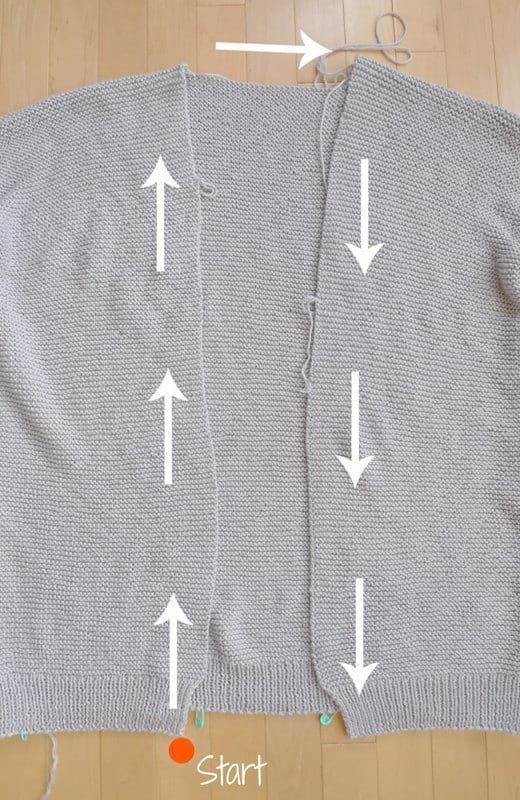
Next, I knitted the collar. To do so, I picked up stitches along the front panel, back panel, and other front panel, starting in the bottom left corner.
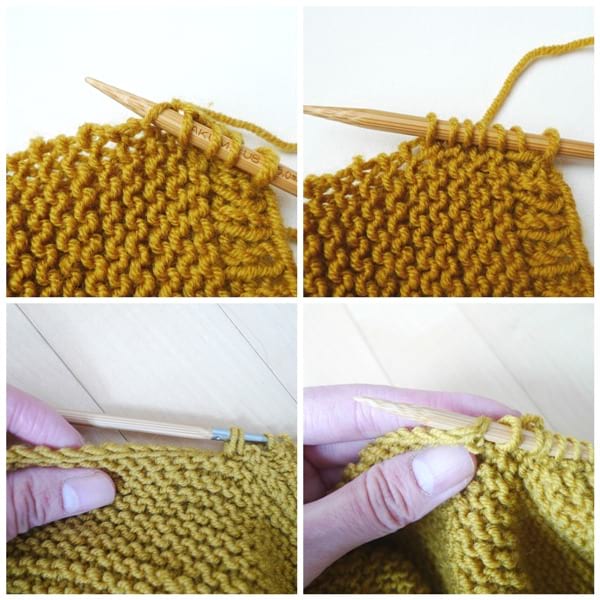
To pick up stitches, insert your needle into the first stitch along the edge. Yarn over, then pull up a loop. You keep inserting your needle into the next stitch, yarning over, and pulling up a loop (pictures taken from the Midtown Cardigan tutorial).
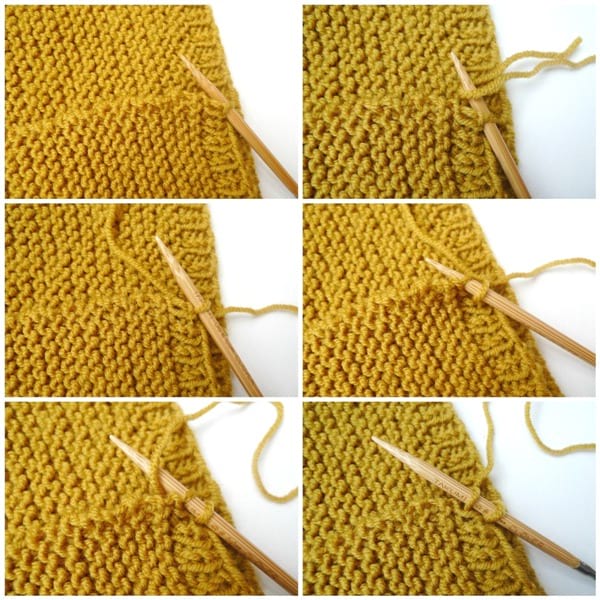
As you approach the garter stitch section, you will pick up stitches BETWEEN THE RIDGES!
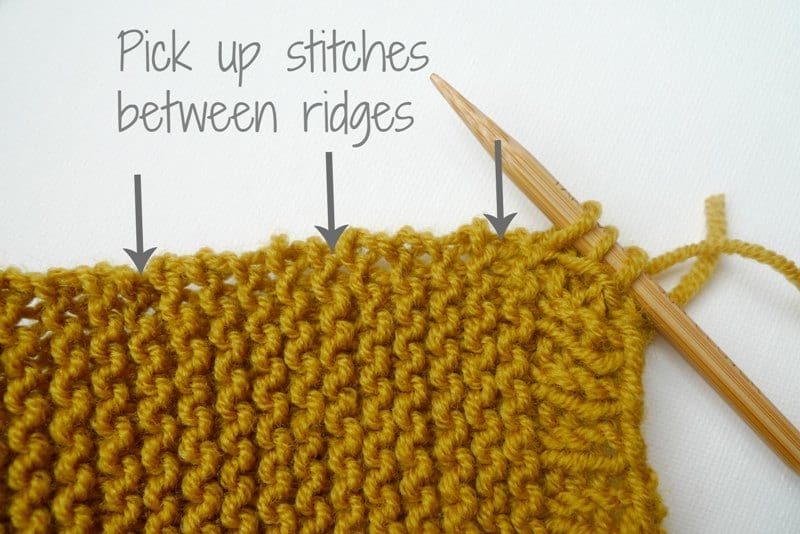
You insert your needle in a stitch between the garter stitch ridges, yarn over, and pull up a loop. When you approach the back panel, you can insert your needle into the front and back loops of a stitch and treat them as one.
All the stitches have been picked up! I worked 5 rows of ribbing and then casted off loosely – if you work too tightly, the front panels will pull upwards.
As a finishing step, I knitted two pockets and sewed them onto the front panels using the running stitch!
I am completely in love with this beautiful and sophisticated cardigan!
The drape is incredible, and it feels so soft against the skin. Out of all the garments that I have ever designed, this one is by far the most versatile since it can be worn year-round and with so many different outfits!
Here are the side and back views – I just love the delicate stitches and how relaxed and comfy this cardigan is!
A styling tip is to roll up and cuff the sleeves for a more casual and laid-back vibe!
You will not want to take off this cardigan since it is so comfy and cozy! As I mentioned, I designed this cardigan to be worn throughout the seasons, and for those who live in warmer climates or who are allergic to wool! The Uptown Cardigan will be a staple in your wardrobe with its timeless, classic, and sophisticated design. It truly is incredible to be able to make a piece like this with your own two hands that looks like it could be store-bought. I know I am itching to make more in different colors!
Be sure to check out the free pattern HERE! Thank you for your support of my knitted cardigans, everyone!
This pattern is an original pattern by Stephanie Lau of All About Ami. Please do not claim this pattern as your own. If you wish to share this pattern, you may link to this pattern but please do not reprint it on your site. You may keep a copy for your own personal use but please DO NOT sell the pattern or distribute it.
You may sell products made from this pattern but please clearly credit the design to me, Stephanie Lau of All About Ami, and provide a link to my blog www.AllAboutAmi.com. Permission is NOT granted for mass production or factory manufacturing of any kind. Thank you for being respectful and for your understanding!