***You can purchase an INEXPENSIVE AD-FREE PDF of this pattern on Etsy HERE and on LoveKnitting HERE! This beautifully formatted PDF includes the step-by-step pictures and is a total of 7 pages including the cover page! It is important that you follow along with my STEP-BY-STEP BLOG POST HERE to see more detailed photos and the step-by-step making of this cardigan! You can also purchase a kit HERE on the Lion Brand Yarn website that includes the pattern and all the Superwash Merino needed to make this cardigan!
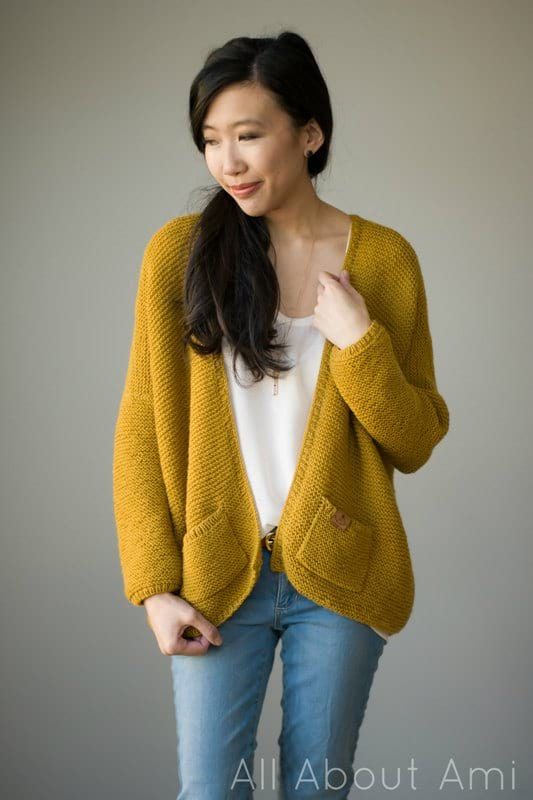
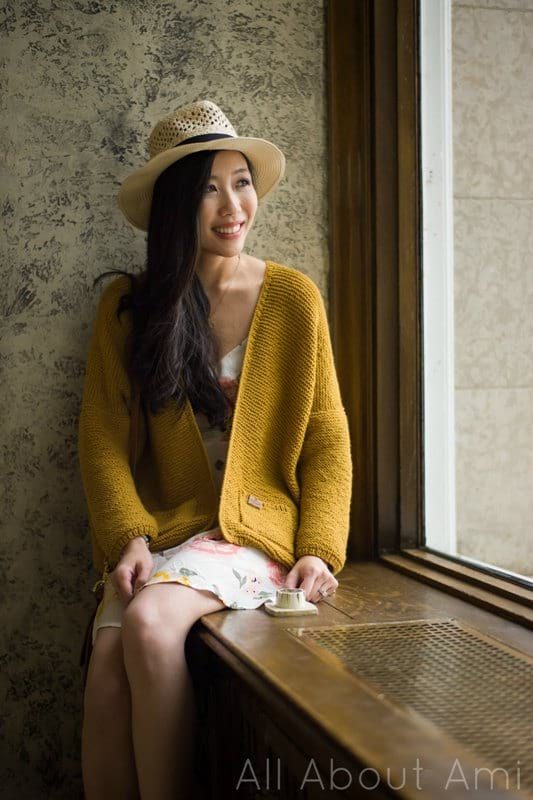
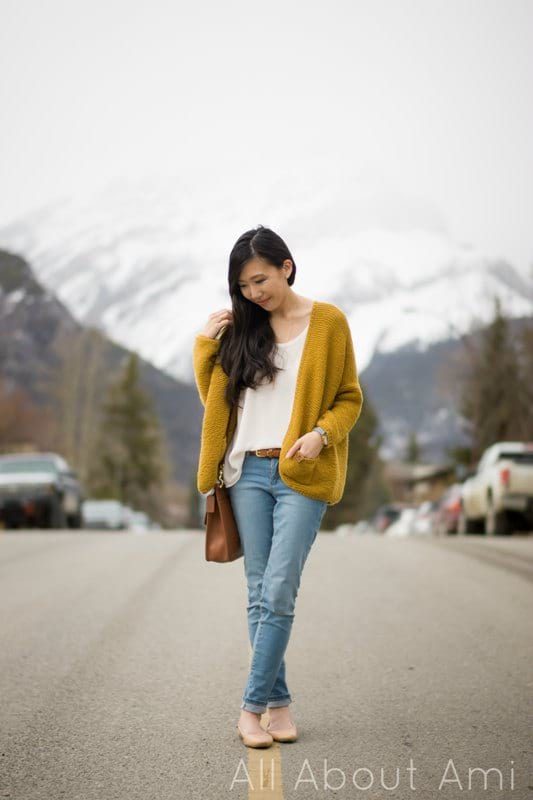
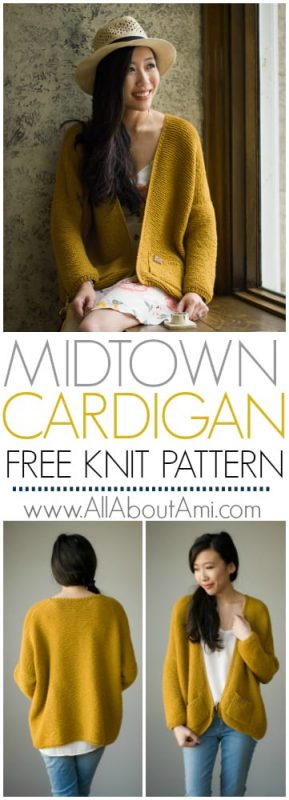
Knit this oversized, relaxed, and slouchy cardigan using the beautiful garter stitch! The Midtown Cardigan is a classic wardrobe staple that can be worn year-round, adding a stylish touch to any outfit. This drop sleeve cardigan is knit with superwash merino wool and is extremely soft, lightweight and easy to care for since it is machine washable. If you have been wanting to add more handmade to your wardrobe, give this beginner-friendly knitted garment a try!
Materials:
- LB Collection Superwash Merino Wool– level 3 DK lightweight yarn (see below for yardage); I used the colour “Dijon” – 26 different colours available HERE; this yarn is not fuzzy (does not pill easily), is cool to the touch and feels incredibly soft and not itchy against the skin; purchase the convenient KIT HERE that contains all the yarn you need!
- If you are looking for a non-wool yarn substitution, I would recommend Vanna’s Style found HERE (100% premium acrylic that is also level 3 DK lightweight – the “Mustard” colour would be similar to “Dijon”)
- Clover Takumi 29″ 5 mm and 5.5 mm circular needles; 48″ cord for picking up stitches along collar
- Yarn needle
- Lock ring stitch markers
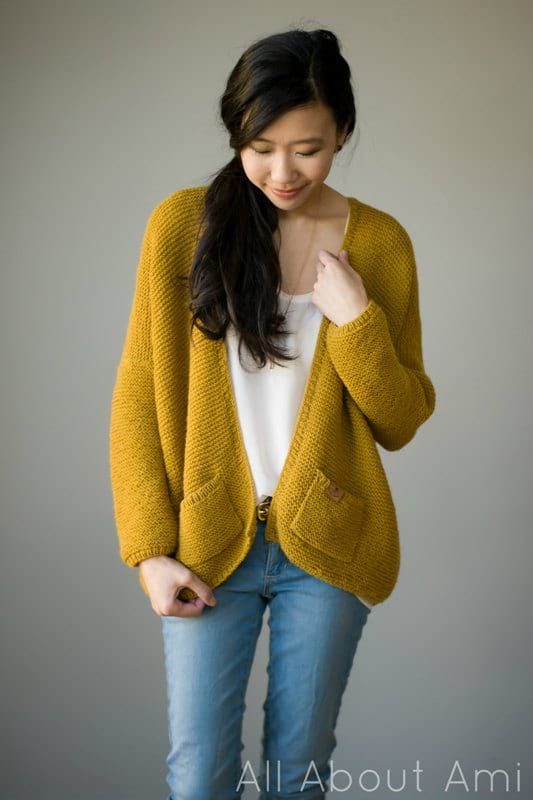
Gauge: 20 stitches and 36 rows = 4 inches
Final Measurements:
- Width across back: 28″/71 cm (S), 30″/76 cm (M), 32″/81 cm (L), 34″/86 cm (XL)
- Length: 22″/56 cm (S), 23″/58 cm (M), 24″/61 cm (L), 25″/64 cm (XL)
- Sleeves: 12.5″/32 cm (stays the same as panels bend down to become part of sleeve)
Approximate Yardage/Number of Skeins Required:
Small: 5 skeins, ~500 g/1530 yards
Medium: 6 skeins, ~565 g/1729 yards
Large: 7 skeins, ~640 g/1958 yards
Extra Large: 8 skeins, ~730 g/2234 yards
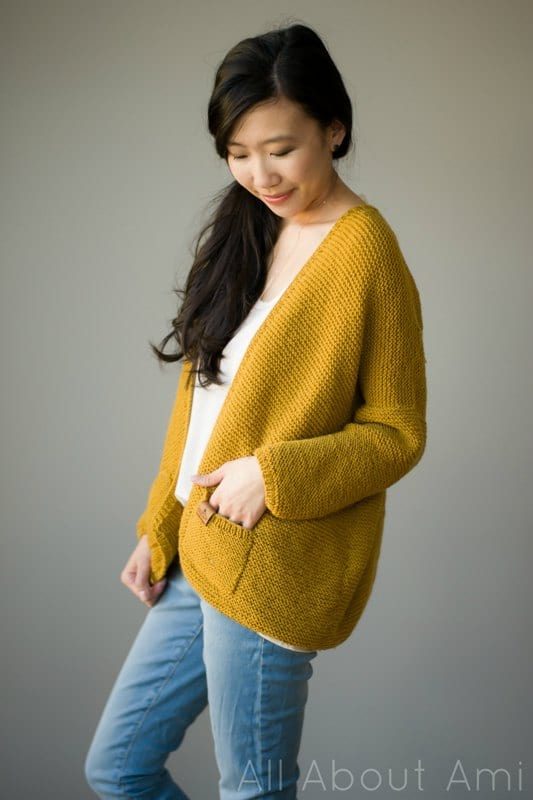
Notes:
- KFB = Knit Front and Back Increase: Step 1: Knit the first stitch on your main needle. Step 2: Before taking the stitch off the main needle, insert the tip of your working needle into the backside of the loop and knit it through the back loop. Then pull the stitch off the needle. See tutorial and video on how to do KFB HERE on New Stitch A Day.
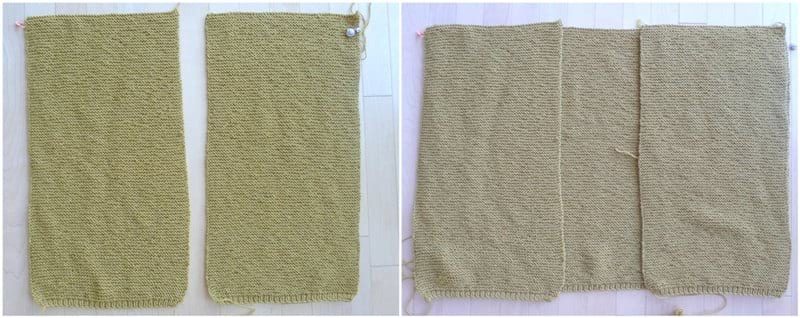
- One back panel and two fronts panels are knitted in garter stitch and seamed together at the top and sides, leaving space for the arm holes. These panels are worked from the bottom up starting with the ribbing. The sleeves are worked from the bottom up (starting from the ribbing as well), whip stitched along the edge, and then attached to the arm holes. Stitches are picked up along the collar and a ribbing pattern is knitted. Two optional pockets are knitted and attached to each front panel.
- To learn or refresh yourself on how to knit the garter stitch, please reference my step-by-step tutorial and video HERE!
- All ribbing is worked with 5 mm needles while the rest is worked with 5.5 mm knitting needles.
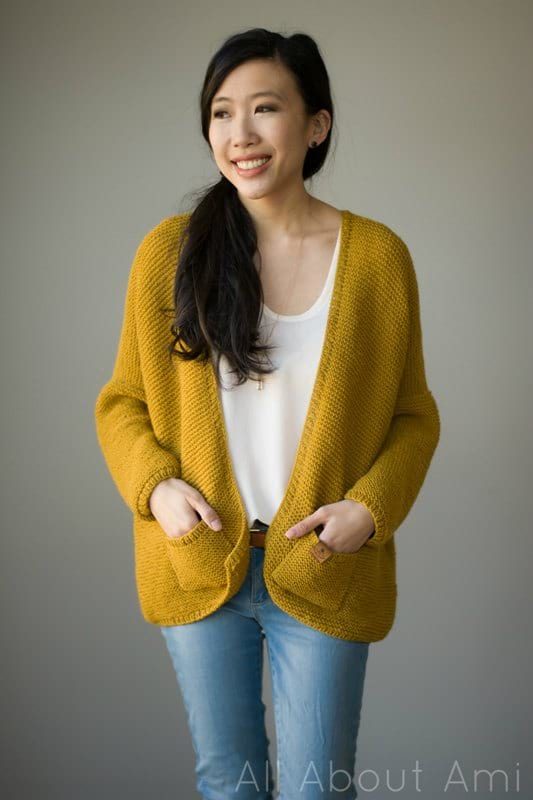
Sizing Notes:
- This drop sleeve cardigan is oversized, relaxed, loose, and slouchy. If you would like your cardigan to be more fitted, move down a size.
- Part of the front and back panels become part of the sleeve as they bend past the shoulders. The sleeve length remains the same for all sizes, but the increased width in the front and back panels help lengthen the sleeves of the larger sizes. The width of the sleeve varies by size.
- If you would like the cardigan to be wider, increase the number of stitches you cast on for the front and back panels. If you would like the cardigan to be narrower, decrease the number of stitches you cast on for the front and back panels.
- If you would like the cardigan to be longer, increase the number of rows for the back and front panels. If you would like the cardigan to be shorter, decrease the number of rows for the back and front panels.
- I am wearing a size Small. I am 5’6 for height reference.
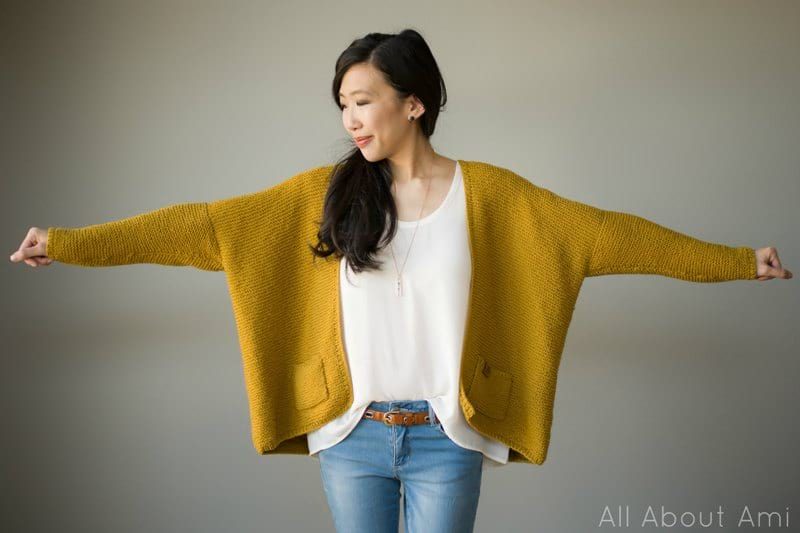
You can view this video below that I put together! You will see me demonstrate how to Knit Front Back (increase), seam the edges of the sleeve together, seam the sleeve to the panel, and pick up stitches along the collar!
PATTERN:
- Back panel
We will begin with the ribbing.
Using 5 mm needles,
Cast on 140 (150, 160, 170) stitches using long tail cast-on.
Row 1: *Knit 1, Purl 1* till end. (140, 150, 160, 170 sts)
Row 2-3: Repeat Row 1
Ribbing is now complete! Switching to 5.5 mm needles,
Row 4-197: Knit all stitches. (140, 150, 160, 170 sts)
Cast off stitches for Size Small.
Row 198 – 206: Knit all stitches.
Cast off stitches for Size Medium.
Row 207 – 215: Knit all stitches.
Cast off stitches for Size Large.
Row 216 – 224: Knit all stitches.
Cast off stitches for Size Extra Large.
- Front panels (make 2)
We will begin with the ribbing.
Using 5 mm needles,
Cast on 56 (60, 66, 70) stitches using long tail cast-on.
Row 1: *Knit 1, Purl 1* till end. (56, 60, 66, 70 sts)
Row 2-3: Repeat Row 1
Ribbing is now complete! Switching to 5.5 mm needles,
Row 4-197: Knit all stitches. (56, 60, 66, 70 sts)
Cast off stitches for Size Small.
Row 198 – 206: Knit all stitches.
Cast off stitches for Size Medium.
Row 207 – 215: Knit all stitches.
Cast off stitches for Size Large.
Row 216 – 224: Knit all stitches.
Cast off stitches for Size Extra Large
- Sleeves (make 2)
We will begin with the ribbing.
Using 5 mm needles,
Cast on 44 (54, 64, 74) stitches using long tail cast-on.
Row 1: *Knit 1, Purl 1* till end. (44, 54, 64, 74 sts)
Row 2-3: Repeat Row 1
Ribbing is now complete! Switching to 5.5 mm needles,
Row 4-6: Knit all stitches. (44, 54, 64, 74)
R7: K1, KFB, K40 (50, 60, 70), KFB, K1. (46, 56, 66, 76)
R8-10: Knit all stitches (46, 56, 66, 76)
R11: K1, KFB, K42 (52, 62, 72), KFB, K1. (48, 58, 68, 78)
R12-65: Knit all stitches (48, 58, 68, 78)
R66: K1, KFB, K44 (54, 64, 74) KFB, K1. (50, 60, 70, 80)
R67-69: Knit all stitches. (50, 60, 70, 80)
R70: K1, KFB, K46 (56, 66, 76), KFB, K1. (52, 62, 72, 82)
R71-73: Knit all stitches (52, 62, 72, 82)
R74: K1, KFB, K48 (58, 68, 78), KFB, K1. (54, 64, 74, 84)
R75-77: Knit all stitches. (54, 64, 74, 84)
R78: K1, KFB, K50 (60, 70, 80), KFB, K1 (56, 66, 76, 86)
R79-81: Knit all stitches (56, 66, 76, 86)
R82: K1, KFB, K52 (62, 72, 82), KFB, K1. (58, 68, 78, 88)
R83-85: Knit all stitches (58, 68, 78, 88)
R86: K1, KFB, K54 (64, 74, 84), KFB, K1. (60, 70, 80, 90)
R87-89: Knit all stitches (60, 70, 80, 90)
R90: K1, KFB, K56 (66, 76, 86), KFB, K1. (62, 72, 82, 92)
R91-93: Knit all stitches. (62, 72, 82, 92)
R94: K1, KFB, K58 (68, 78, 88), KFB, K1. (64, 74, 84, 94)
R95-97: Knit all stitches. (64, 74, 84, 94)
R98: K1, KFB, K60 (70, 80, 90), KFB, K1. (66, 76, 86, 96)
R99-101: Knit all stitches. (66, 76, 86, 96)
R102: K1, KFB, K62 (72, 82, 92), KFB, K1. (68, 78, 88, 98)
R103-105: Knit all stitches. (68, 78, 88, 98)
R106: K1, KFB, K64 (74, 84, 94), KFB, K1. (70, 80, 90, 100)
R107-109: Knit all stitches. (70, 80, 90, 100)
R110: K1, KFB, K66 (76, 86, 96), KFB, K1. (72, 82, 92, 102)
R111-113: Knit all stitches (72, 82, 92, 102)
Cast off stitches.
Assembly:
- When seaming pieces together, always join wrong sides together to make the seams less visible, then flip inside out at the end.
- Fold each sleeve in half lengthwise and whip stitch sides together.
- Whip stitch tops of front panels to back panel. Whip stitch sides of front panels to back panel, marking sure to leave an arm hole. Place sleeve towards top of panels and see how much space is needed for arm holes. For size small, seam approximately 15″ along sides and leave an arm hole of 7″ for arm hole where sleeve will be attached.
- Whip stitch top of sleeve to arm hole.
- See HERE for more detailed assembly photos!
Collar:
Using 5 mm needles,
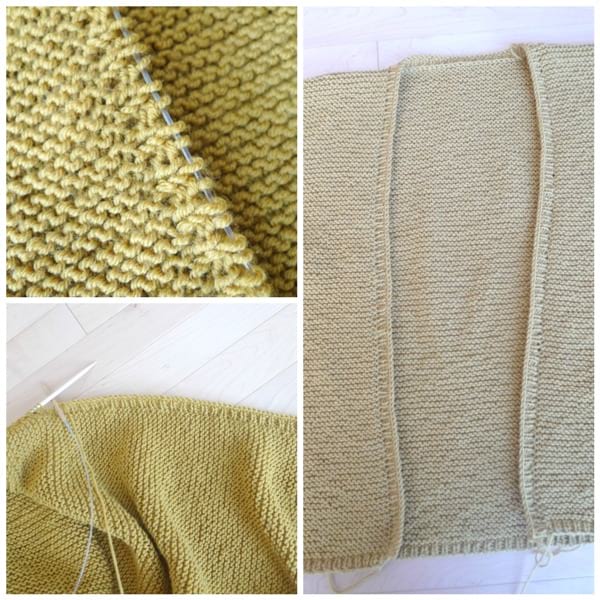
Starting from bottom left corner, pick up stitches along front panel, across the back panel, and down the front panel. When picking up stitches along vertical edge of garter stitch, pick up one stitch between each ridge (see this video for demonstration). For size Small, I had approximately 98 stitches up one side (which is about 197 rows of front panels divided by 2), 32 stitches in the corners and along the back panel, and 98 stitches down the other front panel. For size Medium, you would pick up approximately 101 sts along each panel, Large = 104 sts, Extra Large = 107 sts. Number of stitches in the corners and along back panel would remain approximately the same as size small (32 sts).
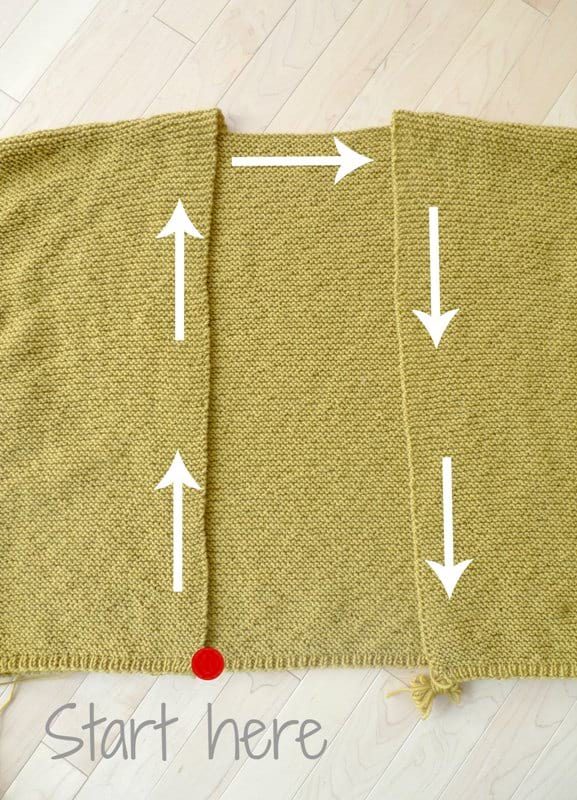
To pick up stitches, insert your needle into the first stitch along the edge. Yarn over, then pull up a loop. You keep inserting your needle into the next stitch, yarning over, and pulling up a loop.
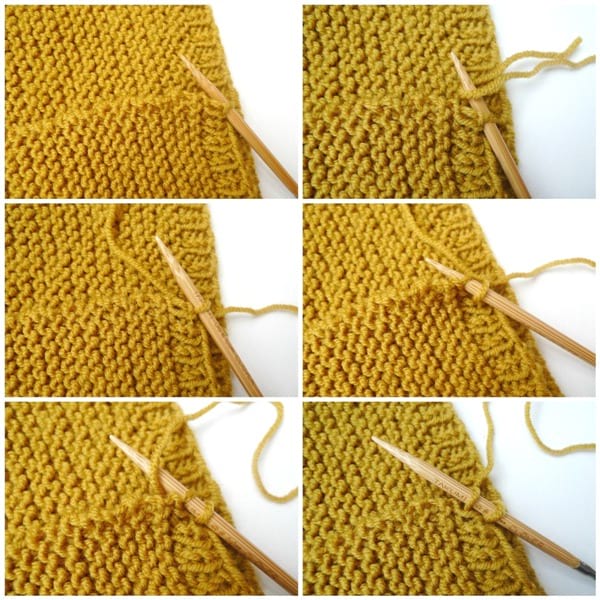
As you approach the garter stitch section, you will pick up stitches BETWEEN THE RIDGES!
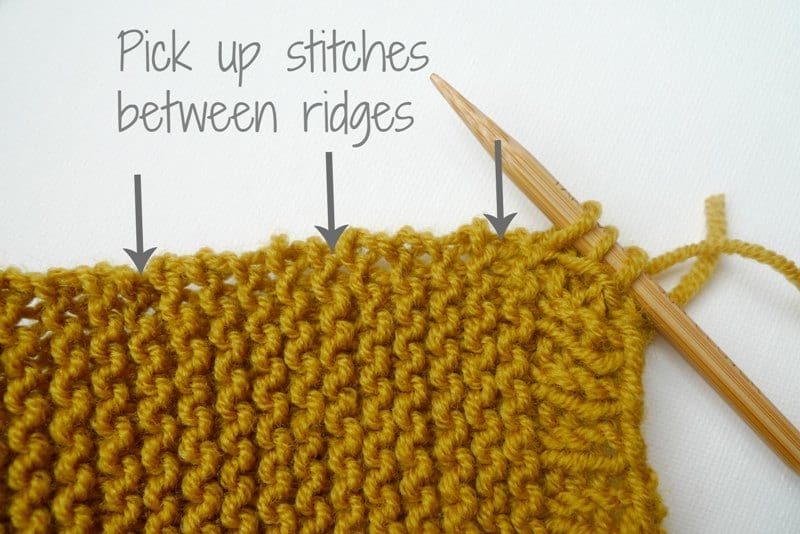
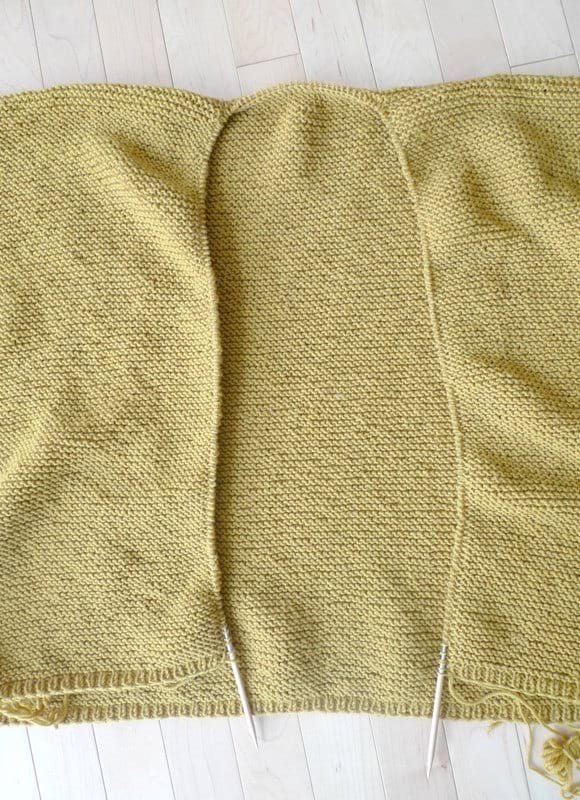
Row 1-3: *K1, P1* across.
Cast off loosely.
Pockets (make 2) – optional:
Using 5.5 mm needles,
Cast on 24 stitches.
R1-33: Knit across. (24)
Switching to 5 mm needles for the ribbing,
R34-37: *K1, P1* across. (24)
Cast off.
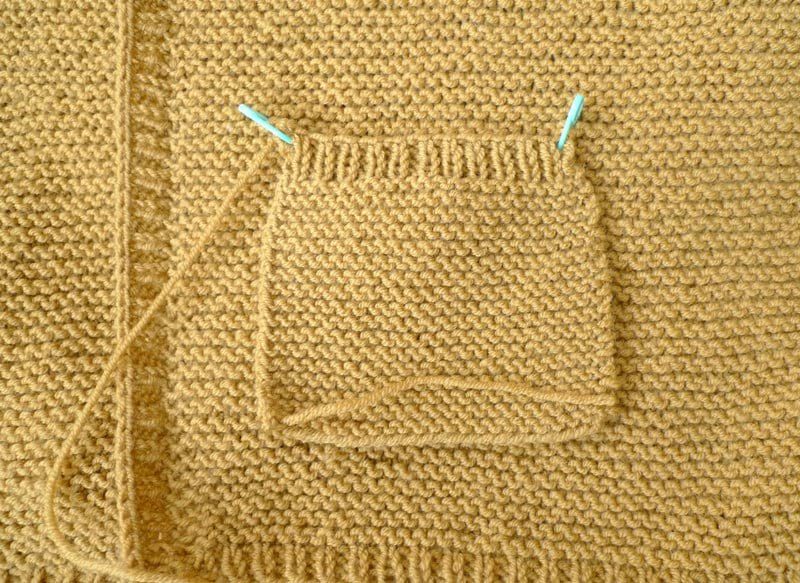
Small pockets measure: 4.5″ in width, 4″ in height
If you wish to increase the size of the pockets for the larger sizes, try adding increments of 4 stitches to increase the width (e.g. 28, 32, 36) and adding increments of 4 rows for the height (e.g. 41, 45, 49).
Place one pocket on each front panel and whip stitch sides and bottom into place. For my size small, I placed the pocket approximately 5 cm from the side edge and 4.5 cm from the bottom edge.
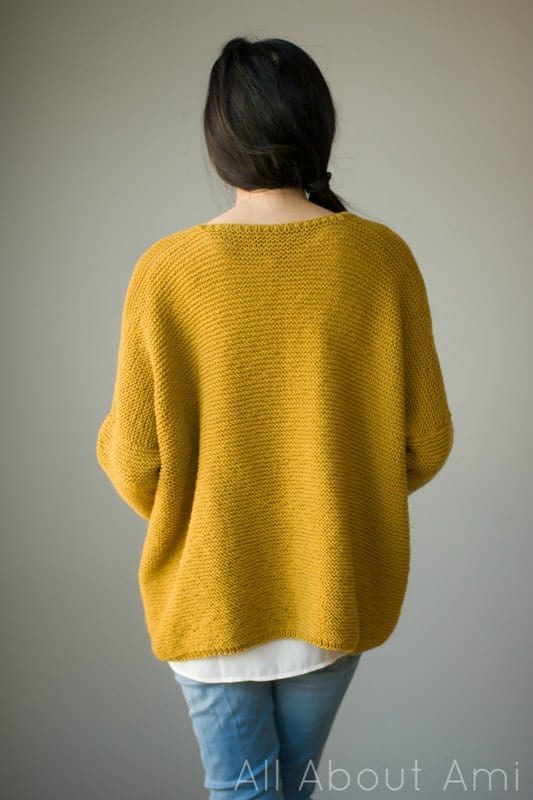
Enjoy wearing your stylish cardigans on all your adventures throughout the seasons! This cardigan looks so cute styled casually with jeans or over a pretty floral dress!
Don’t forget to tag me on social media to show me your work! You can also subscribe to my newsletter if you want to keep up to date with all my latest crochet and knit projects HERE!
{This post is sponsored by Lion Brand Yarn! I’ve loved working with their yarn throughout the years and I’m thrilled that I get to collaborate with them every month!}
This pattern is an original pattern by Stephanie Lau of All About Ami. Please do not claim this pattern as your own. If you wish to share this pattern, you may link to this pattern but please do not reprint it on your site. You may keep a copy for your own personal use but please DO NOT sell the pattern or distribute it.
You may sell products made from this pattern but please clearly credit the design to me, Stephanie Lau of All About Ami, and provide a link to my blog www.AllAboutAmi.com. Permission is NOT granted for mass production or factory manufacturing of any kind. Thank you for being respectful and for your understanding!


