I have always loved stylish and versatile capes that you can throw on over any outfit! They provide an extra layer of warmth while adding such an effortlessly chic vibe with the way they drape and hang on your body. I have designed the crochet Granite Cape (my first original garment design) in the past, but I have always wanted to knit a cape. When I was first introduced to Lion Brand Yarn’s new Truboo yarn (I got to see a preview of this new yarn at the 2019 Blogger Event), I was absolutely smitten and stunned by its soft feel, gorgeous sheen, and lovely shades. I immediately knew that I wanted to use it to make a garment as it is a lightweight level 3 yarn that is made of 100% rayon from bamboo. It is similar to Coboo but has more of a luster and sheen to it. Sometimes it can be hard judging what a colour looks like on-line, but I was completely taken aback when I saw the “Tan” shade in real life – it is such a pretty rose gold shade that has pink tones to it. If you have been following me for a while, you may know that pink is my favourite colour, and sometimes it can be hard finding nice shades of pink. I must say that this “Tan” colour is one of my favourite yarn shades of all time!
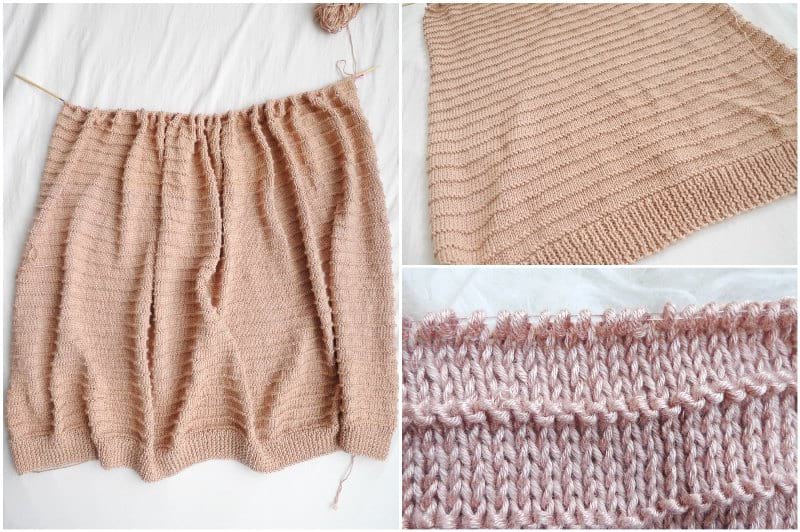
As soon as I started working with Truboo, I knew how beautiful this garment would be. It feels soft on your hands when working with it, and the fabric produced has such a lovely drape. I saw a garment at a retail store last summer that had stockinette stitch rows interspersed with garter stitch rows – I knew I wanted to use this pattern for a future design, and I thought it would be perfect with this yarn! The garter ridges provide such a lovely texture and help segment the panels into chunks. Throughout this pattern, I classify each garter ridge + stockinette portion as a “Chunk” (e.g. Chunk #1, Chunk #2, etc). I find that segmenting the panels into these chunks makes it easier to tackle and less daunting! Each “chunk” is comprised of 6 rows. I reminded myself that after seeing 5 V’s for the stockinette portion, it was time to knit the wrong side row (usually we purl the wrong side row for stockinette) to create the garter ridge!
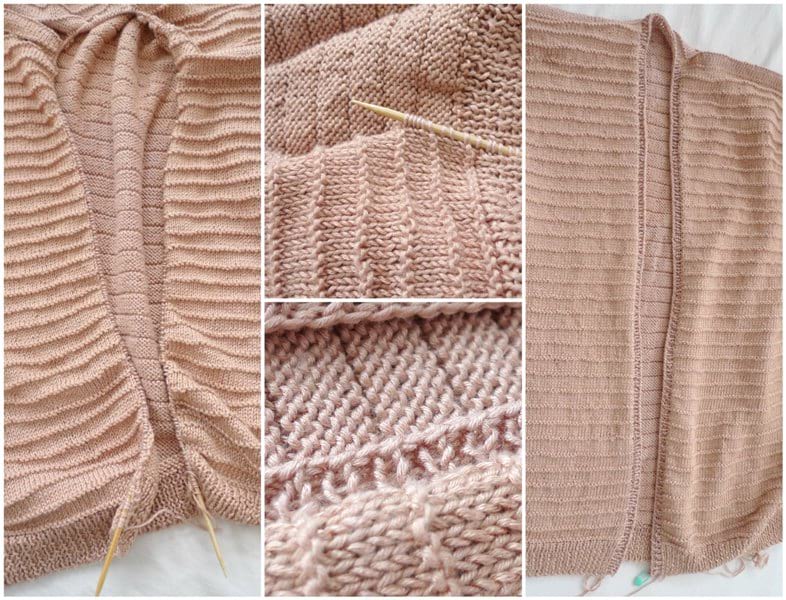
Rather than just creating rectangles for this cape, I wanted the shoulders to taper so that we would not have sharp angular edges/corners for the arm openings. Thus, after building up some of the height of the back panel, I started working decreases on the left and right edges. Note that on the left side of the back panel (and the left front panel), I used the K2tog decrease since it is right leaning (see video demo HERE). For the right side of the back panel (and the right front panel), I used the SSK (slip slip knit) decrease since it is left leaning (see video demo HERE). I stacked 3 decreases closely together on each side to get the shaping/angle I wanted as well as some ruching, which adds a nice touch. If you want, you can add stitch markers to indicate how many stitches you will be decreasing by.
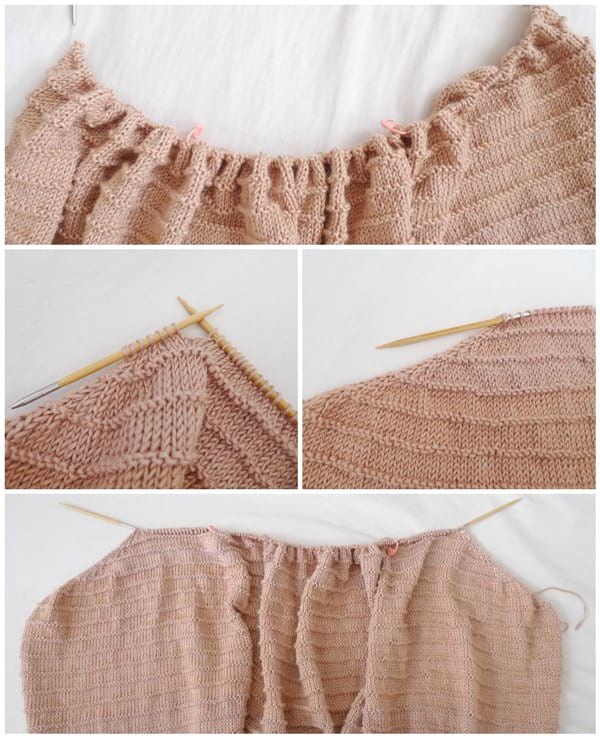
Below you can see the completed back panel with the decreases on the left and right side. The front panels mirror the same decreases. When I was done knitting all the panels, I placed the front panels onto the back panel, being carefully to line up the decrease edges correctly (there should be a 20 stitch gap in the middle of the back panel).
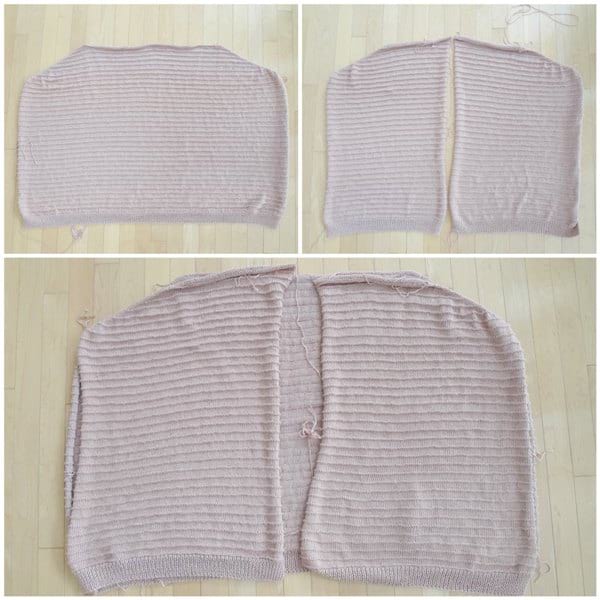
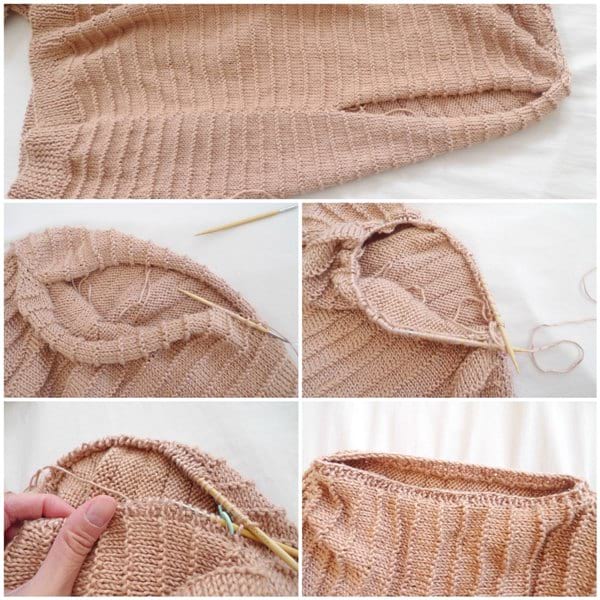
You can use stitch markers to help hold the pieces in place if desired. I whip stitched the tops of the front panels to the back panels, going through both front and back loops of the flat section at the top.Whenever using the whip stitch, I seamed the wrong sides together so that the seam was less visible on the right side.
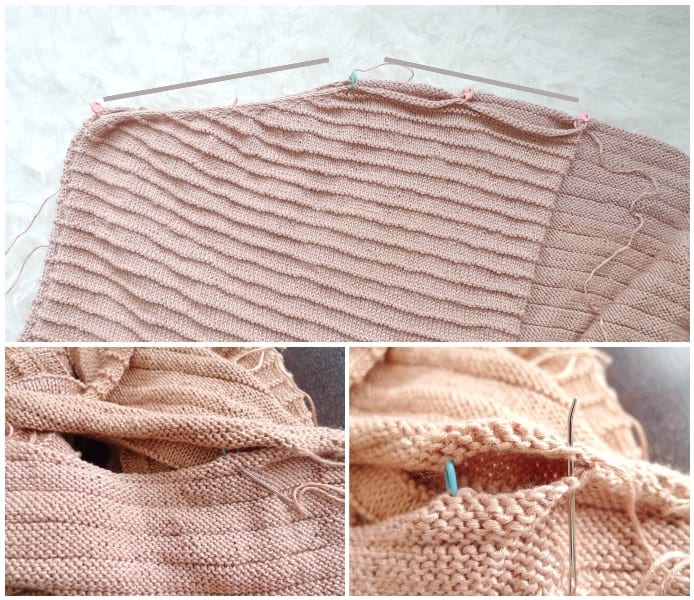
I made sure to line up the garter ridges for the slanted decrease section to make it easier to attach.
I used the vertical invisible seaming technique to attach the sides of the front panels to the back panel, making sure to leave an arm hole of my desired size (I left a 10″ gap). Once again, I used the garter ridges as a reference point when seaming the panels together to ensure they were lining up correctly.
Next it was time to pick up stitches to knit the ribbed collar! Starting in the bottom left corner, I picked up 3 out of every 4 stitches along the front panel, across the back panel, and down the other front panel. To pick up stitches using the working yarn, I inserted my needle into the first stitch along the edge. I then yarned over and pulled up a loop. I kept inserting my needle into the next stitch, yarning over, and pulling up a loop.

I knitted 5 rows of ribbing to create a dainty and delicate collar!
Lastly, I picked up stitches around the arm opening to create a similar delicate ribbing! Details like this add such a lovely polished touch.
I was so excited to try on my finished Dawn Cape after all the panels were attached and the ribbed details were added! I am in love with how soft this garment is and how it drapes and hangs so beautifully. This colour is stunning and unlike any I have worked with before. I hope you will enjoy knitting your own Dawn Capes too – the free pattern with all the detailed numbers and stitch counts can be found HERE! Thank you for following along with this step-by-step blog post!