***You can purchase an INEXPENSIVE AD-FREE PDF of this pattern on Etsy HERE and on LoveCrochet HERE! This beautifully formatted PDF includes the step-by-step pictures and tassel tutorial, and is a total of 4 pages including the cover page!
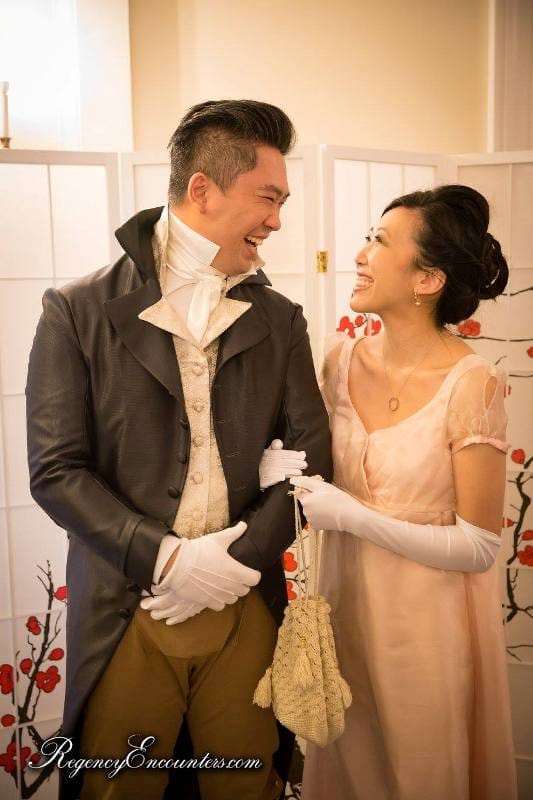
If you are a big Pride and Prejudice or Jane Austen fan AND you love to crochet, I have got the perfect project for you! Pride and Prejudice was always one of my favourite books and movies growing up, and it was an absolute dream come true being able to attend the Pride and Prejudice Ball hosted by Regency Encounters! I blogged about my whole experience HERE including our costumes, dinner, and English country dances and how amazing it was being transported to another time period! When we were putting our ensembles together, I knew I wanted to try crocheting my own reticule, the lady’s handbag of that time period characterized by a drawstring and tassels. Many of you showed interest in the design and thankfully I took step-by-step photos so I can share the process and pattern with you!
![]()
I used Lion Brand Yarn’s Cotton Bamboo in “Magnolia”, the same yarn I used for my Boho Crochet Wrap. The colour itself has an elegant and antique look to it, and the yarn is very soft with a beautiful drape. I started off by crocheting in continuous unjoined rounds to build up the base with my Clover Amour 3.5 mm hook!
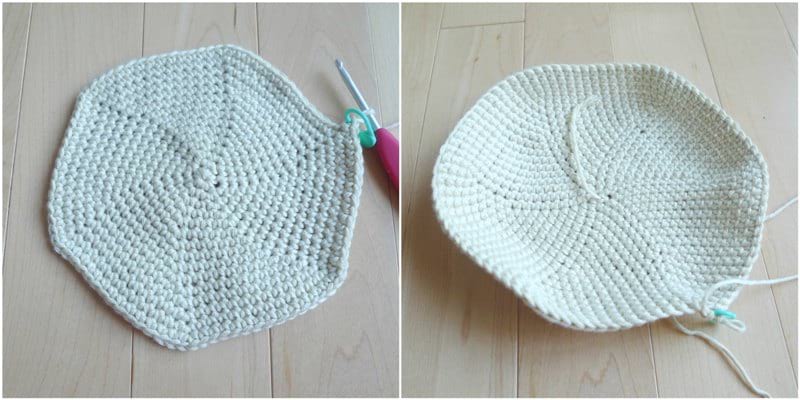
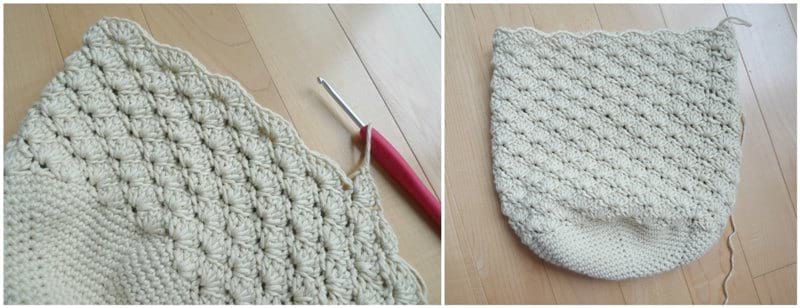
After reaching 90 stitches, I began working in joined shell stitch rounds! I learned how to do the solid shell stitch through Tamara of Moogly’s fabulous tutorial and video HERE! I love how the shell stitches are stacked upon one another, so the shell stitches are crocheted in the “dips” or valleys between the shell stitches of the previous round.
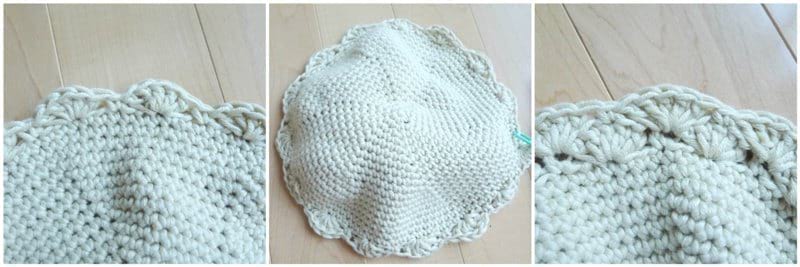
Working this shell stitch pattern is very addictive, and once you get the hang of it, you will be zipping right along! I adore the romantic and beautiful effect of the stacked shell stitches! Once I was happy with the height of the bag, the crocheting part was complete!
To create the drawstring, we found this Hemp Rope Cording by Bead Landing from Michaels (similar on Amazon HERE). The colour matched perfectly and we liked its sturdy feel. Since we would be weaving this rope through the reticule, we wrapped a piece of tape around the end to make it easier and to prevent fraying!
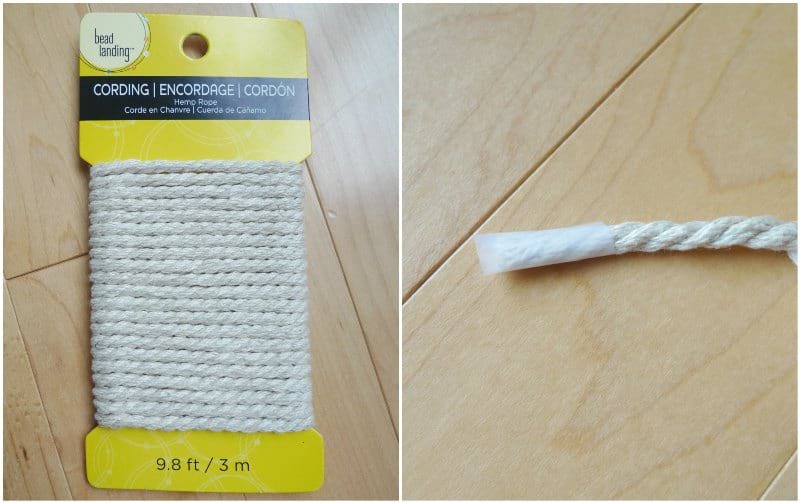
At the base of each shell stitch is a small hole. I weaved my rope in and out of the holes created by the shell stitches of the second last round (rope runs along third round from the top). Once I weaved the rope around the entire circumference of the bag, I cut off the rope and tied a knot. To create the other strap, I simply inserted the rope on the opposite and poked the other end immediately back out. Thus, this second strap does not go around the entire circumference of the bag (I tried it, but I found it too thick, and the bag did not close as well).
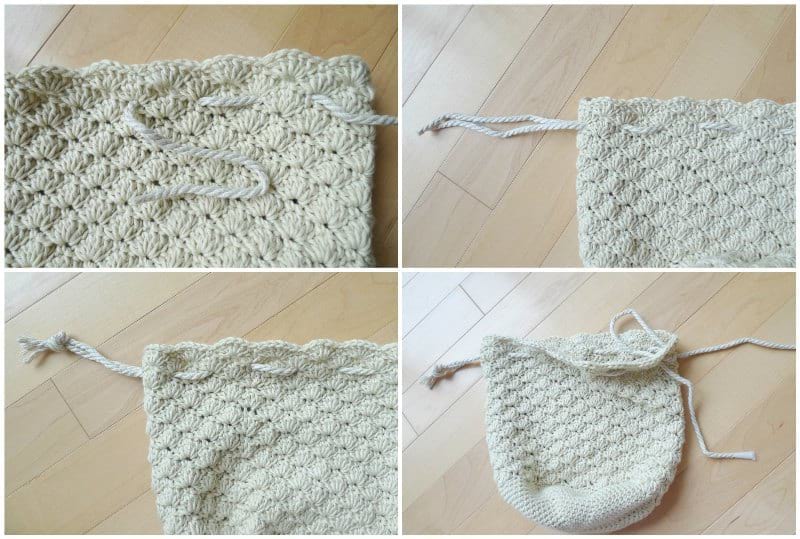
I pulled the drawstring shut and ensured the second strap was the same length as the first strap. Then we cut off the rope and tied a knot!

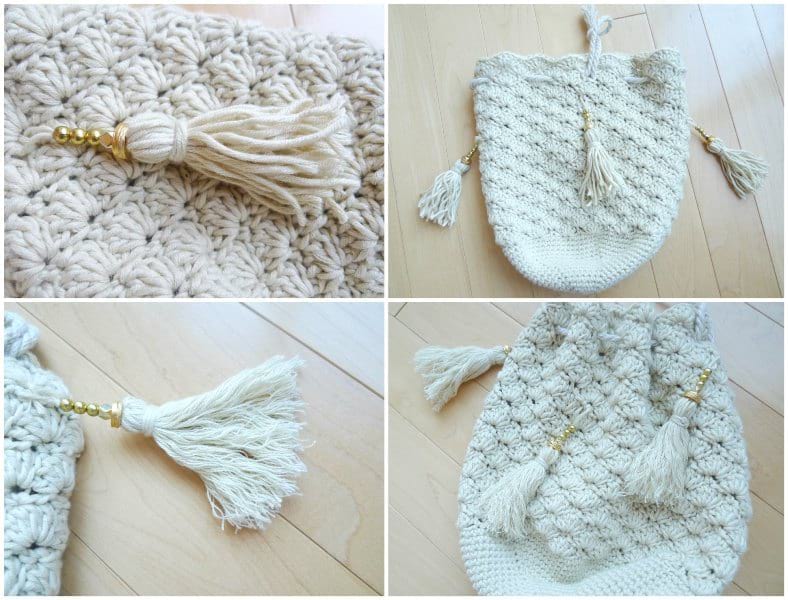
We decided to add four tassels for an elegant and decorative effect! See how to create tassels in my tutorial HERE. We added some gold hardware to this reticule by stringing some gold beads on the string ontop of the tassel! We tied the tassels around the bag so that they were equidistant, with two being higher than the other two. This way, when the bag was pulled shut, it created a neat effect with the tassels at varying heights. We pulled the strands of the tassels apart to give them a fuller look, just as we did with the fringe of the Boho Crochet Wrap HERE. You can use a comb to separate the strands as well!
I absolutely adore how my romantic Regency Reticule turned out, and I am delighted that I can share the formal crochet pattern with you all!
![]()
****************
Here is the free pattern for my “Crochet Regency Reticule”!
![]()
***You can purchase an INEXPENSIVE AD-FREE PDF of this pattern on Etsy HERE and on Craftsy HERE! This beautifully formatted PDF includes the step-by-step pictures and tassel tutorial, and is a total of 4 pages including the cover page!
Materials:
- 3.5 mm Clover Amour hook
- Light worsted weight cotton yarn (I used LB Collection Cotton Bamboo Yarn in “Magnolia” by Lion Brand Yarn, 1 skein); Lion Brand’s 24/7 Cotton in “Ecru” would be another great option!
- Hemp Rope Cord
- Gold beads (optional)
Finished Dimensions: 9”/23 cm long 17”/43 cm in circumference
Note: See Moogly’s blog post and accompanying video HERE to see how to work the solid shell stitch.
We will begin by crocheting the base of the reticule. Work in unjoined rounds.
Round 1: 6 sc in Magic Ring. (6 sts)
R2: *Inc*, rep 6 times. (12 sts)
R3: *Sc 1, Inc*, rep 6 times. (18 sts)
R4: *Sc 2, Inc*, rep 6 times. (24 sts)
R5: *Sc 3, Inc*, rep 6 times. (30 sts)
R6: *Sc 4, Inc*, rep 6 times. (36 sts)
R7: *Sc 5, Inc*, rep 6 times. (42 sts)
R8: *Sc 6, Inc*, rep 6 times. (48 sts)
R9: *Sc 7, Inc*, rep 6 times. (54 sts)
R10: *Sc 8, Inc*, rep 6 times. (60 sts)
R11: *Sc 9, Inc*, rep 6 times. (66 sts)
R12: *Sc 10, Inc*, rep 6 times. (72 sts)
R13: *Sc 11, Inc*, rep 6 times (78 sts)
R14: *Sc 12, Inc*, rep 6 times. (84 sts)
R15: *Sc 13, Inc*, rep 6 times. (90 sts)
We will now begin the solid shell stitch rounds. Work in joined rounds.
R16: Ch 1, sc in the 1st st. *Skip 2 sts, work 5 dc in the next st, skip 2 sts, sc in the next st. Repeat from * until 2 sts remain. Skip 2 sts, join with a sl st to the first sc of the round. (15 shells)
R17: Ch 3 (counts as first dc), work 2 dc in the same (1st) st. *Skip 2 sts, sc in the next st (top of the shell from previous round), skip 2 sts, 5 dc in the next st (the sc from previous round). Repeat from * until 2 sts remain. Work 2 dc in the same st you started the round with. Join with a sl st to the top of the ch 3. (15 shells)
R18-36: Repeat Rounds 16-17 or until desired height is achieved.
Fasten off and weave in ends.
Drawstring Closure:
Wrap tape around one end of rope to help prevent fraying. Thread rope along third last row (R34 in this pattern) through holes created under shell stitches of R35. Thread rope around entire circumference of bag and exit on same side from where rope originated. Pull drawstring shut, cut to desired length, and tie knot (when pulled shut, my straps measured 10.5″ long). To create the other strap, insert another rope on the opposite side and immediately have it exit back out around one shell stitch (do not thread across whole round). Drawstring closure is achieved by only pulling the longer rope tightly (rather than both sides). Measure second strap so that it is the same length as the first strap when bag is drawn shut. Cut and tie a knot.
Adding Tassels (make 4 or as many as desired):
See how to make tassels HERE. My tassels ended up being 2.5″ in length not including the beads. Thread top of tassel through gold beads and attach to reticule. . We attached two tassels to the bottom of Round 30 and two tassels to the bottom of Round 33 so that they are equidistant from one another.
![]()
***************
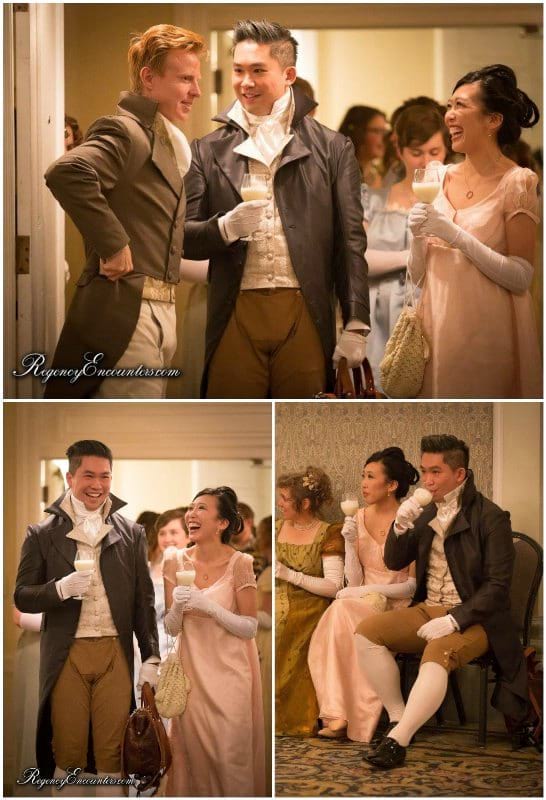
Here are some pictures from the Pride & Prejudice Ball with me proudly carrying my handmade Regency Reticule!
It was such a magical evening as we sipped on syllabub, got introduced as the Duke and Duchess of Weselton, and danced the night away with new friends!
Thank you for all your support and feedback about this reticule and for encouraging me to post the pattern! Many of you mentioned how you, your friends, or loved ones are Jane Austen or Regency fans, and that you cannot wait to make this for them or wear them to your own balls! This reticule works up very quickly with less than one skein of yarn needed, so this indeed would make a very special gift! Add your own beads, lace, or other decorative trims to really make it your own! Happy reticule-making, my friends!
![]()