***You can purchase an INEXPENSIVE AD-FREE PDF of this pattern on Etsy HERE and on LoveCrochet HERE! This beautifully formatted PDF includes the step-by-step pictures and is a total of 5 pages including the cover page! This pattern is also available in the “Crochet Cowls & Scarves PATTERN BUNDLE” which includes over 20 beautiful designs at a discounted price – check out the bundle HERE! You can also purchase a kit to make The Boho Crochet Wrap HERE on the Lion Brand Yarn website! It contains all the yarn you need as well as a copy of this pattern!
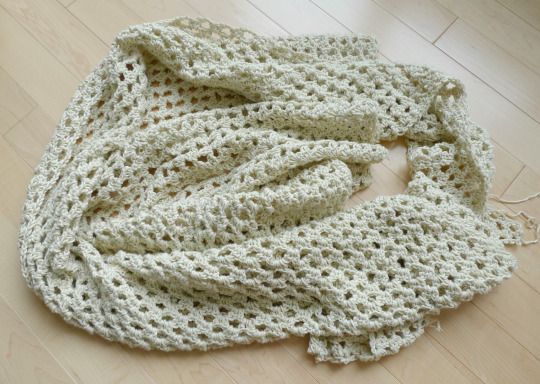
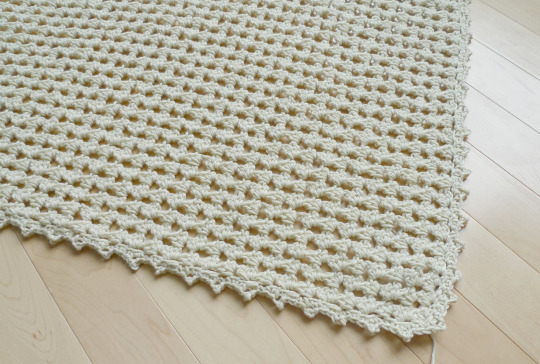
With Spring in full swing, I wanted to design a light and airy triangular scarf that could also serve as a shawl or open cardigan. When I got my hands on Lion Brand Yarn’s Cotton Bamboo, I knew it would be the perfect choice of yarn for this project!
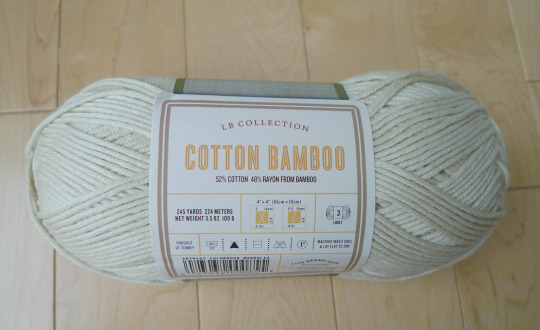
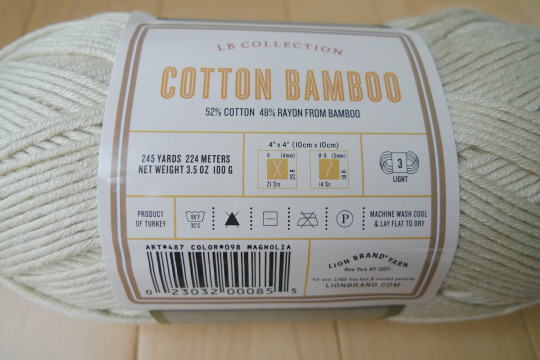
This special yarn is from the LB Collection and is exclusively available through Lion Brand via LionBrand.com, the Lion Design catalog, the Lion Brand Yarn Studio in New York City, and the Lion Brand Yarn Outlet in Carlstadt, New Jersey. Their site states, “Combining the softness and drape of bamboo rayon with the durability of cotton, our beautiful Cotton Bamboo yarn is great for year-round projects, such as clothing and baby items.” It is available in 8 different shades, and I went with the neutral “Magnolia” colour. It is a DK (level 3) weight yarn made of 52% cotton, 48% rayon from bamboo and each skein is 3.50 oz./100 g (245 yd/224 m). This yarn is a great choice for wearable items because rayon is moisture absorbent, breathable, comfortable to wear, and it does not fray or pill easily! I used four skeins of yarn for this project!
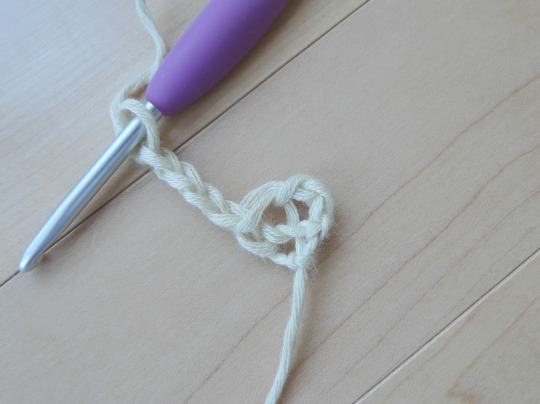
To start off, I chained 4.
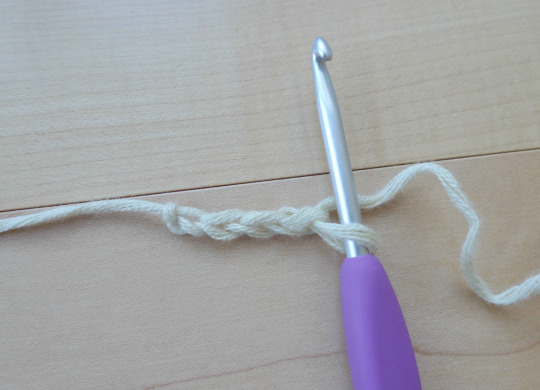
Then, I did a double crochet in the first chain to form a ring.
I chained 4…
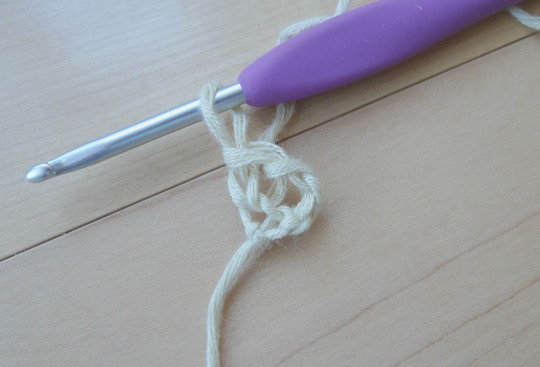
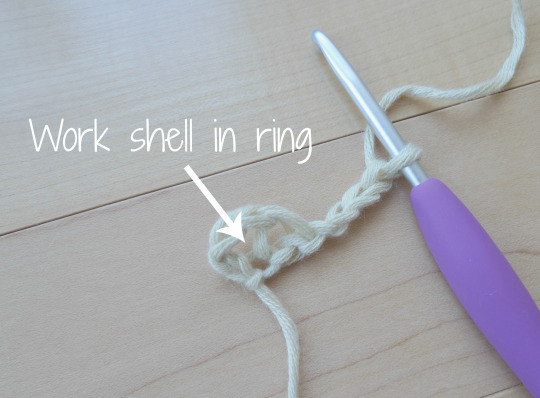
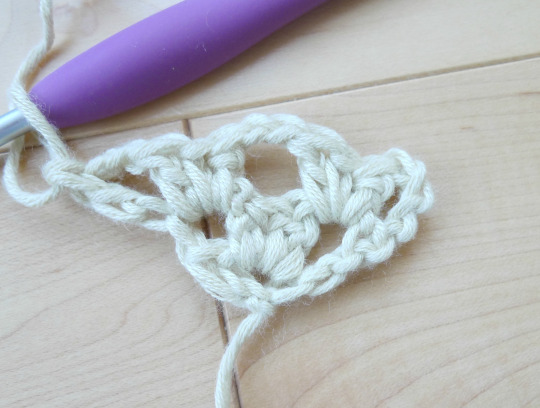
Then I turned my piece and worked a shell in the ring. In this project, a shell consists of 1 double crochet, 1 single crochet, and 1 double crochet (1 dc, 1 sc, 1 dc) all worked in the same ring.
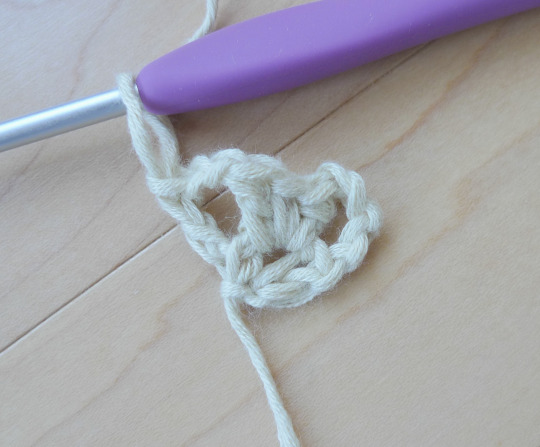
The shell has been worked!

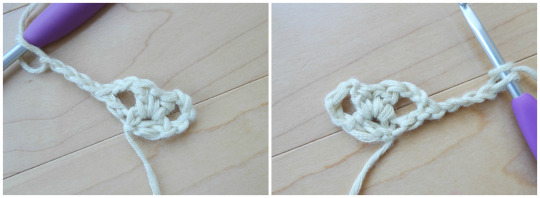
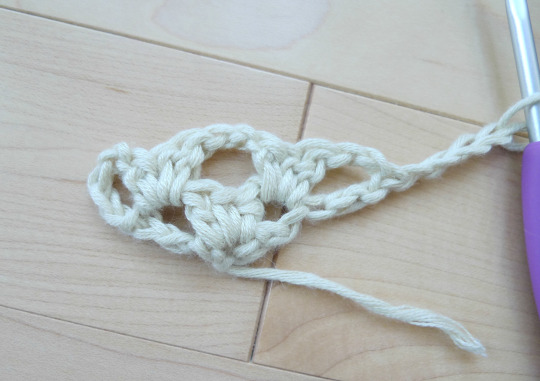
Then I chained 2 and worked a double crochet in the 2nd chain of the beginning chain 4 of the previous row.
Next I chained 4 again and flipped my work.
I worked one shell in the chain 2 space from the row below.
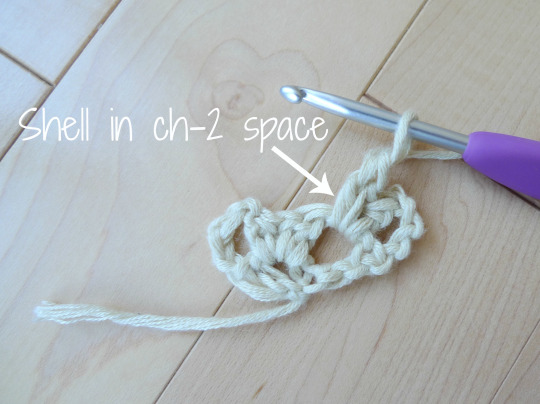
Then I chained 2 and then worked another shell in the next ch-2 space.
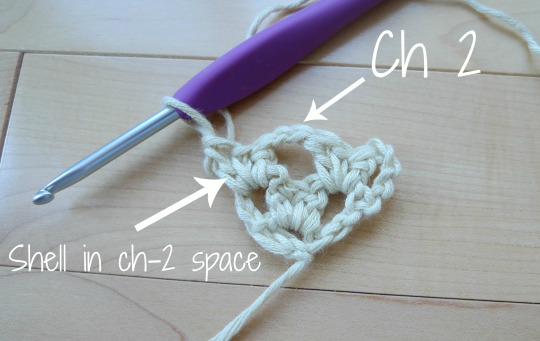
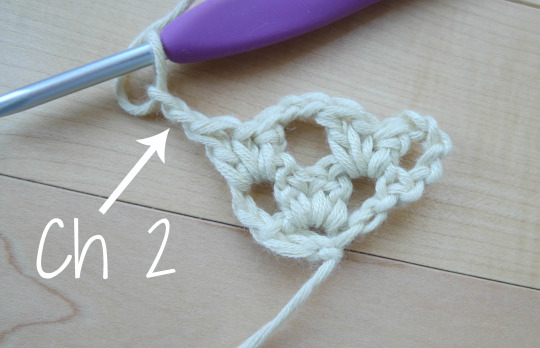
It may seem like this row is complete, but it is not! You need to chain 2 again…
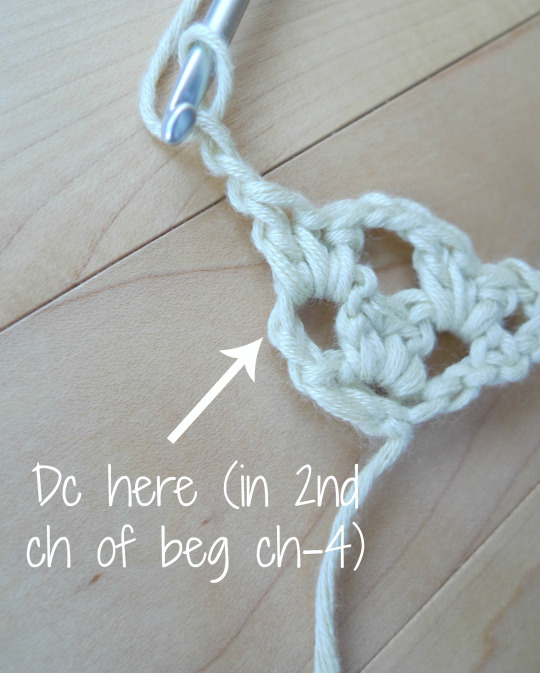
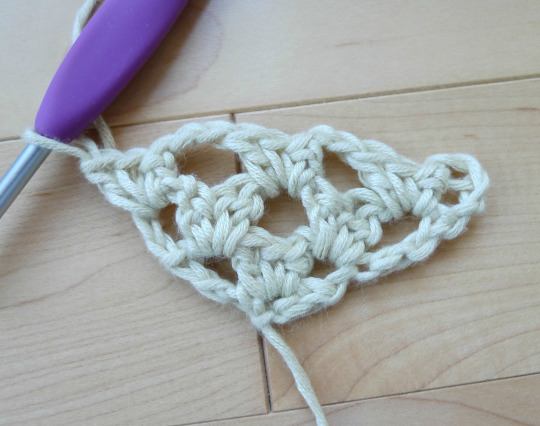
And work a double crochet once again in the 2nd chain of the beginning ch-4 as indicated in the diagram below. I always worked this dc in the “bump” of the 2nd chain.
Now this row is complete! See the symmetry?
You always chain 4 to begin the next row and turn your work.
Furthermore, you always work your shells in the chain 2 spaces of the row below with Chain 2′s in between each shell. Remember, this row is not complete!
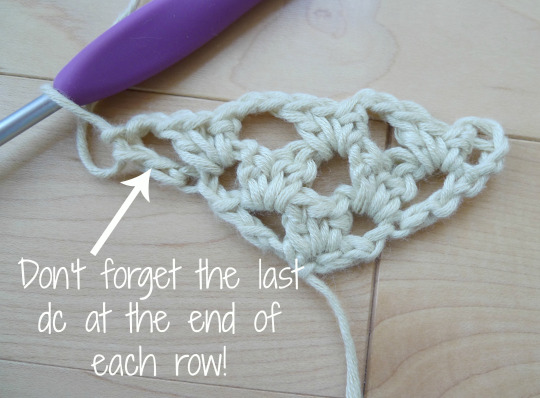
Don’t forget to do that last dc at the end of each row! I forgot it a number of times while working up this project, and I sadly had to frog my work to go all the way back to the end of the previous row once I discovered my mistake. This was especially frustrating towards the latter rows when there are LOTS of shells within each row!
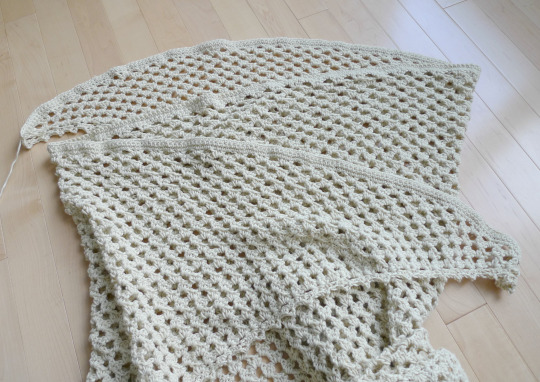
I continued on with this simple pattern to build this lovely triangle shape.
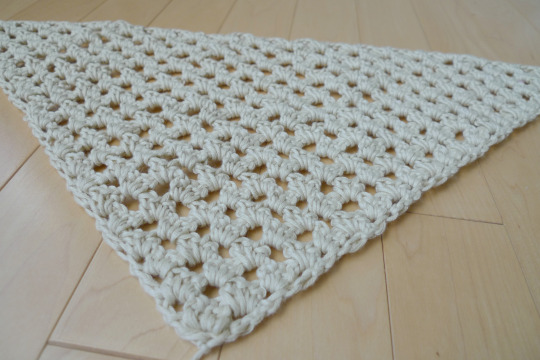
In the end, I completed 71 rows of these delicate shells!
Now it was time to add the details to my beautiful wrap!
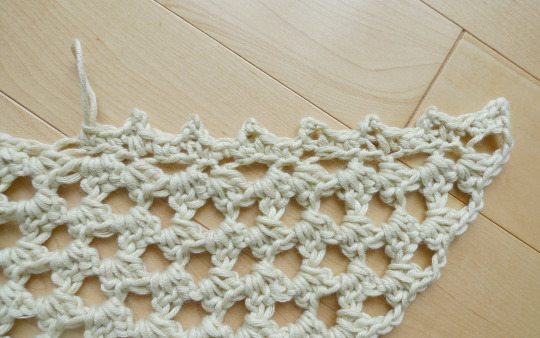
I decided to do a picot edging across the side edges (the V) of the triangle. Interesting fact: did you knot that “picot” is a French word so it is pronounced “pee-ko” (like rico)? I did not know it was a French word, so I was pronouncing it like “picket” (as in white picket fence). Thank goodness I found out now so I could avoid potentially embarrassing conversations with fellow crocheters and knitters! When I posted about this on social media, a reader also informed me that “crochet” means “hook” in French! My mind was blown as I was totally unaware of this fact even though I studied French in school- I suppose the word “crochet” was never one of our vocabulary items! This also led me to a random fact…”Captain Hook” would be “Capitaine Crochet” in French, haha!
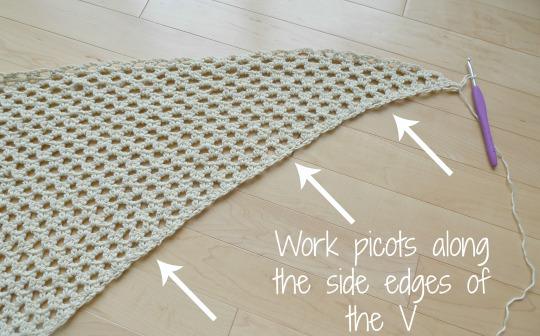
Thus at the end of Row 71, I simply turned my triangle (no need to cut the yarn!) and began working picots along the side.
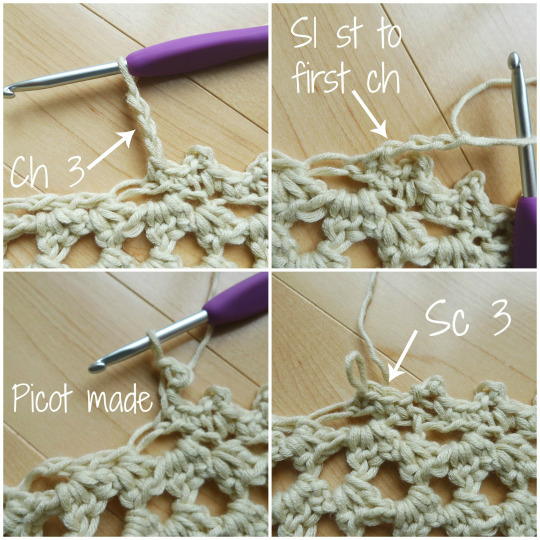
To work a picot, I chained 3 and then slip stitched to the first chain. Then I single crocheted 3 in the next 3 stitches.
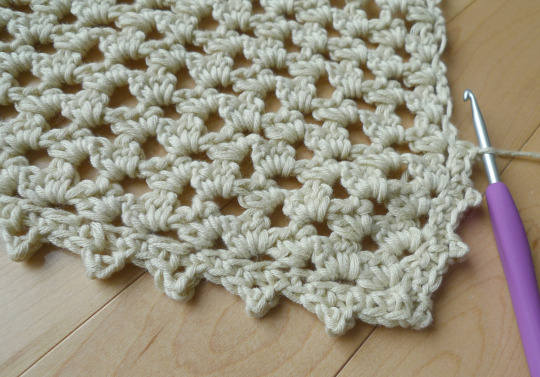
I kept working this picot edging across the tip of the V and along the other side.
Once I was done the picot edging, I then worked 3 rows of single crochets across the top of the triangle. This would be the collar of the wrap when it is worn as a cardigan or sweater.

The piece looks so much more polished with these beautiful edgings and details!
Next, we wanted to add fringe to the picot edging to give it more of a boho look!
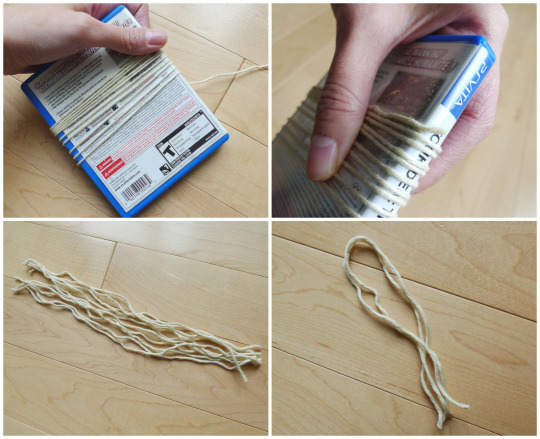
To form my fringe, I wrapped the yarn around one of Ryan’s video games (measuring 4.13″/10.5 cm across) and snipped across the edge. This is the best way to get strands of equal length! Each strand measured approximately 9″/23 cm long. I then grabbed two of these strands and folded them in half.
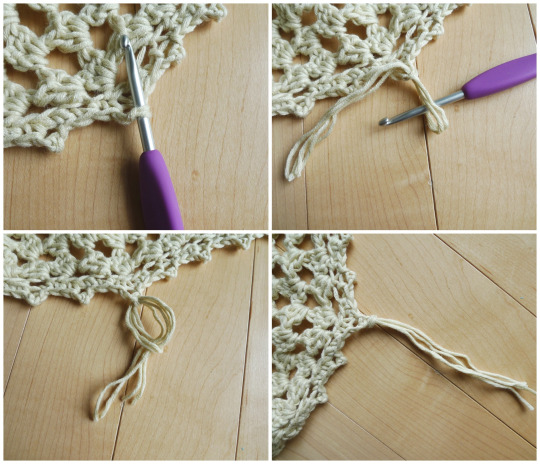
To add the fringe, I inserted my crochet hook into the tip of each picot. I pulled the folded loop of the strands through, and then pulled the tips of the strands through the loop. I pulled tightly and one piece of fringe was added!
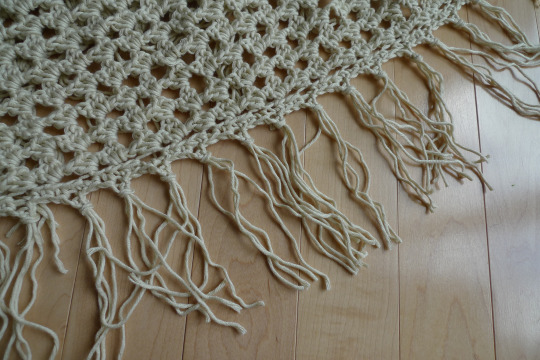
I continued adding fringe to all the picots!
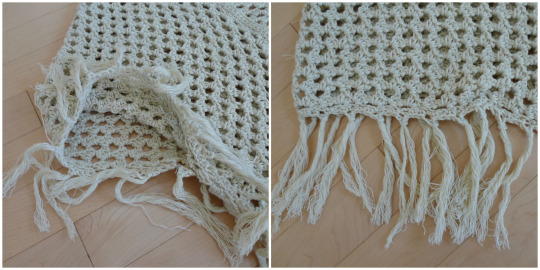
To make the fringe look more full and almost like tassels, we separated the strands of yarn. We did this by untwisting the yarn, pulling apart the individual strands, and combing the strands with a fine-tooth comb. See it all in action in this video below! Some readers also suggested using a needle to separate the yarn strands too!
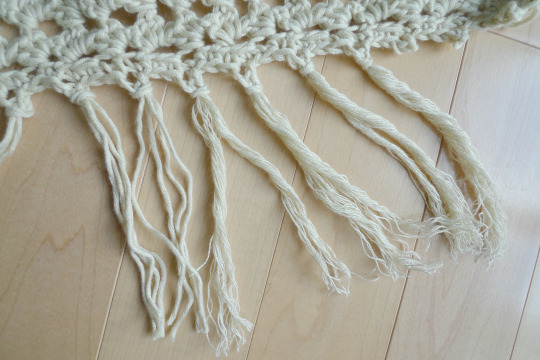
You can see the big difference it makes when you separate the strands of yarn in the picture below! The unseparated fringe looks weak and scraggly while the separated strands look so much more full and rich! This process was time-consuming but thankfully this task can be done by non-crocheters too….hehe thanks to Ryan for helping me separate much of the fringe!
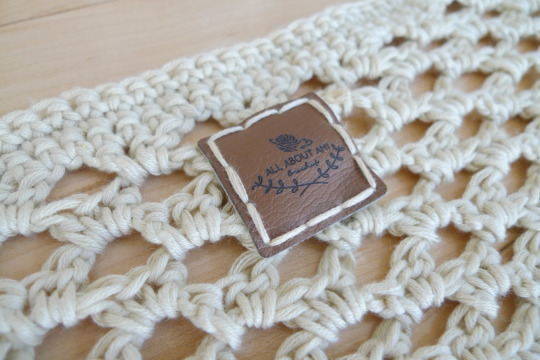
I sewed one of my ultraleather labels that I ordered from “Brick Bubble” onto the inner part of my wrap so I could easily see which side was the inside and outside. You can tell which is the outside because the third row of single crochets (of the collar) will be facing outwards so the V’s will be visible. Pictured below is the inside!
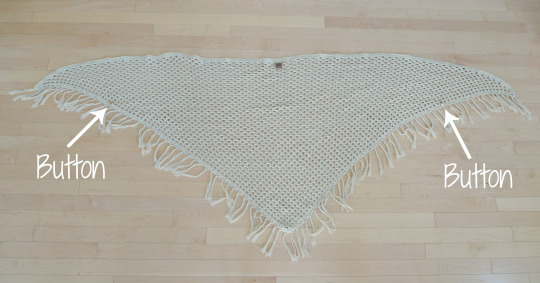
As an optional step, I decided to add buttons to my wrap so that I could form arm holes and sleeves with the button closure. I draped the wrap over myself and determined where I wanted my arm holes/sleeves to be. I marked these spots off with a stitch marker to indicate where to sew the buttons.
I sewed buttons to the inside of my wrap and even made a subtle mark showing where I wanted the button hole to be. I made this mark by tying gold embroidery floss onto this spot.
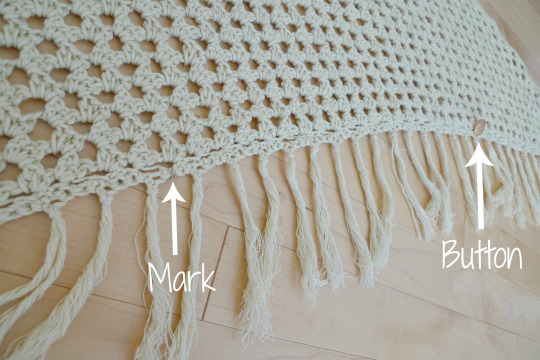
Below you can see the gold button going through its hole.
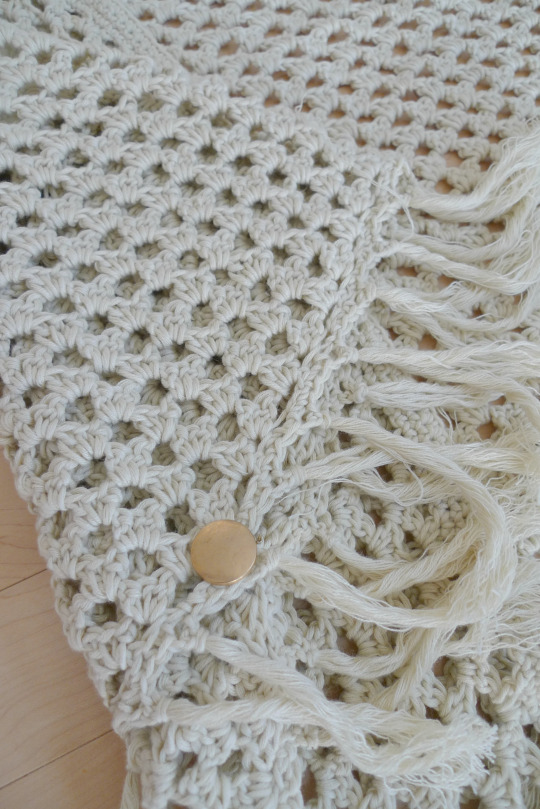
These are the arm holes formed! The button is not visible from the front- only from behind!
***************************************
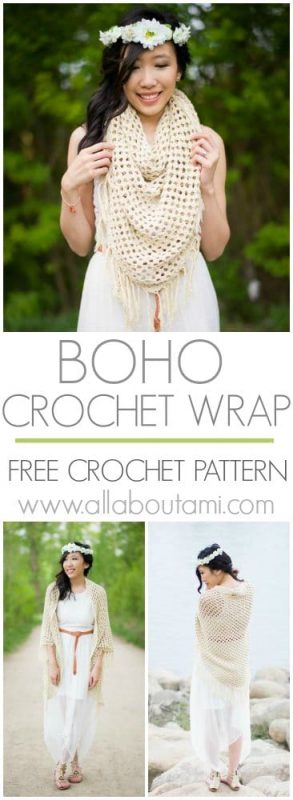
Here is the free pattern for “The Boho Crochet Wrap”!
***You can purchase an INEXPENSIVE AD-FREE PDF of this pattern on Etsy HERE and on Craftsy HERE! This beautifully formatted PDF includes the step-by-step pictures and is a total of 5 pages including the cover page! You can also purchase a kit to make The Boho Crochet Wrap HERE on the Lion Brand Yarn website! It contains all the yarn you need as well as a copy of this pattern!
Stitch abbreviations:
- Dc = double crochet
- Sc = single crochet
- Beg ch-4 = the beginning chain 4 (used to start each row)
- Ch-2 sp = chain 2 space
- Shell consists of {1 dc, 1 sc, 1 dc}
- Picot = Ch 3, Sl st in 1st ch, Sc 3 in next 3 sts
Materials:
- 4 mm Clover Amour hook (for the edging and ribbing)
- Light worsted weight cotton yarn (I used LB Collection Cotton Bamboo Yarn in “Magnolia” by Lion Brand Yarn, 4 skeins). 980 yards/896 m needed.
- Scissors
- 2 Buttons, embroidery floss (optional)
TRIANGLE:
Chain 4, dc in first ch to form ring.
Row 1: Chain 4, turn, work shell in ring. Chain 2, dc in 2nd ch of beg ch-4. (1 shell, 2 ch-2 spaces)
R2: Ch 4, turn. *Work shell in next ch-2 sp, ch 2*, rep twice. Dc in 2nd ch of beg ch-4. (2 shells, 3 ch-2 spaces).
R3-71: Ch 4, turn. *Work shell in next ch-2 sp, ch 2* across. Dc in 2nd ch of beg ch-4. (Row 71 will have 71 shells and 72 ch-2 spaces).
Do not cut yarn. We will begin working down the edges of the triangle (the “V”) to form the picot edging.
PICOT EDGING:
*Ch 3, Sl st in 1st chain, Sc 3 in next 3 sts* rep around V of triangle. I crocheted 96 picots in total!
After working the picot edging, do not cut the yarn! We will now work along the top of the triangle to give the collar some edging.
COLLAR:
Row 1: Single crochet across the top of the triangle. I had 357 sc (If you want to know the math: 71 shells = 71 x 3 = 213 sts, 72 ch-2 spaces = 144 sts. 213 sts + 144 sts = 357 sts).
R2: Chain 1, turn. Starting from 2nd chain from hook, sc across (357 sc).
R3: Repeat Row 2.
Fasten off and weave in ends.
FRINGE:
- Wrap yarn around a sturdy object (e.g. book or video game- mine measured4.13″/10.5 cm).
- Cut yarn on one side of object to make strands of fringe (each of my fringe strands measured about 9″/23 cm long).
- Fold two strands of fringe in half.
- Insert crochet hook into tip of each picot.
- Pull folded loop of strands through, then pull tips of the strands through the loop.
- Pull tightly.
- Repeat across picot edging.
- To make the fringe look more full and almost like tassels, separate the strands of yarn: untwist the yarn, pull apart the individual strands (can also use a needle too), and comb the strands with a fine-tooth comb (see Instagram video HERE).
Button Closure (optional):
Add buttons to the inner edges of the triangle so that you can form arm holes/sleeves. Drape the wrap over yourself and determine where you want the sides to come together- use a stitch marker to mark off this location. As a reference, I sewed my button on the 21st shell/15th fringe (starting from the top and counting downwards along the edge).
I also added a mark showing where I wanted my button hole to be. I wrapped and tied gold embroidery floss between the 42nd and 43rd shell (29th and 30th fringe).
Final measurements:
Width: 80″/203 cm
Height (from tip of V to top): 30.3″/77 cm
Special Notes:
- If you only want to make a scarf, you can use less yarn and do fewer rows.
- Adjust the size to your liking: the great part about this design is that it keeps expanding row after row, so you can decide when you would like to stop and measure it against yourself as you go!
- When determining your size, remember that it will be larger after adding the picot edging and fringe.
- You can sew a garment tag to the inner top center of the wrap to help indicate the inside and outside. The outside will have the 3rd row of single crochets of the collar facing outwards (the V’s)!
- Try using worsted, bulky or super bulky acrylic yarn or wool for a completely different look! It would make a very luxurious and bold triangle scarf for the fall and winter months!
- If your triangle’s edges seem to be curving, try increasing the number of chains at the beginning of each row (e.g. Chain 5 or 6) as your tension might be tighter than mine.
***************************************
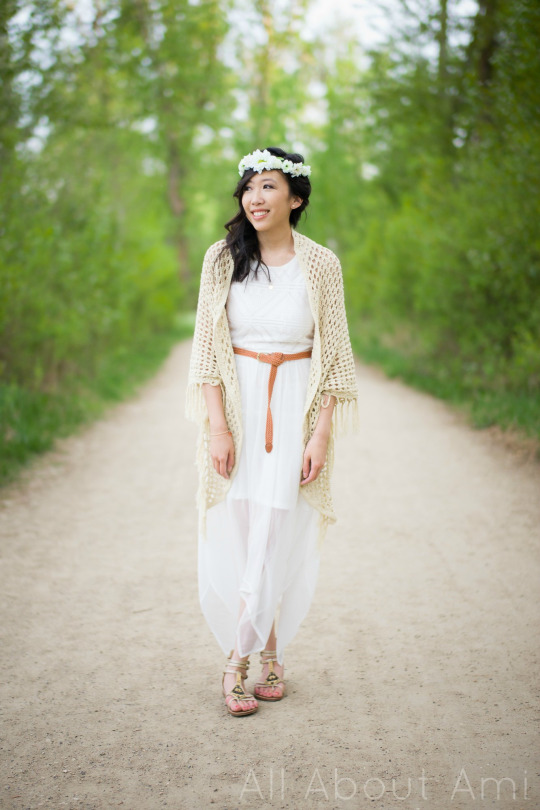
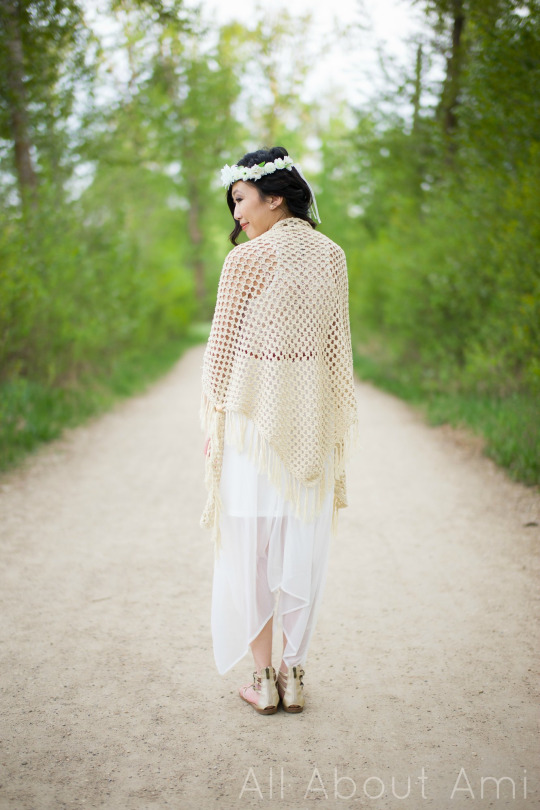
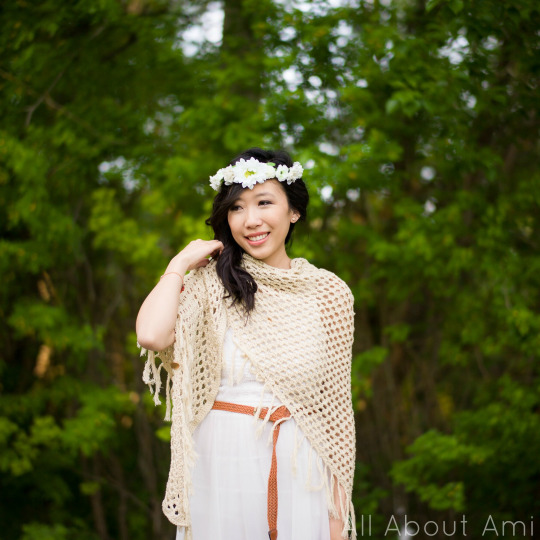
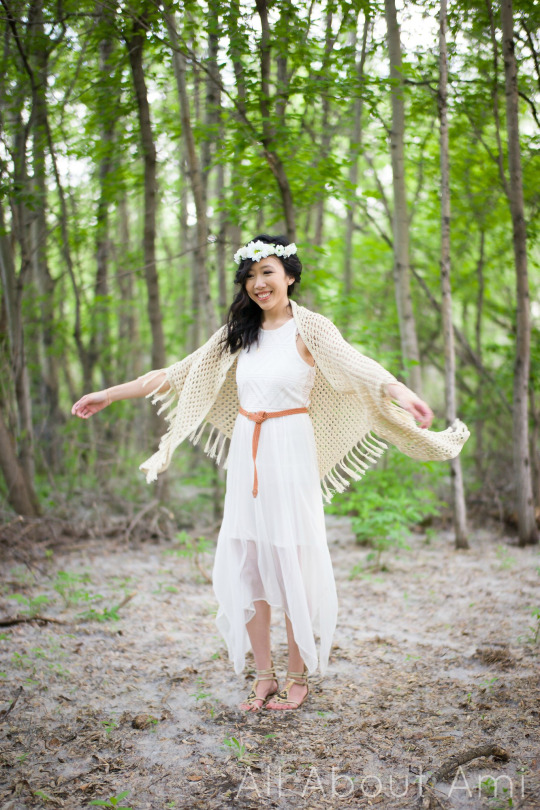
I am so pleased with how “The Boho Crochet Wrap” turned out as it is so pretty and romantic! Most of my photoshoots are during the crisp fall or cold winter months, so I seized upon this opportunity to do a lovely Spring shoot!
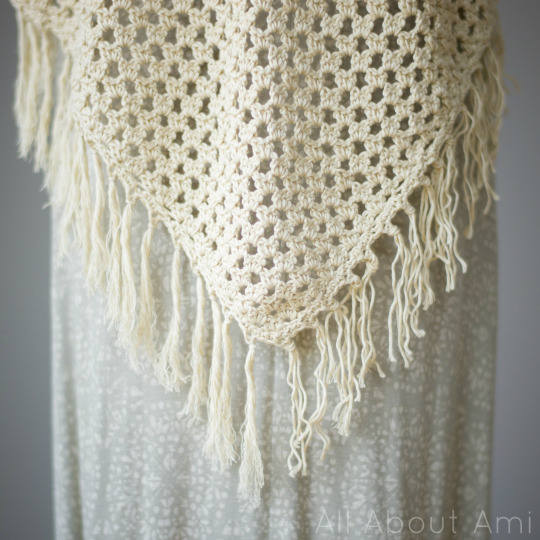
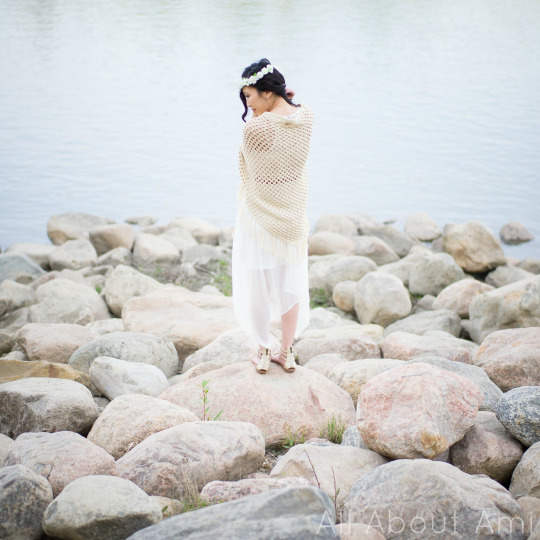
The back drapes absolutely beautifully and I love the look of the textured fringe!
You can also drape one of the sides over your shoulder so the piece becomes a beautiful shawl!
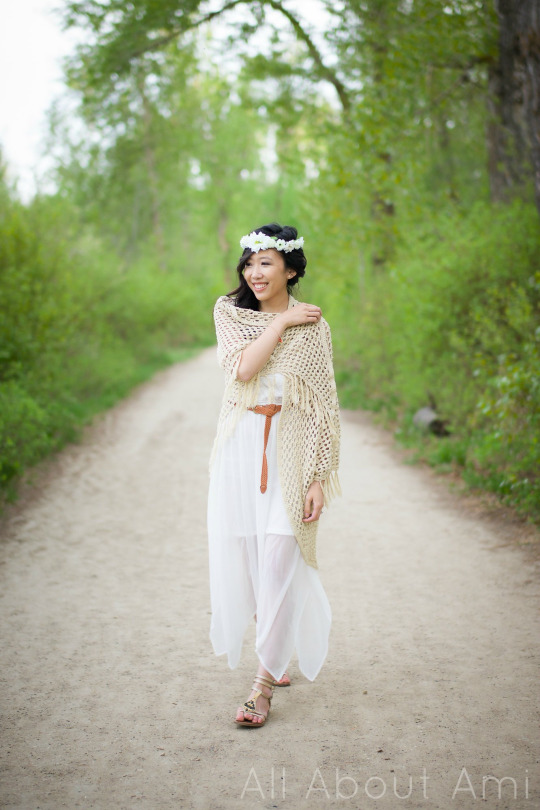
You can see the gold button I used for closure in this side view of the wrap below! I love how the buttons give the piece more definition to form optional arm holes!
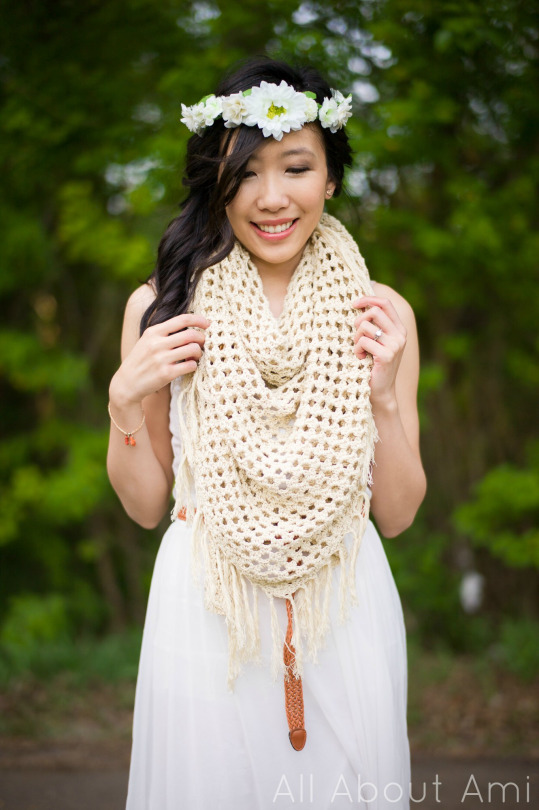
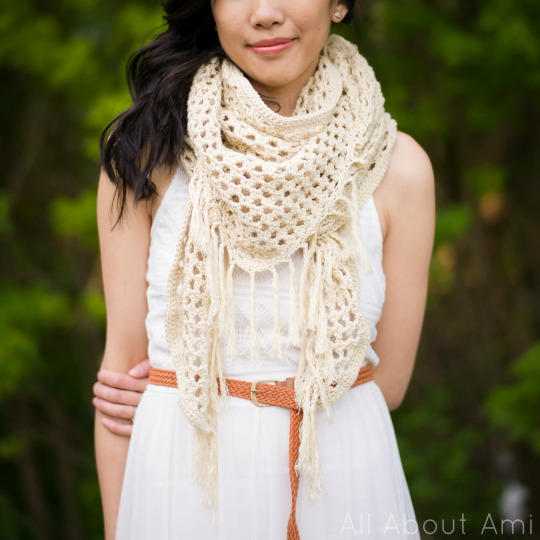
The Boho Crochet Wrap is so versatile as it can also be worn as a scarf! The V of the triangle is in the center while the corners drape down beautifully.

I tucked the corners underneath the V of the triangle for this look below! It is so full and dramatic yet lightweight and airy with its open stitches. Its breathability and cotton bamboo fabric make it the perfect Spring and Summer scarf!
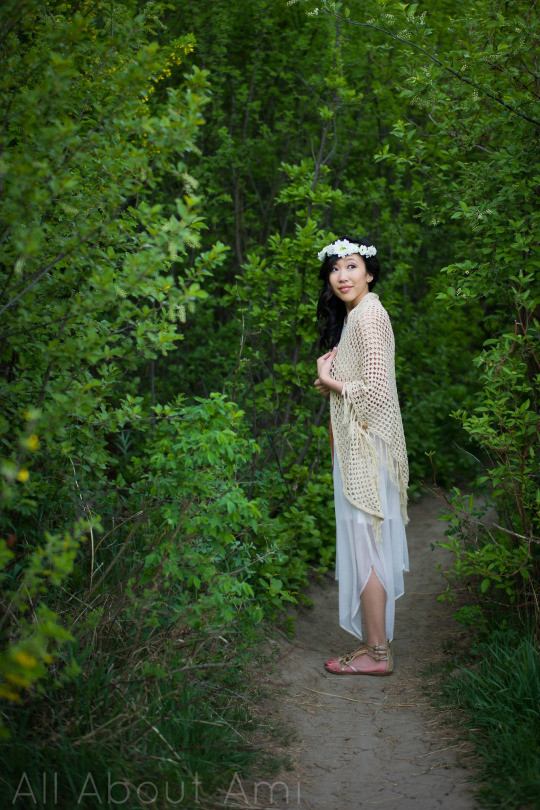
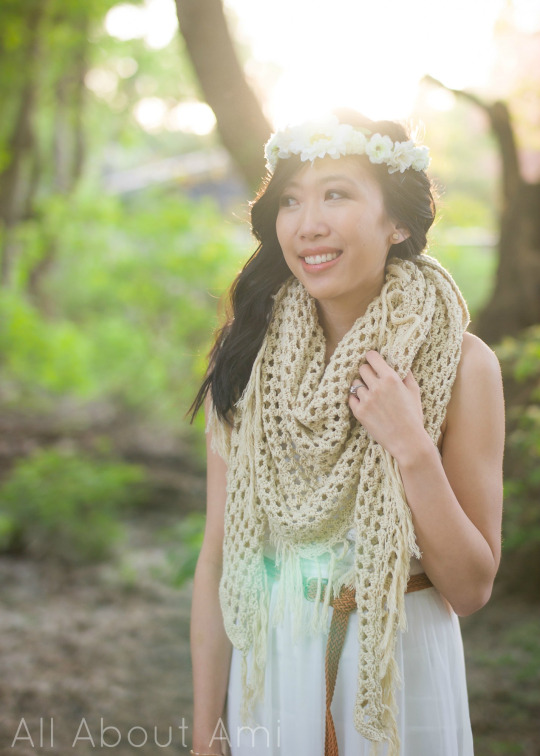
Once again, here it is worn more as a shawl with it asymmetrically draped over one shoulder!
In the below photo I tied the ends into a knot to shorten them! You can play around with this scarf to get many different looks depending on how closely you wear it to your neck and where the corners/ends are! During the fall and winter months, you could try this pattern using worsted, bulky, or super bulky yarn as well for a full and luxurious triangle scarf! I just might do that in the coming months!
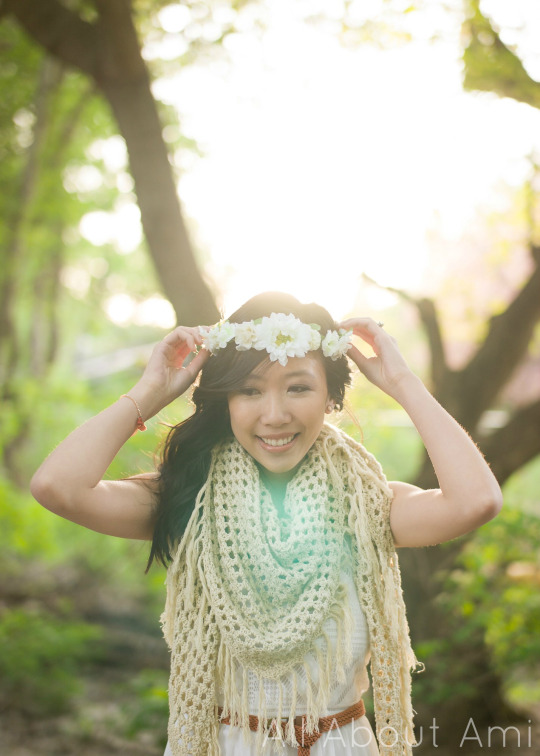
Flower crowns are all the rage this season, and I thought it would be such a lovely accessory for this Spring shoot! Myla loved trying it on too 🙂
The Boho Crochet Wrap would be a great piece for those Spring and Summer nights out or on vacation when you need a versatile item. You could wear it as a chic scarf accessory at the beginning and then drape it over your shoulders and wear it as a cardigan when the temperatures cool down. Both the cotton and rayon are breathable and moisture absorbent, so you won’t heat up or feel too sweaty in this wrap as it actually helps to wick away moisture! I could also see this being useful on airplane rides when you want to be hands free in the airport (wear it as a scarf) and then possibly need more layers in case the airplane cabin is cool. It could also serve as a light blanket!
Wearing fringe just makes you want to spin and let it SWAY! Haha…Ryan and I had lots of fun doing this shoot enjoying the great outdoors! [On a sidenote, in case anyone is wondering, I picked up this gorgeous white dress from H&M recently for only $30 (see HERE)!]
I hope this will be your new favourite Spring/Summer wrap and I can’t wait to see you rock the different ways to wear it! I had such a fun time designing this lightweight wearable piece, and it was a nice change from working with the bulky and super bulky yarns of the winter. Please share your photos with me on my blog and social media here: Facebook page, Twitter (@AllAboutAmi) or Instagram (@AllAboutAmi)I! Don’t forget that I’ve also opened an Etsy store HERE and a Craftsy store HERE to sell concise PDF versions of my patterns! I hope you enjoyed reading about this wrap, and I thank you for your continued support of my work and this blog! Enjoy the beautiful weather, everyone!
{This post is sponsored by Lion Brand Yarn! I’ve loved working with their yarn throughout the years and I’m thrilled that I get to collaborate with them every month!}
This pattern is an original pattern by Stephanie Lau of All About Ami. Please do not claim this pattern as your own. If you wish to share this pattern, you may link to this pattern but please do not reprint it on your site. You may keep a copy for your own personal use but please DO NOT sell the pattern or distribute it.
You may sell products made from this pattern but please clearly credit the design to me, Stephanie Lau of All About Ami, and provide a link to my blog www.AllAboutAmi.com. Permission is NOT granted for mass production or factory manufacturing of any kind. Thank you for being respectful and for your understanding!