When I first started my blog in January 2011, I posted about amigurumi that I had made following other people’s patterns. The next month, Ryan and I designed our very first original pattern, the Chinese New Year Doll holding a tiny bunny to celebrate the Year of the Rabbit! Little did I know that it would become a tradition for us to create an original design for each zodiac animal with each passing year. We designed Dragon, Snake, and Pony, and all were received very well!
2015 is the Year of the Sheep/Ram/Goat, and with our baby girl due in December 2014 and Chinese New Year less than two months later in February 2015, we knew that it would be in our best interest to design our sheep ahead of time! Amidst all the cowl making and fall/winter projects, we managed to find time to design and create a sweet little lamb at the end of November just weeks before our baby Brielle was born! I am so glad that we worked on this project ahead of time as I cannot imagine trying to design an amigurumi from scratch at this point in time with a 6 week old and a toddler….free time is very scarce these days and I don’t think I would be able to focus properly with the sleep deprivation!
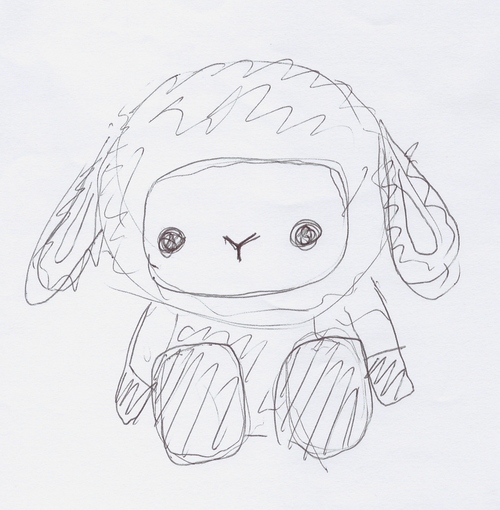
We talked about different ideas for our sheep amigurumi such as whether he should be sitting or standing, and what his general shape should be like. Ryan did the initial sketch below of our sitting little lamb!
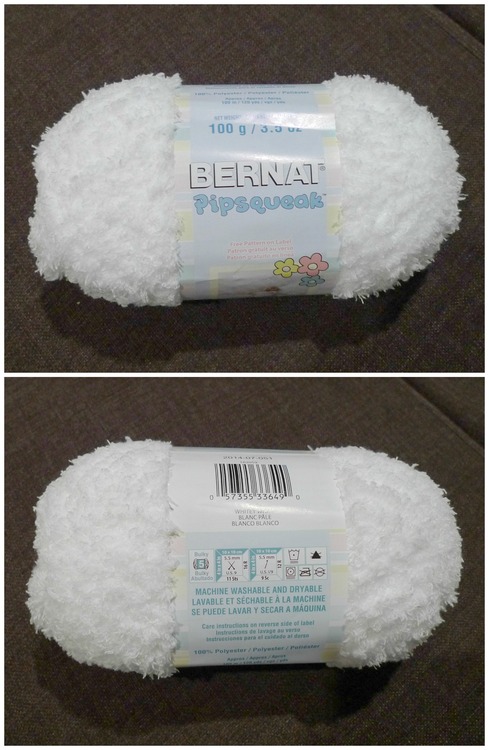
We knew that we wanted our lamb to be fluffy, so we scoped out the yarn selection at Michael’s. Ryan found this incredibly soft Bernat Pipsqueak yarn and we liked how it was not too “stringy” or “scraggly” compared to other eyelash yarns we had worked with before!
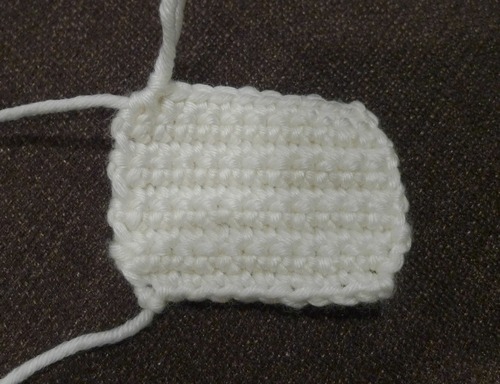
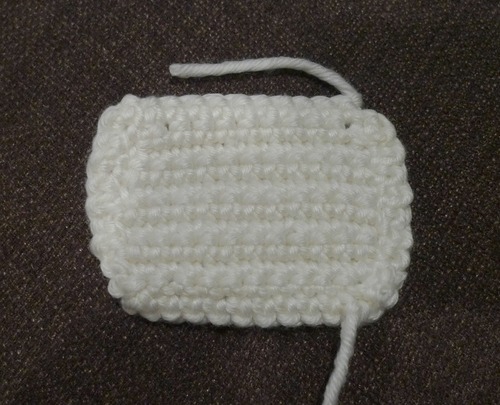
For the face, I used some beige yarn that I already had in my stash called Lion Brand Martha Stewart Extra Soft Wool Blend in “Bakery Box White”. I had previously used this yarn to make Myla’s newborn Panda Outfit! I crocheted a rectangle shape by working in rows and turning after each row was completed. This is in contrast to most other amigurumi shapes in which you work in a continuous round or spiral!
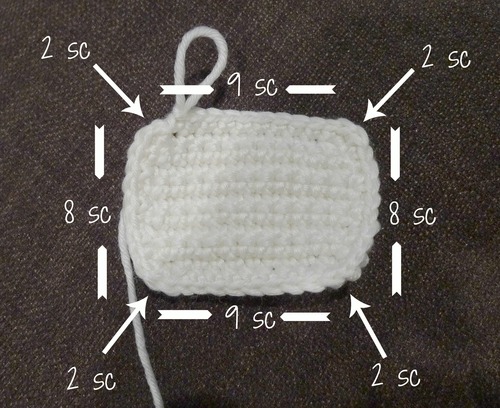
I then crocheted around the edges of this rectangle by doing one single crochet in each stitch and two single crochets in each corner as shown below:
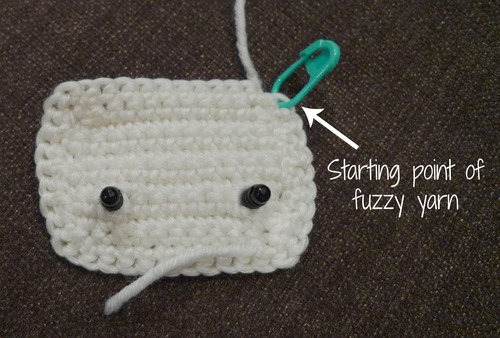
I then flipped the face so the “right side” was facing downwards and the “wrong side” was facing me. Normally when working in rows there is no “right” or “wrong” side, but we are determining which is which solely by the last round we crocheted around the edge of the rectangle!
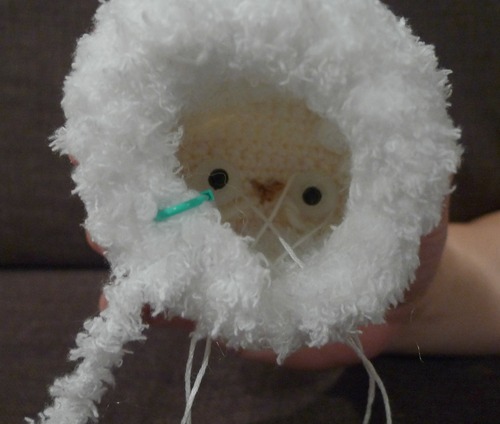
I then switched to the fuzzy Bernat Pipsqueak yarn in the upper right corner as indicated by the green stitch marker. We tentatively placed the safety eyes so we could figure out how to shape the head in relation to the face!
I then crocheted around the entire face using the fluffy yarn! Note that we are working counter-clockwise: we want the “wrong side” of the fluffy yarn to be showing on the outside as this tends to be the fluffier side in my experience. To read more about the “right” and “wrong” side of amigurumi, read my blog post HERE!
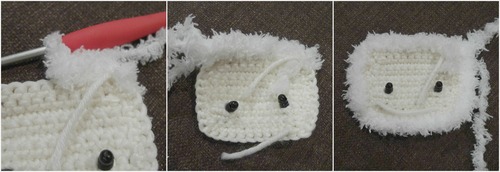
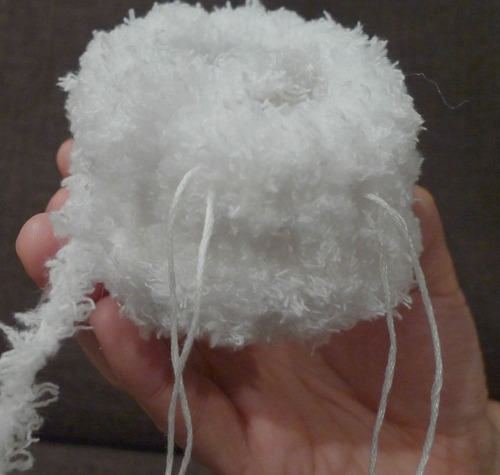
I then crocheted round after round, increasing more towards the top so that the upper head was puffier and larger. Be warned that it is impossible to see your individual stitches when working with this fuzzy yarn! You need to “feel” for the next stitch and intuitively place your crochet hook in the next stitch. It is imperative that you use a stitch marker so that you know where each round is supposed to end and where you are approximately in the round (e.g. across the stitch marker you should have half the stitches of the round completed). If you are a beginner, I would NOT recommend working with this fluffy yarn as it could be discouraging or frustrating! With that being said, however, since you cannot see the individual stitches, it also means that this yarn is very forgiving- you cannot easily see mistakes so don’t fret if you miss a stitch here or there!
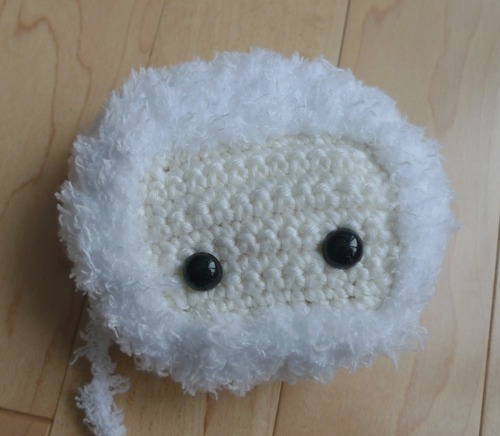
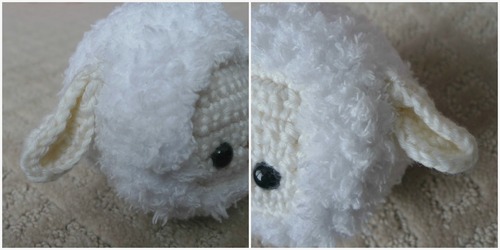
This is what the face and head looked like from the front! Notice that we placed the safety eyes very low on the face, giving him a cute big forehead 🙂
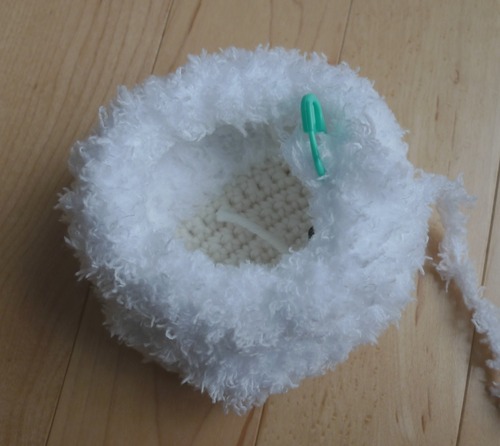
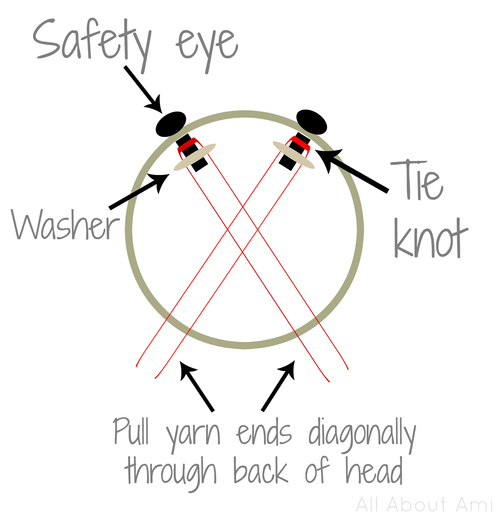
We gave him slightly indented eyes as we LOVED using this technique for our Bunny Ornament! Note that this next step is optional as you do not need to follow this part- you can simply place the safety eyes as normal if you do not want indented eyes. To do this technique, Ryan inserted the safety eyes without attaching the washer. He then used some yarn and tied a knot around the post of each safety eye and pulled the two yarn ends diagonally towards the bottom of the head. Ryan then secured each safety eye with its washer. Please reference this diagram that we put together that visually shows this:
This is what the inside of the face/head looked like with the safety eyes, washers, and yarn ends…
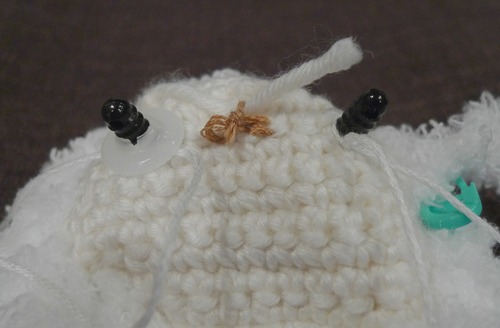
Here you can see how the yarn ends are pulled diagonally towards the bottom of the head. The ends will be hidden once we sew the head to the body!
The bottom of the head with the yarn ends sticking out:
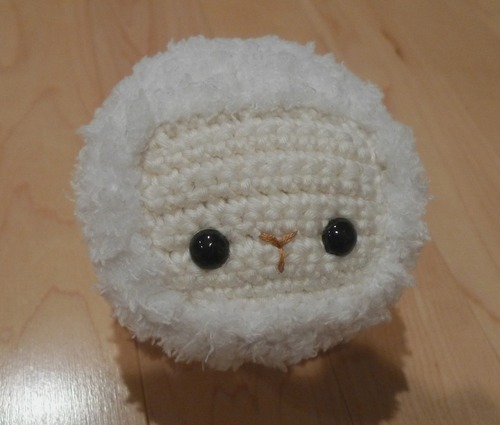
Here is the face from the front with the slightly indented eyes and a cute “Y”-shaped nose using brown embroidery floss! By giving him indented eyes, it pushes the snout out a bit and gives the face a bit more definition.
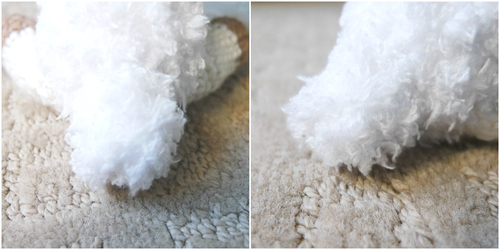
After stuffing up the head and closing it off, this is what the back of the head looked like. The Bernat Pipsqueak yarn gives such a luscious and soft texture- some people would probably never guess that this was a crocheted piece made of yarn!

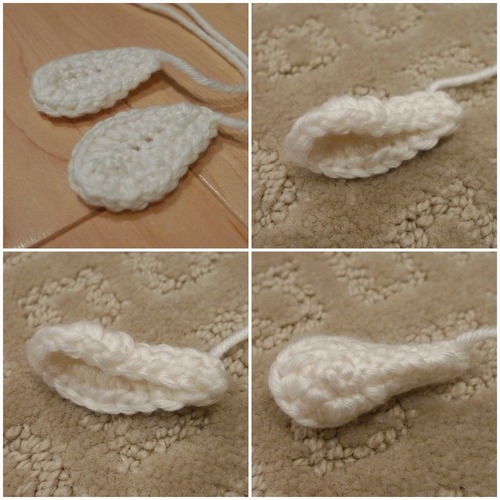
Next I shaped the ears using the same yarn I used for the face. I made them teardrop-shaped and then pinched and sewed the narrow ends together as shown below. Note that we did not fold the ears so that they are perfectly overlapping as we wanted to see both layers!
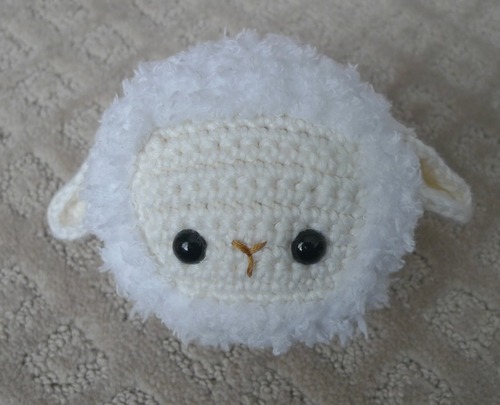
I then attached the ears to the head!
Here are some side views:
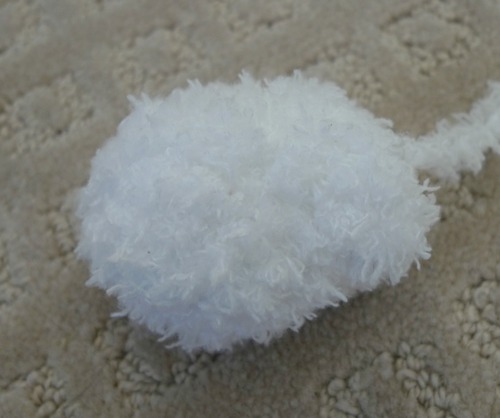
Then I worked on the fluffy little body…
Next I created the arms and legs! I started off with tan yarn for the hooves and then switched back to the cream yarn for the upper portions. Working in the back loops only for Round 3 of both the arms and legs gave the hooves more definition and made the bottom part flat.
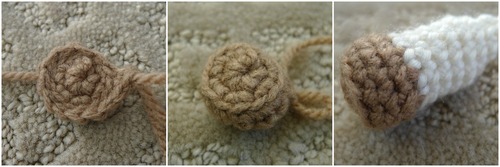
Both the arms and legs are essentially the same shape with the legs being slightly larger and longer!
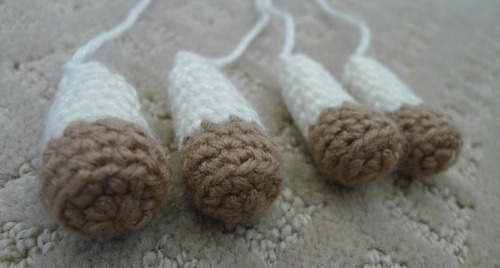
With all the individual body parts completed, it was time to assemble my little lamb!
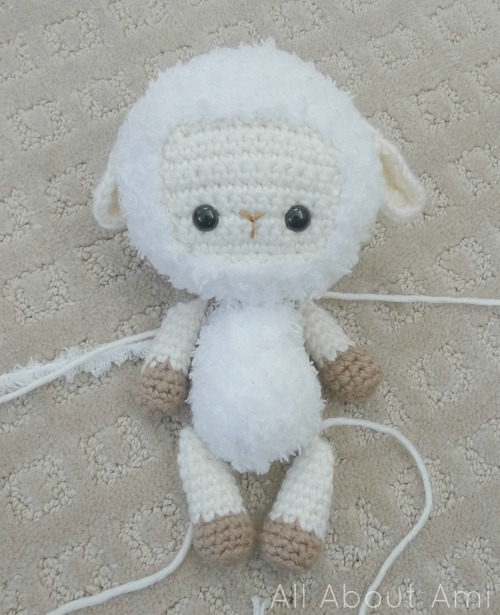
After attaching all the pieces together, I added this fluffy little tail to help our lamb sit better…
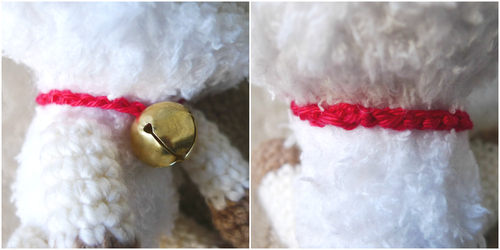
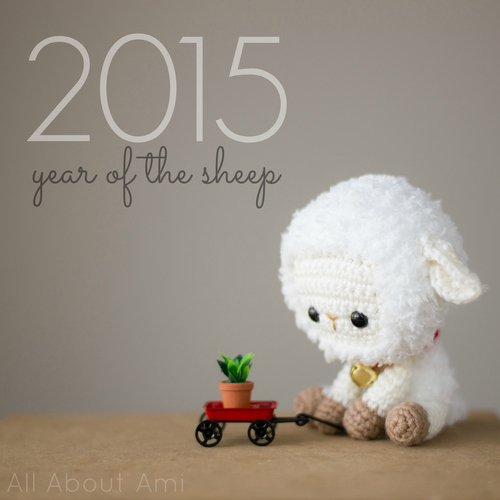
For a cute accessory, I also used some red yarn to make this collar with a bell attached to it. We used red since it’s such a significant colour for Chinese New Year!
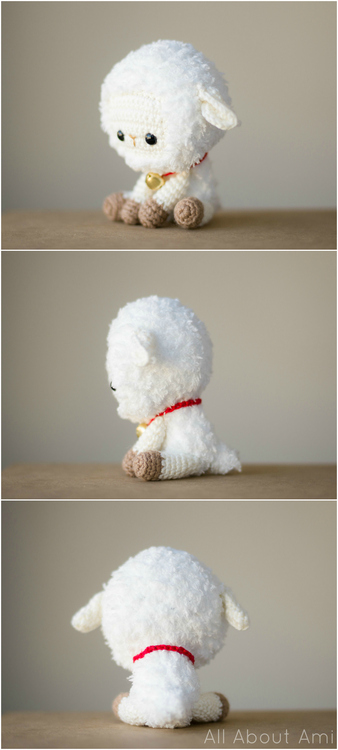
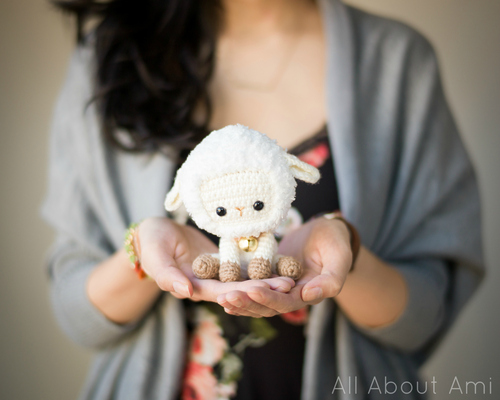
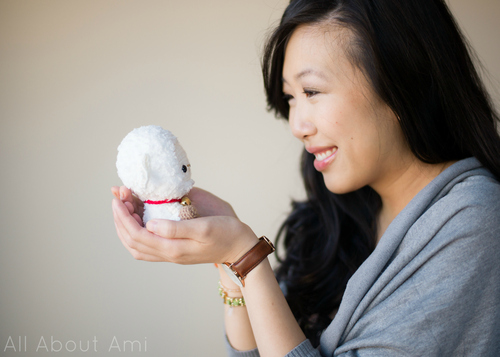
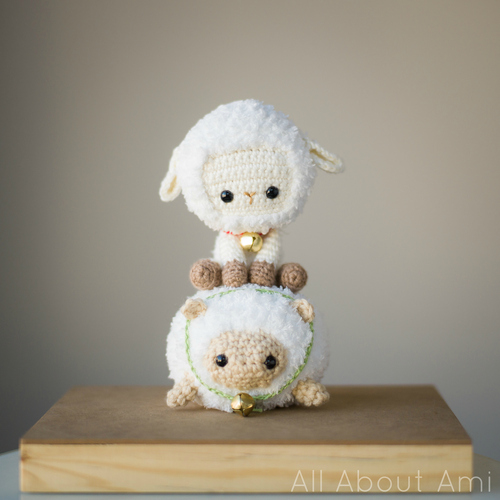
After all the designing, crocheting and attaching, here is our finished lamb! He’s a cutie, isn’t he?
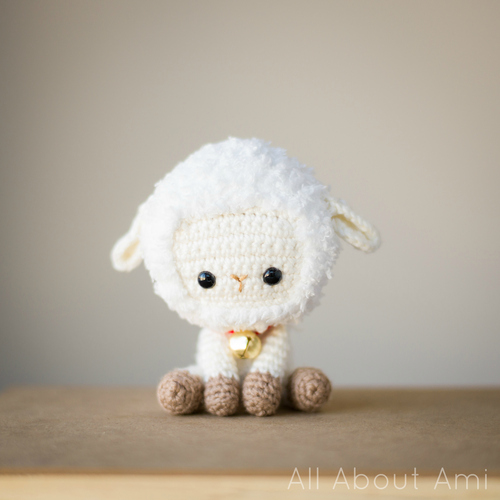
Here are some different views! I love how he sits with his arms leaning forward!
We are so proud of how our little lamb came out, and we think he reflects our style of amigurumi perfectly! And in case you’re wondering, “lambs” refer to sheep that are less than one year old, so our little amigurumi is a baby sheep 🙂
We decided to name him “Lambert” after going through all your wonderful name suggestions (thanks to “krystalmaycole” and “_iheart_u” on Instagram)! You are all so creative, dreaming up names we could never imagine or think of on our own 🙂 Lambert is a shy and sweet little lamb who loves cuddles!
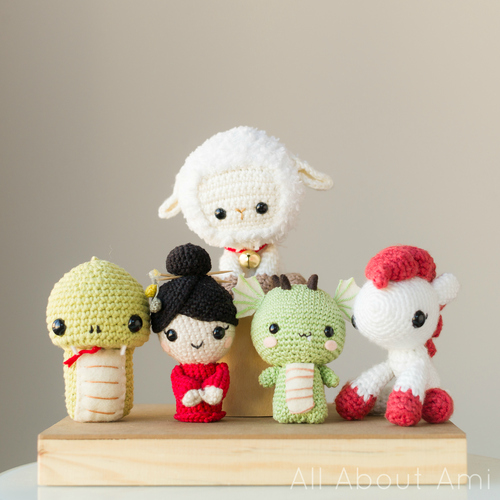
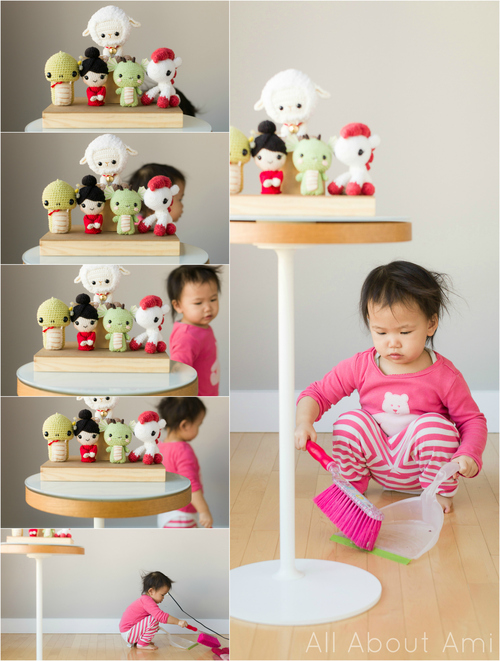
Here is Lambert with the other amigurumi from our zodiac series: Chinese New Year Doll, Dragon, Snake and Pony! I can’t believe he’s the fifth addition! Oh, and in case you’re wondering what happened to the tiny bunny that Chinese New Year Doll is normally holding, Myla took the bunny to play with one day and we were unable to find her during this photoshoot >-< Thankfully I found the tiny bunny days later as I was cleaning the house 🙂
While we were doing the photoshoot for Lambert, Myla was keeping herself busy by doing one of her favourite activities: sweeping the floor! Ryan was snapping away and did not even notice Myla sneaking into the shot. As soon as he saw Myla’s head pop into the frame, he bursted out laughing and his attention got diverted to Myla- then suddenly Myla became the focus of attention! Haha, I swear I did not coerce her into doing this housework- she loves copying what I do and she frequently picks up the dustpan and broom to clean all by herself. She’s my little helper! Check out these bloopers of our little Myla nonchalantly cleaning the floor around these amigurumi and photobombing Lambert!
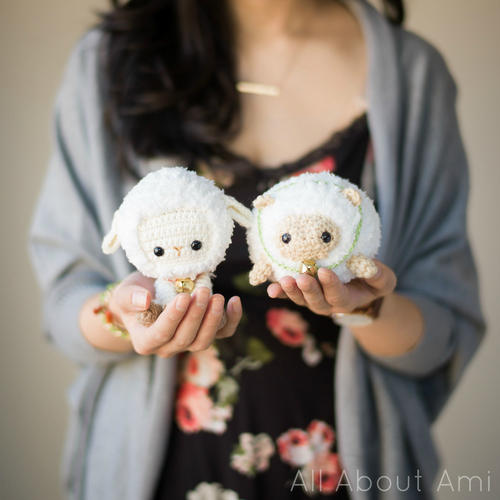
Now let me introduce you to Lambert’s best friend: Fluufie the Sheep! Fluufie is the creation of Momomints who I introduced you to last year in a “Craft Chat” post (read more about the talented Sami & Marissa HERE). I crocheted my own Fluufie using the free pattern found on the Momomints blog HERE! They also offer a kit that has all the materials you need to make your own Fluufie in their Etsy store HERE!
Lambert and Fluufie are sooo cute together, and it turns out that they were created using the same Bernat Pipsqueak yarn! Thus, if you end up purchasing this fluffy yarn, you’ll be able to make both Lambert and Fluufie! If you’re interested in crocheting a ram, you can also check out Momomints’ newly updated free ram pattern HERE too!
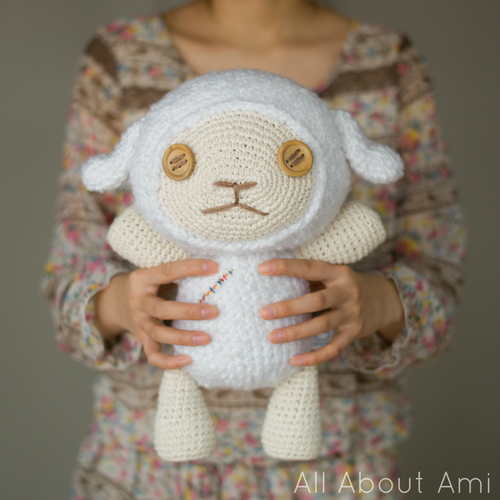
I also want to remind you of “Cotton”, our lamb that we made after seeing the anime movie “Oblivion Island”! If you would like to make a larger lamb that is more huggable, do check out my step-by-step blog post HERE and his free pattern HERE!
I hope you enjoyed reading about the creation of our sweet little Lambert! It felt nice diving into an amigurumi project again as it had been a while since I had designed a stuffie! My love of amigurumi is what drove me to start this blog and to name it “All About Ami” (the “ami” actually refers to “amigurumi” although I know many of you think that my name is “Ami” and not “Stephanie” haha)! The FREE PATTERN for Lambert can be found in this blog post HERE and we are so excited to see the little lambs that you will create!
***You can also purchase an INEXPENSIVE AD-FREE PDF of this pattern on Etsy HERE and on Craftsy HERE. The printable PDF with step-by-step pictures has been condensed into a total of 5 pages including the cover page!
Have a Happy Chinese New Year, friends, and thanks for being so supportive of this series of zodiac animals!