***You can purchase an INEXPENSIVE AD-FREE PDF of this pattern on Etsy HERE! This beautifully formatted PDF includes the step-by-step pictures and is a total of 12 pages including the cover page! You can also check out my Chinese New Year Zodiac Amigurumi Bundle HERE as it includes ALL my special zodiac designs to date at a discounted price!
- Note that this is Part 2 of the step-by-step blog post detailing how to crochet the snout, hair, hooves, belly, horns, ears and tail can be found
- Part 1 that covers how to crochet body and divide into the four legs can be found HERE.
- The free crochet pattern with all the written numbers can be found HERE!
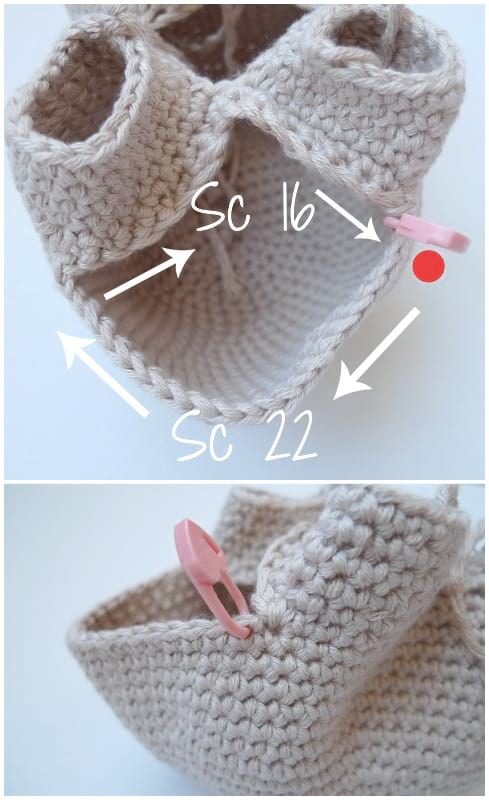
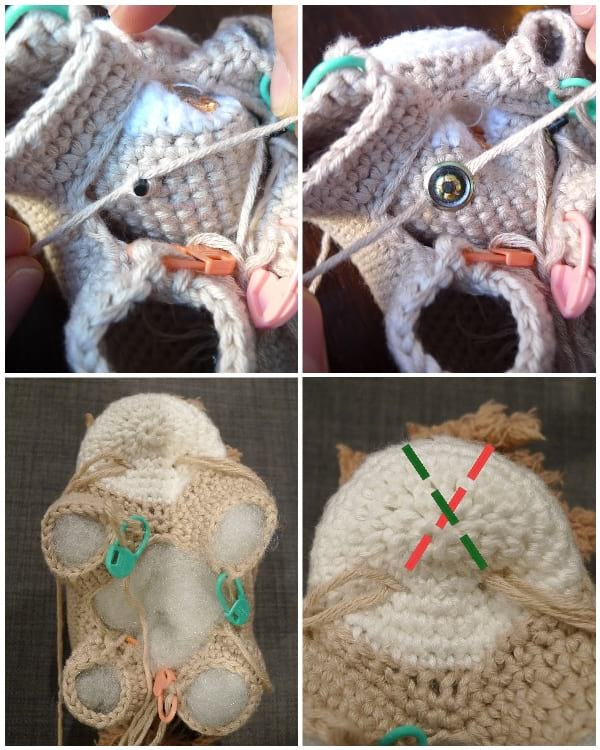
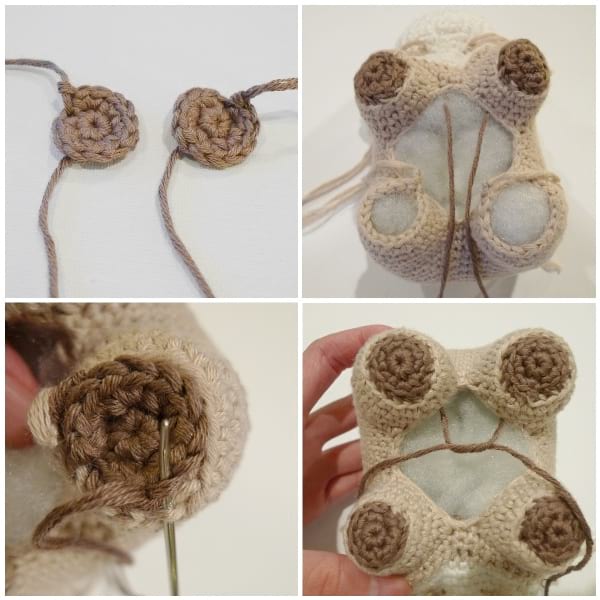
After crocheting the four legs, it is time to work on the snout! While holding the ox upside down so that the legs and open belly are towards the top, rejoin the white yarn at the first stitch next to Leg 4 as indicated by the pink stitch marker and red circle in the image below. Single crochet 22 in the back loops only around the face (this helps leave a defined ridge between the upper face and the snout). Then, single crochet 16 along the chain length in the loops that are left-over (the back loops were worked during Round 24 of the body).
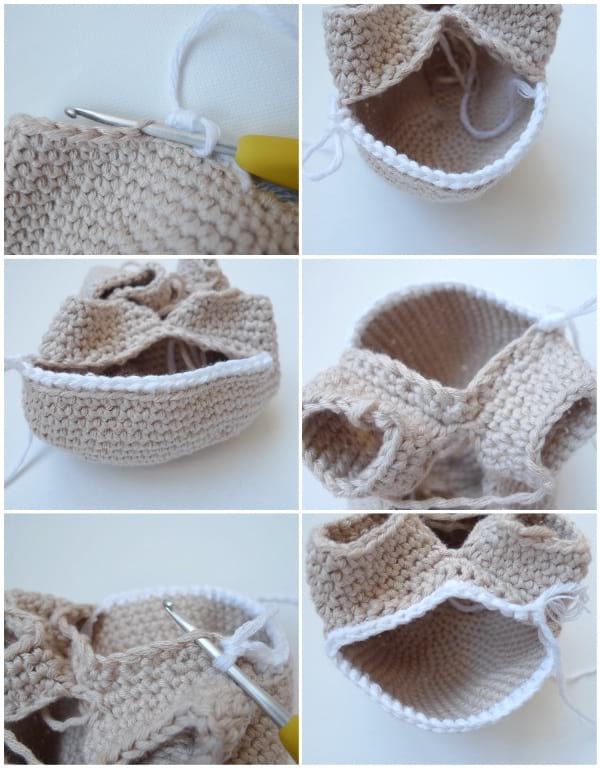
The collage below shows how you work the back loops of the Sc 22 and the left-over loops of the chain length (the chain 16)! It is important to note that the original Y and Z from when we created the chain length DO NOT count as stitches – ignore the slip stitch that was worked at Y to get the correct number of stitches.
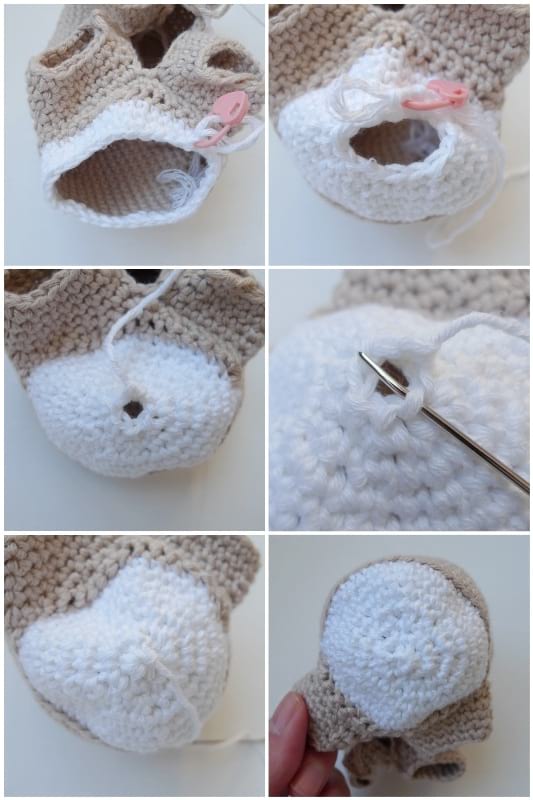
After the first round of the snout has been worked, we will be crocheting a series of decrease rounds to eventually close up the snout. When you have seven stitches at the end, you can fasten off and weave the yarn tail through the front loops of the remaining stitches. When you pull tight, this will close up the hole so there is no remaining gap or hole!
To give the face more definition, we will be using a technique called eye indentation that helps to pull the eyes back to give more depth and to help define the snout. There is a junction between the white snout and tan face: We placed our safety eyes around the 2nd to 3rd row of the tan section above the junction, about 7 stitches apart. Do NOT snap in the washers yet.
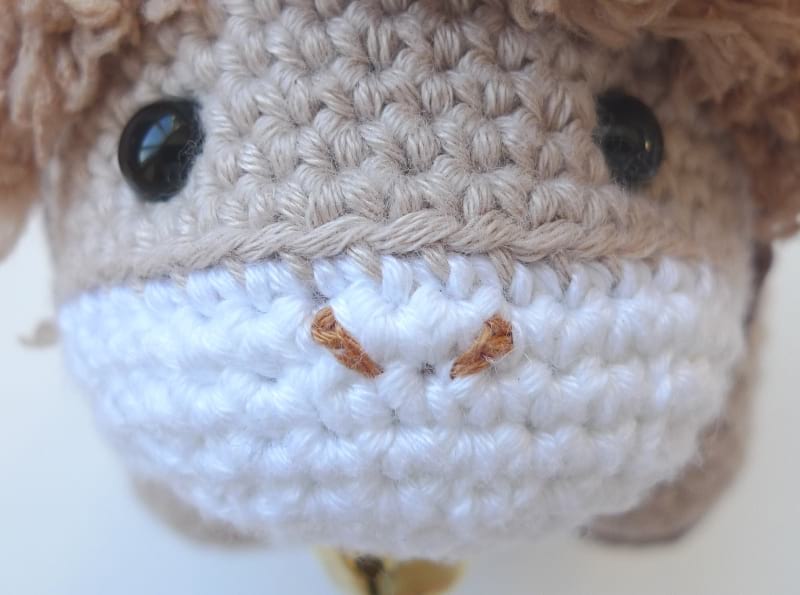
Using tan embroidery floss, embroider the nostrils onto the snout. We embroidered two lines centered between the eyes, starting from the second round below the junction of the white snout and tan face (line spans across the second round).
After inserting the safety eyes (without attaching washer yet), use two yarn strands and tie knots around the post of each safety eyes. Add the washers and pull each strand downwards diagonally, ensuring the strands cross each other to form an X inside the head behind the snout. Pick up the strands and have them exit the snout between Rounds 4 and 5 of the snout, about 5 stitches apart. Stuff only the front of the snout gently (the area in front of the X created by the eye indentation strands).
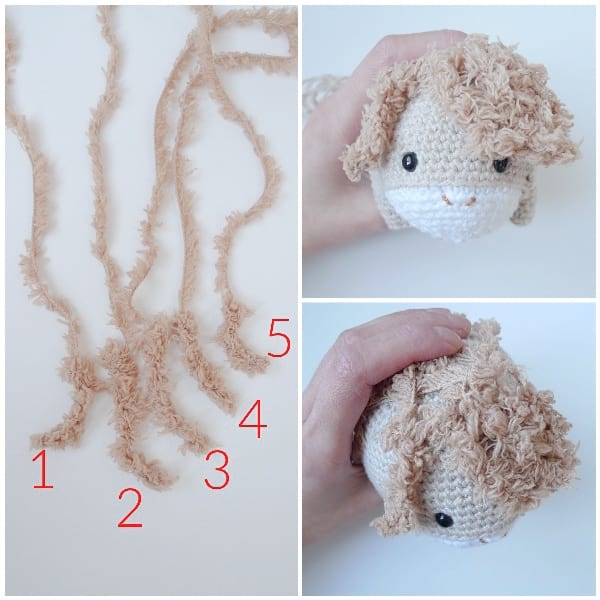
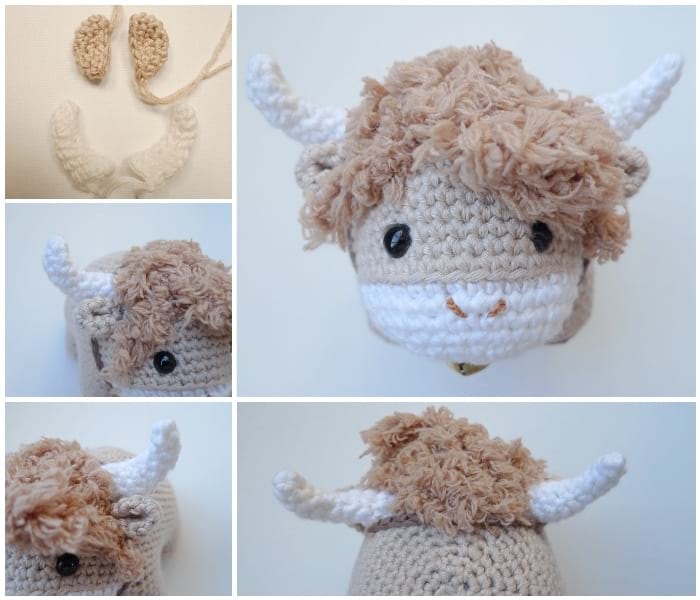
Now it is time to add the fuzzy hair! We played around with different hair ideas, including crocheting a patch of hair. However, we liked the look of individual hair strands that could be strategically placed much better! Create five strands of hair that range in length (ours ranged from 2″/5cm – 3.65″/9.5 cm long). Always leave a long initial end for attaching the hair strand to the head but leave a short final end (snip the yarn pretty close to where you fasten off). Place the strands of hair on top of the head to get an idea of where you will place them and how the final hair will look.
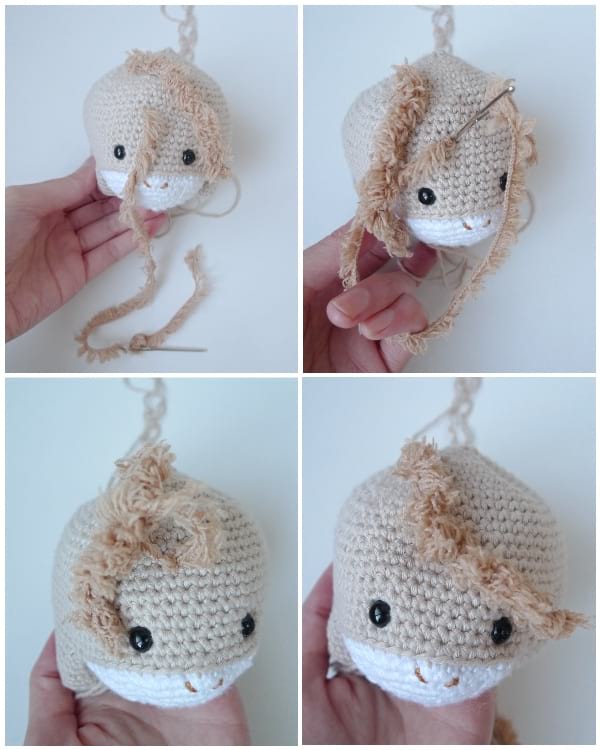
Use the long initial end to attach one strand to the top of the head. Then, have the yarn end exit the head approximately half way down the hair strand, tagging down the strand into place. Reinsert the yarn end back into the head at the same location. Methodically keep placing the yarn strands on the head and attaching them in this manner.
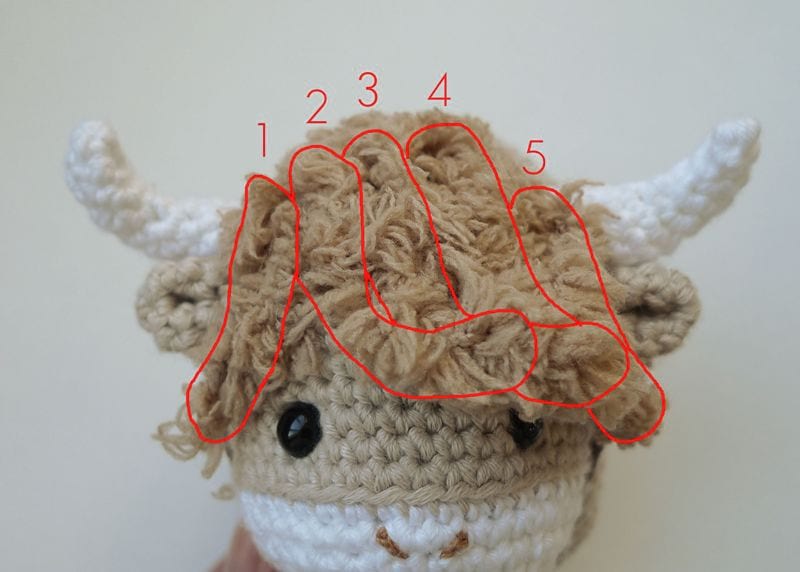
This image below shows where the five individual hair strands are located! The fuzzy yarn blends so well together to give such a smooth and neat final hair look!
At this point in time, you can stuff the head and body with fiberfill. Take the two eye indentation strands (from the same eye), pull (not too tightly) and tie a knot. Check to see if you like how the eye and snout look – then secure with another knot. Repeat with the other eye.
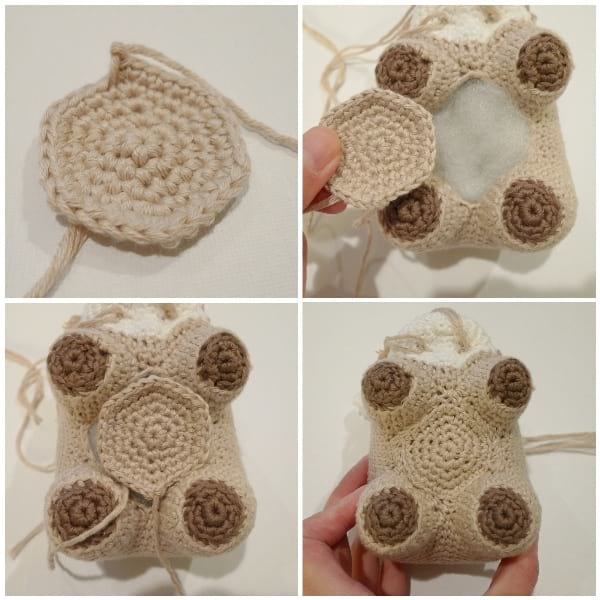
Now it is time to crochet the four hooves with taupe yarn. These hooves are small circles and consist of only two rounds. Finish stuffing each leg and then place the hoof on top of the open leg. To attach the hoof to the leg, whip stitch the outermost loop of the hoof to the open end of the leg. For added security, you can tie knots with the yarn ends from opposite legs (e.g., tie knots with strands from two front legs and tie knots with strands from two back legs).
To crochet the belly, you will use tan yarn and work five rounds. Place the belly onto the hole with the yarn tail at the bottom. The belly fits very well into this space and it is very satisfying seaming this piece into place to close up the body!
I tried out some different uneven increases and eventually came up with this horn shape! I love how they turned out, and I adore the ox’s little ears too. First attach the horns to the sides of the head just behind the hair and then attach the ears right underneath the horns (be sure to pinch the ears).
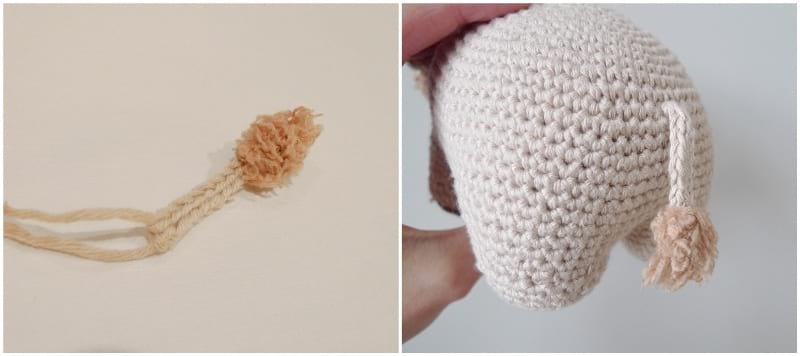
I used both the regular tan yarn and the fuzzy yarn to create the tail! Once you have crocheted the two separate pieces, you will tie the fuzzy part onto the regular part, and then seam the tail onto the rear of the ox using the regular tan yarn ends. It adds such an adorable touch to our ox!
Thank you for going through Part 2 of the step-by-step tutorial! You can check out the written crochet pattern with all the specific numbers HERE!