Note: This is Part 2 of the step-by-step photo tutorial of the Camellia Tote Bag. We will learn how to crochet the sturdy straps with edging and detailing as well as the interior pocket.
- The free crochet pattern with exact written numbers and row/round counts can be found HERE.
- The beautifully-formatted, inexpensive PDF containing the written-out pattern and all the step-by-step pictures (total of 13 pages) can be found on Etsy HERE , Ravelry HERE and on LoveCrafts HERE!
- The convenient Lion Brand Yarn KIT containing all the required 24/7 Cotton Yarn can be found HERE.
- Part 1 of the step-by-step tutorial explaining how to crochet the ovular base, half double crochet side panels and accent panels can be found HERE.
- Join our Camellia Tote Bag Crochet-Along on Facebook HERE!
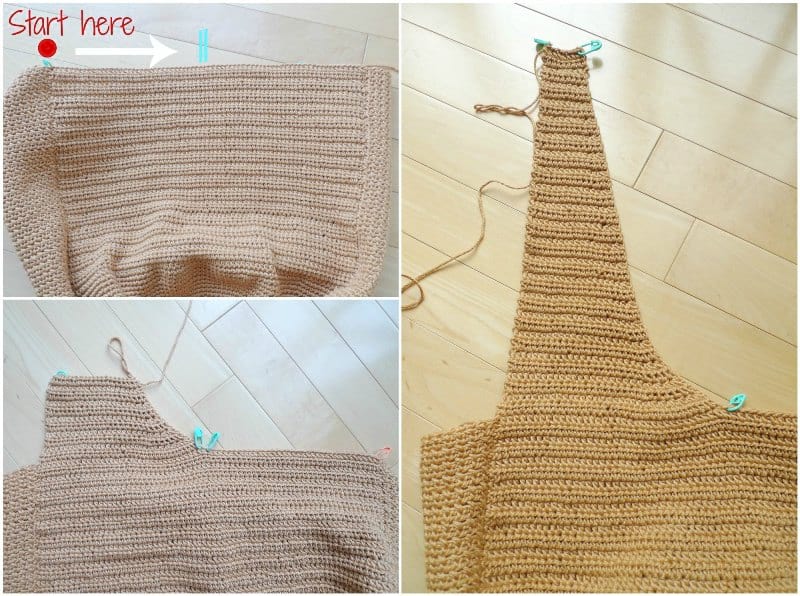
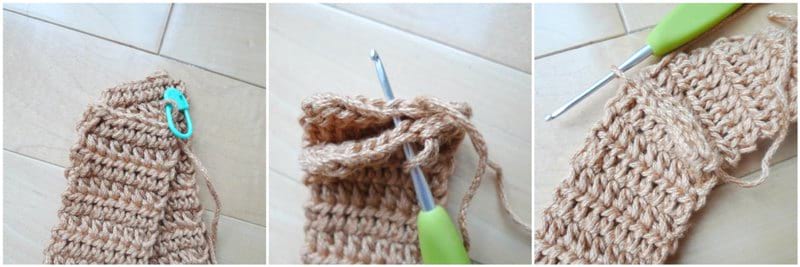
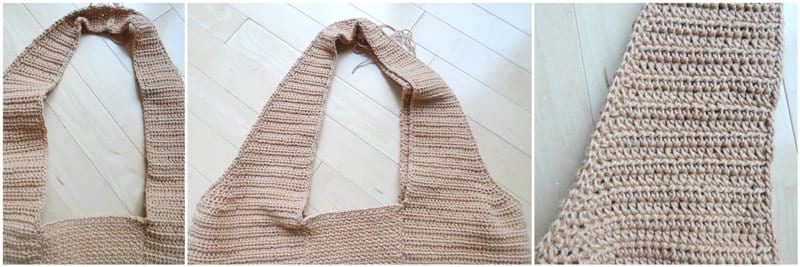
Now that we have completed the Half Double Crochet Side Panels and Accent Panels, it is time to work on the sturdy straps. In total, there are four strap panels, with two strap panels emerging from each half Double Crochet Side Panel. To begin, divide the Half Double Crochet Side Panel (which has a total of 72 stitches) in half and place two stitch markers at the 36th and 37th stitch to indicate where this panel will split into two (Left Strap Panel and Right Strap Panel). Both panels will have a curved shape as they emerge from the center, meaning that the decreases are worked on the side facing the center. Your working yarn should be on the far left side (we left the yarn here when we finished the Half Double Crochet Side Panel), and we will be working half double crochets towards the center where you placed the first stitch marker (36th stitch). The strap panels are worked in turned rows using a 2 mm hook, and we gradually go from 36 stitches down to 8 stitches. Be sure that you are only working the decreases on one side. Note that if you want to adjust the length of the handles depending on your height (I am 5’6 for reference) and where you want the bag to hang, you can increase or decrease the number of rows between R37-44 where there are no decreases as you are repeating 8 half double crochets row by row for that section.
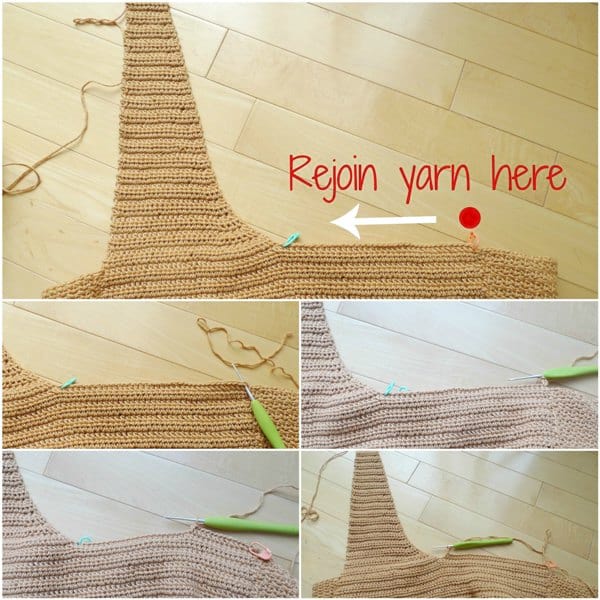
After the Left Strap Panel is complete, it is time to rejoin the yarn at the far right corner so we can begin working the Right Strap Panel. You will work the exact same pattern you worked for the Left Strap Panel, and the end of Row 1 should take you to the second stitch marker that you placed (the midpoint of the Half Double Crochet Side Panel). The curved decrease should be a mirror image of the Left Strap Panel so that the two curved edges are facing each other. For the Right Strap Panels, DO NOT CUT THE YARN, as you can use this yarn to slip stitch the strap panels together (the Left Strap Panel emerging from one Half Double Crochet Side Panel will be slip stitched to the Right Strap Panel emerging from the opposite Half Double Crochet Side Panel).
Repeat the exact same process to create the Left Strap Panel and Right Strap Panel of the other side.
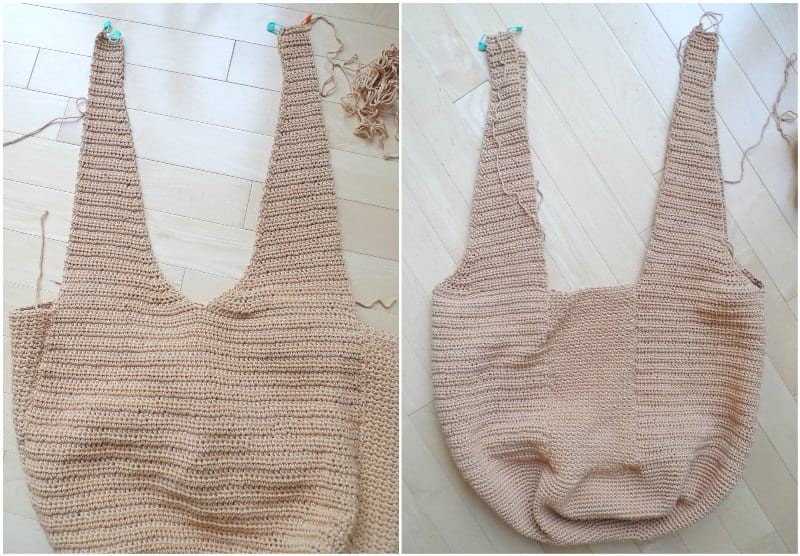
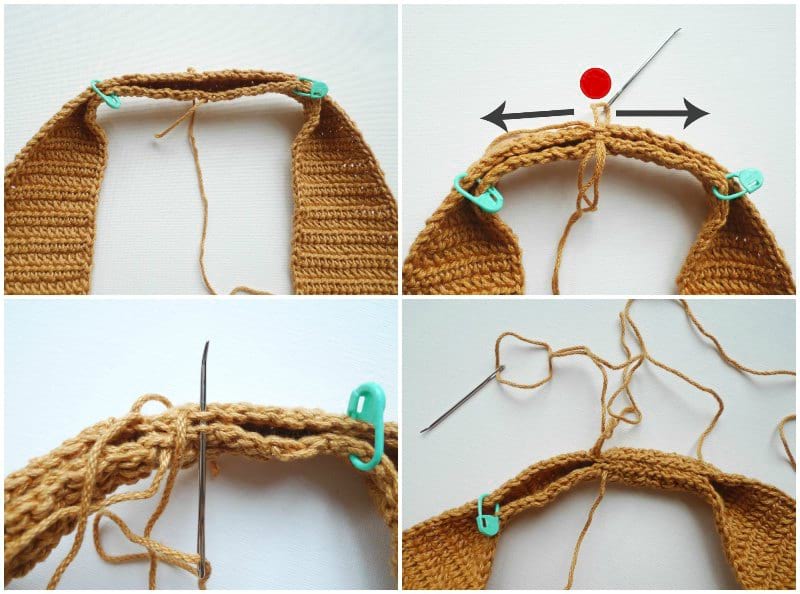
Once all 4 strap panels have been crocheted, it is time to join the straps together. The Left Strap Panel emerging from one Half Double Crochet Side Panel will be joined to the Right Strap Panel emerging from the opposite Half Double Crochet Side Panel. The joined straps should frame the Accent Panel (be sure you are joining the correct straps).
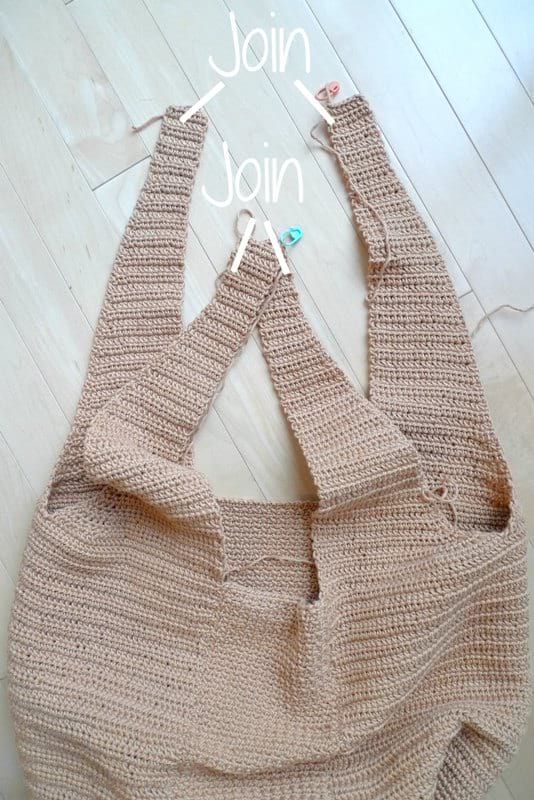
Using the yarn that you left from the Right Strap Panel, slip stitch the 8 stitches of one strap panel to the 8 stitches of the other strap panel, going through the front and back loops of all stitches. Fasten off the yarn from one strap joining but LEAVE YARN FROM THE OTHER STRAP JOINING to continue crocheting the strap edging of the large section (described in the next part).
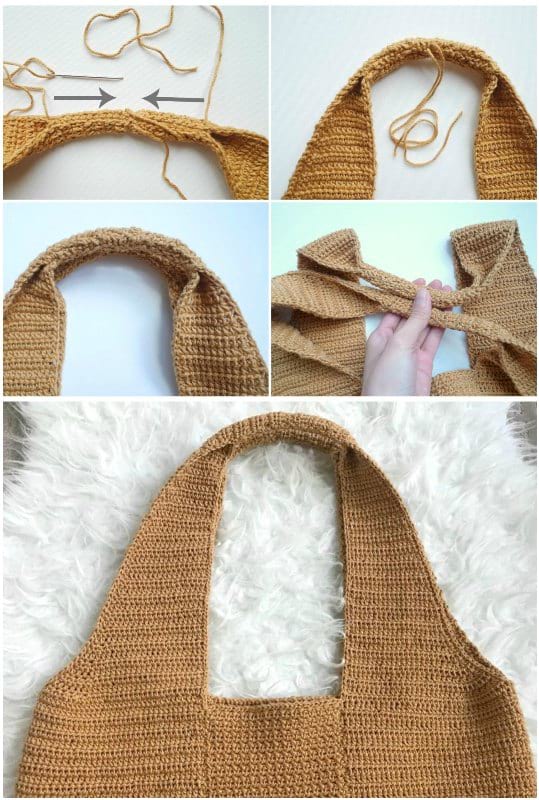
To strengthen the straps and add a smooth decorative edge, we will be working slip stitches around all the straps using a 2 mm hook. There will be 3 sections that need the slip stitch edging: 2 smaller sections that go across the straight edges of the strap panels with the bottom as the Accent Panel, and 1 larger section that goes around the curved edges of the strap panel). For the larger section, continue using the yarn that you left after joining the straps. Carefully slip stitch around the area as indicated by the arrows shown below.
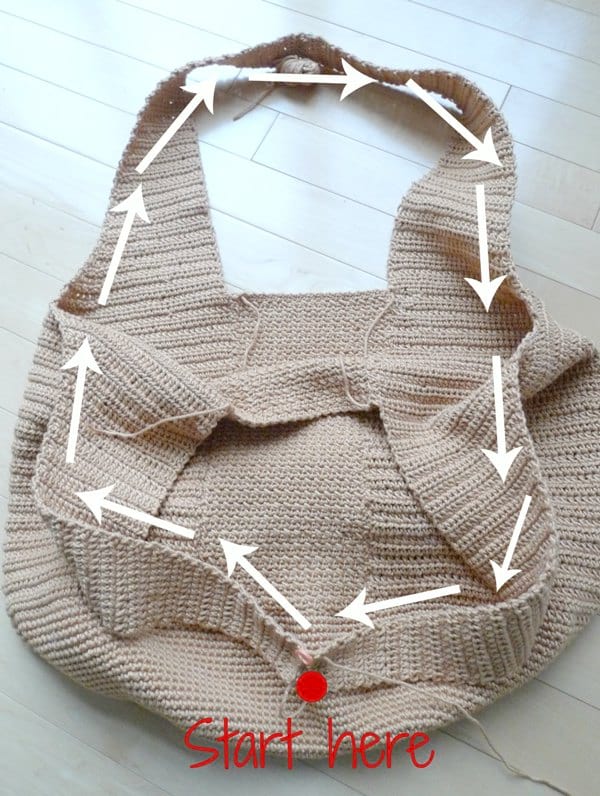
To do so, insert your hook into the next space, yarn over, and pull through both loops. Continue in this manner around until you reach the first slip stitch you created. Slip stitch to the first slip stitch created and fasten off the yarn.
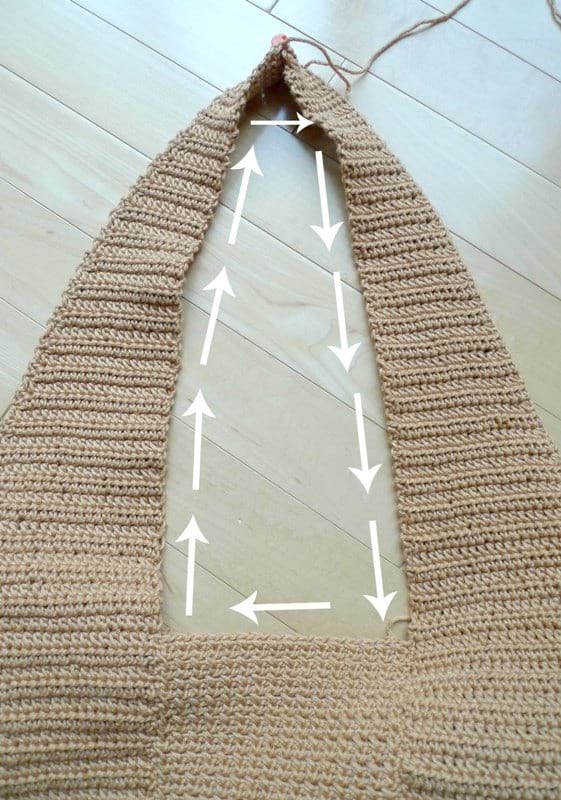
For the two smaller sections, rejoin the yarn at any point around the described area (I rejoined the yarn along the strap panel). Work slip stitches all the way around, slip stitch to the first slip stitch created and fasten off the yarn.
The slip stitch edging gives such a smooth and clean look around all the edges of the handles and provides more strength and support!
Next, we will strengthen the straps even more and provide a beautiful detail by seaming the top of the straps into a tube. With the outside of the bag facing you, measure 4.5”/11 cm across the tops of the handles (you can use stitch markers to indicate this length). Pinch the strap in on itself by folding the strap inwards towards the center. Note that with the front side of the strap facing you (back side is on the inside of the bag), the front sides will be pinched together and form the inside of the tube. Using a yarn needle and a 35”/89 cm yarn tail, start in the middle (leave half the length for each side) and whip stitch outer edges together by going through the outermost loops on either side to form a tube.
Once each end has been reached, whip stitch back towards the middle for added strength (both yarn ends should meet back at the center). Tie both yarn ends into sturdy knots and weave in the ends. Hide all ends into this tube that has been formed.
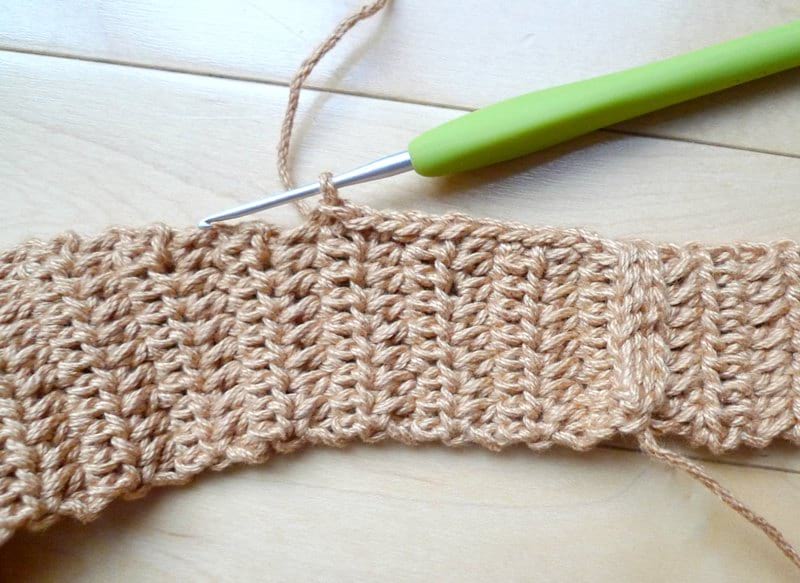
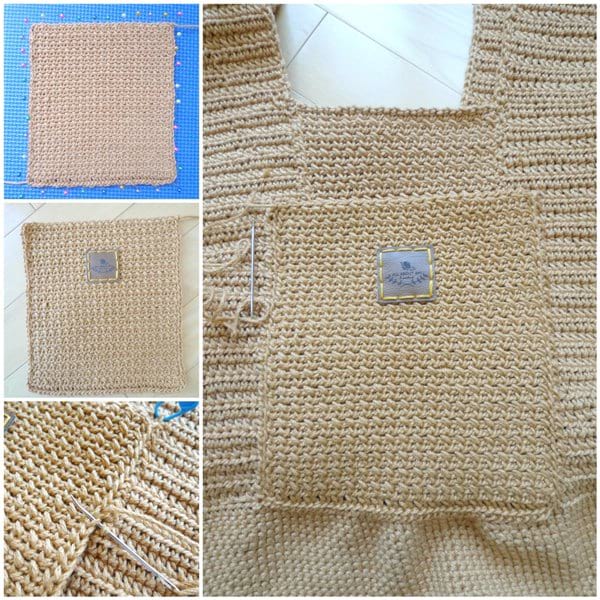
Lastly, you can crochet an interior pocket (I sized mine to fit my cell phone)! Crochet a rectangle using the same stitch that you used for the Accent Panel, (in my case, Single Crochet Columns) and work a slip stitch edging down one side, across the bottom, and up the other side.
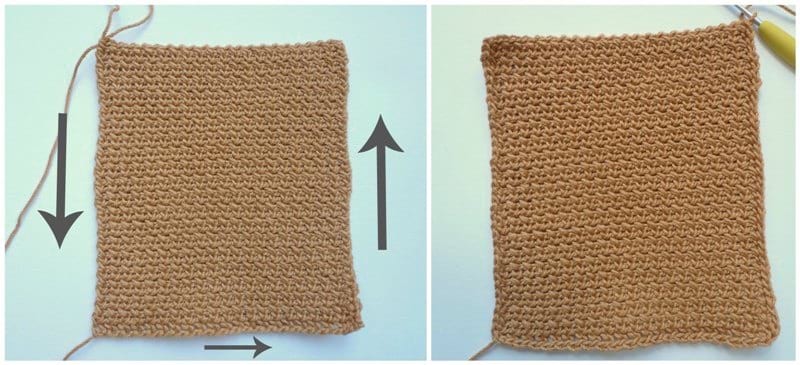
Block the rectangle, sew a faux leather square garment tag with embroidery floss, and whip stitch it onto the interior back of the bag. When using the whip stitch, go through the outermost loops of the slip stitch edging and be careful not to go through the entire panel of the bag (otherwise the whip stitches will be visible from the outside). I also sewed a wood tag onto the front of my bag in the bottom right corner using embroidery floss.
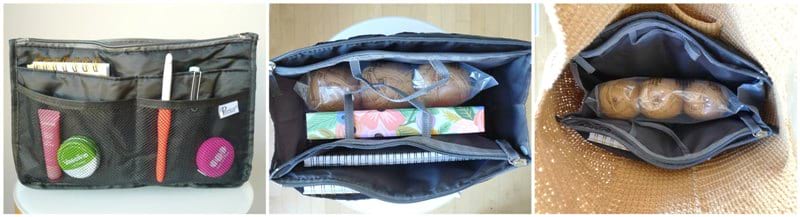
Congratulations, your Camellia Tote Bag is complete! I highly recommend buying a Periea large purse organizer insert as it instantly adds compartments and zipper closure to this bag (it perfectly fits inside as I designed this bag’s dimensions with this purse organizer in mind). This is a great option for those of us who are not as good at sewing and who may not be able to add a fabric lining. The purse organizer is lightweight and makes it easy for you to quickly switch out the contents of your bag from one purse to another! These purse organizers come in many different colours and patterns, and the large size perfectly fits into my Camellia Tote Bag, Wildrose Market Bag, and Star Stitch Purse!
I hope you found these step-by-step tutorials helpful! You can find the free written pattern for this Camellia Tote Bag HERE!
Note: Watch this video below to see how this project can be segmented into 4 sections (Ovular Base, Half Double Crochet Side Panels, Accent Panels & Straps and Interior Pocket) with a detailed verbal explanation of each part. These videos were recorded for the Camellia Tote Bag Crochet-Along: