***This is the STEP-BY-STEP TUTORIAL for the Snuggle Bunny Pillows! The FREE PATTERN can be found in this blog post HERE! I highly recommend reading through this post before attempting the pattern so you can see how each piece is created!
***You can purchase an INEXPENSIVE AD-FREE PDF of this pattern on Etsy HERE and on Craftsy HERE! This beautifully formatted PDF includes the step-by-step pictures and is a total of 7 pages including the cover page! Lion Brand has also put together a convenient kit to make these pillows HERE that includes all the yarn you need as well as a copy of the pattern!
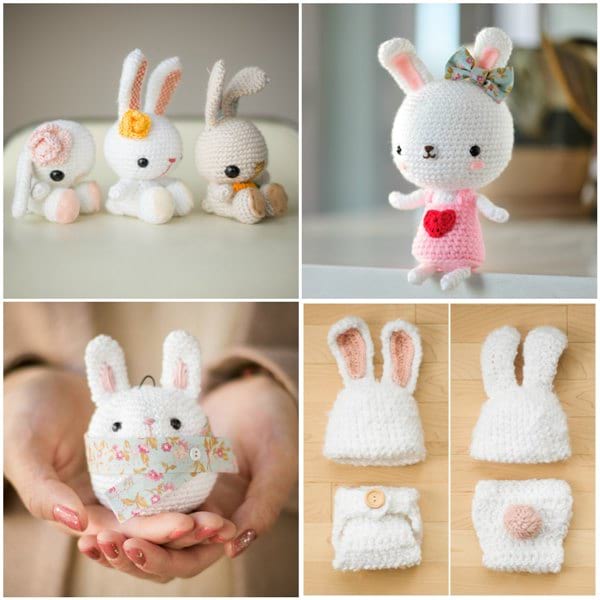
Our love of bunnies has been evident throughout the years as we’ve designed so many bunny projects in the past including the Spring Bunnies, Sweetheart Bunny, Bunny Ornament, and the Fuzzy Baby Bunny Outfit which Brielle wore for her newborn photoshoot! It’s no surprise that we are tackling another bunny project, this time on a much larger scale!
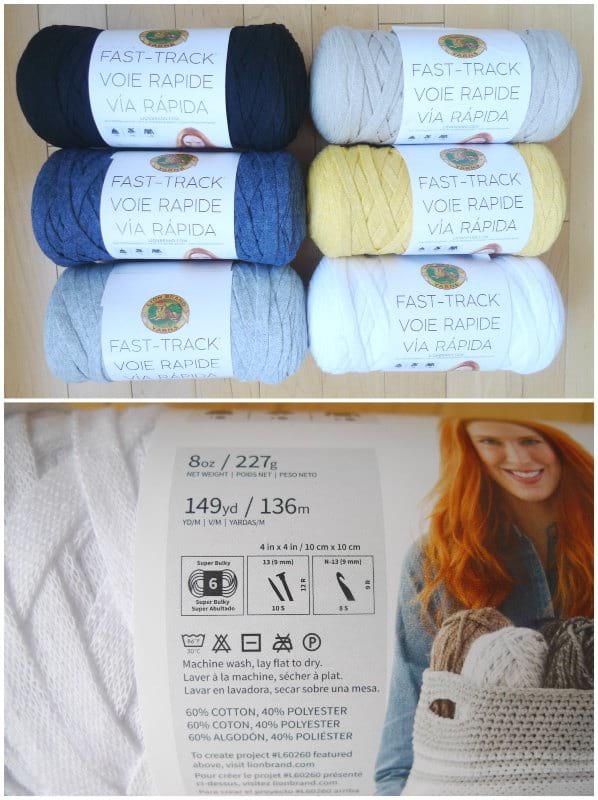
When Lion Brand Yarn sent me some samples of their brand new t-shirt yarn called Fast-Track, I immediately gave it a squish and was very impressed by how soft it was as well as its unique shape. It is a flat, tape-like yarn that is classified as a super bulky (level 6) yarn that is 60% cotton and 40% polyester. It comes in a variety of bold and neutral colours, and I ended up going with the Chopper Grey and Airstream White!
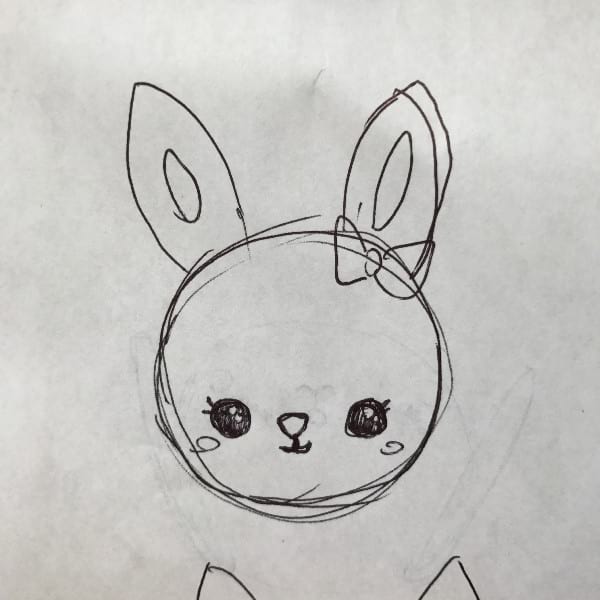
When I first started crocheting with the Fast-Track yarn, I wanted to create a basket as we are in need of a basket to hold all the girls’ socks. However, I then switched gears and thought how this yarn would be wonderful for amigurumi since it does not fuzz up easily and has great stitch definition! I still plan to make a basket with Fast-Track in the future as it is great for home decor projects. Ryan made a sketch of this sweet bunny below, and I excitedly began crocheting some large circles to make Bunny Pillows for the girls! I knew it would be a fun project since it is part amigurumi and part home decor!
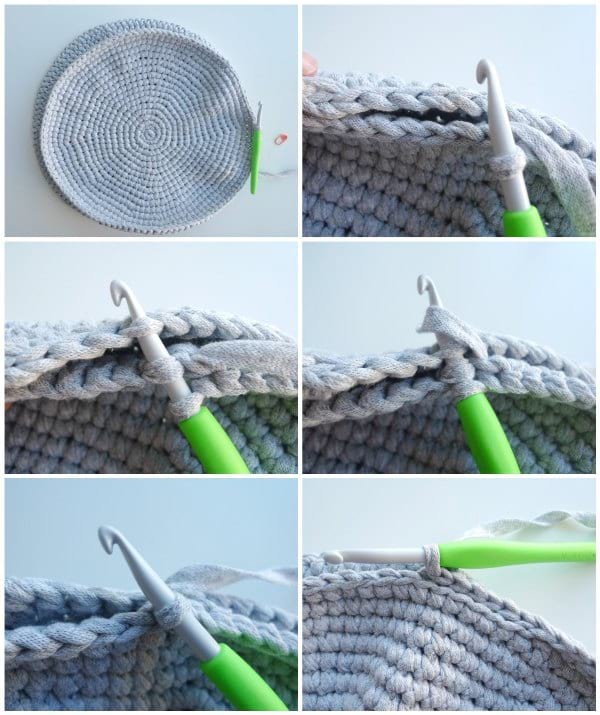
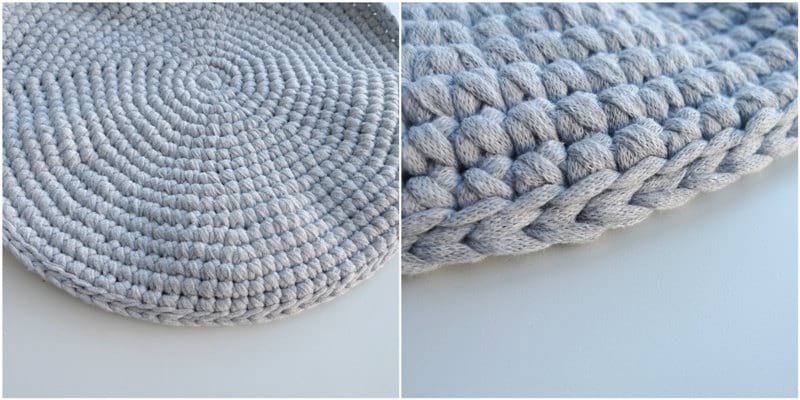
I crocheted two large circles, increasing after each round to make sure that I got a flat shape rather than a curved one. I wanted this project to use two skeins of Fast-Track yarn, and I ended up having to resize and frog some rounds at the end to ensure I had enough yarn left to crochet the ears! I left one circle attached to the working yarn as I would later use this yarn to seam up the head!
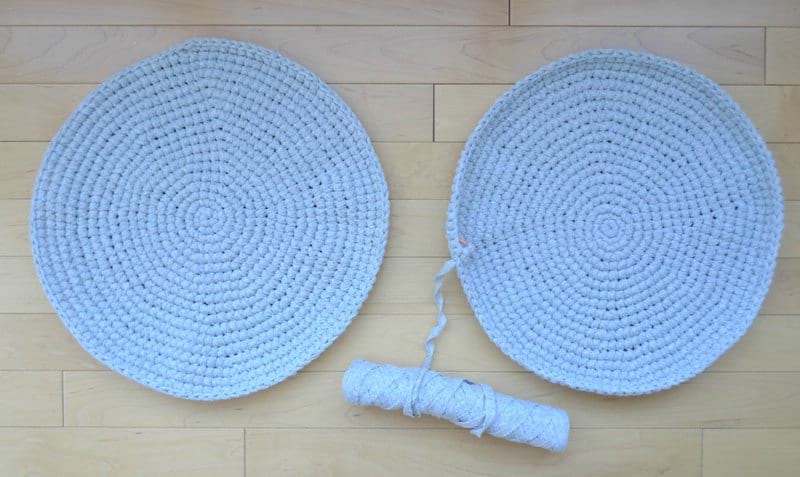
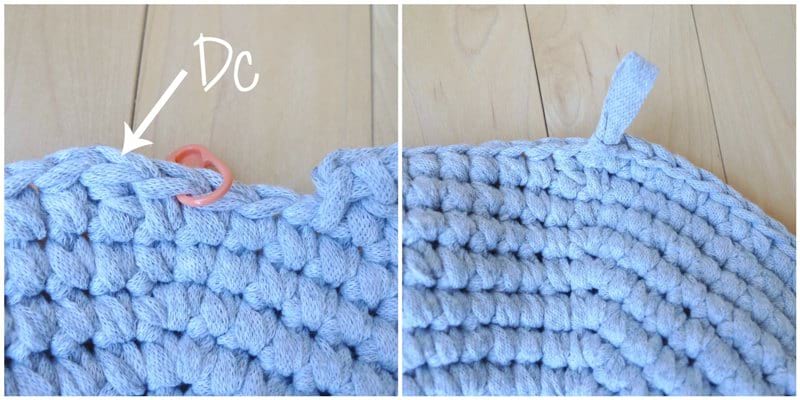
Since I worked in a huge spiral without joining my work after each round, no seam was created. For the very last round, I started off by working one double crochet at the beginning of the round to create a bit more height. Then I worked all the other stitches as normal with single crochets, and when it was time to close up this final round, I slip stitched to the double crochet! This made it less of a step or dip to close off the round.
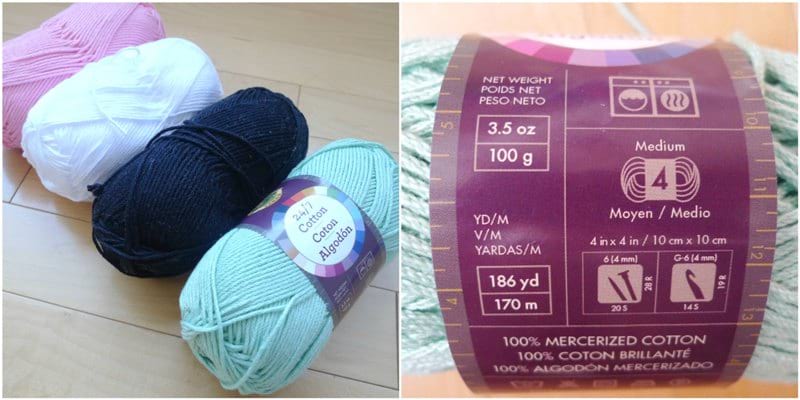
Once the large circles were complete, it was time to crochet all the facial features and details! I decided to use one of my favourite yarns called “24/7 Cotton” by Lion Brand Yarn. I’ve used it for numerous projects in the past including my popular Star Stitch Pouches, Bee Amigurumi, and Captain Kawaii Costume. This yarn is a medium (level 4) yarn that is 100% mercerized cotton. It comes in a wonderful array of colours and since it is mercerized, it has a lovely sheen to it and it does not fuzz up easily. I knew the 24/7 Cotton would complement the Fast-Track yarn nicely, and both would not get too fuzzy or run-down with repeated snuggles!
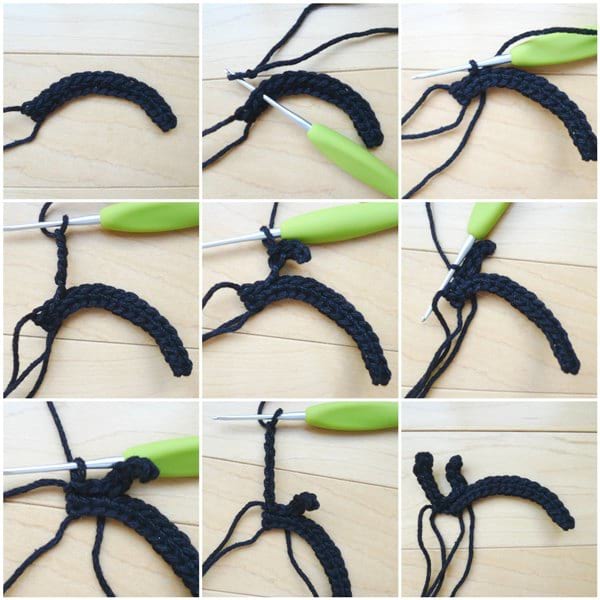
I created the eyes by crocheting a circle with joined rounds. To form the eyelashes, I made a series of chain stitches and then worked in the back “bumps” of the chains to achieve that curved effect. To get the right eye’s lashes to curve the other way, I simply turned and worked in the opposite direction for the last round and continued the lashes in the same way as the left eye. We wanted to create an anime-type look for the eyes, so Ryan embroidered two white circles on the eyes: one large and one small. Both circles were created by embroidering repeated lines at slightly different angles as shown below.

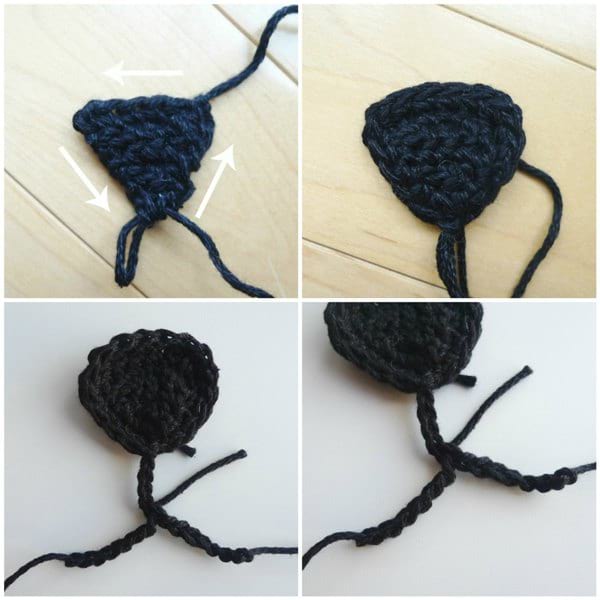
I crocheted a triangle for the nose and then single crocheted around the border to create a nice edging. Then it was time to begin creating the upturned, smiling mouth! I chained 12 and then fastened off. I rejoined the yarn in the 5th chain from the top (where the nose is located), chained 7, and then fastened off. When it was time to attach the nose/mouth, we made sure to shape the chain stitches so that they formed two “u’s” or a “w” to become a smiling mouth!
I used pink yarn to create these two oval cheeks! Blushing cheeks are such a sweet addition to amigurumi!

Ryan then sewed all the facial features onto the head! Placing facial features is very important as even shifting the parts a little can really change the overall look. Attaching limbs and sewing pieces together is my least favourite part about amigurumi, so I was very thankful that Ryan helped me with this! He sewed the facial features onto the side that the working yarn was attached to. As I seamed the pillow together (which is shown next), we stuffed the pillow firmly. It’s important to note that this pillow uses A LOT off fiberfill stuffing as you want this pillow to be very sturdy and not floppy. You need to push the stuffing especially towards the edges so that there are no dimples or dips in the crocheted piece.
Below are some pictures showing you how I seamed the two sides together (I took these pictures before we attached the facial features). I placed both sides ontop of each other, with the wrong sides touching each other on the inside (correct sides should be facing outwards). I positioned the join towards the bottom of the face and made sure that the side with the facial features was facing me. I inserted my crochet hook into the back loop of one side (with the facial features) and front loop of the other side. I then yarned over and pulled through all the loops, continuing in this manner all the way around the circle working counter-clockwise. At the very end, I then slip stitched to the first slip stitch.
This method creates a very clean and strong seam as pictured below!
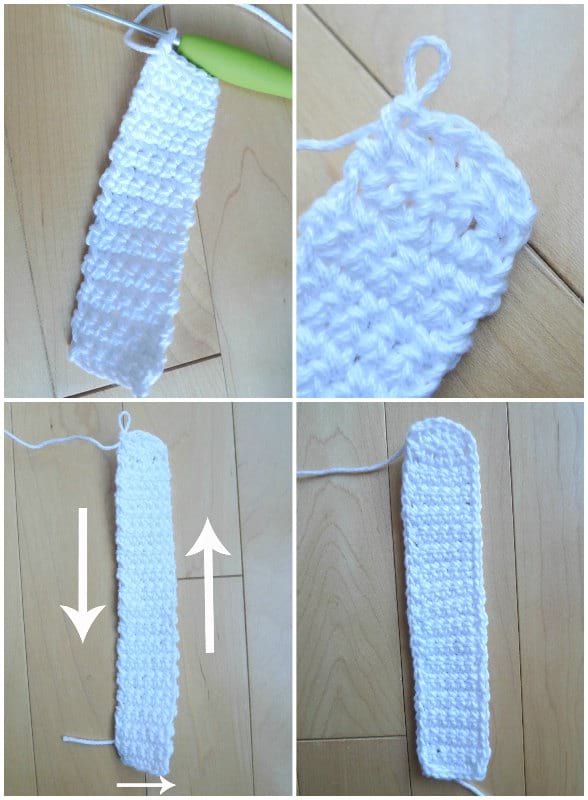
Next, I crocheted the ear linings using white cotton. I worked in turned rows and used stitches of various heights to create the curved top. Then, I slip stitched across the sides and bottom to create a more clean and polished edge!
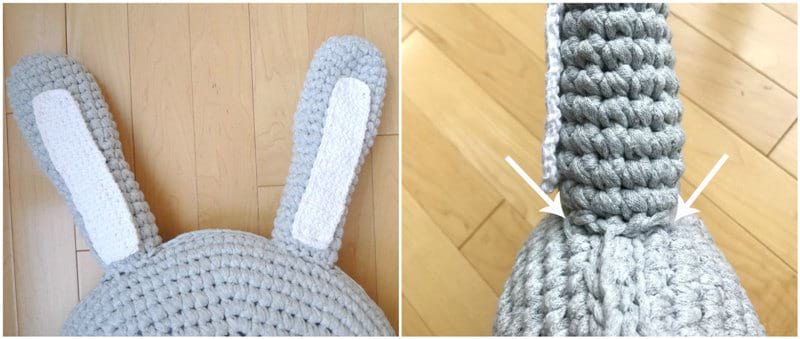
I crocheted the ears using Fast-Track yarn and worked in continuous rounds. For the last round, I did half the number of stitches and left this jagged “step” in stitch height on purpose. We positioned these extra stitches towards the outsides as this change in height helped when attaching these ears to a curved surface (the head). Ryan sewed the ear lining onto the ear, and then he sewed the ears onto the head.
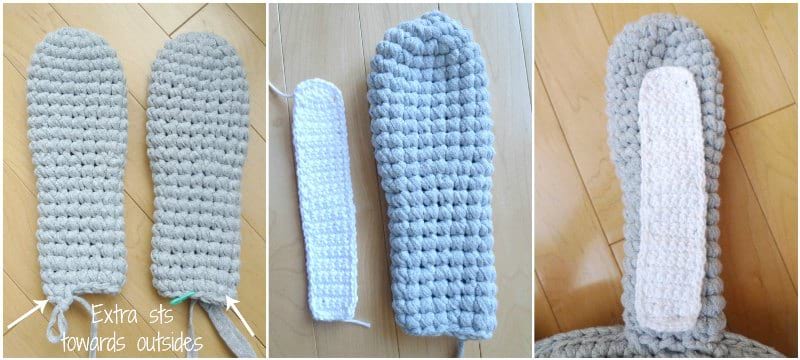
Note that we did not sew the open end of the ear shut or flatten it. We stuffed the ear gently and attached the ear so that it spanned across the last rounds of both sides of the head. By attaching it around a wider space, this gave the ears more stability so that they did not flop downwards!
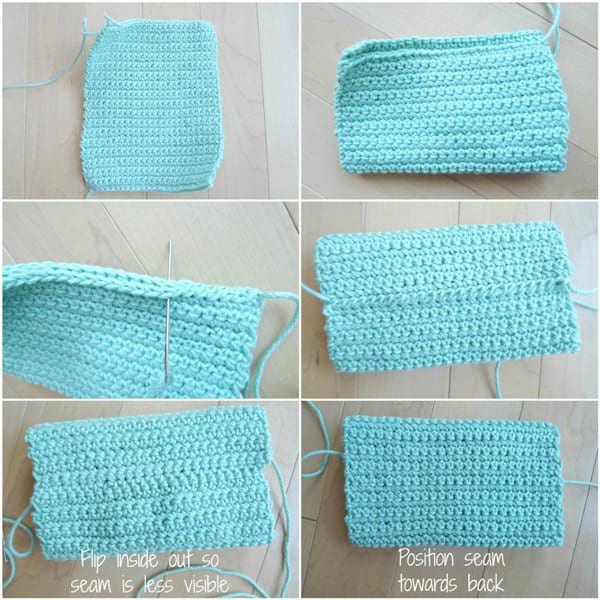
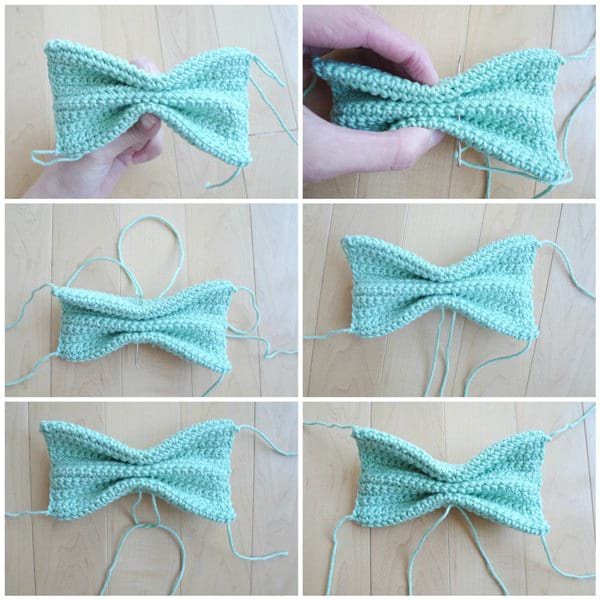
Lastly, it was time for the final cute touch: the puffy bow! I used this beautiful mint green yarn and crocheted a rectangle. Then I folded the rectangle in half so that the rows were horizontal. I whip stitched the ends together and flipped the piece inside out so that the seam was less visible. I then positioned the seam towards the back of the bow.
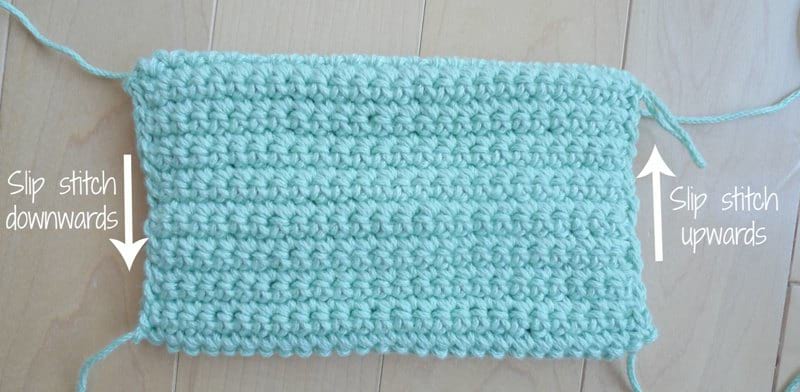
I worked slip stitches across the sides of the rectangle to seam them up!
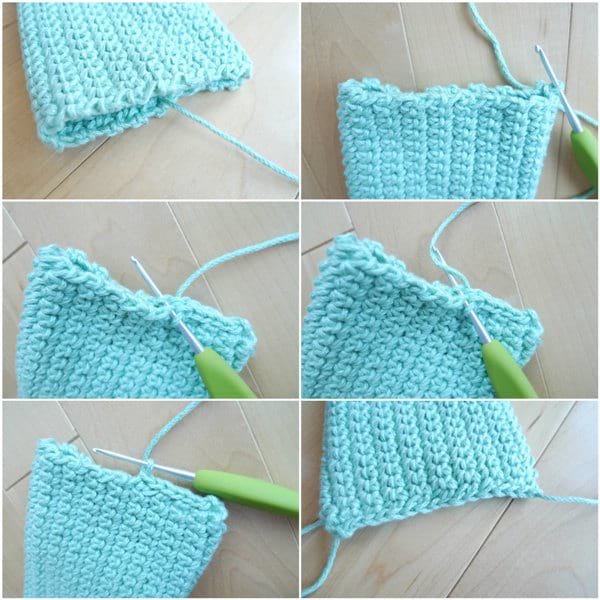
Note that I worked slip stitches upwards on the right side and downwards on the left side so that those nice “v”s were visible from the front!
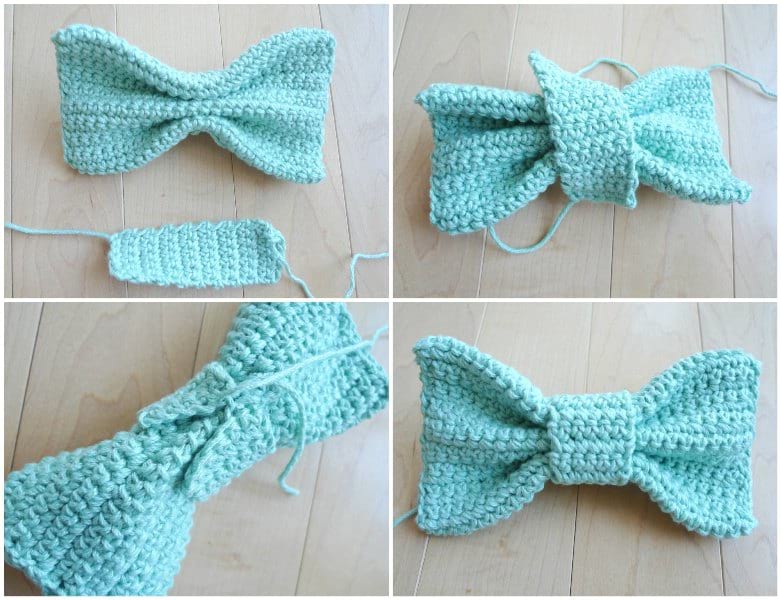
Next, I pinched the middle of the bow to form these creases and threaded a yarn needle up through the bow and then back downwards. I then tied a knot to hold the ruching in place!
I crocheted a small strip, wrapped it around the middle of the bow, and then whip stitched the ends of the small strip together. My puffy bow was complete!
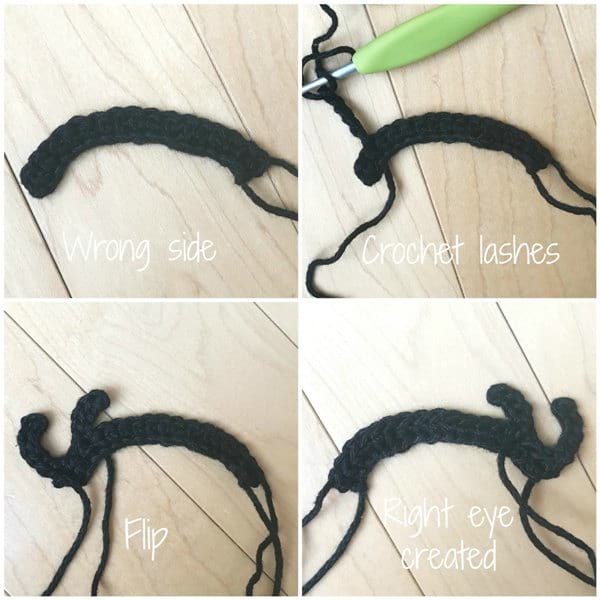
We wanted to create an alternative to the open eyes that was just as cute for a second bunny: closed, smiling eyes! I crocheted one row of single crochets which had a lovely natural curve to it. For the left eye, I positioned the row so that the right/correct side was facing me (yarn ends on the left side). I rejoined the yarn in the third stitch from the left and began working the curved lashes. I did a series of chains, worked slip stitches in the back bumps of the chains, and then slip stitched across to the first stitch on the left and made another lash using the same technique.
To make the right eye, I positioned the row so that the wrong side was facing me (yarn ends on the right side). I then repeated the exact same steps as with the left eye to create the curved lashes. When it was complete, I then flipped this eye so that the lashes were on the right side! It’s important to note that when Ryan sewed down both sets of eyes (open and closed), he DID NOT sew down the lashes so that they could be free to move. This gives a wonderful dimension to the face!
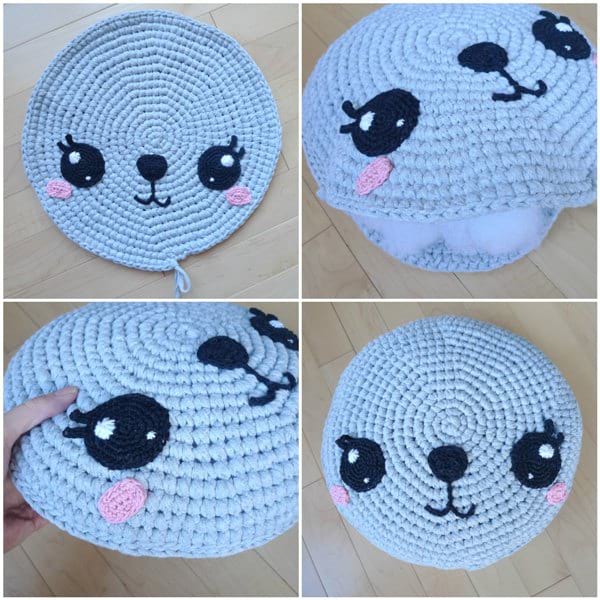
I was ECSTATIC to see all the pieces come together to form this adorable and sweet Snuggle Bunny Pillow!
![]()
They are such a great size and the Fast-Track and 24/7 Cotton yarns give such a sturdy and clean look!
![]()
This is how our white Snuggle Bunny Pillow with the closed smiling eye turned out! Her expression is so sweet and happy, and I love the pink against the white!
![]()
I am over the moon with how these adorable bunnies turned out, and I hope you like them too!
![]()
The girls were so excited when they saw me working on the bunny pillows and when I was finally done both of them! Aren’t they the perfect size for cuddling? When we snapped these pictures of them on Sunday morning, they just so happened to be wearing the PERFECT shades of pajamas so we didn’t bother changing them! Their pajama colours complement their pillows perfectly- you can see that we are big fans of mint green and pink! The grey bunny is Myla’s, and the white bunny is Brielle’s! When Brielle saw her finished white bunny’s expression, she immediately smiled and said her bunny was “shy” 🙂
![]()
They add such a touch of whimsy to any room, whether that be in a nursery, child’s room, your own room, or on a sofa! You can choose any combination of colours to match your decor or theme, and the yarn holds up really well without fuzzing up!
![]()
I had the hardest time choosing an official name for these projects, but I opened it up to my readers and several people mentioned the word “snuggles”! I thought the “Snuggle Bunny Pillows” would be a perfect name! A “Snuggle Bunny” is defined as a “romantic partner, child, pet, stuffed animal, etc. which is an object of affection and which provides comfort through physical contact“. These pillows can definitely be objects of affection and provide comfort through hugs and cuddles!
![]()
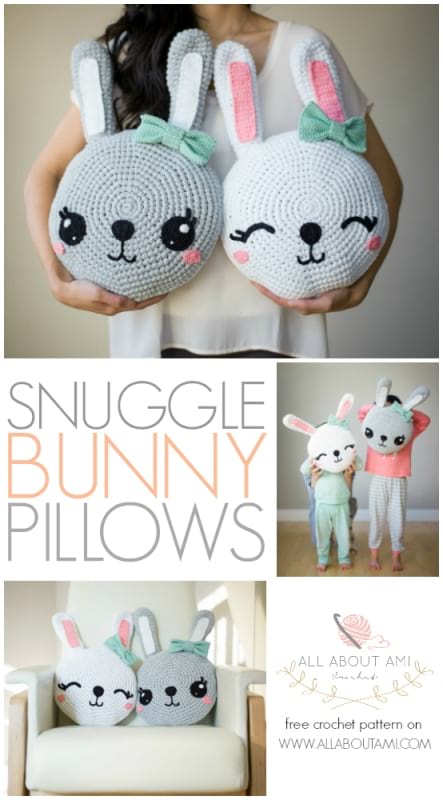
Don’t forget to check out the official formally-written crochet pattern HERE! Lion Brand Yarn has also put together a kit to make this project HERE! If you love this project and other designs you’ve seen on my blog, I highly encourage you to sign up for my BRAND NEW NEWSLETTER HERE! I send new designs and patterns straight to your inbox, and provide helpful tips along the way! You can also follow me on my social media (Facebook, Twitter and Instagram) to stay up to date with my work too! Happy bunny making, everyone! Feel free to pin the below image to your Pinterest boards to remind you of this project! Be sure to use the hashtag #snugglebunnypillow on social media so we can see your progress and all your adorable bunnies!
{Thank you to Lion Brand Yarn for providing the yarn for this project!}