In Part 2 of our “Simple Knit Series“, we are learning how to knit the classic stockinette stitch– see the full tutorial and video HERE! The stockinette stitch is created by alternating rows of knit stitches and purl stitches. Once you have practiced this stitch, you can knit a simple, beginner-friendly hat that is worked flat with absolutely no increases or decreases. I personally love knitting in the round with circular needles and it is my preferred method of knitting hats since you do not need to seam up the sides. However, this hat pattern is designed for beginners who either do not own circular needles yet or are not ready to try them. This is a great project if you want to stick with your flat needles and you want to practice the stockinette stitch!
The techniques you will need to know for this project are:
- Casting on stitches
- The knit stitch
- The purl stitch
- Casting off stitches
Check out my “How to Knit the Stockinette Stitch” blog post HERE if you are unsure about how to do any of the above techniques and watch the video below to see me demonstrating them. You can also view this video on YouTube HERE!
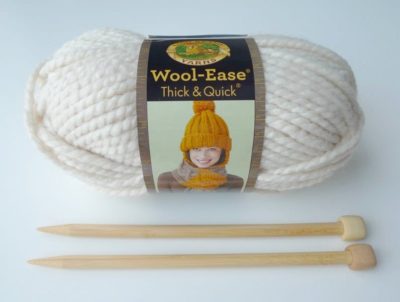
The materials needed to knit this hat are 1 skein of Lion Brand Wool-Ease Thick & Quick in “Fisherman” (on the Lion Brand Site HERE) and Clover Takumi 9 mm knitting needles. I would recommend getting the longer needles (14″) as opposed to the shorter ones I own pictured below as you’ll see that all the stitches can get quite squished together on the shorter needles!
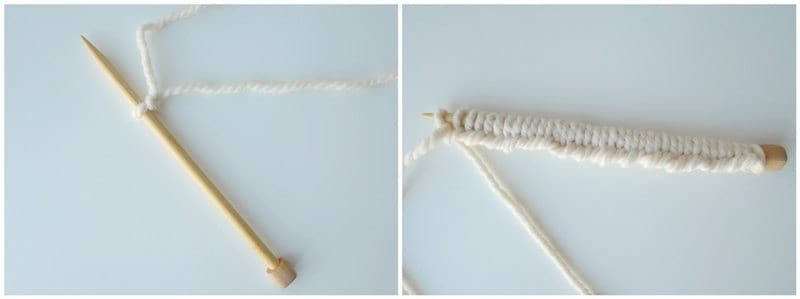
To begin, make a slip knot and use the long tail cast-on to cast on 40 stitches. This technique actually creates the first row of knit stitches as well! The number of stitches that you cast on will serve as the circumference of the completed hat.
Flip your work and begin working purl stitches across the entire row. When purling, the right needle is inserted downwards and in front of the other needle while the working yarn is in front of both needles.
Next, flip your work and work knit stitches across the entire row. Knit stitches are worked by inserting the right needle upwards and behind the other needle, and the working yarn is behind both needles.
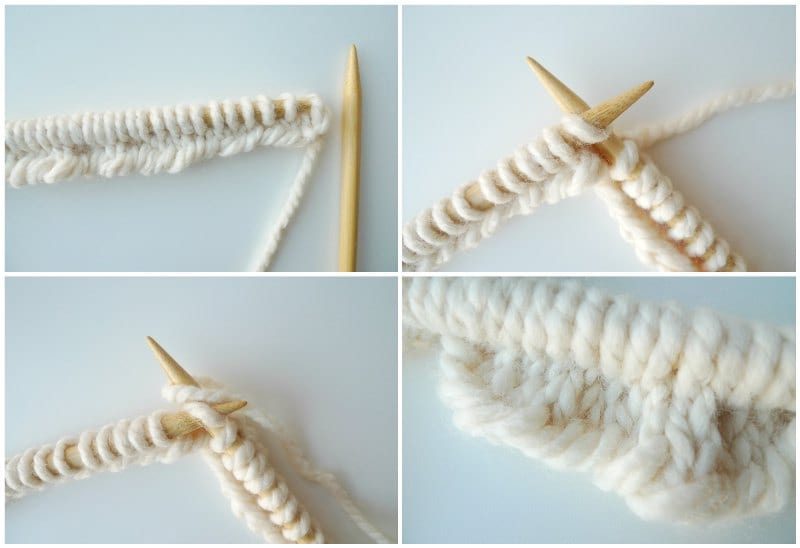
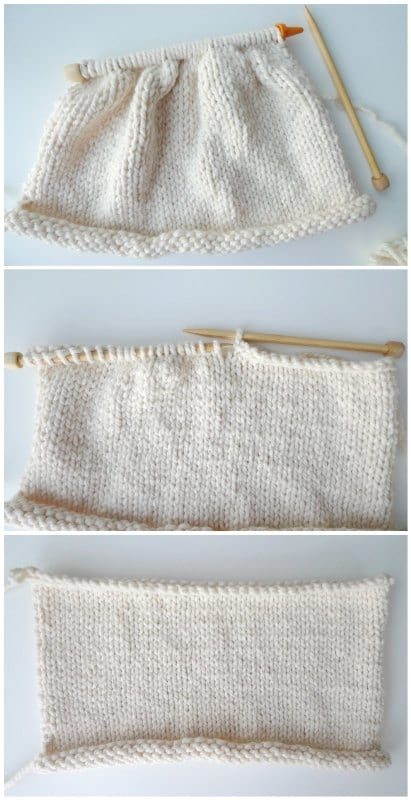
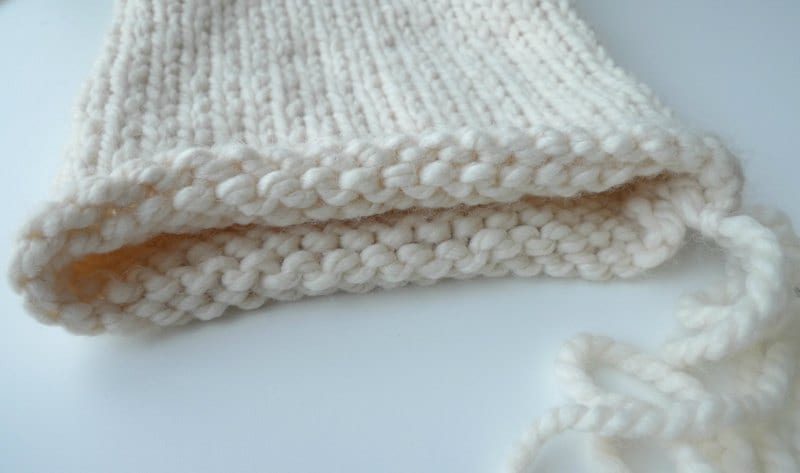
Keep alternating one row of purl stitches with one row of knit stitches (if you ever forget what side you’re on and what stitch you’re supposed to do for this project, read this post HERE for a handy trick)! After working a total of 33 rows, it is time to cast off the stitches! The number of rows serves as the height of the finished hat, so if you want a slouchier or taller hat or one with a thicker rolled-up brim, complete more rows. When cutting the yarn at the end, leave a long tail as you’ll be using this tail to close up the top later on. You’ll notice that the finished rectangle is curling along the edges. An interesting feature about the stockinette stitch is that it naturally curls (see this Craftsy blog post HERE). We will take advantage of this curling by using it as the hat’s brim!
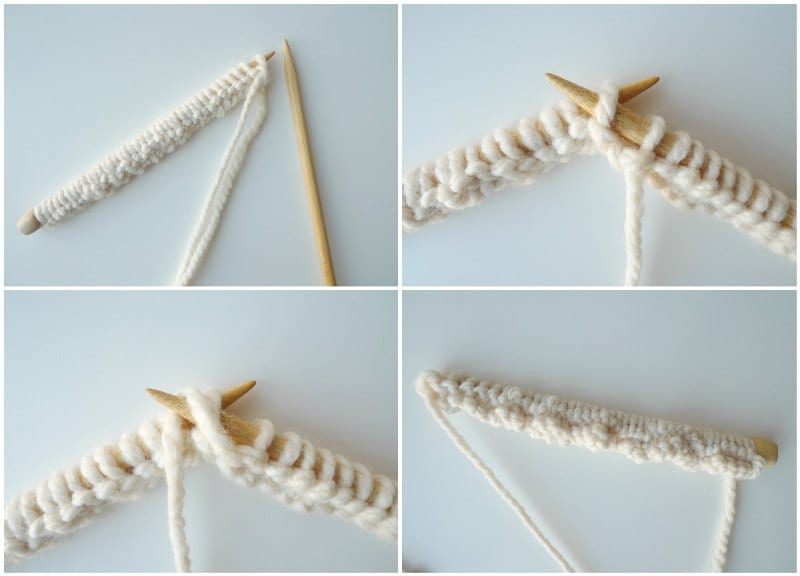
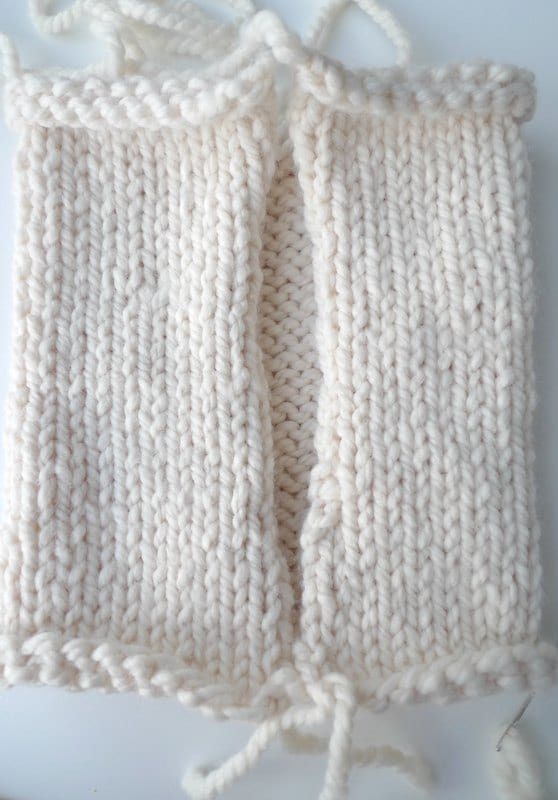
Now it is time to seam up the sides of the hat to create a tube. Fold the sides of the hat together so that the stockinette stitches are facing you. Thread a yarn needle (bent tip is very handy and ergonomic) onto a piece of yarn at the bottom of the piece (the beginning of the rows) and get ready to do the mattress stitch!
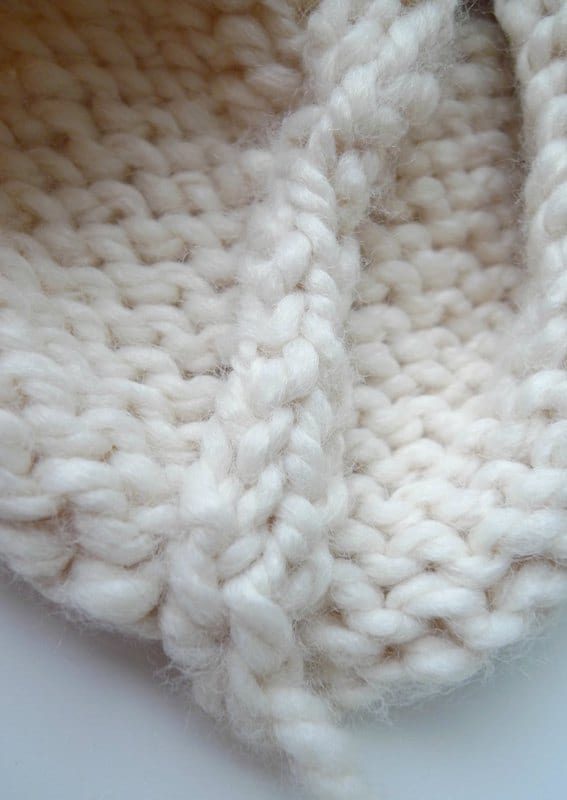
The mattress stitch is a brilliant vertical seaming technique for stockinette stitches that makes the seam invisible! I learned how to do it HERE and I would highly recommend you check out their video. You need to find the horizontal bars separating the edge stitches from the knitting stitches (see arrows below). You insert your yarn needle under them, alternating the left side with the right side, working towards the top. When you pull the yarn taut, you’ll see that the seam becomes invisible!
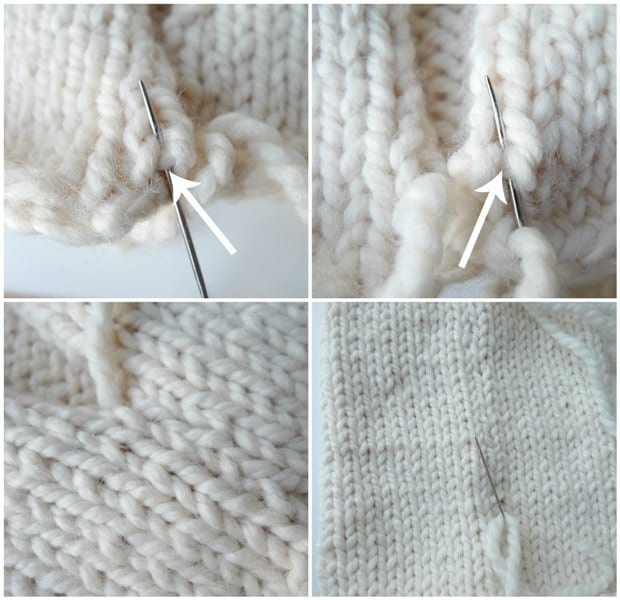
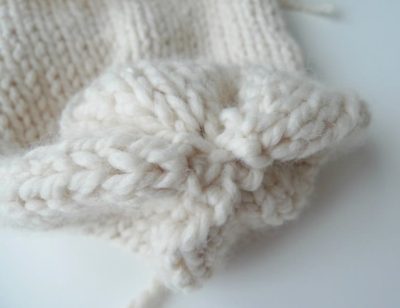
The mattress stitch creates this raised ridge on the inner side, so if you want to knit a hat with a more folded up brim, this ridge would be visible on the outside when folded over. I would recommend simply whip stitching the edges together if you want a thicker folded-up brim (the seam would not be invisible, but at least this raised ridge would not be showing)!
Next, it is time to close up the top of the tube we have created (the edge where we casted off stitches).
To do this, thread your yarn tail through a yarn needle. Pinch opposite ends of the opening together and weave your yarn needle through them. Keep weaving through opposite ends and close up any resultant holes or gaps.
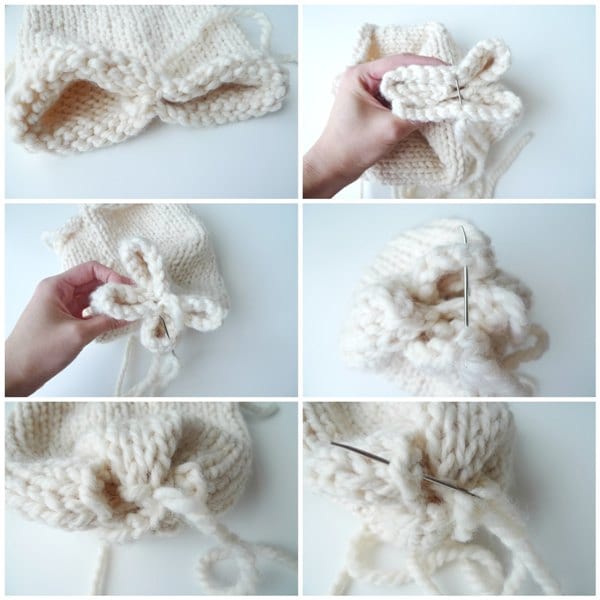
The top of the hat has been seamed up! Now you can add an optional pom pom and your hat is done!
*********************
Here is the free knitting pattern for my “Simple Stockinette Hat“, perfect for beginners!
***You can purchase an INEXPENSIVE AD-FREE PDF of this pattern on Etsy HERE and on Craftsy HERE! This beautifully formatted PDF includes the step-by-step pictures and is a total of 4 pages including the cover page!
![]()
Materials:
- 1 skein of Lion Brand Yarn’s Wool-Ease Thick & Quick in Fisherman (super bulky level 6 yarn)
- 9 mm Clover Takumi Bamboo Needles (14 inch recommended)
- Yarn needle (bent tip recommended)
- Large Point Protectors (optional)
- Faux fur pom pom (optional: I used pom pom keychains- see post HERE)
Final Measurements: Height: 9″/22.9 cm without pom pom, Circumference: 17″/43 cm
Notes:
- Increase the width/circumference of the hat by casting on more stitches (more than 40).
- Increase the slouchiness/height of the hat by completing more rows (more than 33).
- If you want to fold up the rolled brim more, use the whip stitch to seam the sides together. The mattress stitch leaves a very bumpy and raised edge on the inside, so if you use this seaming technique, it will be very visible when you fold up the hat!
- You can try switching yarn colours to make a striped or colour-dipped hat, or a hat with a different-coloured brim!
- Pieces made with the stockinette stitch have a natural tendency to curl. We will take advantage of this by using the curled edge as the brim of the hat!
Pattern:
Cast on 40 stitches using long tail cast-on (leave 50″ tail). This cast-on counts as Row 1 as well.
Row 2: Purl all stitches.
Row 3: Knit all stitches.
Repeat Rows 2-3 until you reach Row 33.
Cast off stitches. Leave long end for seaming up top of hat later on.
Seaming sides together:
- Fold sides of rectangle together so that stockinette stitches are facing you.
- Thread a yarn needle through some yarn and attach to bottom of work (the beginning rows).
- Work the mattress stitch upwards by inserting the yarn needle through the horizontal bars alternating on the left and right sides.
Seaming top of hat:
- Thread yarn tail through yarn needle.
- Pinch opposite sides of opening together and weave yarn needle through them. Keep weaving through opposite sides and closing up resultant holes and gaps.
Optional: Add pom pom
******************
The Simple Stockinette Hat is a classic design that even complete beginners can tackle!
![]()
The curled brim is an interesting feature of stockinette that serves as a cute touch!
![]()
I love how absolutely no shaping is required with no increasing or decreasing!
![]()
You can try altering your numbers to make these simple and classic hats for the entire family, from babies and children to the men in your life! If you can knit a simple rectangle, you can make this hat!
![]()
Next month we will have the third and final installment of the Simple Knit Series! I hope you’ve been enjoying these posts and that they have given you more confidence to try and learn how to knit! You can check out all my knit and crochet projects HERE! I love being able to use yarn in so many different ways!

Note: Thank you to Lion Brand Yarn for sponsoring this post and for providing the yarn! Thank you to Clover USA for providing the knitting needles!