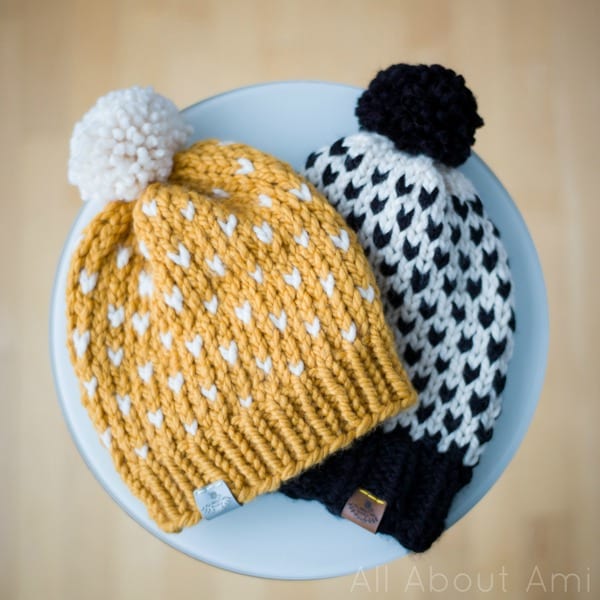
Ever since rediscovering my love of knitting, one of my goals has been to learn how to knit cables! I never learned this technique as a child, and they looked so intricate and complicated. After conquering some of my other goals such as switching colours with fair isle knitting (see these beanies HERE), I knew it was time to try knitting cables!
I had seen these gorgeous cabled headbands online, and I really wanted to try knitting one! I found a free pattern called the “Cable Crown Super Bulky Headband” by Margo Knits, and I was itching to try it! I used my Clover Takumi 9 mm bamboo needles and this amazingly soft cream super bulky merino wool from Mama Knows Luxury (Sarah no longer sells this specific wool, but she carries a similar one called Sugarbush Chill Yarn HERE).
![]()
I learned some new techniques along the way such as the provisional cast-on! This method results in live stitches at the beginning so that you can place them back onto a knitting needle later on when it’s time to seam up the headband. I learned how to do this technique HERE and you can also use a crochet hook to do a provisional cast on as well (see HERE)!
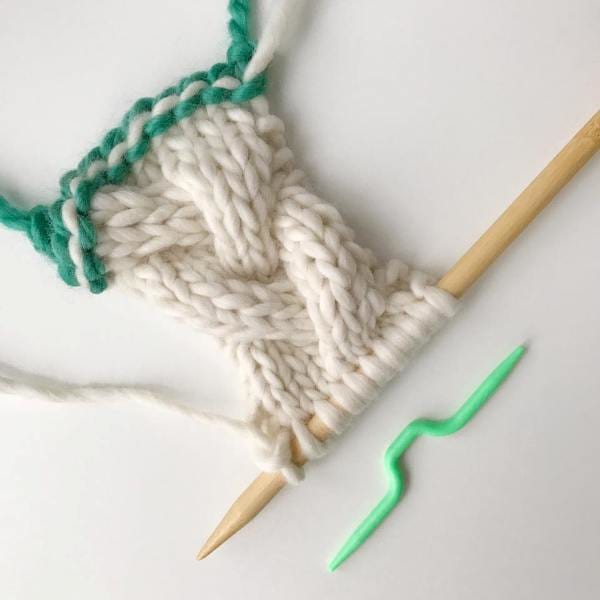
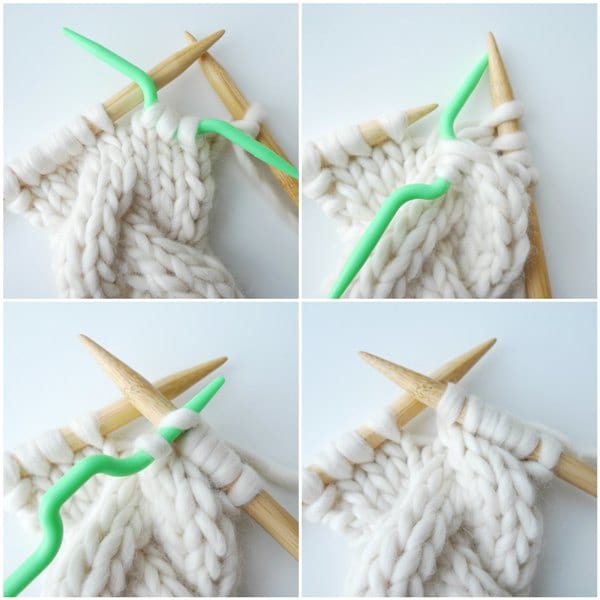
I was so excited to try knitting cables! They are definitely NOT as difficult as I thought they would be. Essentially you are placing some stitches onto a cabling needle, placing the cabling needle either behind or in front of your work, and then knitting them later on. Displacing these stitches and changing the order results in the beautiful curves and twists of the cables. I found this video HERE very helpful as it showed cabling in action and where I was supposed to place the stitches.
This is a fantastic project to work on if you are new to cabling as it is simple and quick, and you are only tackling one cable at a time. You could definitely complete this project in one sitting!
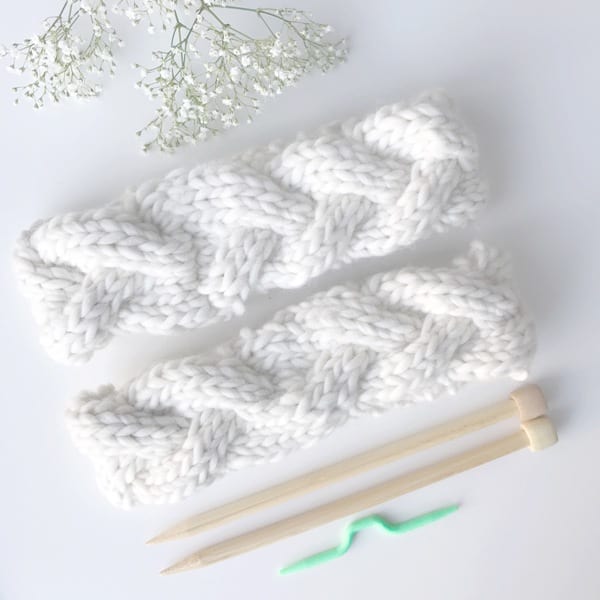
When I posted my work-in-progress on Instagram, someone mentioned how I could try the “Kitchener Stitch” for a cleaner seam versus the 3 needle bind off recommended in the pattern. Both the Kitchener stitch and 3 needle bind off were new to me, so I was curious about both! I ended up making two headbands so that I could try both techniques! As you can see, the Kitchener stitch (bottom headband) definitely gives a more invisible and cleaner bind off! You just need to methodically follow the steps (see this tutorial HERE) and try not to forget what step you’re on. The 3 needle bind off (top headband) is easier but gives a more visible seam (see HERE)!
Here is the front of my Cable Crown Headband! I love how romantic and pretty it looks!
![]()
This is a great transitional piece from Winter to Spring as the temperatures warm up but it’s still a little nippy out! This crown headband adds such a chic boho vibe!
![]()
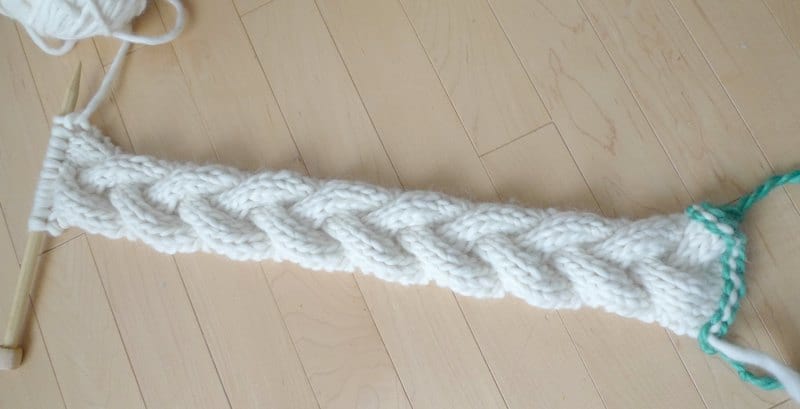
I love pieces that are both beautiful and functional! It’s such a warm and lovely earwarmer that you can just throw on when you’re having a bad hair day! The elegant braids are so classic and timeless!
![]()
Thank you to Margo of Margo Knits for her wonderful free pattern (check it out HERE)! I love learning new techniques and I hope you’ve been inspired to try knitting cables as well! If you are totally new to knitting, don’t forget to check out my beginner-friendly “Simple Knit Series” in which I teach how you to cast on, work knit and purl stitches, and cast off (see Part 1: the Garter Stitch HERE and Part 2: the Stockinette Stitch HERE). This Cable Crown Headband has definitely become a new favourite pattern of mine, and when I’m in need of a quick gift for a friend, I know I’ll be revisiting it as it is such a quick and gorgeous project! I will share another amazing knitted cable pattern that I’ve been working through soon, so get some practice with this simple pattern in the meantime!
![]()