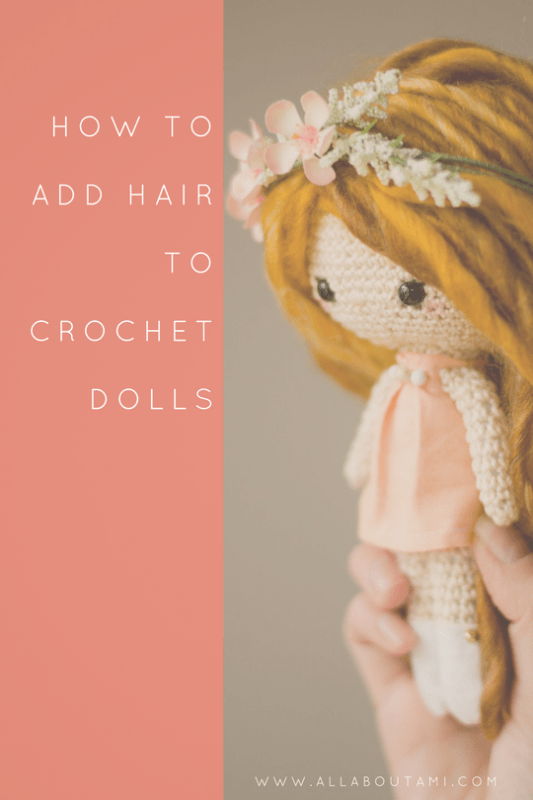
Since we started crocheting more dolls, we have loved exploring the technique of adding yarn strands as hair! Our first Chinese New Year Doll simply had a bun and two semi-circles to form her scalp. However, we wanted individual strands for our Myla Doll, and we received some wonderful help and guidance from Erinna and Rosemary of Bubbles & Bongo on how to do so. With their advice, we added black hair to our Myla Doll to emulate our own sweet Myla’s hair! We will describe how we add hair to our dolls in more detail in this tutorial! Specifically, we will be describing how to add hair to the Primrose Crochet Doll, our newest doll design- you can find the free pattern HERE! Keep in mind that there are many different ways to add hair to crochet dolls, but this is the way that we like to do it!
![]()
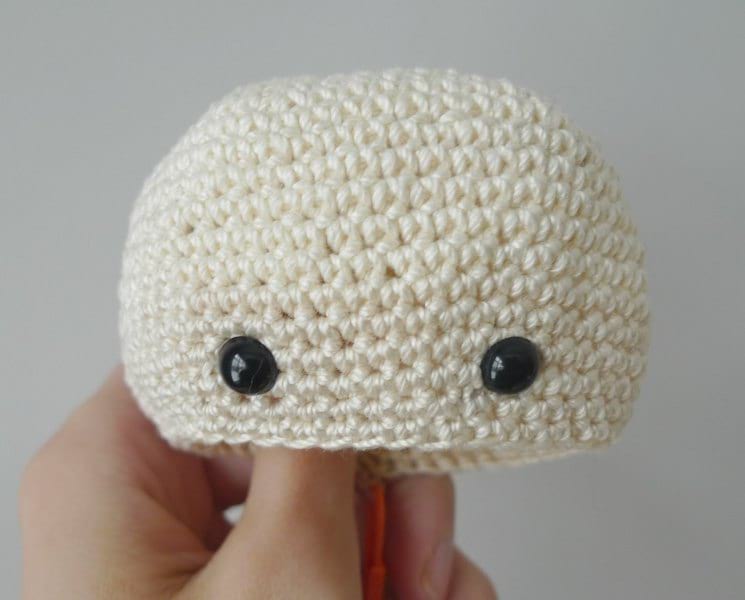
Start off by crocheting the head top-down, but do not close it up. When you have reached the 22nd round, place the eyes between Rounds 19 and 20, about 7 stitches apart. DO NOT SECURE them into place as you might need to move them later on.
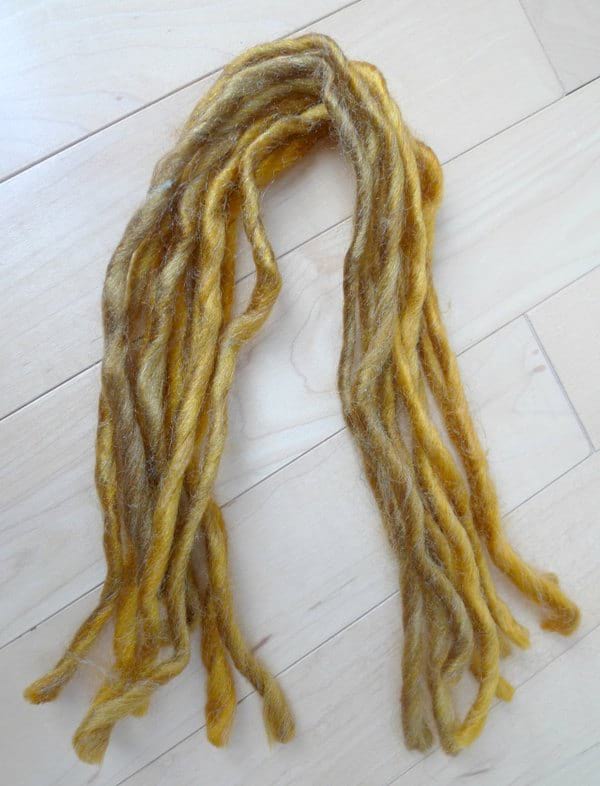
Cut long strands of hair, at least double the length you would like the final hair to be (we will be trimming the hair later on to make it even). Each length of yarn you cut will be equivalent to two strands of hair as the middle will go through the scalp (this will be explained in more detail down below). Here we have cut 17″ strands of thick and thin yarn. An easy way to cut even strands of yarn is to wrap it around a hard-cover book (e.g. children’s book) and cut the strands on only one end of the book (e.g. the bottom). I use this technique to make uniform-length fringe for my scarves as well (see photos in this post HERE)! We have chosen to use thick and thin yarn for our hair as it gives a lot of dimension with slight waves.
With our technique, we are inserting the yarn strand through the top of the head and then pulling the other end back out through an adjacent space without making any knots. Thus, both ends of the yarn are protruding out of the head. This technique enables us to position yarn anywhere we want and allows the hair to fall more naturally and create a more realistic hair part. After all the hair strands have been placed, we add glue to the inside of the head to secure the yarn in place, not allowing the strands to shift or move.
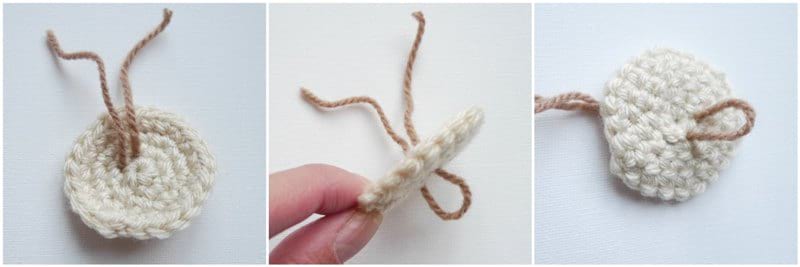
The diagram below shows where to place the strands of yarn so that both ends are sticking out of the scalp.
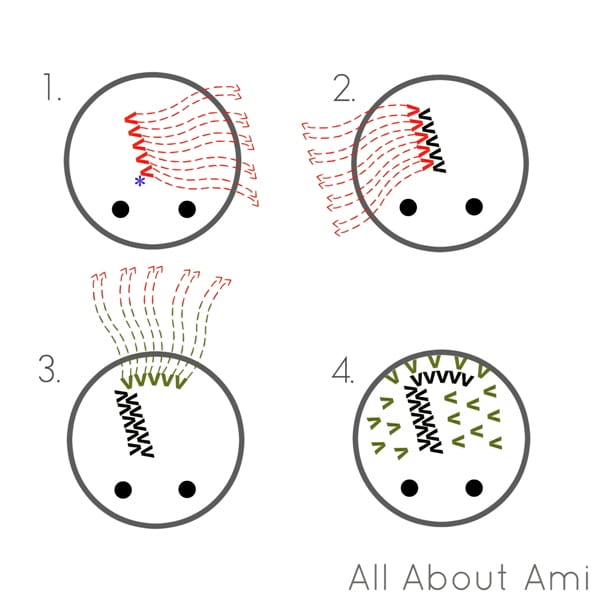
- The blue star is a very important point as it is where the hair part begins. With our doll, it is approximately 8 rounds above the eyes. Place the strands in adjacent spaces going diagonally back from the blue star.
- Once one side of the hair part is finished, begin adding hair to the other side. Add the yarn strands between the hair from the other side so that they zigzag each other. After this step, you have now defined the parting of the hair. Every other step from this point on will be done to make the hair appear more full.
- Add hair to the back of the head. Up until this point, all hair strands are added in adjacent spaces to give the hair maximum density.
- Fill in any spots along the back and side that need additional hair. It is VERY important that you only add hair where needed (stagger the spaces- no longer adjacent). You want the hair to appear full but not actually weigh the head down. DO NOT fill in every spot with hair as this will cause the head to be too heavy and possibly tilt back. After adding a couple strands of hair, always check the fullness of the hair by arranging/repositioning the strands around the face to see how it is looking. This will help you determine which areas will require more yarn. How much yarn is needed varies depending on the thickness of the yarn (i.e. you’ll need to add more strands if your yarn is thinner).
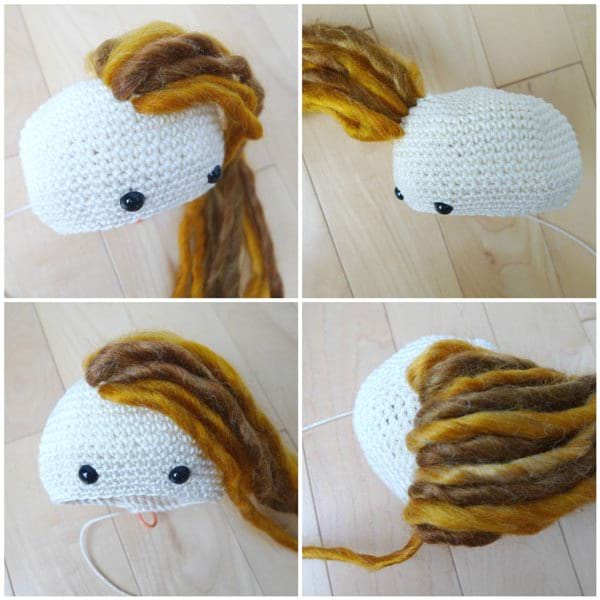
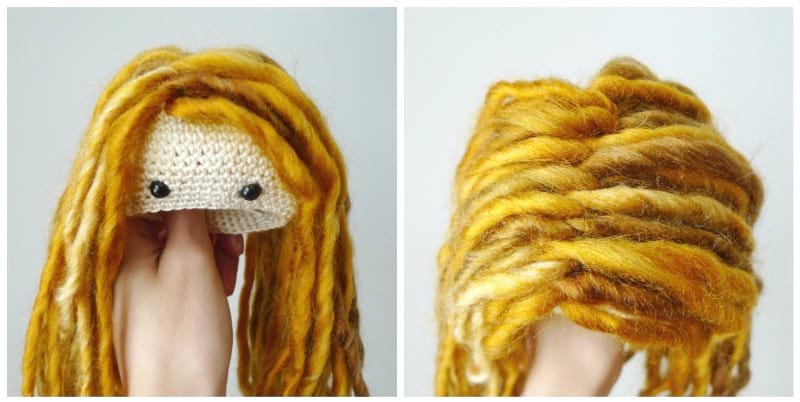
Here are some pictures showing the hair being placed on one side of the part. Note how it curves towards the back.
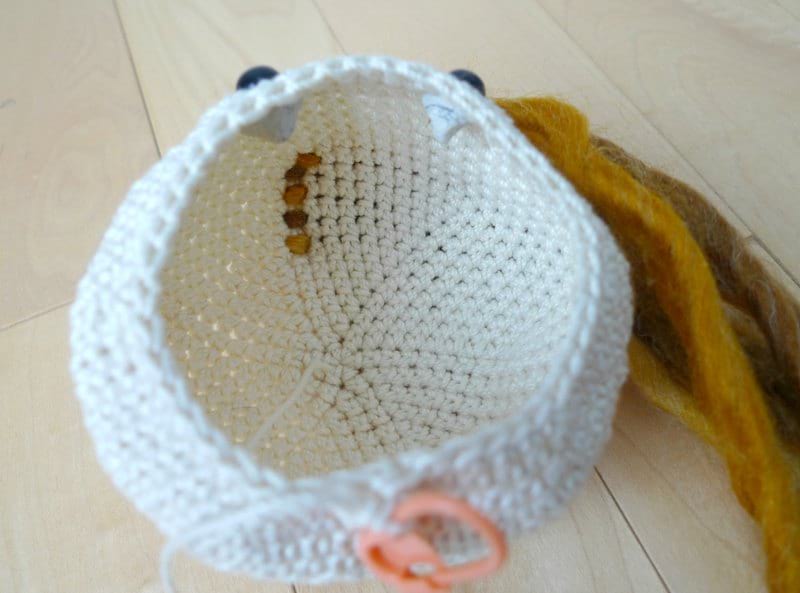
This is what the inside of the head looks like. You can add some glue at the very end to secure the yarn into place so that the strands cannot be pulled out and will not shift.
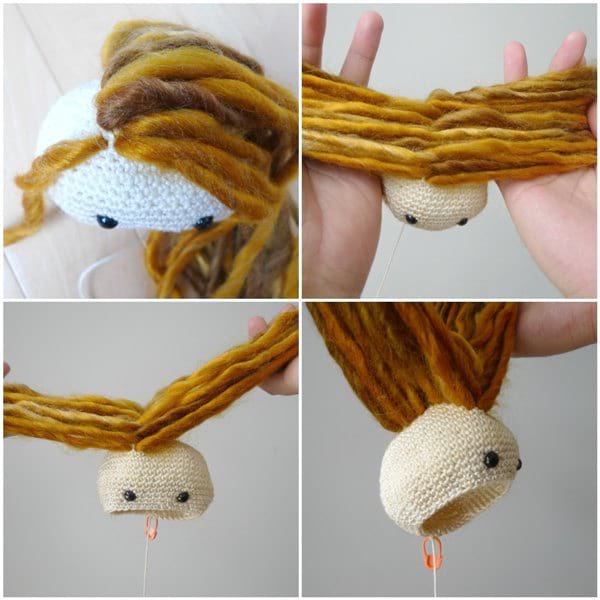
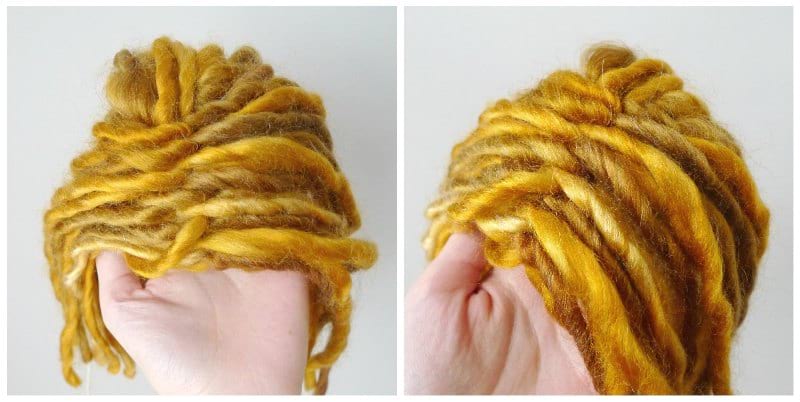
Below you can see how the hair on the other side of the part goes in between and zigzags with the hair from the other side.
The side part has been defined:
Now hair has been added to the back:
Once you are happy with the hair, add fabric glue to the inside of the head to keep the strands in place. Secure the eyes, embroider eyelashes, add a nose, stuff the head, and finish up the bottom! As a last step, trim hair to desired length!
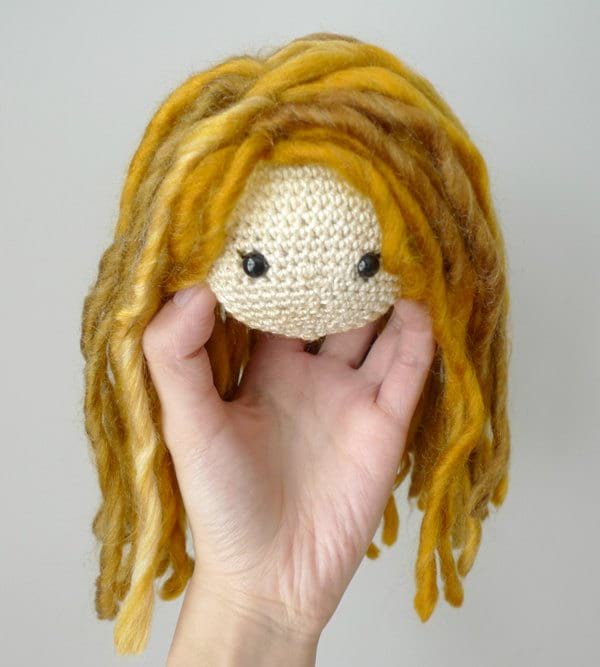
Give her hair a trim to your desired length, and you are done! We hope you found this tutorial helpful and that you will enjoy adding yarn hair to your dolls! You could braid the hair, put them in ponytails, or add a floral crown as we did with our Primrose Crochet Dolls! Feel free to pin the image below to your Pinterest boards to remind yourself of this hair tutorial! Once again, the free pattern and step-by-step tutorial for these whimsical dolls can be found HERE!