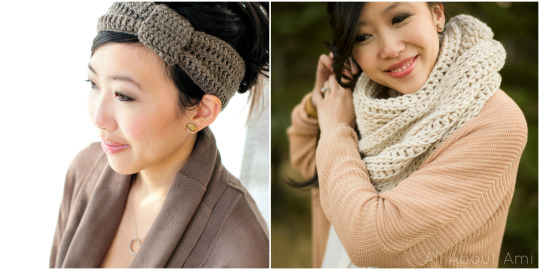
This fall I have been really loving headbands and earwarmers! I think they are such a cute and chic way to stay warm, and they really help pull an outfit together. I have been working on three different designs that I am excited to show you! First off, I thought it would be lovely to combine two of my favourite and most popular patterns: the “Knotted Headband” and the “Triple Luxe Cowl”!
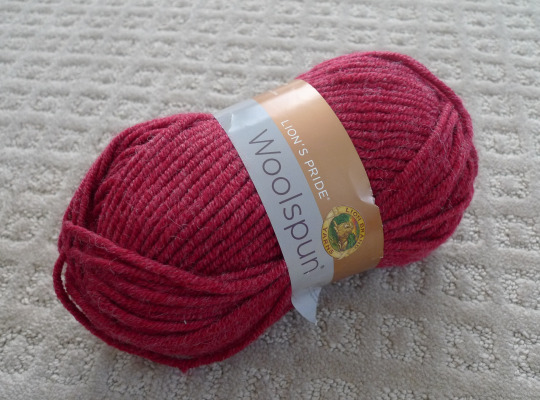
This project works up very quickly and makes a great set with its matching cowl counterpart! Of course, I had to use Lion Brand Yarn’s beautiful “Woolspun” yarn for this headband as this is the same yarn I used for the Triple Luxe Cowl. Typically I tend to choose neutral colours, but this time I went for a bold and rich red colour called “Cranberry”! One of the great things about this pattern is that you can make TWO headbands with one skein of Woolspun!
With the Triple Luxe Cowl, I wanted a very drapey look with large stitches since crocheting in the third loop tends to give a denser feel- this is why I went with a 10 mm hook. However, I did not want this headband to be drapey or to stretch too much over time (don’t you hate it when that happens?). Thus, I went with the crochet hook size that Woolspun recommends on the label: a 6.5 mm (K) hook. It just so happened that I had a new comfy Clover Amour 6.5 mm hook that I could put to use! I began using the foundation half double crochet technique which combines the chaining and round 1 into one step (click HERE to see how to do this)!
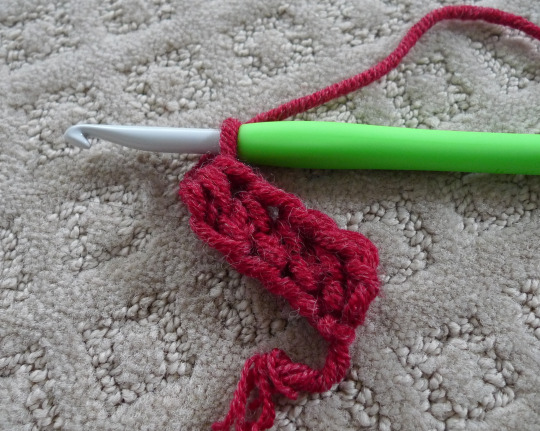
I love using foundation stitches now as I can achieve my desired length as I go- no more guessing if the number of chain stitches is correct! You can adjust the length based on your own head size- just remember that this headband will stretch a bit over time so you want it to be snug at the beginning.
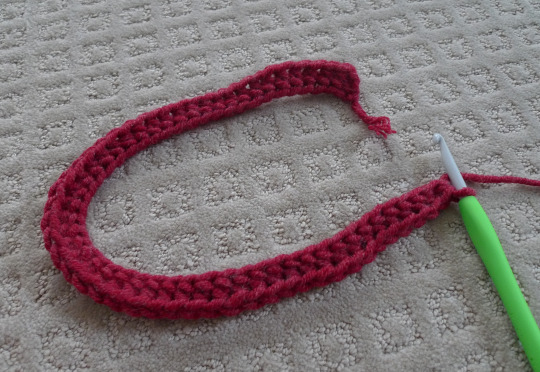
Once you have achieved your desired length, you slip stitch to the third loop of the first half double crochet (see this tutorial HERE to find the third loop of half double crochets OR see my step-by-step tutorial for the Triple Luxe Cowl HERE).
Then you chain 2.
Next you work a half double crochet in the SAME STITCH where you did your chain 2.
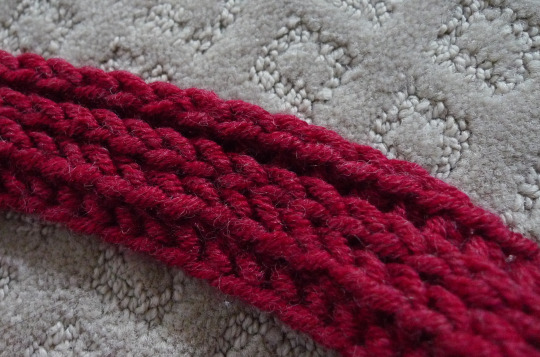
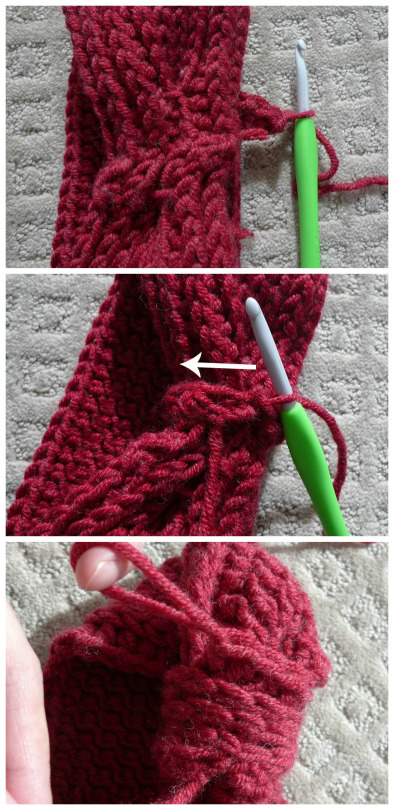
Then you keep crocheting along, working half double crochets in the third loop.
This technique gives a beautiful braided and almost “knitted” look as the front and back loops are pushed forward.
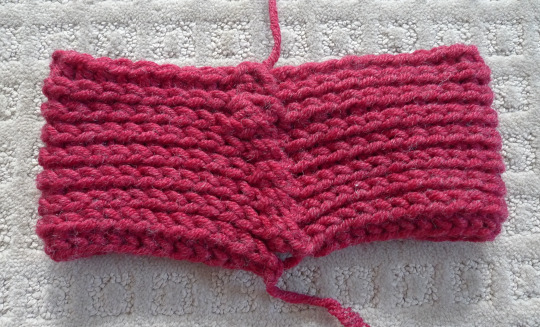
Whenever you close your round, you always slip stitch to the first half double crochet, not the chain 2. This ensures that your seam goes straight upwards. The seam is not very pretty-looking, but don’t worry…it will be covered by the middle knot!
When you are doing a foundation row of stitches and working in a round, there will be a gap at the seam marking where you began your second round. You can close this gap up with the loose yarn end or actually leave it open since this whole seam will be covered by the knot anyway.
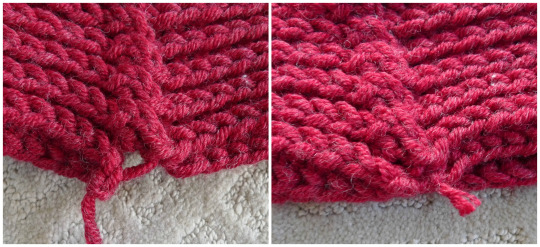
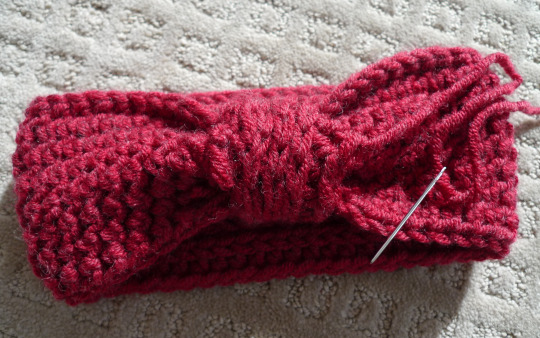
I then scrunched the middle part together where the seam is located to help add a ruched look (same thing I did with my Knotted Headband). I took a yarn needle and sewed the middle rounds together as shown below!

Next up, it was time to crochet the middle knot! I wanted this middle knot to also have that “knitted-v” look so I started off with a series of foundation half double crochets.
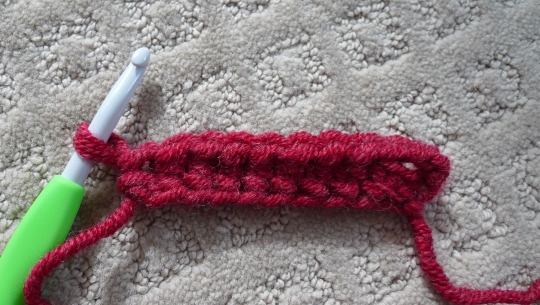
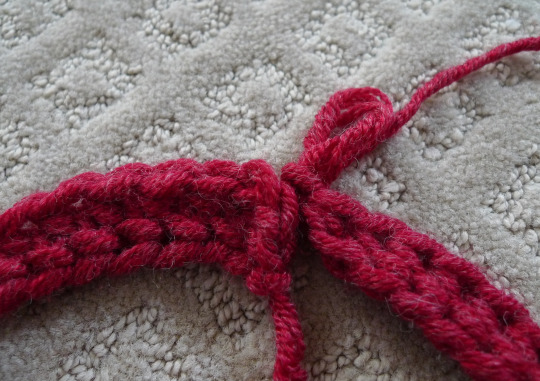
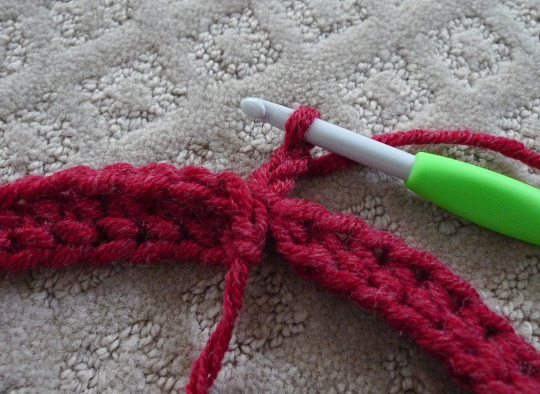
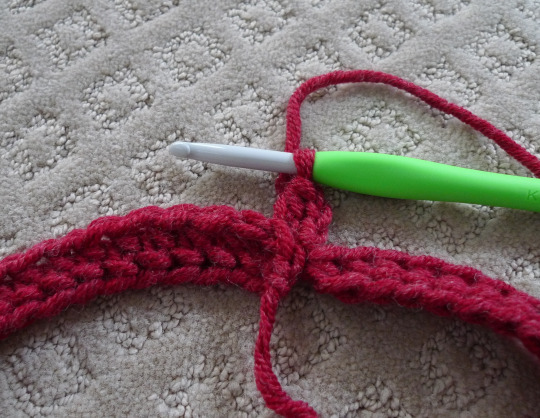
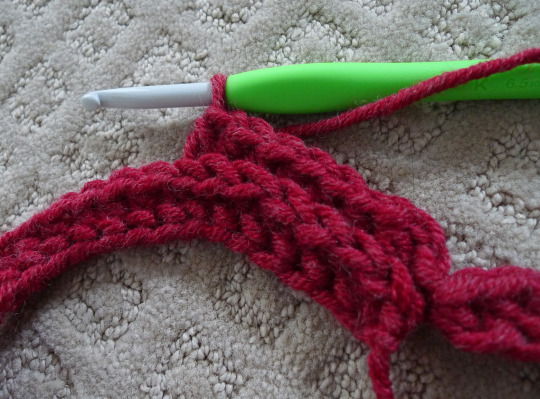
I then slipped this strip of half double crochets through my headband around the seam/ruched part with my crochet hook to the right. I slip stitched to the third loop of the first half double crochet just as I did above to form a ring around the headband. However, instead of closing up each round with a slip stitch, I just continued crocheting in unjoined rounds so that there would be no visible seam. You can tell approximately where the beginning is by where your initial yarn end is or you could use a stitch marker. You keep crocheting in the third loop around and around (in the direction where the arrow is pointing), rotating the middle knot as you go.
Once I achieved the desired width of my middle knot, I used a yarn needle to sew the middle knot in place (sew the middle knot to the body of the headband) so that the middle knot does not slide or rotate.
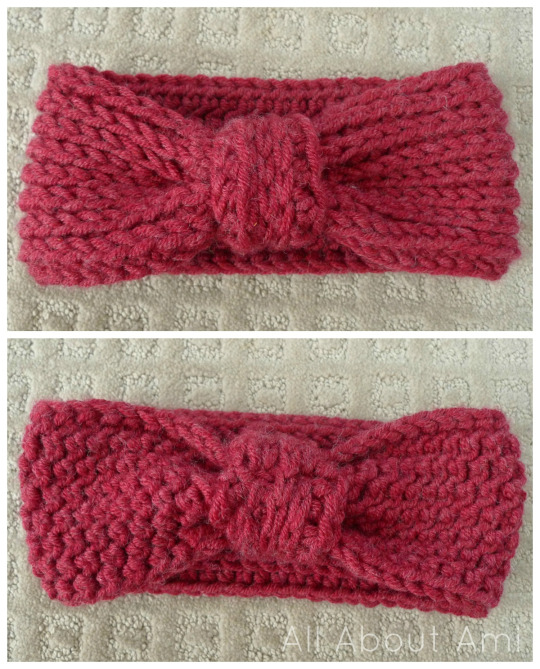
Here is the beautiful front and back of my “Triple Luxe Headband”! I love its chunky look and how it has two different textures on either side. You could totally wear both sides and make this headband reversible, just like the Triple Luxe Cowl!
Here is the free pattern for my “Triple Luxe Headband”!
*********************************
Materials:
- Bulky level 5 yarn (I used Lion Brand Yarn’s Woolspun in “Cranberry”)- I used exactly half the skein (~50 g) for one headband, so you should be able to make two headbands with one skein!
- 6.5 mm crochet hook ( I used my Clover Amour 6.5 mm hook)
Headband:
Round 1: Foundation half double crochet 51 or to desired length (mine was 50 cm or 20″ long). Slip stitch to third loop of first half double crochet. (51 hdc)
R2: Chain 2. Half double crochet in same stitch as Chain 2 and in each third loop around. Slip stitch to third loop of first hdc [not to Ch 2] (51 hdc)
R3-8: Repeat Round 2.
Optional: Sew gap at junction of Round 1 and 2 together.
Pinch middle rounds of headband where seam is located and sew them together with yarn needle.
Middle Knot:
Round 1: Foundation half double crochet 10 or to desired length (mine was 10 cm or 4″ long). Slip this strip of half double crochets through the headband so that your crochet hook is to the right. Slip stitch to third loop of first half double crochet to form a ring around the headband.
Rounds 2-4: Continue working half double crochets in the third loop around. You will need to keep rotating the middle knot to work around this piece since it is wrapped around the headband. Do not close your rounds with a slip stitch (work in unjoined rounds) so that no seam is formed.
Sew middle knot into place with a yarn needle so that it does not slide or rotate. Hide ends inside the knot.
Finished dimensions: 21 cm/8 “ x 9 cm/3.5″
*********************************
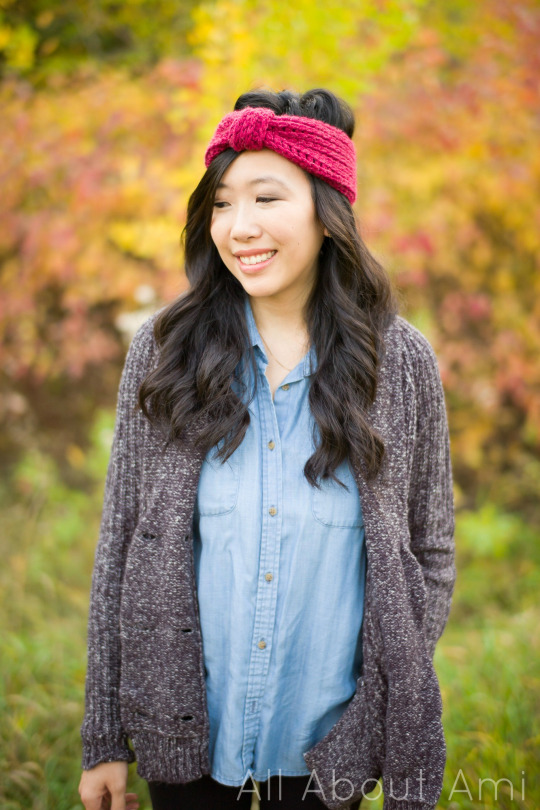
Doesn’t this Triple Luxe Headband look so luxurious? I just love the look of the stitches!
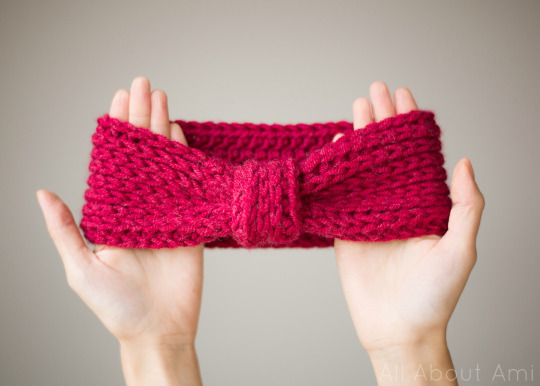
It looks so cute and functions as both a hair accessory and a way to stay warm! I’m so happy we got to capture the beautiful fall colours in this photoshoot- don’t those leaves look so vibrant?
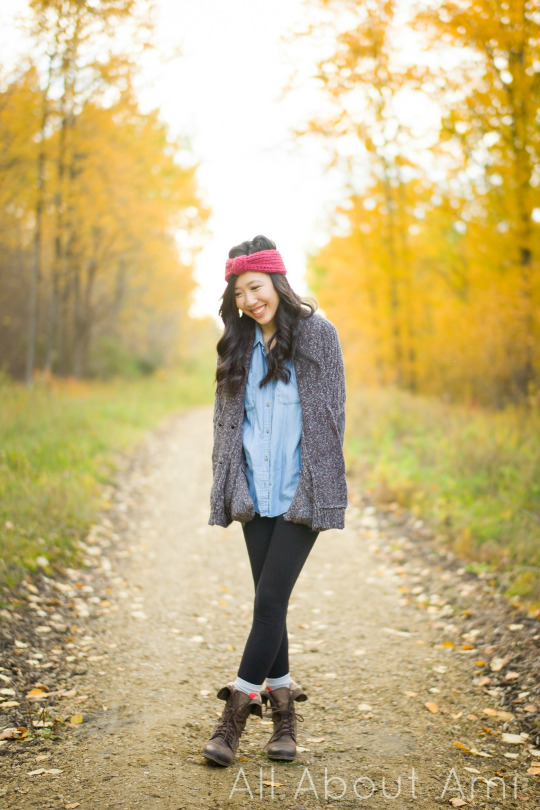
I am really glad I went with this rich red colour as well! I think it looks so striking against my black hair, and it will be perfect during the upcoming holiday season!
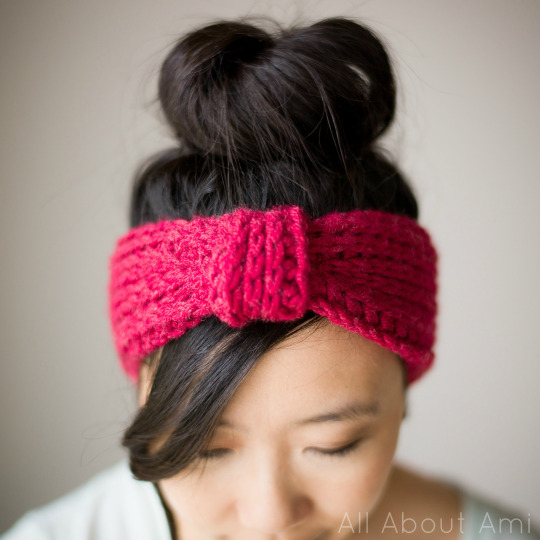
Another cute way to wear this headband is with your hair up, like with this topknot below! This is one of my favourite ways as I frequently wear my hair up out of my face 🙂
Have fun making your own Triple Luxe Headbands! Since you can make two headbands with just one skein, you can make one for yourself and one for a friend (or one for your mini-me’s)! The construction is very simple and I like how minimal sewing is required since both the body and middle knot of the headband are worked in rounds. Don’t forget to show off your projects by posting them on my Facebook page or tagging me on Twitter or Instagram! Stay tuned to see the other two headbands that I’ve been working on
❤
This pattern is an original pattern by Stephanie Lau of All About Ami. Please do not claim this pattern as your own. If you wish to share this pattern, you may link to this pattern but please do not reprint it on your site. You may keep a copy for your own personal use but please DO NOT sell the pattern or distribute it.
You may sell products made from this pattern but please clearly credit the design to me, Stephanie Lau of All About Ami, and provide a link to my blog www.AllAboutAmi.com. Permission is NOT granted for mass production or factory manufacturing of any kind. Thank you for being respectful and for your understanding!