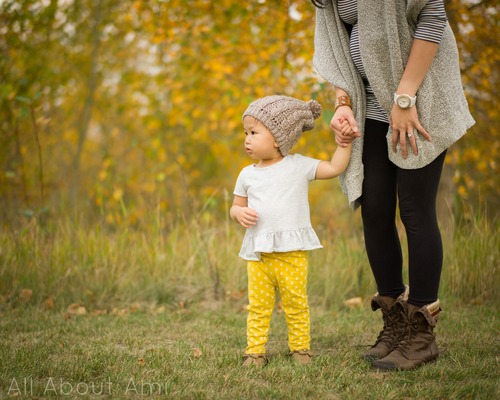
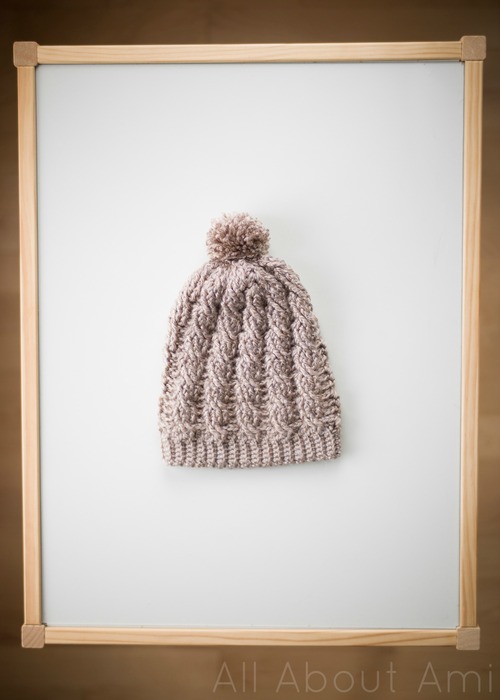
Here is the free pattern for the “Toddler Cabled Slouchy Beanie” that I made for my daughter Myla to match the adult one that I made for myself!
***You can purchase an INEXPENSIVE AD-FREE PDF of this pattern on Etsy HERE! This beautifully formatted PDF is a total of 11 pages including the cover page. It includes the step-by-step picture tutorial and FOUR patterns: the Adult Cabled Slouchy Beanie, Toddler Slouchy Beanie, Chunky Cabled Beanie, and Cabled Beanie version 2!
***PLEASE follow along with the step-by-step post HERE as I showed how to work the cabling in detail with plenty of photos 🙂
***************************************
Materials:
- 4 mm Clover Amour crochet hook (I used this to achieve smaller, more delicate cables compared to my adult beanie- you can choose to use either a 4 or 5 mm hook and adjust numbers as necessary)
- Medium worsted weight yarn (I used Lion Brand’s Heartland in “Grand Canyon”, 1 skein)
- Optional: yarn needle to seam up beanie; Clover Pom Pom Maker
Special stitches:
- Front Post Treble Crochet (Fptc): Yarn Over (YO) twice, insert hook from front to back around post of stitch indicated. YO and pull up a loop, [YO and draw through 2 loops on hook] 3 times.
- Back Post Double Crochet (Bpdc): YO, insert hook behind post of stitch (insert hook from back to front of stitch), YO, pull up a loop, YO, (pull through 2 loops) twice.
- Front Post Double Crochet (Fpdc): YO, insert hook behind post of stitch (insert hook from front to back of stitch), YO, pull up a loop, YO, (pull through 2 loops) twice.
Ribbed Band:
Chain 7
R1: In back loops only, Sc 1 in second chain from hook and in each chain across (6 sc).
R2-67: Chain 1, turn. In back loops only, Sc 1 in second chain from hook and in each chain across (6 sc).
My ribbed band measured 16.5″ or 40.5 cm. Adjust this number based on desired size. Fasten off and leave long end for sewing. Sew short ends together to form ribbed band.
Cabled Body:
***In each round, the Ch 2 does not count as a stitch. When joining at the end of each round, join to the stitch indicated (NOT the Ch 2) to make an invisible seam.
Join yarn with sl st at any point around edge of band.
Round 1: Chain 2, work one double crochet in same st as Chain 2. Work 65 dc as evenly as possible around edge of band. Join with sl st to first dc (66 dc). [If adapting the pattern, make sure your final number of dc’s is a multiple of 6.]
R2: Chain 2, Bpdc around first dc from previous round (same dc you joined to from Round 1). Bpdc around next st. Work cabling: {Skip next two dc, 2 Fptc around next 2 dc. Fptc around first skipped dc and next dc}. *2 bpdc in next two st. Work cabling: Sk next 2 st, 2 Fptc around next 2 st. Fptc around first skipped st and next st.*, rep 11 times. Join with sl st to first Bpdc. (11 cables around with 11 sets of Bpdc’s between)
R3: Chain 2, Bpdc around first Bpdc from previous round. Bpdc around next st. Fpdc 4. *Bpdc 2, Fpdc 4*, rep 11 times . Join with sl st to first Bpdc. (11 cables around with 11 sets of Bpdc’s between)
R4: Repeat Round 3.
With rounds 2-4, one set of cables is complete! Keep repeating Rounds 2-4 until desired length.
R5-7: same as Round 2-4
R8-10: same as Round 2-4
R11-13: same as Rounds 2-4
R14-16: same as Rounds 2-4
R17-19: same as Rounds 2-4
R20-22: same as Rounds 2-4
I completed 7 sets of cables with this beanie measuring 9″ or 22 cm (including ribbed band). Fasten off and leave long end for sewing. Weave yarn through ends of last round, pull tightly and sew hole shut. Alternatively, seam up beanie using this method shown in video below.
Optional: Add pom pom (I used my “Clover Pom Pom Maker”). Attach pom pom to beanie and you are DONE!
***************************************
If you would like to adapt this pattern for a baby, child, teen, etc., please check out this very helpful post by Anne HERE that contains a chart with head circumference sizes (your ribbed band) as well as general hat height (the number of rounds or length of the beanie)!
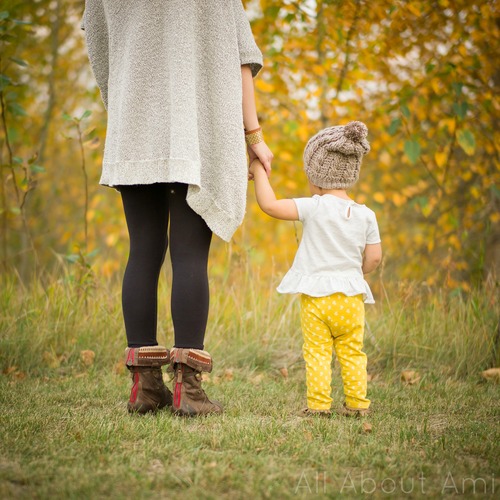
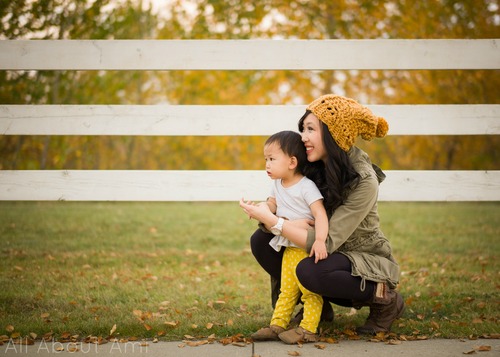
This toddler version is such a cute accompaniment to my adult “Cabled Slouchy Beanie”! Don’t forget to check out the step-by-step blog post and free pattern to the adult beanie HERE!
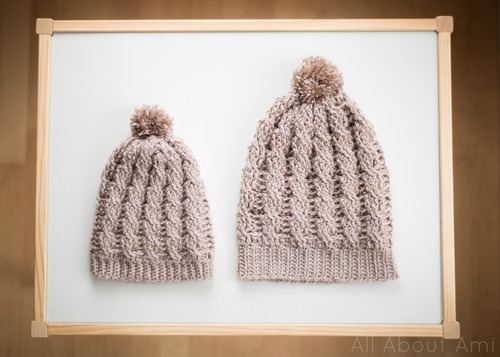
Enjoy matching with your mini-me’s! These “Cabled Slouchy Beanies” are really perfect for the fall and winter and would make great gifts for mommies, daddies, and their little ones!

I also made a “Chunky Crocheted Slouchy Beanie” for another variation using super bulky (level 6) yarn- you can find the free pattern HERE! Keep up with all my updates on Facebook, Twitter (@AllAboutAmi) & Instagram (@AllAboutAmi)! Happy cabling! ❤
This pattern is an original pattern by Stephanie Lau of All About Ami. Please do not claim this pattern as your own. If you wish to share this pattern, you may link to this pattern but please do not reprint it on your site. You may keep a copy for your own personal use but please DO NOT sell the pattern or distribute it.
You may sell products made from this pattern but please clearly credit the design to me, Stephanie Lau of All About Ami, and provide a link to my blog www.AllAboutAmi.com. Permission is NOT granted for mass production or factory manufacturing of any kind. Thank you for being respectful and for your understanding!