***Please note that this is the step-by-step making of the Granite Cardigan with detailed pictures. The free written crochet pattern with sizes S-XL can be found in this blog post HERE. You can purchase an ad-free PDF of this pattern complete with step-by-step pictures and granite stitch tutorial in my Etsy shop HERE and on Craftsy HERE.
***The Granite Cardigan is also available as a kit for purchase with all the required yarn and pattern on the Lion Brand Yarn website HERE!
In December 2015, I ventured out of my crochet comfort zone of amigurumi, hats and scarves and designed my very first crochet garment: the Granite Cape! It continues to be one of the most popular patterns on my blog, and I love its beautiful drape and chic style. At the time, some people asked how they could make the sleeves longer, and I myself was unsure of how to do so. After knitting and crocheting more garments over time, however, I learned how to shape and add long sleeves, so I vowed to make a sequel to the Granite Cape with long sleeves: the Granite Cardigan!
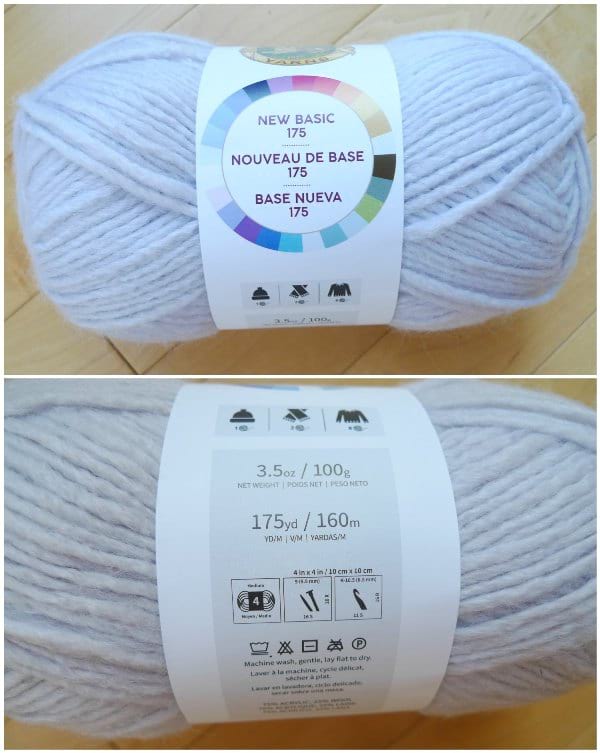
For this cardigan, I wanted to use a brand new yarn by Lion Brand Yarn called New Basic 175: it is a wool blend yarn that is 25% wool and 75% acrylic. It is worsted weight yarn (level 4) with 175 yards per skein, hence the name New Basic 175. They have some beautiful colours available, and I absolutely fell in love with this gorgeous colour called “Whisper“- it is a light grey with hints of mauve. With this yarn, you get the benefits of wool (warmth, slight fuzz, ability to be felted) along with the affordability and easy care of acrylic. Keep in mind that if you pull very hard on this yarn, it is possible to tear it- take care when frogging the yarn and seaming pieces together as too much force can cause it to break.
For my size (size Small), I chained 75 as you always want to start with an odd number when working the granite stitch. If you are unfamiliar with this stitch, please check out my Granite Cape blog post HERE as I detail how to do it step-by-step. After the 75 chains, I worked one single crochet in the third chain from the hook. From there, I chained 1, skipped the next stitch, and then worked a single crochet. This creates a row of single crochets separated by chain 1 gaps.
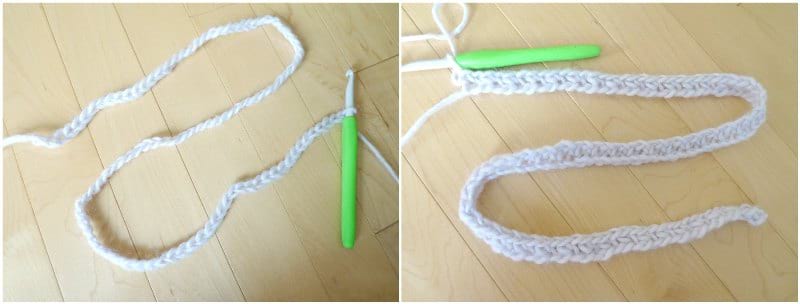
In subsequent rows, you work single crochets in the chain 1 gaps, chaining 2 every time you turn a row. This creates this gorgeous granite/moss/linen stitch of staggered little v’s. This is one of my favourite stitches of all time as I love working in the chain 1 gaps and I find it very relaxing and therapeutic. I can work on this project while watching a show or on the go as I can easily pick it up and put it back down without too much concentration.
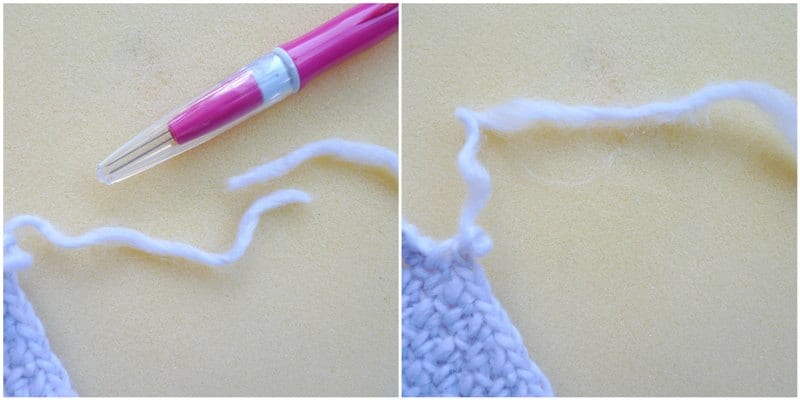
As I mentioned above, due to the 25% wool content, the yarn ends of New Basic 175 can be felted together when you need to add a new skein of yarn. This is such a handy trick when working on large projects such as cardigans or blankets that use many skeins of yarn! I use my trusty Clover Felting Needle Tool to felt the yarn ends together so that I do not need to tie knots or weave in ends. You can see the full tutorial on “How to Felt Yarn Ends Together” in my blog post HERE!
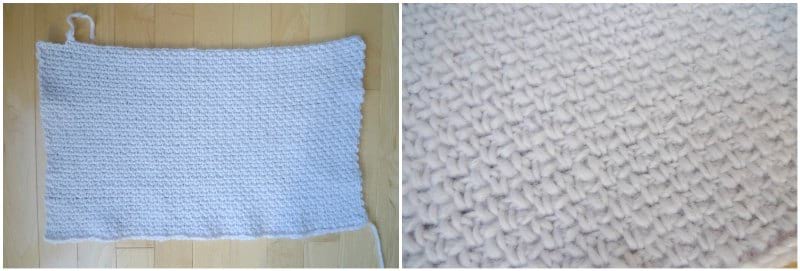
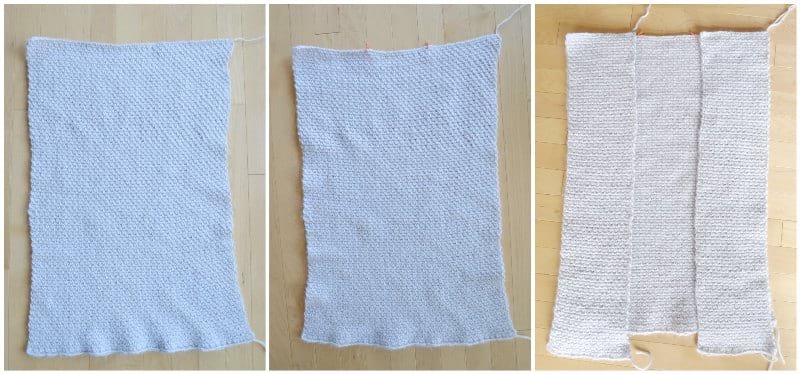
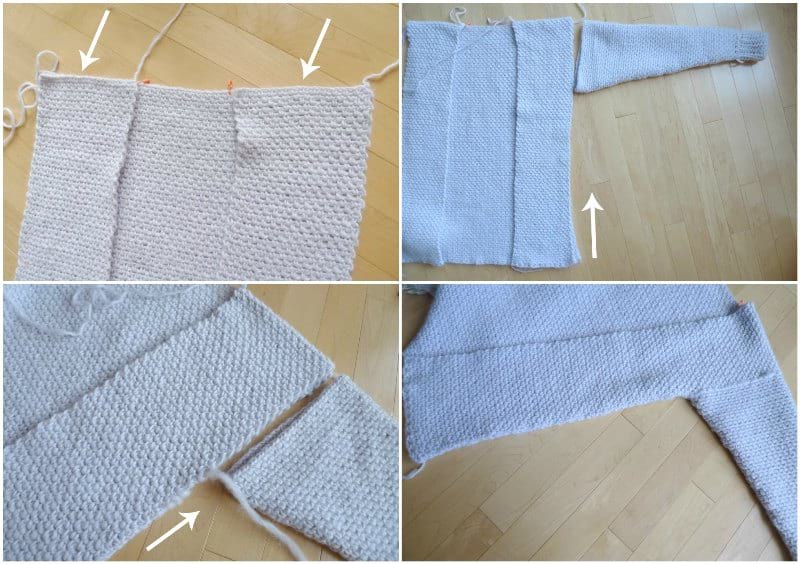
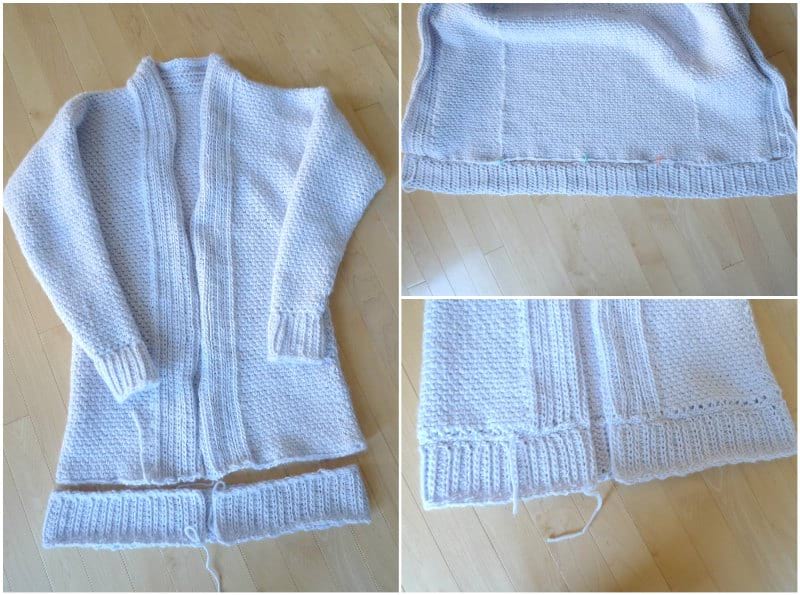
After crocheting the back panel, I then crocheted two separate front panels, leaving a gap of about 21 stitches in between for the small size. This is not the final length of the piece as we will be adding bottom ribbing later on. The front panels look longer than the back panel in the picture below (even though I crocheted the same number of rows) due to how much it stretched as I was crocheting it. Do not fret if this happens as you will be blocking all the pieces later on.
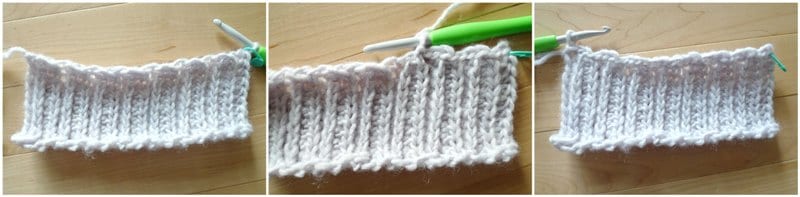
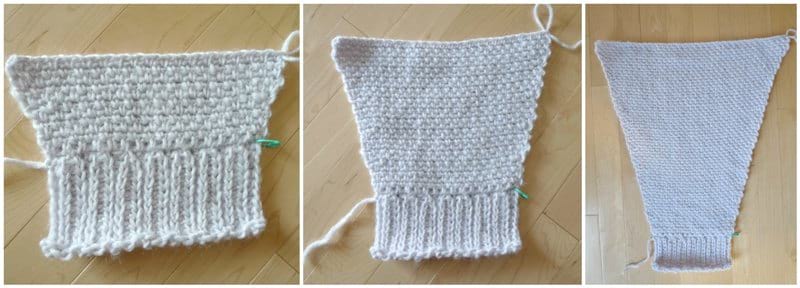
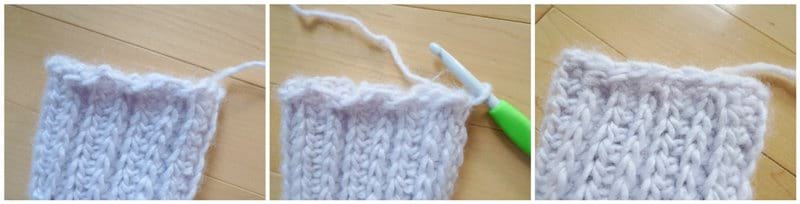
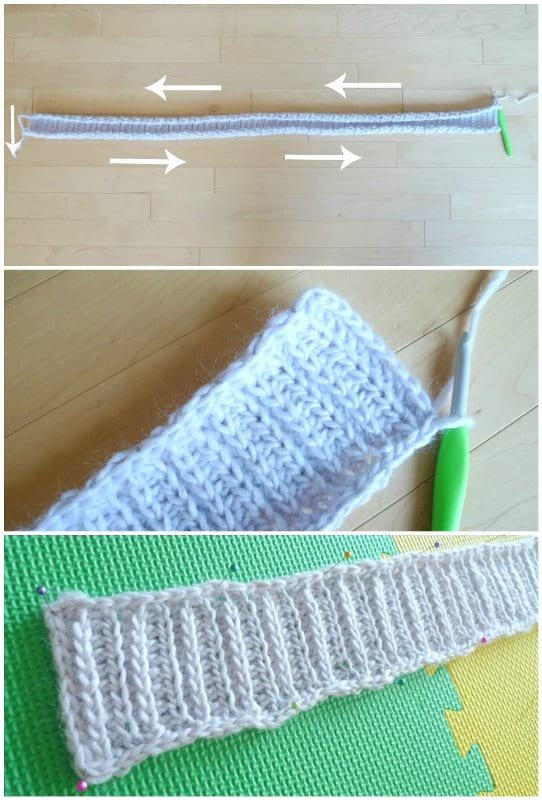
To begin the sleeve, I started off by crocheting the ribbed cuff. After chaining 11, I worked half double crochets for the first row. For the second row, I worked half double crochets in the third loops as indicated below by the arrows.
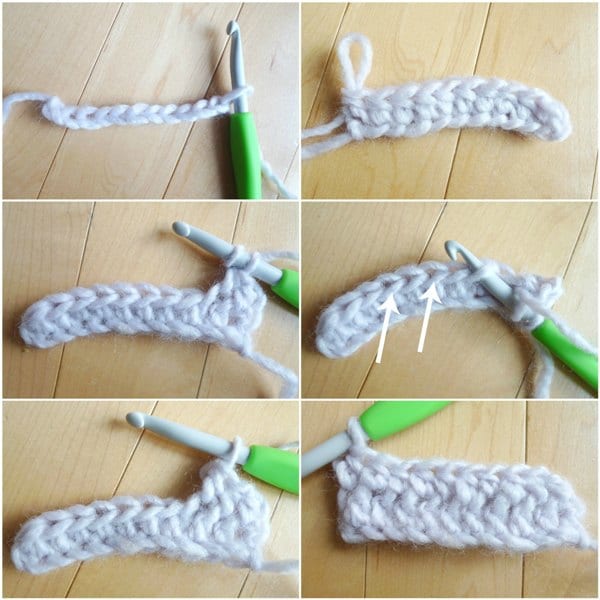
For the third row, I then worked half double crochets in the back loops as indicated by the arrows below.
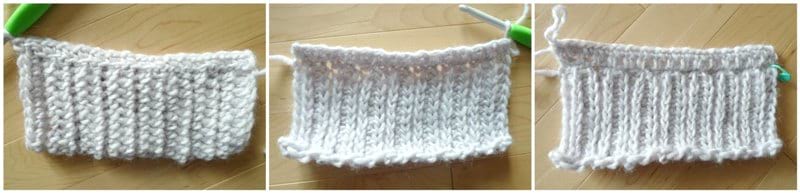
By alternating Rows 2 and 3, this causes this beautiful effect of pushing all the rows of “V’s” forward so that they are all displayed on one side. It has an almost knitted stockinette look to it! This ribbing does curl, but we will block it later on as well. To begin the body of the sleeve, I worked slip stitches across the length of the ribbed cuff.
Next, I turned my work and then began working the granite stitch across for the second row.
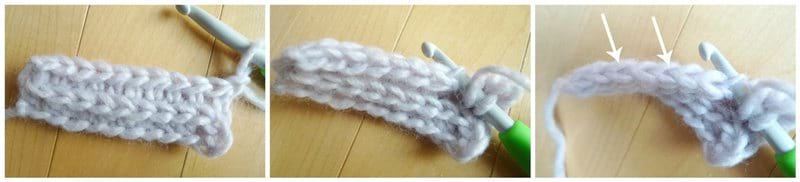
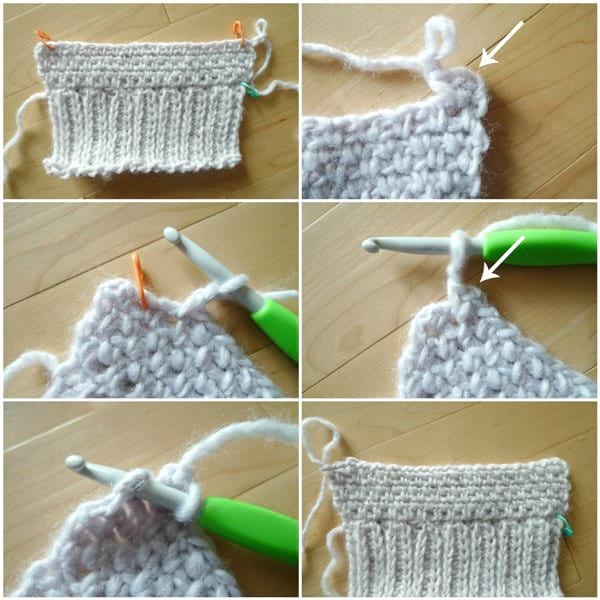
Then, it was time to figure out how to do increases for the sleeves. I decided to work an increase at each end of the row, as indicated by the peach stitch markers below. I worked an increase by crocheting a *single crochet, Chain 1, single crochet* in the same stitch as shown by the arrows below. After turning a row, an increase is worked in the first chain 1 gap and in the second last chain 1 gap. After working the increase in the second last chain 1 gap, it is important to remember to work that last single crochet in the last chain 1 gap which can sometimes be easy to forget!
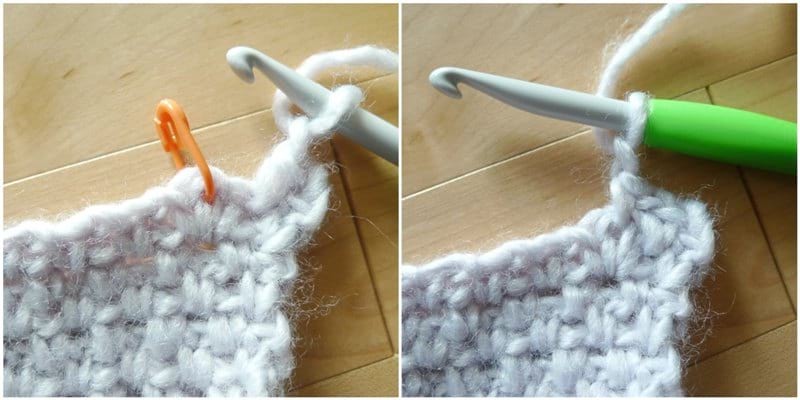
On the row after the increase row, do NOT forget to work a single crochet in the chain 1 gap between the two single crochets from the increase! I’ve marked that chain 1 gap with the peach stitch marker below. This is how we will increase the number of single crochets and chain 1 gaps over time with the increase rows.
I interspersed increase rows throughout the sleeve to get this shape for the sleeve.
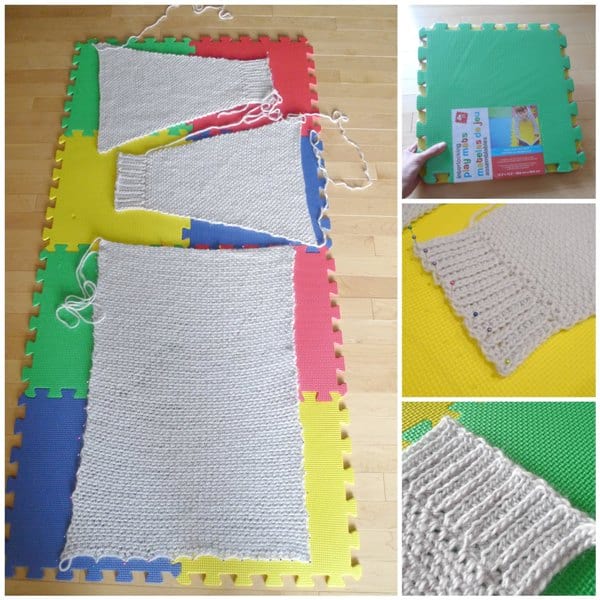
Prior to this piece, I did not have too much experience with blocking my work. However, I knew that blocking would be vital for this piece to get the panels and sleeves to lay flat and to help relax the yarn and let it bloom. I purchased these foam playmats from the Dollar Store and pinned my pieces onto them (T-pins would be better but I only had these pins). I then used the steam function on my iron to blast the pieces with steam. I usually did this at night so that all the pieces were dry by the morning.
To start assembling my cardigan, I folded my sleeve in half (wrong sides facing outwards) and whip stitched the length together starting at the widest part and ending off at the ribbed cuff.
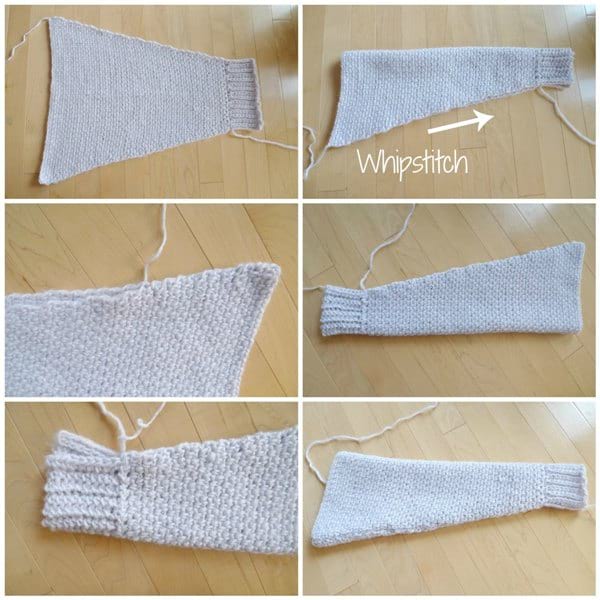
When I reached the end of the ribbed cuff, I flipped the sleeve right side out and picked up a stitch. I then loosely worked slip stitches across the edge of the ribbed cuff to help smooth it over.
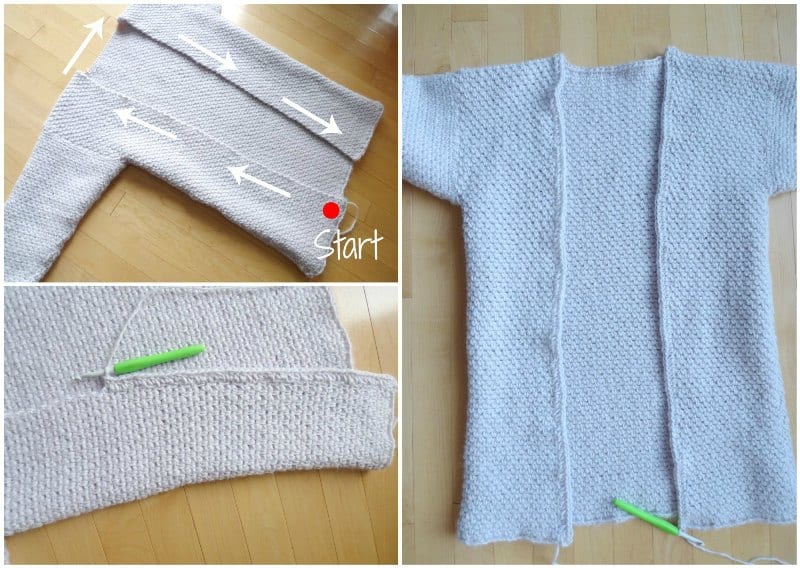
To assemble the body of the cardigan, I whip stitched the top of the front panels to the top of the back panel as indicated by the arrows below. I then began whip stitching up the sides of the panels and left a space to attach the sleeves. I moved my sleeve towards the panels and whip stitched it to the panels (half the sleeve gets attached to the front panel while the other half of the sleeve gets attached to the back panel). When whip stitching pieces together, always have the wrong sides facing outwards for a cleaner look.
Next it was time to add the collar. I began picking up half double crochets starting from the bottom left of the cardigan when you are looking at it (as shown by the red circle below). I picked up stitches upwards, across the neck, and then downwards. Once I reached the bottom of the collar, one row of half double crochets was complete.
For the collar, I worked the same ribbing pattern as the ribbed cuff of the sleeves. I alternated rows of half double crochets in the third loops with half double crochets in the back loops. After seven rows, my collar was complete!
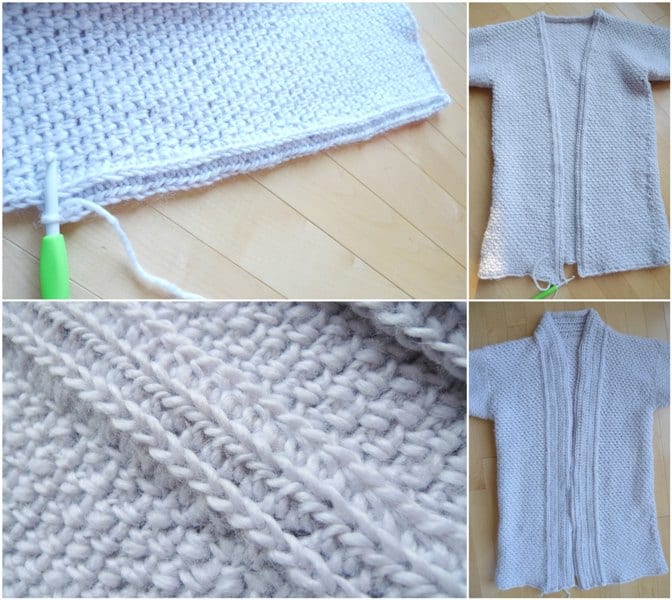
For the bottom ribbing, I once again used the same pattern. You’ll notice that this ribbing is curling immensely with such a long piece. I slip stitched across the top of the ribbing, down the side, and across the bottom to give it a cleaner edge and to reduce the curling a bit. I then blocked the bottom ribbing to get it to lay flat.
After the bottom ribbing was blocked, I whip stitched it to the bottom of the cardigan.
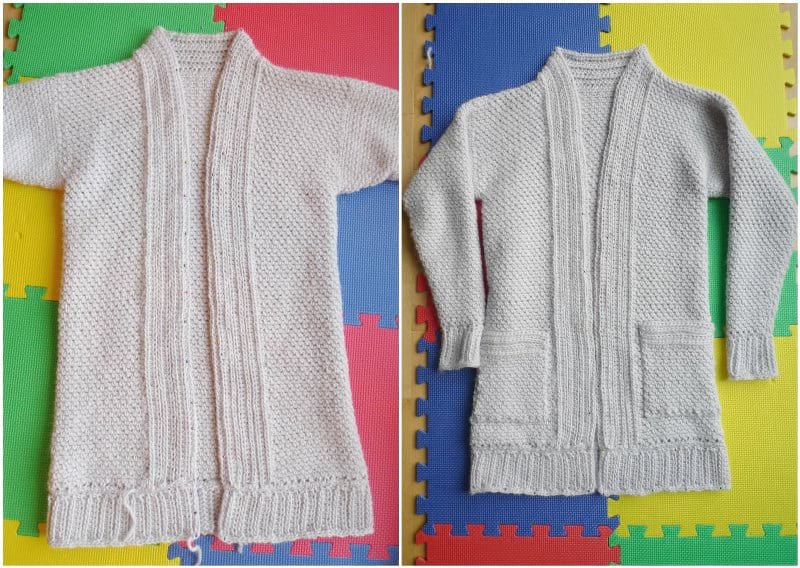
I blocked the collar to get it to lay flat as well. As a finishing touch, I also crocheted two pockets and added them to the front panels of my cardigan! I LOVE pockets!
Here is a quick video showing how to work the granite stitch and the ribbing by working half double crochets in the third loops and back loops!
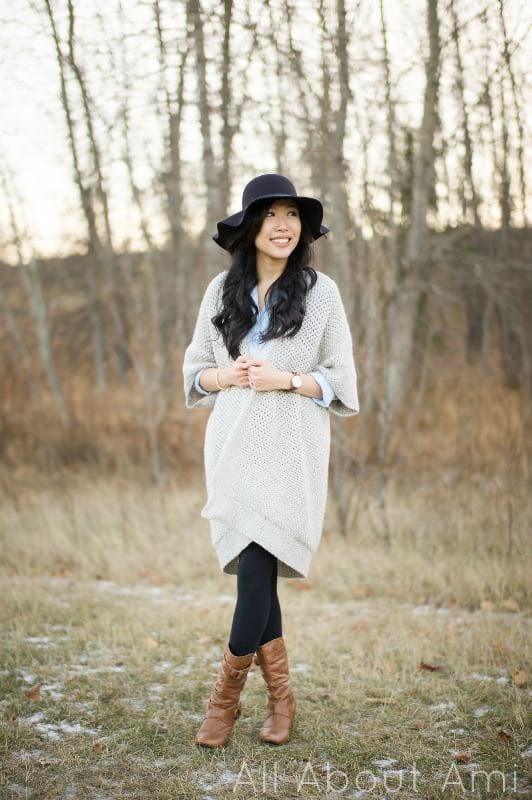
I was ecstatic to try on my Granite Cardigan, and it is just as soft and cozy as I imagined it would be!

I love the stitch definition of this cardigan with its beautiful texture!
![]()
You can make the collar as wide as you want, and I adore how the vertical lines juxtapose against the horizontal rows of the front panels and pockets!
![]()
The Granite Cardigan flows and drapes beautifully, and I love how long it is!
![]()
New Basic 175 has some fuzz to it (halo) as you can see where the light hits in the photo below- it appears as though the yarn is glowing!
![]()
Here is a back view! We took these photos during Golden Hour, and I cannot get enough of the gorgeous light!
![]()
Cardigans are absolutely one of my favourite wardrobe items as I love throwing them on over long tops and leggings for layering. They are a must-have when the colder weather approaches!
![]()
There is something so cozy about being able to glide your hands into pockets, and it’s always a bonus when you discover that a shirt or dress has pockets. I knew I HAD to add pockets to my newest cardigan design, and I think it adds such a lovely touch! I also sewed on one of my personalized ultraleather garment tags by BrickBubble.
![]()
I love challenging myself to design new items using skills and techniques that I’ve learned from previous projects. I always wanted to add long sleeves to the Granite Cape, so I am thrilled that I can add this design to my pattern database and repertoire!
![]()
Enjoy crocheting your own Granite Cardigans and adding some handmade items to your wardrobe! Once again, the FREE PATTERN can be found HERE and the ad-free PDF can be found in my Etsy shop HERE and on Craftsy HERE! Don’t forget to tag me on social media and subscribe to my newsletter HERE to get all my updates! Thank you for following along with my work and happy crocheting!
![]()