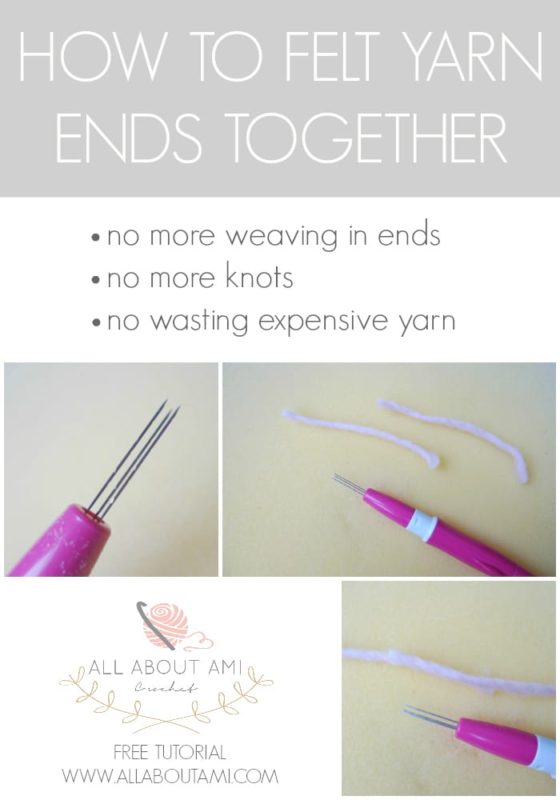
Ask any crocheter and knitter what their least favourite aspect of a project is, and many will give the same answer: weaving in ends and hiding knots. As one ball of yarn begins to run out and the need to begin another ball approaches, it can be bothersome, particularly with projects that require a lot of yarn skeins or projects using bulky, super bulky, or jumbo yarn where hiding the ends can be tricky. I will show you a brilliant technique to join yarn ends together that eliminates the need to weave in ends and make knots. By using this technique, less expensive yarn is wasted since you do not need to weave in ends!
Felting is the process of shrinking and bonding animal fibers through heat, agitation, and moisture. Animal fibers are lined with tiny microscopic scales that interlock and tighten together through felting, forming a dense cloth/felt with a soft texture. We will learn how to felt yarn ends together through agitation using a felting needle! Felting needles have barbs/notches on them, and when you repeatedly jab at the yarn (agitation), it causes the fibers to interlock together.
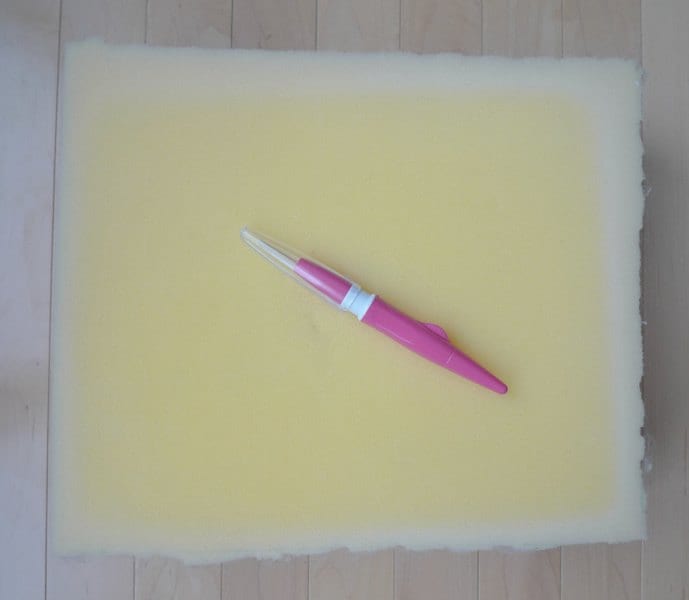
Tools needed:
- Felting needle – I use the Clover Felting Needle Tool
- Felting board – I use a piece of high density foam. Clover makes a large felting mat HERE.
- Yarn with some component of animal fibers (wool, alpaca, wool blend)
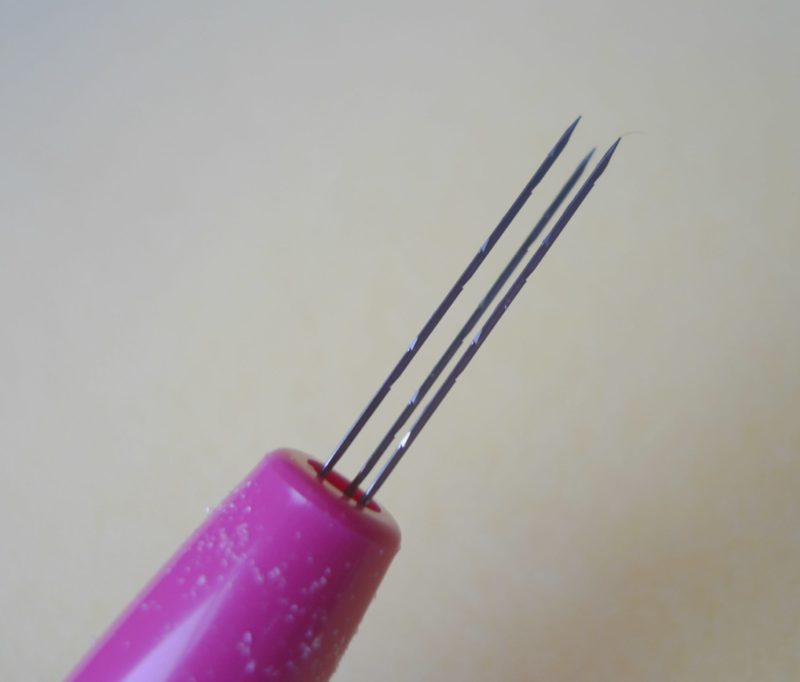
Here is a close-up of the barbs/notches on the felting needles! Keep in mind that you cannot use regular sewing or tapestry needles to do felting as you need these barbs/notches to cause the fibers to interlock together through agitation!
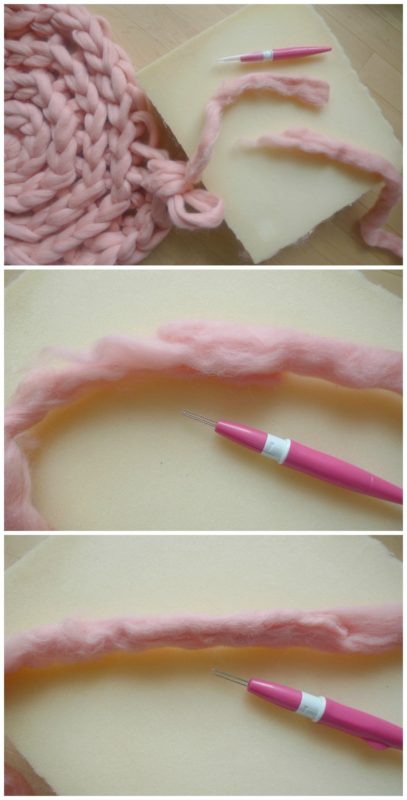
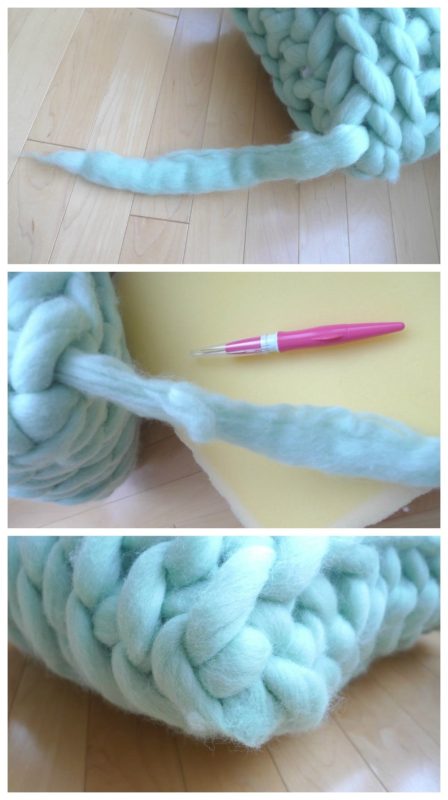
To begin felting the yarn ends together, place one strand ontop of the other, overlapping them about 1.5″ (4 cm) to 2″ (5 cm). You want to have a decent length to felt together so that the resulting piece is strong.
- Begin jabbing the yarn together, moving along the overlapped section.
- Periodically lift the yarn up, rotate it, and jab it some more. You want to be thorough when interlocking the fibers together to ensure that the fibers are getting agitated from different angles.
- Keep repeating this process until the yarn appears to be one cohesive piece and some tugs ensures that the ends will not come apart.
- Smooth the yarn by rolling it between your fingers if necessary.
- Continue on with your project!

Here is a video showing felting in action!
You may be curious if this felting technique works with all yarns: remember that it ONLY works if there is an animal fiber component to it. Check your yarn’s label and see if any percentage has wool, alpaca, mohair, etc. Felting does NOT work with acrylic yarn since acrylic yarn is synthetic with no animal fibers in it. Cotton is a plant fiber with no scales, so felting does not work with cotton either. Interestingly, superwash merino wool has been treated in a special way to remove the scales so that felting does not occur, making the wool machine washable. However, the yarn I was using in the video above was actually superwash merino wool, so felting just the ends with agitation is possible. As a demonstration of what types of yarns can be felted, I tried felting the following five yarns:
- 100% Peruvian Highland Wool by We Are Knitters – felting works
- 95% Alpaca, 5% Polyamide by The Rare Creature – felting works
- 80% Acrylic, 20% Wool by Lion Brand Yarn (Wool-Ease Thick & Quick) – felting works
- 100% Acrylic by Lion Brand Yarn (Heartland) – felting does not work
- 100% Mercerized Cotton by Lion Brand Yarn (24/7 Cotton) – felting does not work
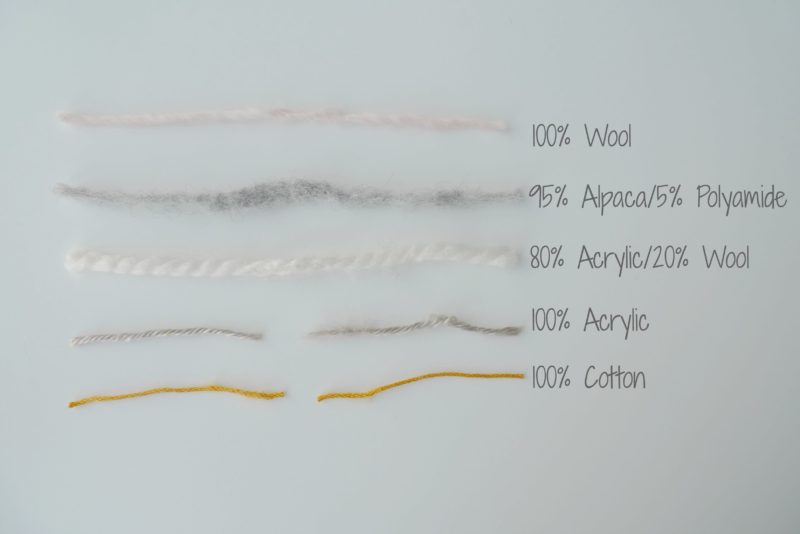
As you can see, this technique of felting yarn ends together works with wool blends such as the ever popular Wool-Ease Thick & Quick Yarn with its 20% wool composition! This is great news for those of us who use this yarn frequently and I was delighted when I first tried this technique and it worked! I would test out this technique with small strands of yarn that you are unsure about, as it may not always work with different yarn blends. You want to make sure that you have enough yardage when doing your projects (i.e. don’t assume that certain yarns will felt). Check out this video below to see me attempting to felt five different types of yarn ends (you can also view this video on YouTube HERE!
Felting ends is particularly useful when doing extreme knitting and crocheting since hiding such huge ends is troublesome, and the wool itself is very expensive. Below you can see some pictures of when I felted my ends together in my “Extreme Crocheted Rug” project!
You can also use this brilliant felting technique at the end of a project when you want to hide just one end. You place the yarn end ontop of the finished piece by choosing a strategic location where it will blend in. Then, you simply use the felting needle and do the same technique as described above, this time felting the yarn end with the rest of the piece. Below you can see some pictures of when I felted my wool end with the rest of the piece in my “Extreme Crocheted Cushion“. Sarah of Mama Knows Luxury has put together a more in depth video to show “Felting to Finish Ends” HERE and she also has a “How To Use Felting to Join Yarn” video HERE!
This felting technique is a game-changer as it eliminates the need to weave in our ends, tie knots, and waste yarn. I hope you are able to apply it to your knit and crochet projects! If you are looking to purchase your own felting needle, I highly recommend the “Clover Felting Tool” HERE as it contains multiple needles, and there are refills available as well. Thank you for reading, everyone, and happy felting! Feel free to pin the below collage to your Pinterest boards to remind you about this tutorial and to let others know about this very useful technique!
***UPDATE: For chunkier yarns, I highly recommend trimming your yarn down to half thickness so that the join is less bulky! For example, for Wool-Ease Thick & Quick (super bulky level 6 yarn), I untwist the yarn and snip half of each end. Then, when you twist and felt the two ends together, it is the same thickness as the rest of the yarn. You can watch my video that I created below to demonstrate this technique!
@allaboutami No more knots & weaving in ends when adding a new yarn ball 😱🧶🙌🏻 ##yarntrick ##yarnhack ##iloveyarn ##yarncrafts ##yarnlove ##yarnie
♬ dear katara – L.Dre