***You can purchase an INEXPENSIVE AD-FREE PDF of this pattern on Etsy HERE and on LoveCrochet HERE! This beautifully formatted PDF includes the step-by-step tutorial and the full pattern for BOTH the Snow Puff Ribbed Beanie AND Snow Puff Ribbed Scarf! It is a total of 6 pages including the cover page! This pattern is also available in the “Crochet Cowls & Scarves PATTERN BUNDLE” which includes over 20 beautiful designs at a discounted price – check out the bundle HERE! You can also purchase a kit HERE on the Lion Brand Yarn website that includes the pattern and all the yarn needed to make the scarf and beanie (as well as the yarn pom poms)!
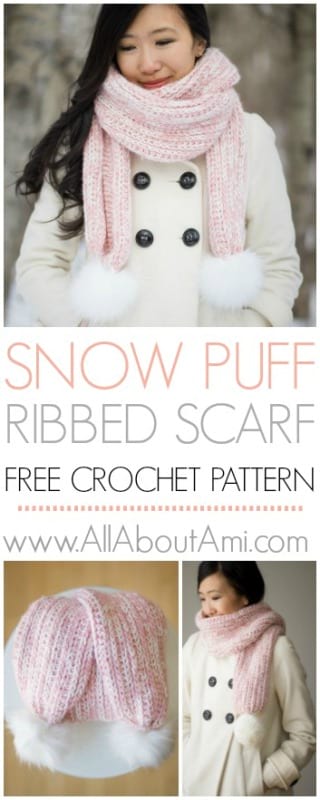
After designing my “Snow Puff Ribbed Beanie” with these gorgeous shades of New Basic 175 in “Peony” and “Cream”, I was excited to make a matching scarf!
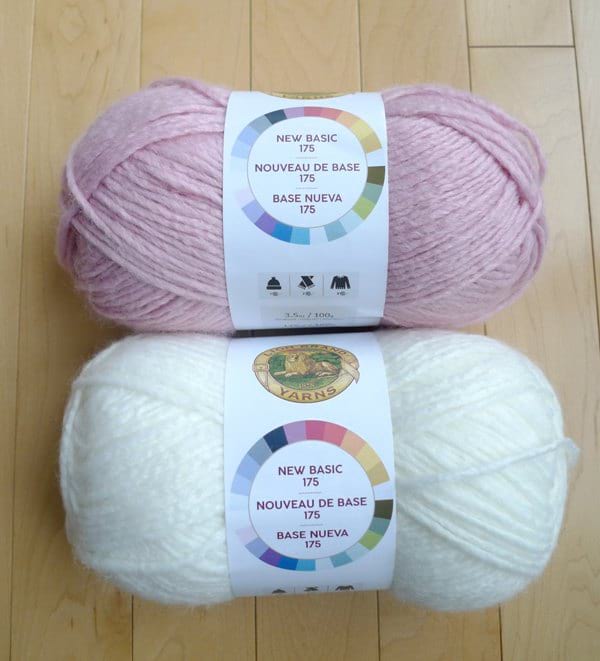
This yarn feels so soft against the skin and is classified as a level 4 worsted weight yarn! I wanted to try crocheting a long scarf that could be wrapped around the neck a few times with the ends hanging down! Most of the neckwear that I’ve designed are cowls that are worked in the round or seamed into a circle, so I thought it was about time I crochet a long scarf!

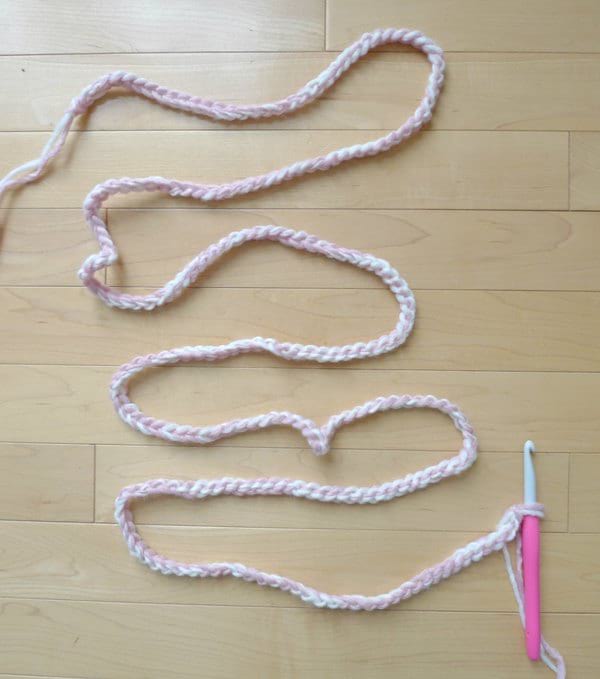
I held both strands of yarn together and worked a series of 216 chains with my 8 mm Clover Amouro hook to determine the length of my scarf.
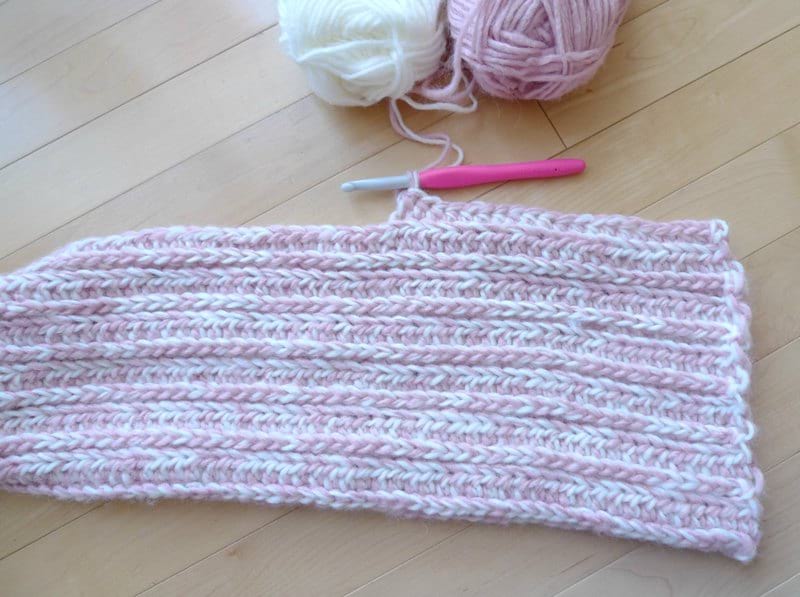
Next, I worked the same ribbing pattern of alternating half double crochets in the third loops and back loops! Check out my beanie post HERE to see how to work this lovely ribbing!
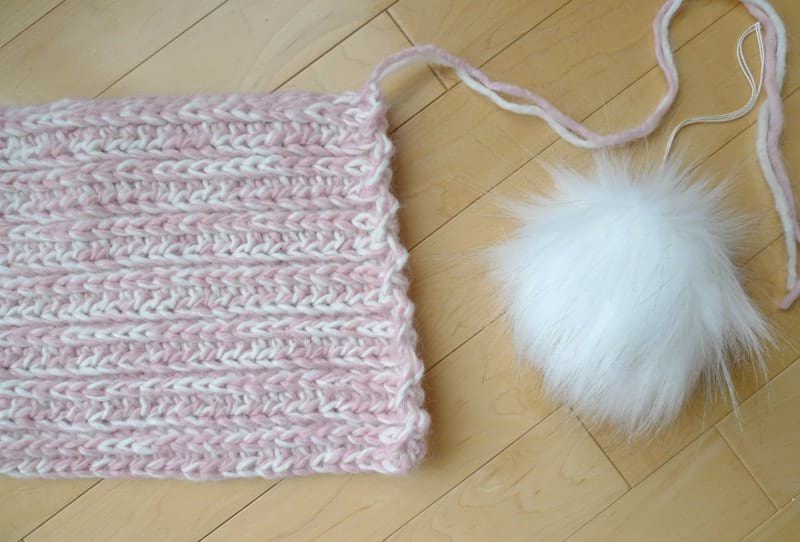
This ribbing has a tendency to curl as shown below. When I was happy with my width or number of rows, I blocked the scarf on my foam mats!
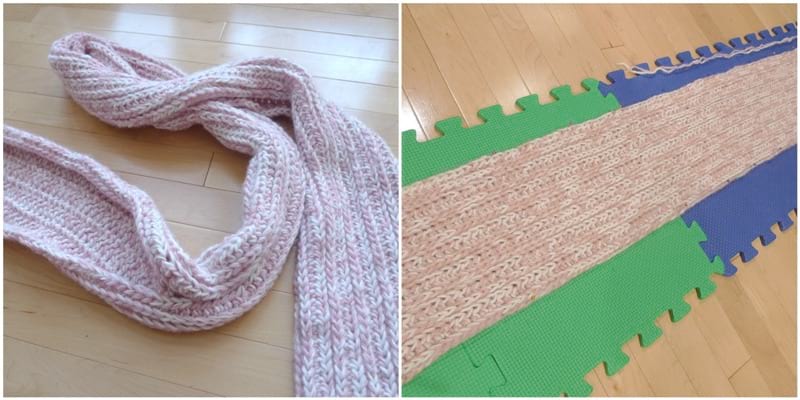
Doesn’t the scarf look so much cleaner and crisper once it’s been blocked? I love how it lays so flat! It was then time to add some pom poms!
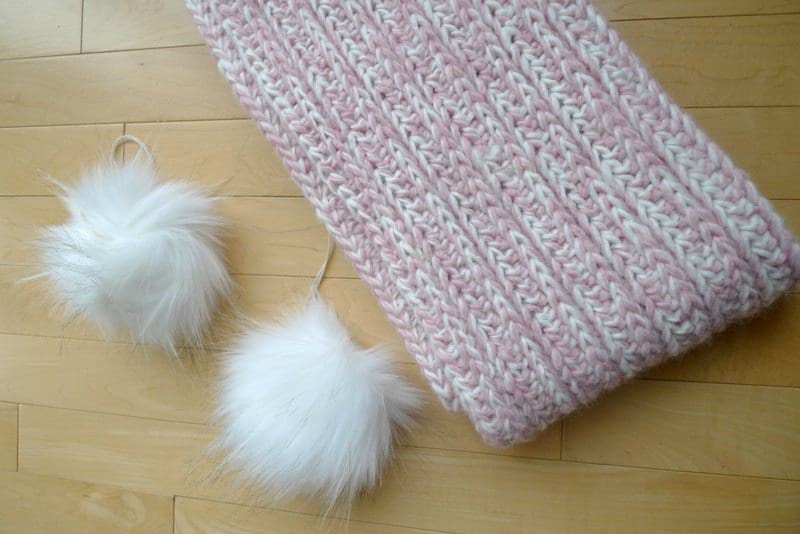
I wanted to add a pom pom to each side of my scarf. These faux fur pom poms are handmade by Cristin of Kozy Komforts, and she offers a variety of colours!
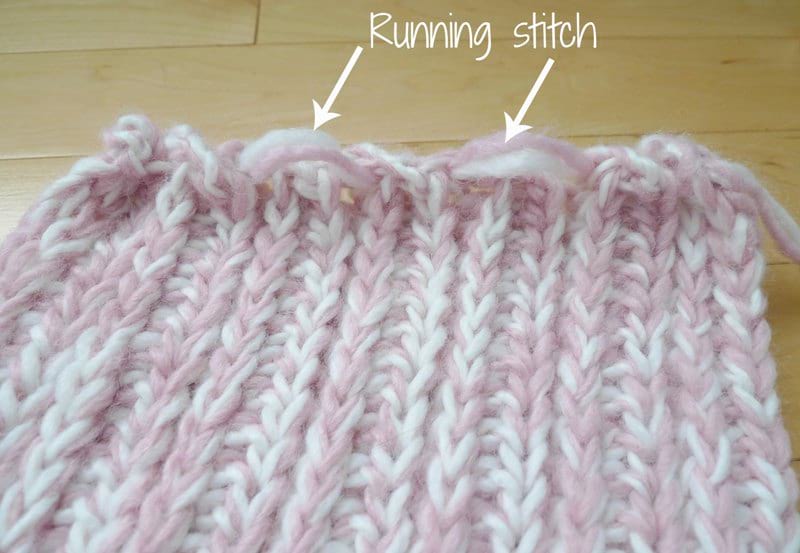
To cinch the edge of the scarf together, I worked the running stitch across the edge, in and out of stitches.
Next, I pulled tightly, and the edge gathered together as shown below! I weaved the yarn end through the opposite side and tied multiple knots!
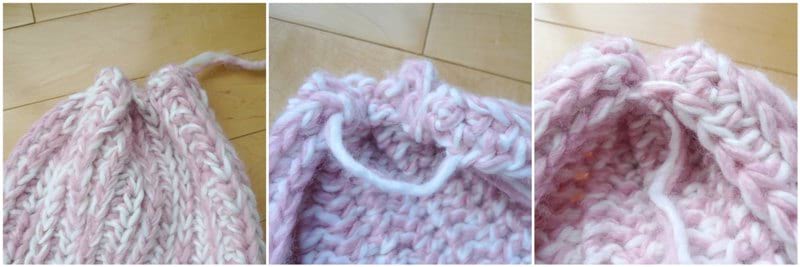
I then attached the faux fur pom pom pom securely into place at the tapered end!

You can watch this video below to see how to crochet the ribbing:
***************************
Here is the free pattern for my Snow Puff Ribbed Scarf!
***You can purchase an INEXPENSIVE AD-FREE PDF of this pattern on Etsy HERE and on Craftsy HERE! This beautifully formatted PDF includes the step-by-step tutorial and the full pattern for both the Snow Puff Ribbed Beanie AND Snow Puff Ribbed Scarf! It is a total of 6 pages including the cover page! You can also purchase a kit HERE on the Lion Brand Yarn website that includes the pattern and all the yarn needed to make the scarf and beanie (as well as the yarn pom poms)!
![]()
Materials:
- New Basic 175 yarn (worsted, level 4): 4 skeins (400-436 grams) required – I held two different colours together for a beautiful effect- I used “Peony” and “Cream“; on the Lion Brand site HERE.
- I used 4 skeins and the remainder of the yarn from the Snow Puff Ribbed Beanie project- if you are making both the beanie and scarf, you will need a total of 6 skeins of yarn.
- Note that if you are using yarn pom poms for this scarf, an additional skein of desired colour should be used (our sample yarn pom pom required 30 grams of yarn).
- 8 mm Clover Amour hook
- Clover lock ring stitch markers
- Yarn needle
- Optional: two pom poms – yarn pom poms (Clover pom pom maker) or faux fur pom poms (similar HERE)
Notes:
- A beautiful ribbed pattern is created by working half double crochets in the third and back loops.
- This ribbing has a tendency to curl, so you will need to block your work at the end.
- After the crocheting is complete, each end of the scarf is cinched together to create a tapered effect.
- A faux fur pom pom or yarn pom pom is attached to each tapered end.
- Fringe or tassels could be added to the tapered ends as well. You could also choose not to taper the ends and leave them as is.
- To make the scarf longer, increase the number of initial chains (i.e. more than 216).
- To make the scarf shorter, decrease the number of initial chains (i.e. less than 216).
- To make this scarf wider, increase the number of rows (i.e. more than 14 rows).
- To make the scarf narrower, decrease the number of rows (i.e. less than 14 rows).
- Keep in mind that the faux fur or yarn pom poms will add some weight to the scarf when you wear it, so the length will stretch further.
Gauge: 10 hdc and 7 rows = 4″
Scarf:
Ch 216
Row 1: Hdc 1 in 2nd chain from hook and across. (215 sts)
R2: Chain 1, turn. Hdc in third loops across. (215 sts)
R3: Chain 1, turn. Hdc in back loops across. (215 sts)
R4-14 (or until desired width): Repeat Rows 2-3.
Fasten off and leave long end for sewing. Block scarf to minimize curling.
Weave yarn end in and out of the stitches along the end (running stitch). Pull tightly to cinch the scarf end together. Secure the yarn end to the opposite side and tie multiple knots. Weave in end and repeat on both sides.
Attach faux fur or yarn pom pom to each tapered end. If creating yarn pom pom, I would recommend using embroidery floss to tie the center of the pom pom tightly as New Basic 175 yarn may tear when pulling with great force.
Finished Dimensions: 8″ wide x 84″ long (without pom poms)
*****************************
I love how this scarf can be wrapped multiple times around my neck for ultimate coziness and wamrth!
![]()
Those pom poms at each end add such a fun and whimsical look! Of course, you could always choose to omit the pom poms or perhaps add fringe or tassels! Try out different ideas or work with different colours!
![]()
In case you’re wondering what the scarf looks like with yarn pom poms rather than faux fur pom poms, it looks just as cute!
![]()
We made this full and plump yarn pom pom using the large Clover Pom Pom Maker! As stated in the pattern above, if you decide to make yarn pom poms, I would recommend getting an additional skein of yarn of that colour so you can make large pom poms without having to take away any yardage from the scarf!
![]()
This matching Snow Puff Ribbed Beanie & Scarf set is so pretty, and it really brightens up any outfit! It helps you look stylish and chic while also keeping you warm on those brutal winter days! Have fun choosing different colour combinations! The free pattern for the Snow Puff Ribbed Beanie can be found HERE and don’t forget that the concise PDF comes with BOTH the beanie and scarf pattern!
![]()
{This post is sponsored by Lion Brand Yarn! I’ve loved working with their yarn throughout the years and I’m thrilled that I get to collaborate with them every month!}
This pattern is an original pattern by Stephanie Lau of All About Ami. Please do not claim this pattern as your own. If you wish to share this pattern, you may link to this pattern but please do not reprint it on your site. You may keep a copy for your own personal use but please DO NOT sell the pattern or distribute it.
You may sell products made from this pattern but please clearly credit the design to me, Stephanie Lau of All About Ami, and provide a link to my blog www.AllAboutAmi.com. Permission is NOT granted for mass production or factory manufacturing of any kind. Thank you for being respectful and for your understanding!