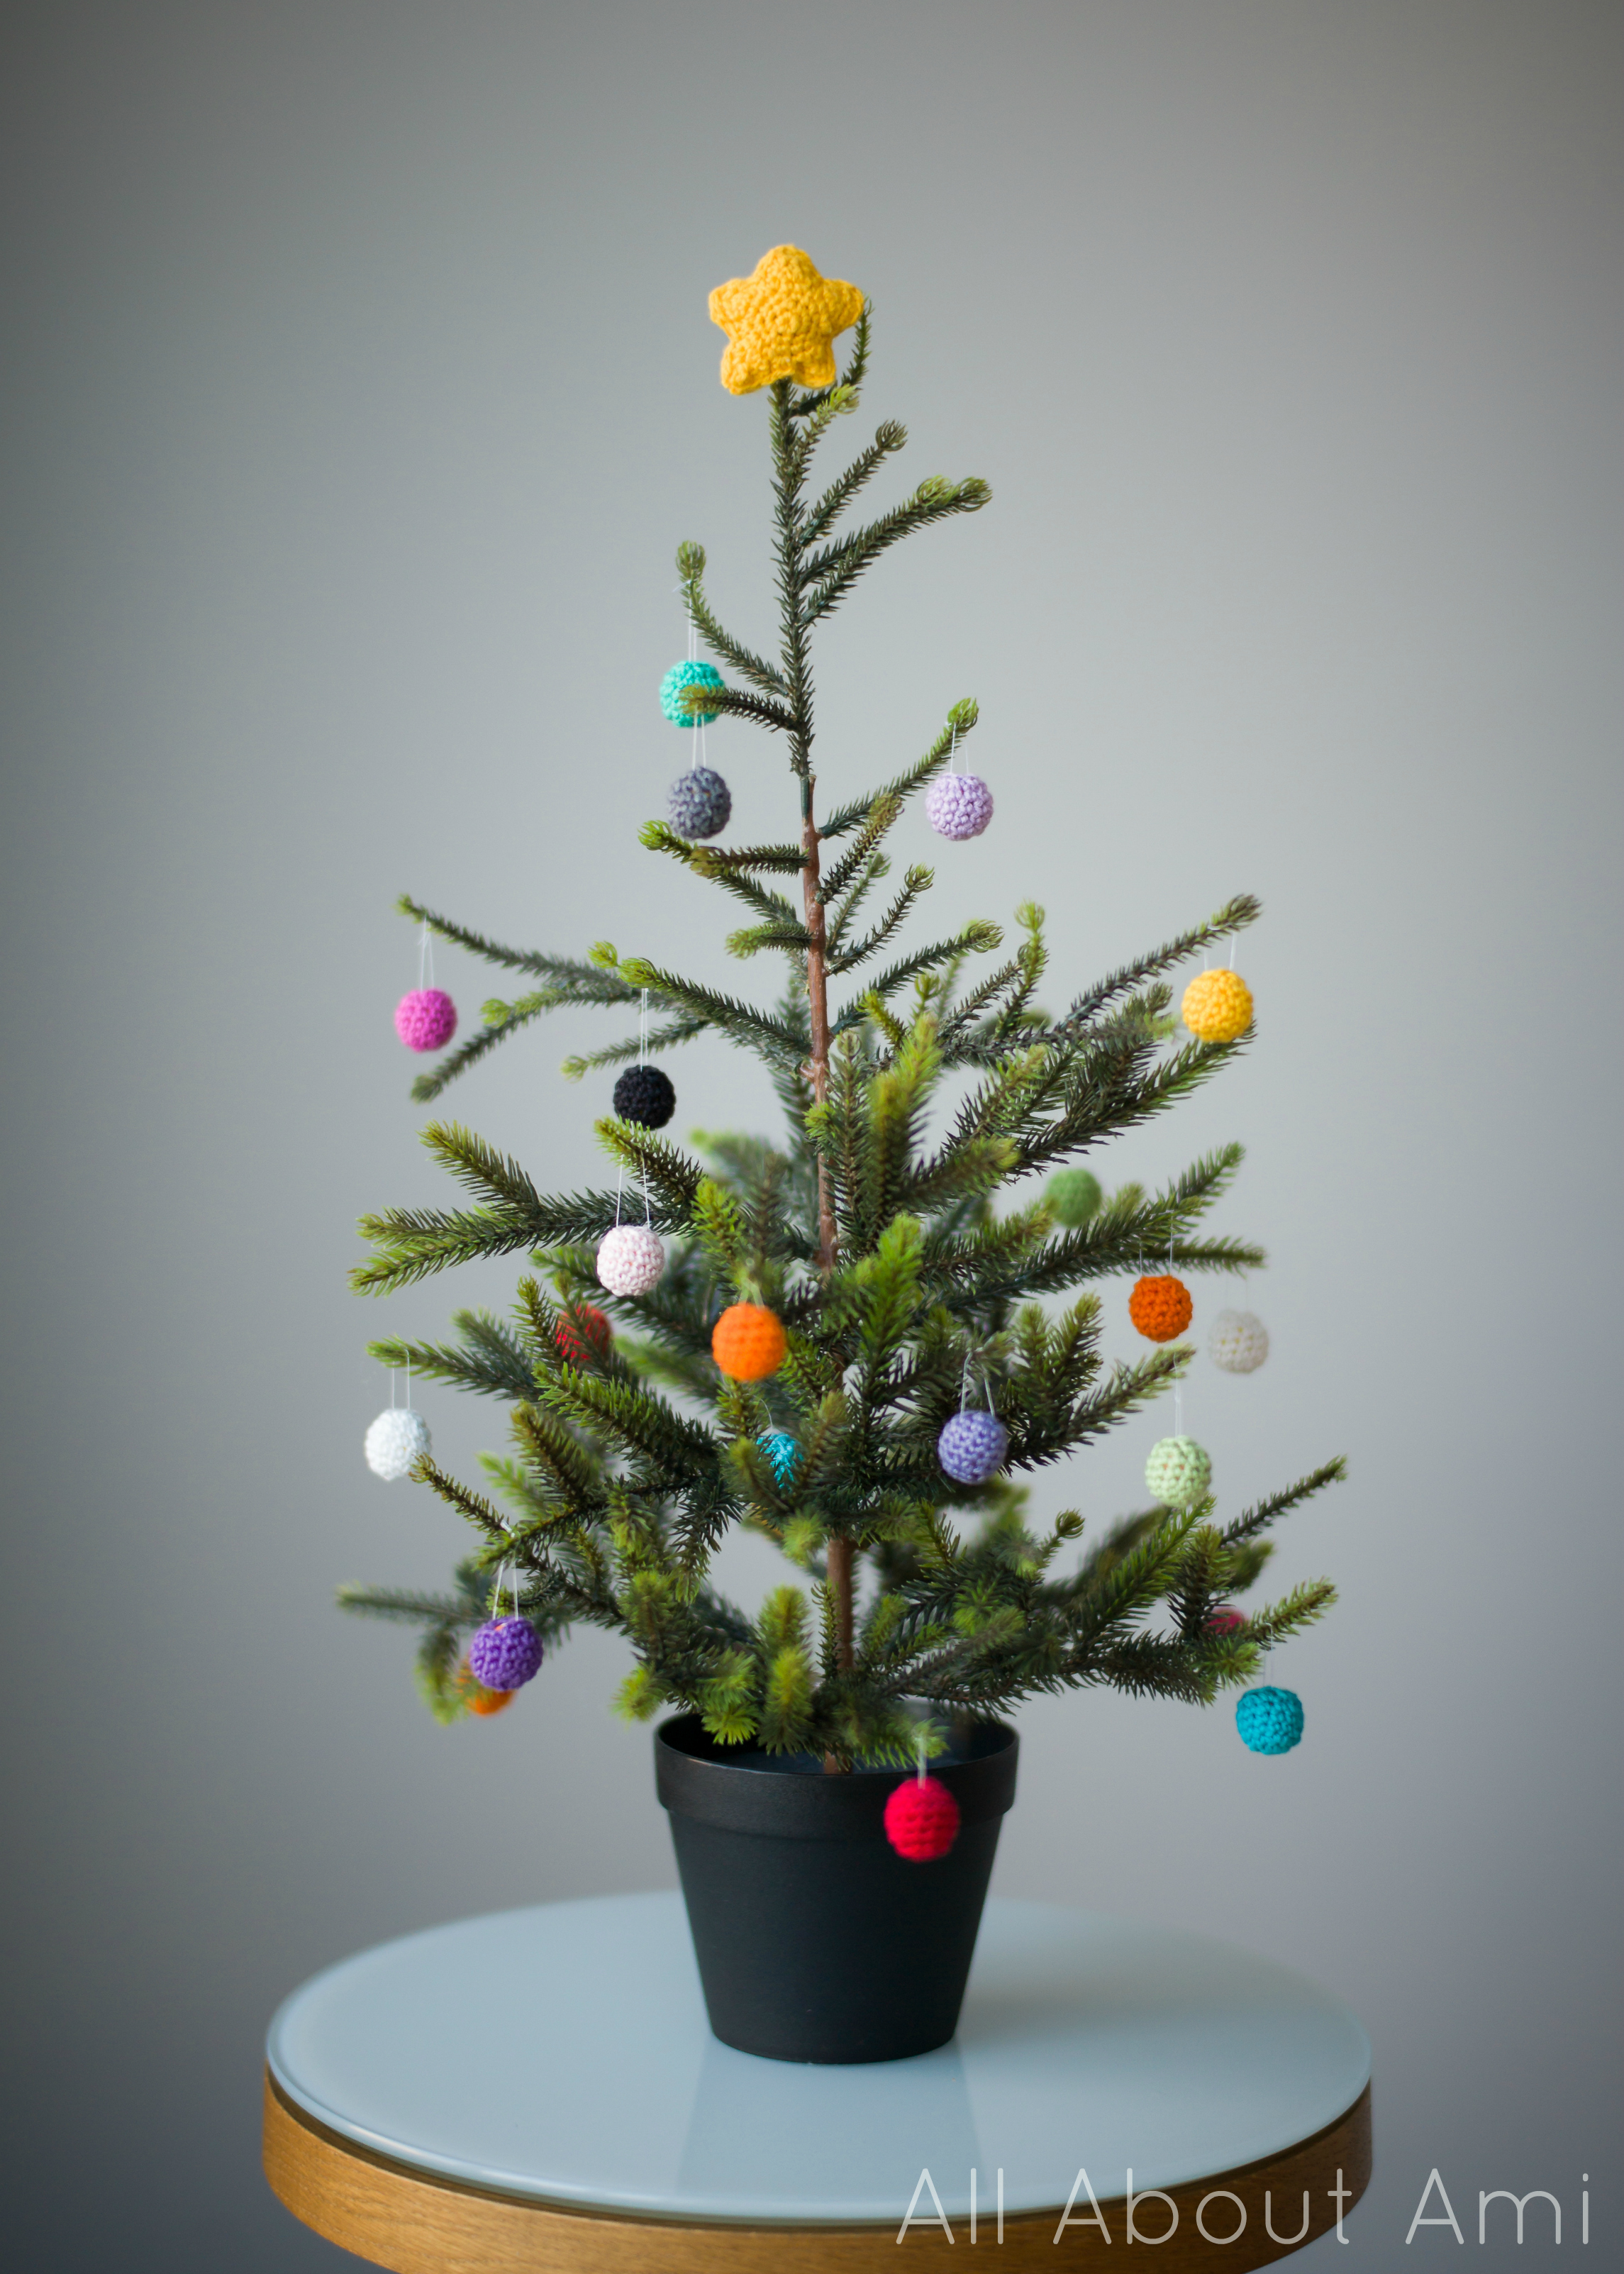
Last year right before Christmas, we picked up an adorable little tree from Ikea (similar HERE) that was on sale! When we brought it home, it looked so bare and we were trying to figure out how to decorate it. We knew it would need some tiny and dainty ornaments, so I decided to crochet them last minute! Below you can see a picture we snapped of our adorable tree from last year- you can still see our birch tree background from Brielle’s Woodland Creature 1st birthday party! This year I thought I would share more about this project and show you how we made our own little crochet ornaments!
![]()
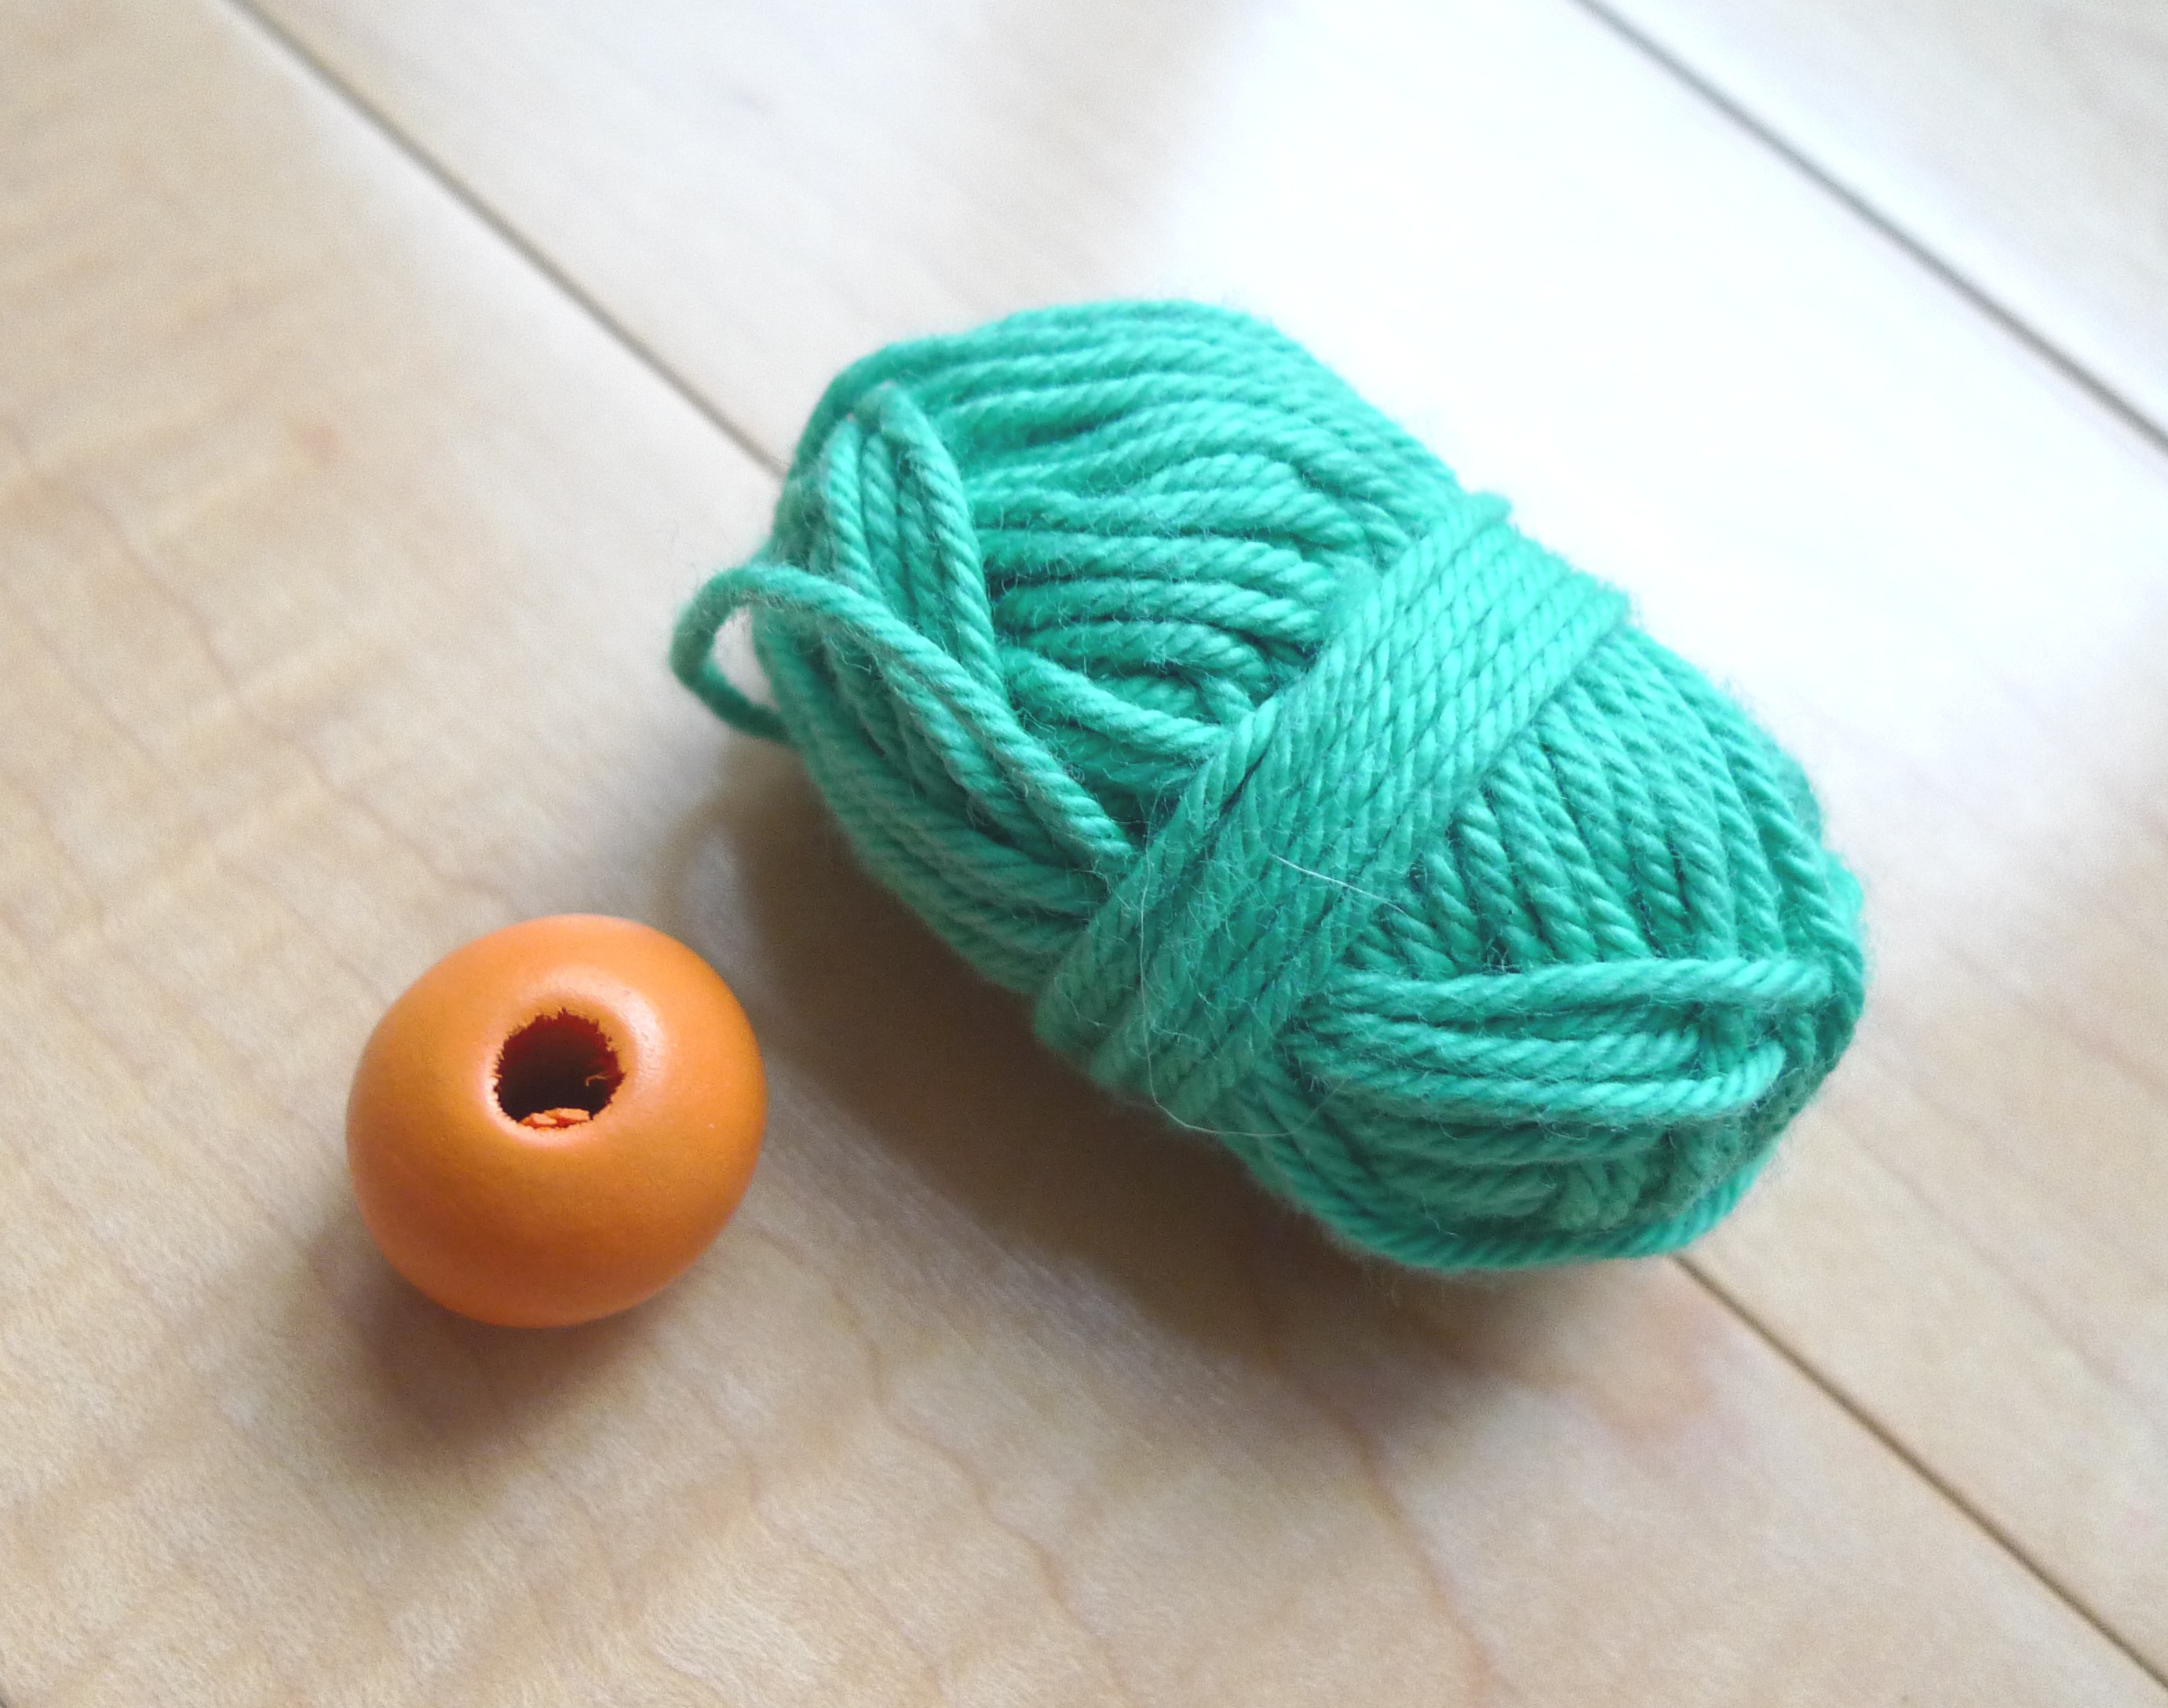
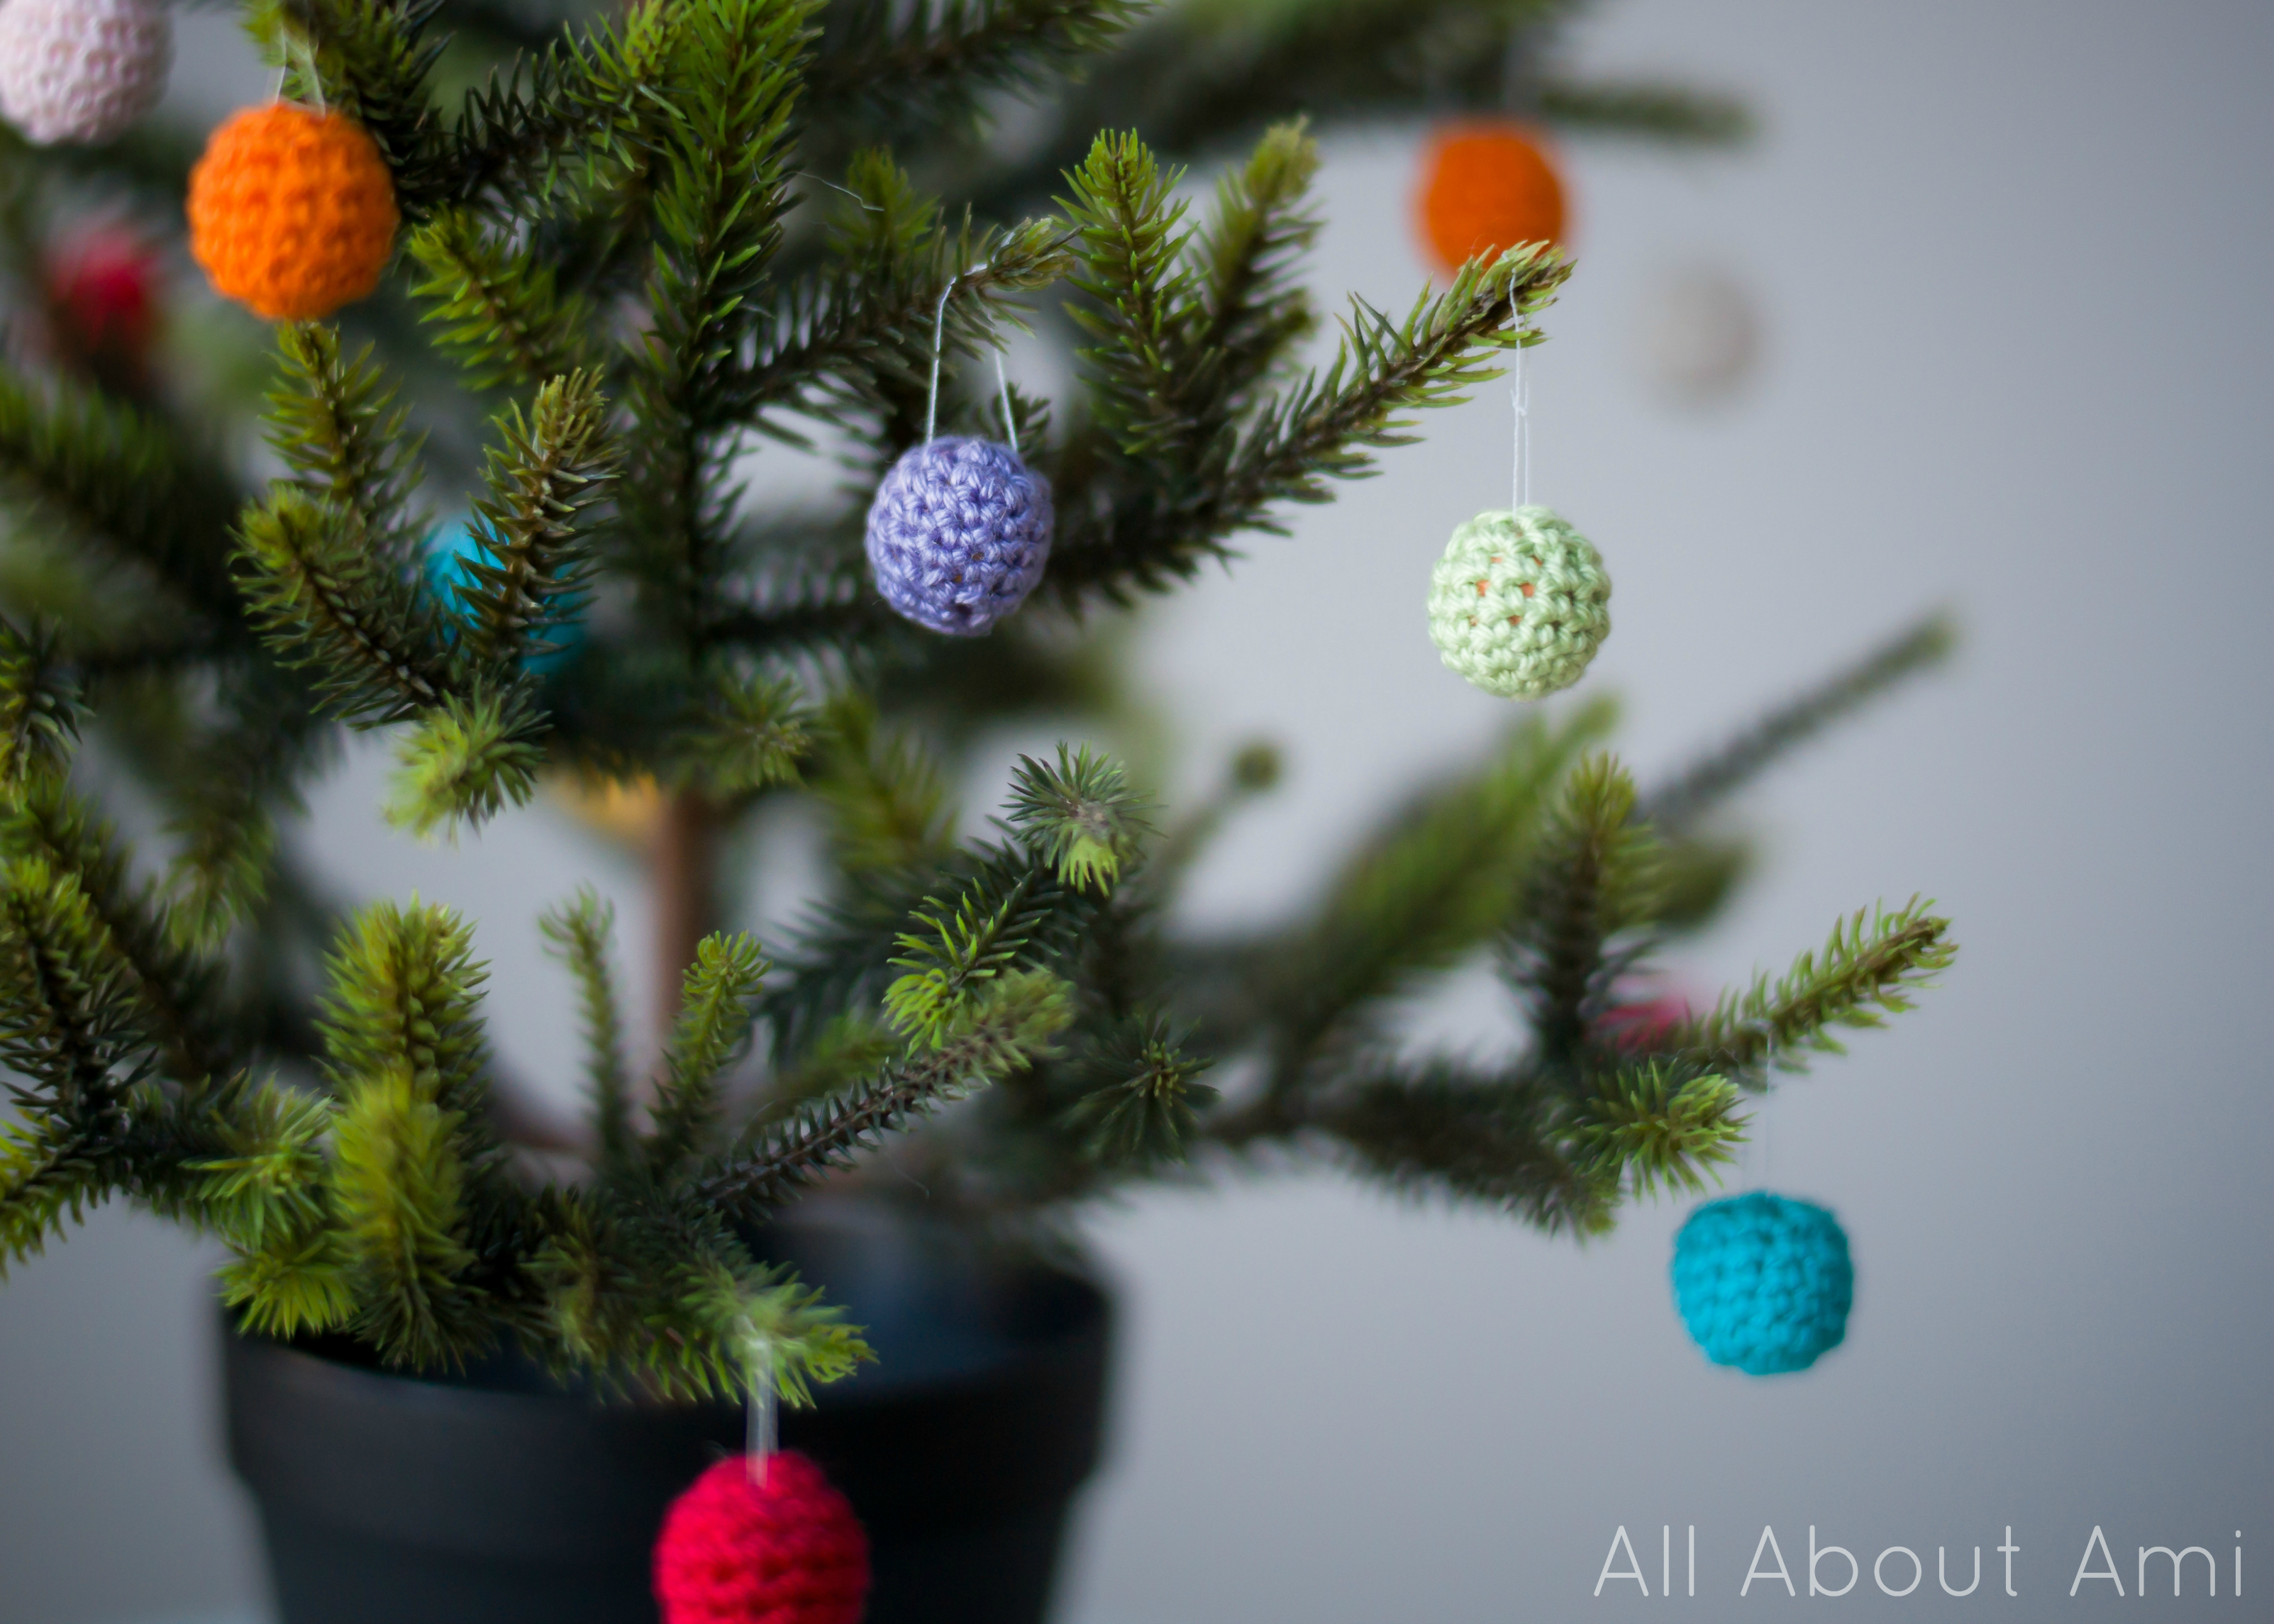
I love perusing craft stores, and a while back I found a bag of wooden beads on clearance for 25 cents at Deserres! They are about 2″/5 cm in circumference and 15 mm in diameter. I decided to crochet around these beads to create little balls to adorn our mini tree!

I knew I needed lightweight yarn in a variety of bright colours to crochet around these beads, so I went with my trusty Lion Brand Yarn Bonbons! This cotton yarn does not pill and provides great stitch definition. I love all the colours available too!
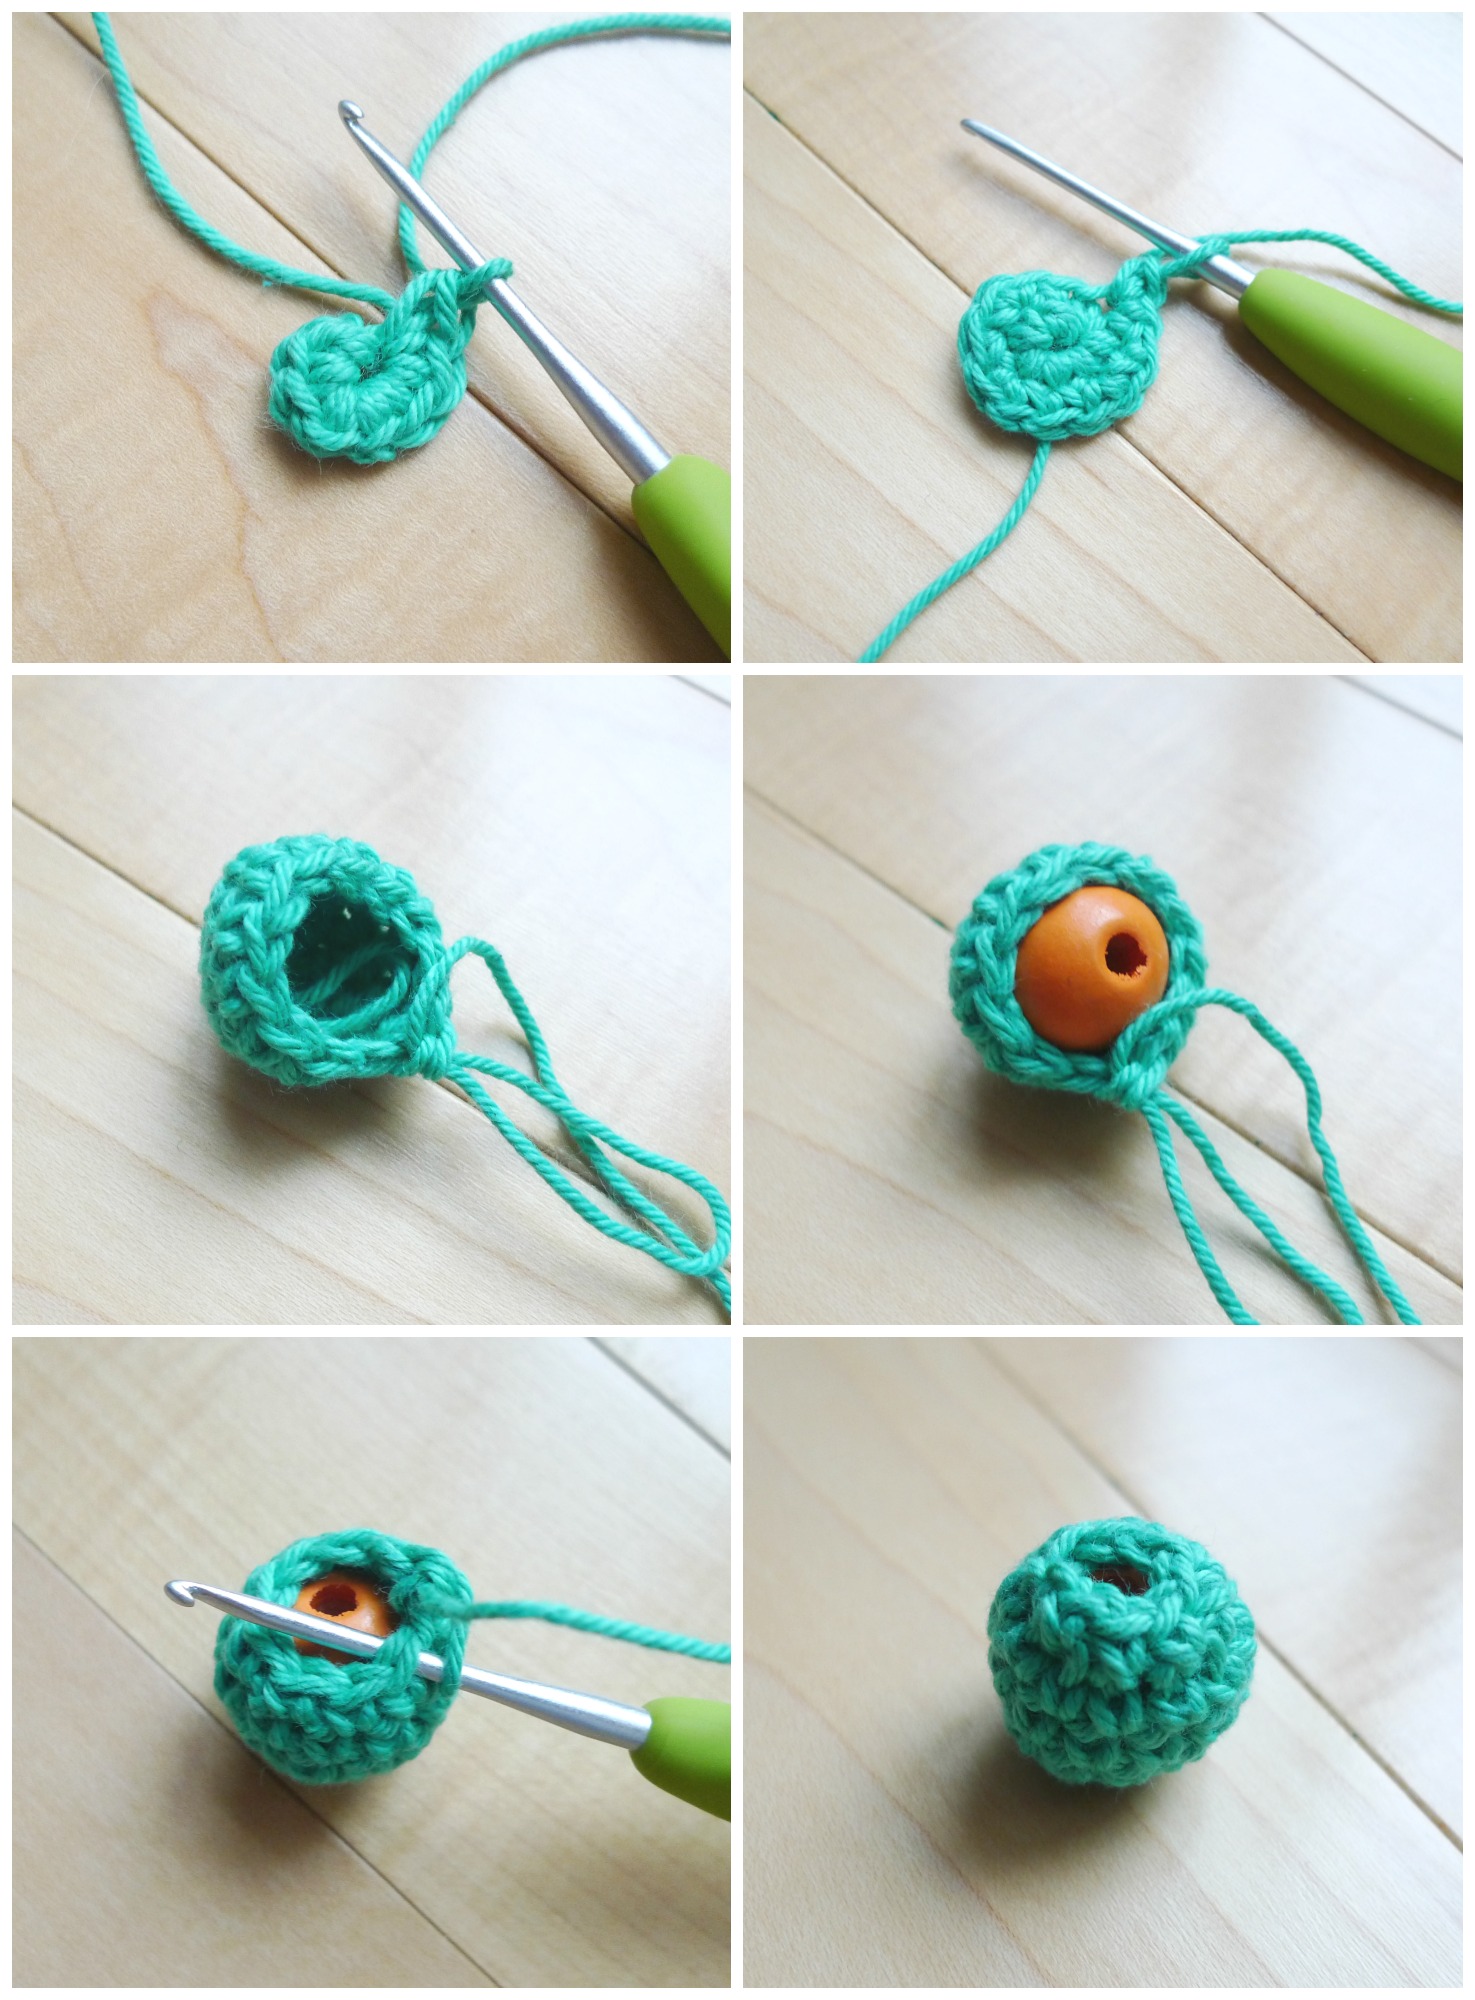
I used my 2.00 mm Clover Amour crochet hook and started off with a magic circle. I worked in unjoined rounds and then slipped my bead into the sphere created. I then decreased and closed up the sphere around the bead! Each ball worked up very quickly, and it was so satisfying churning them out!
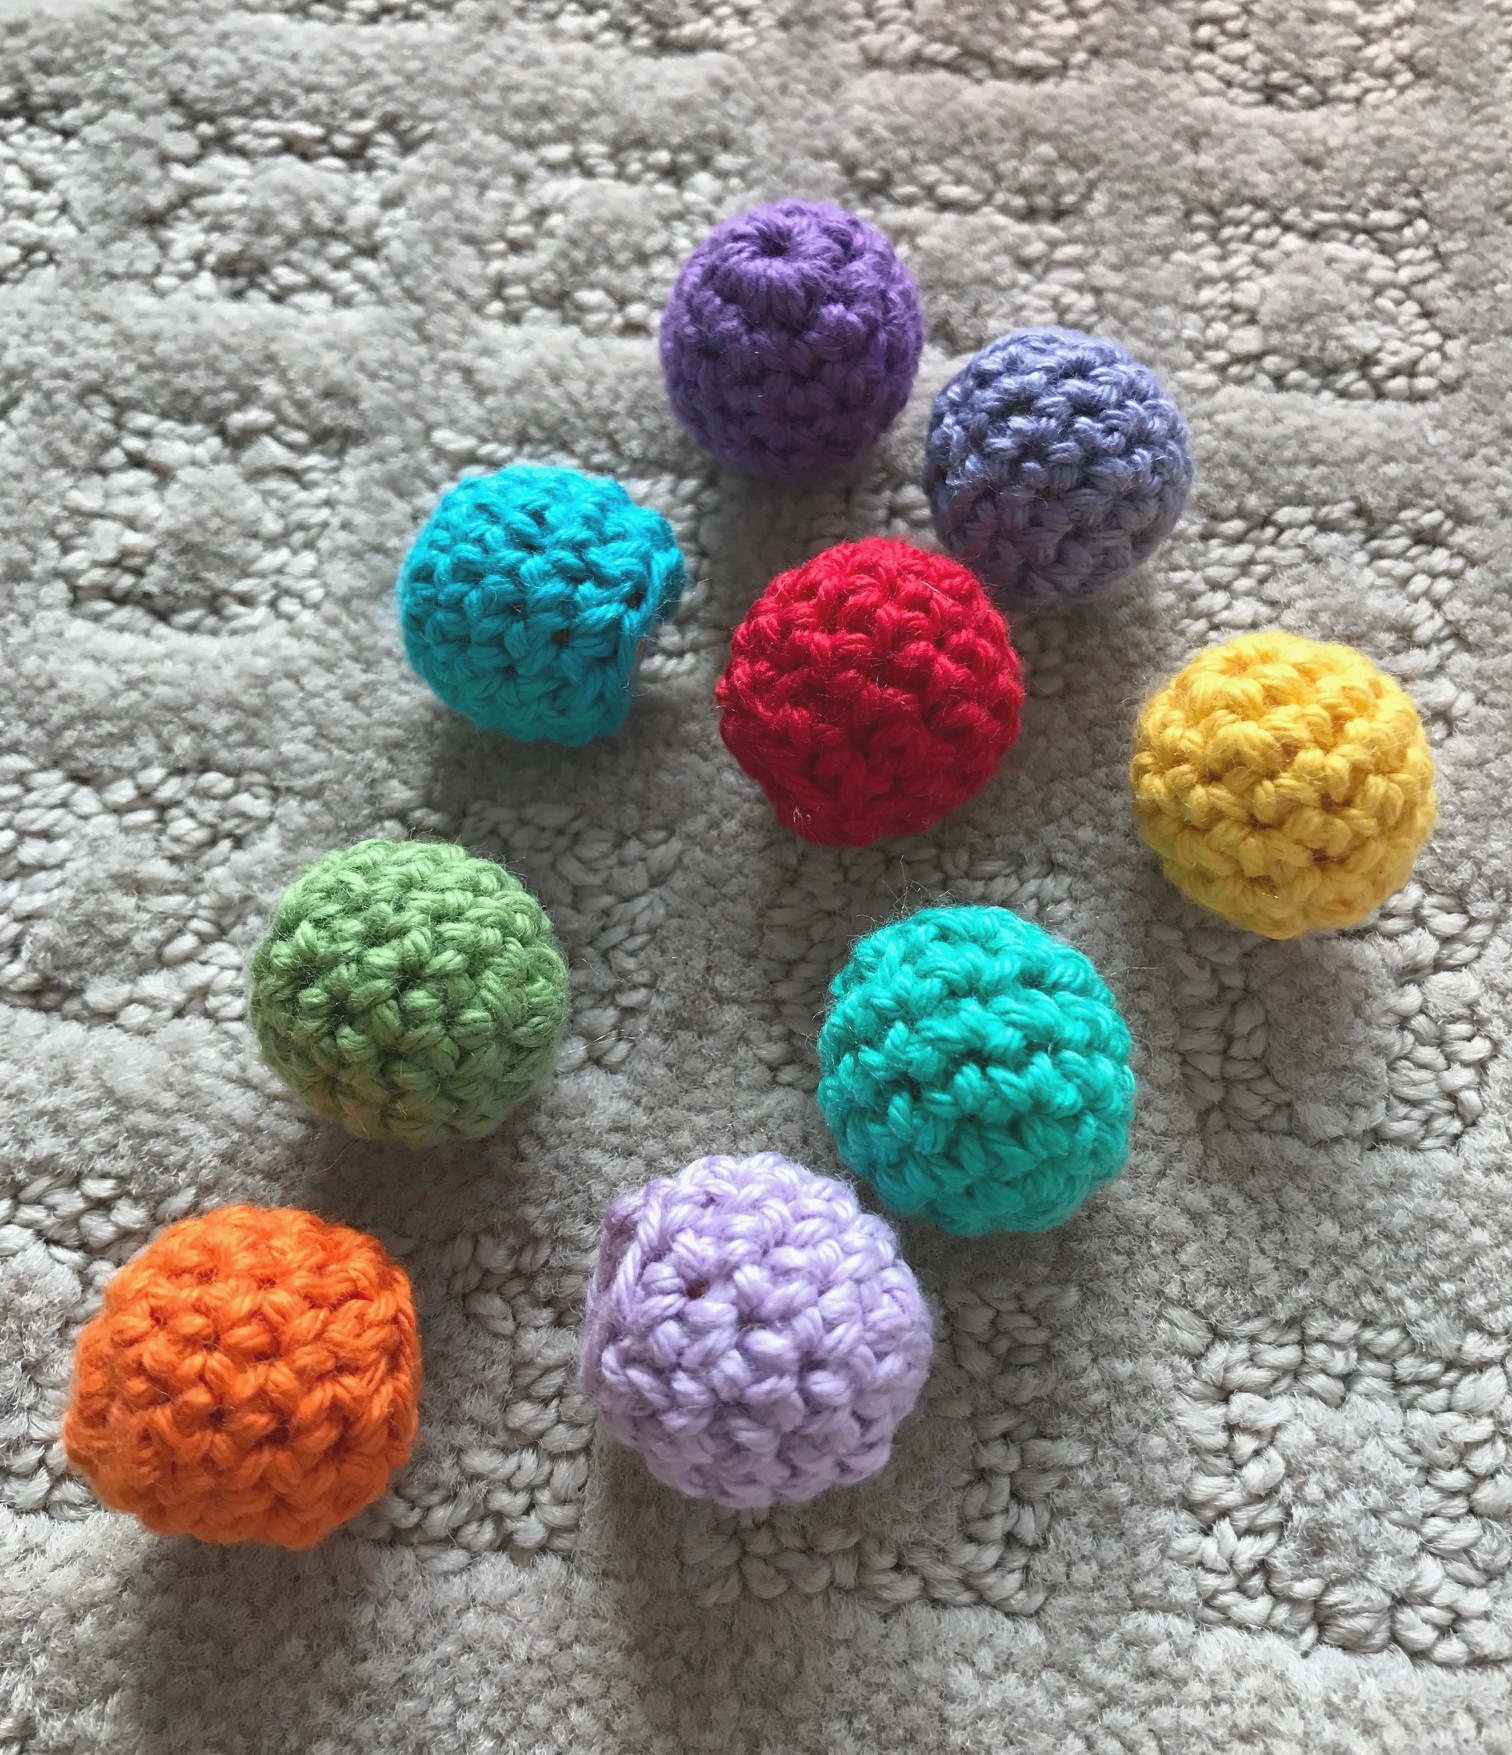
Here are some of the beautiful colourful balls that I created!
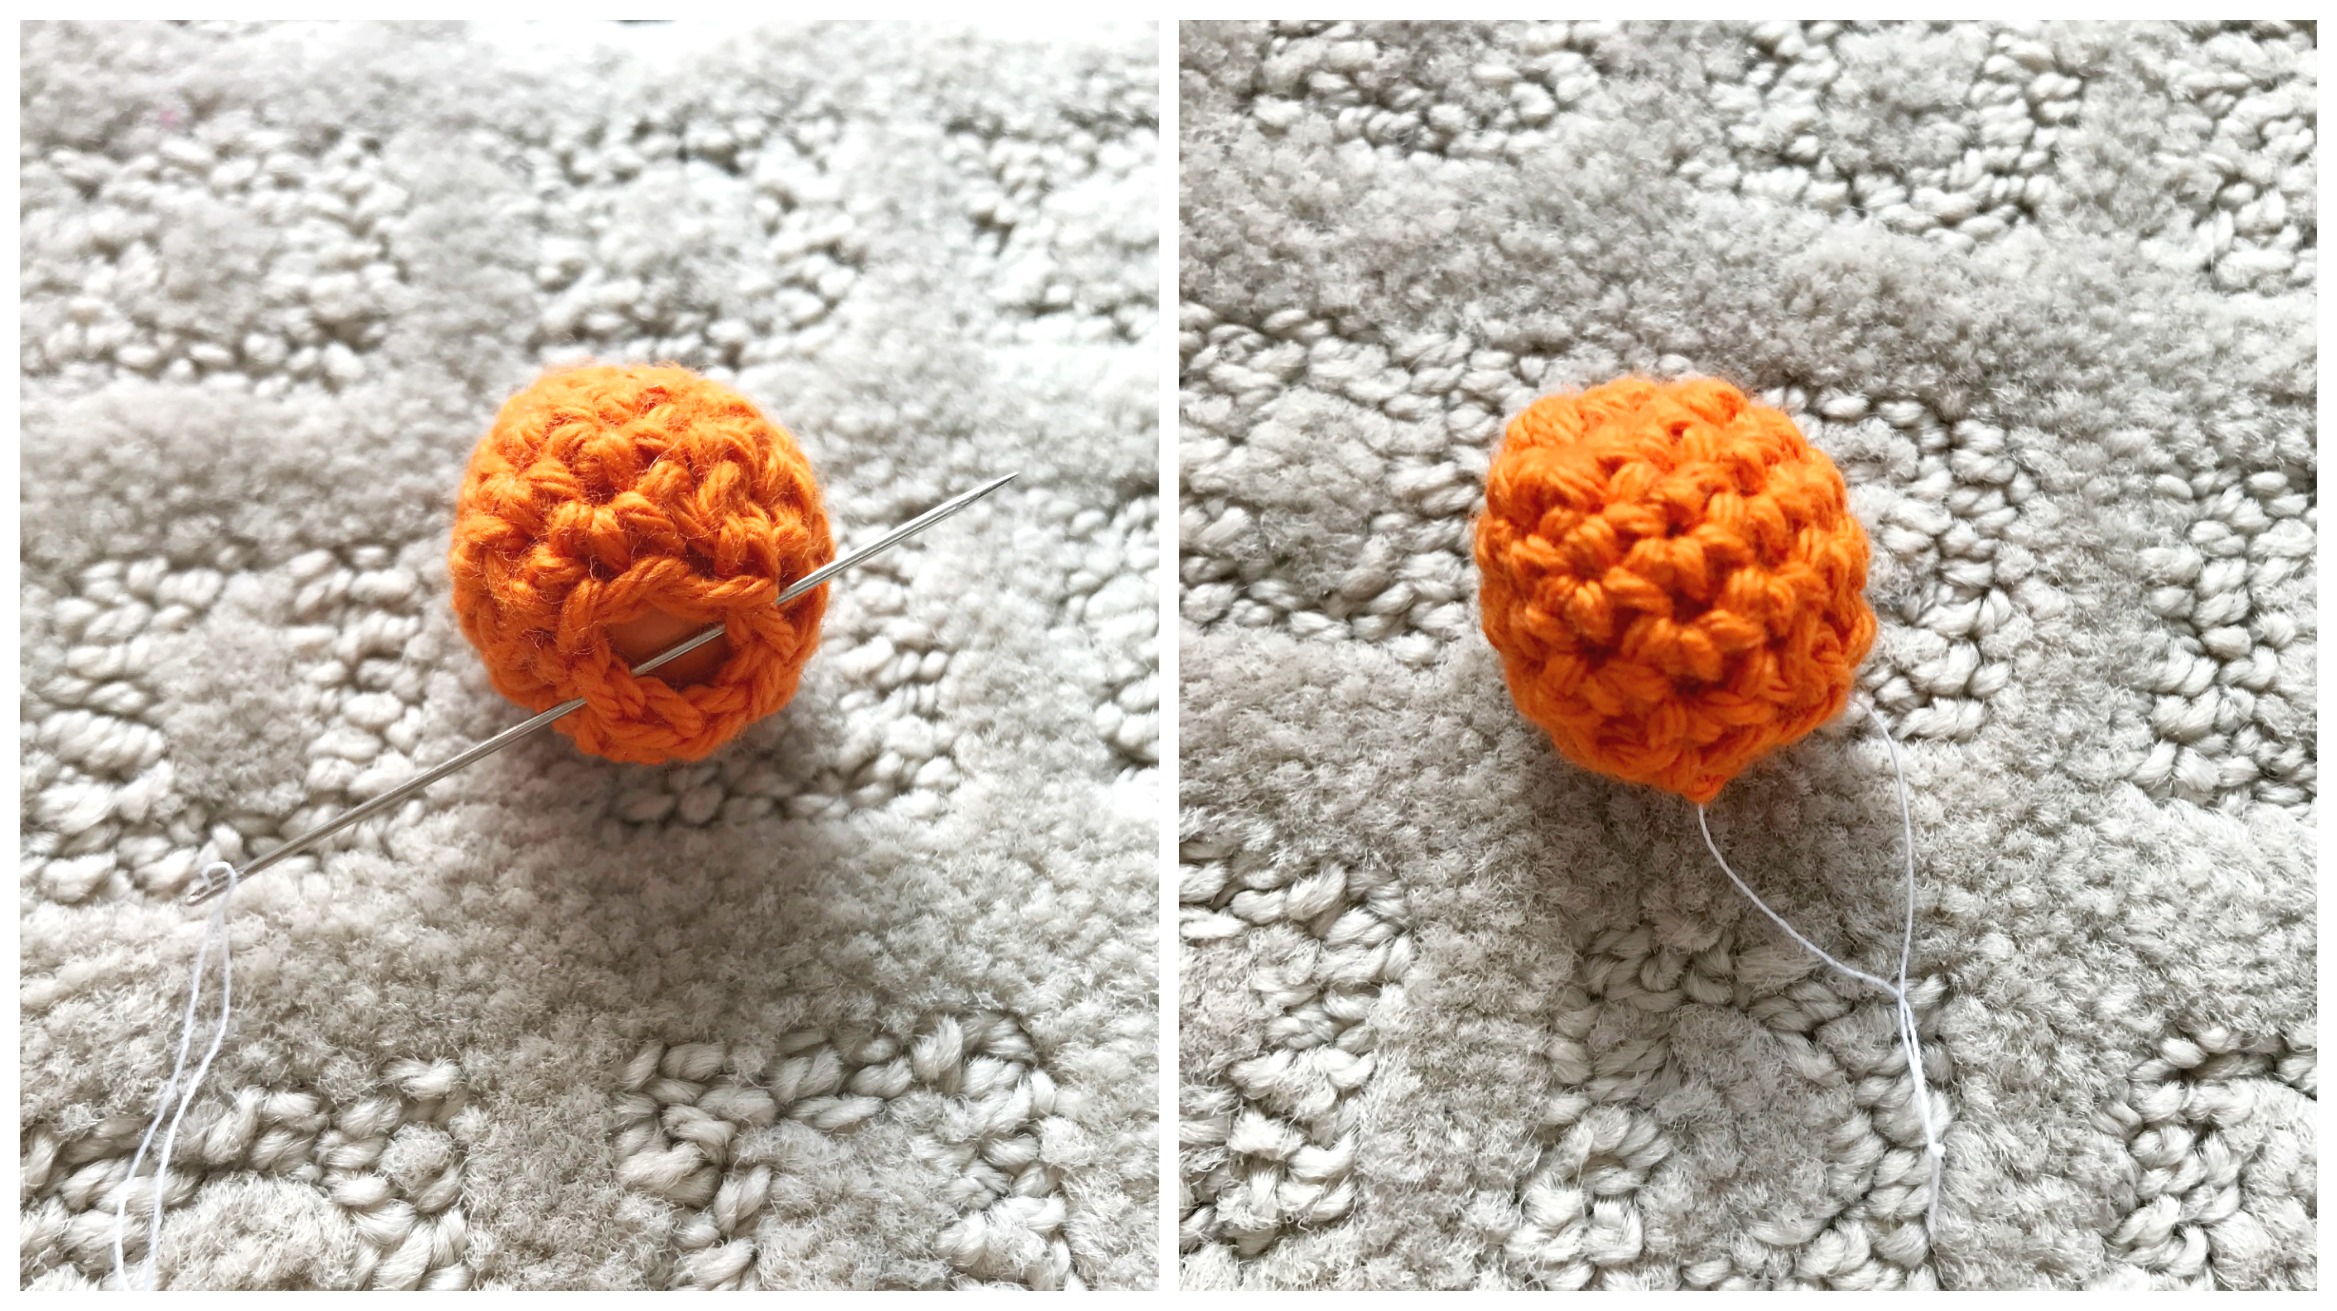
In order to hang them onto the tree, I threaded some white thread through the top of the bead. I tied a knot on one end, and this provided a great way to hang the beads inconspicuously since the thread was not visible at a distance.
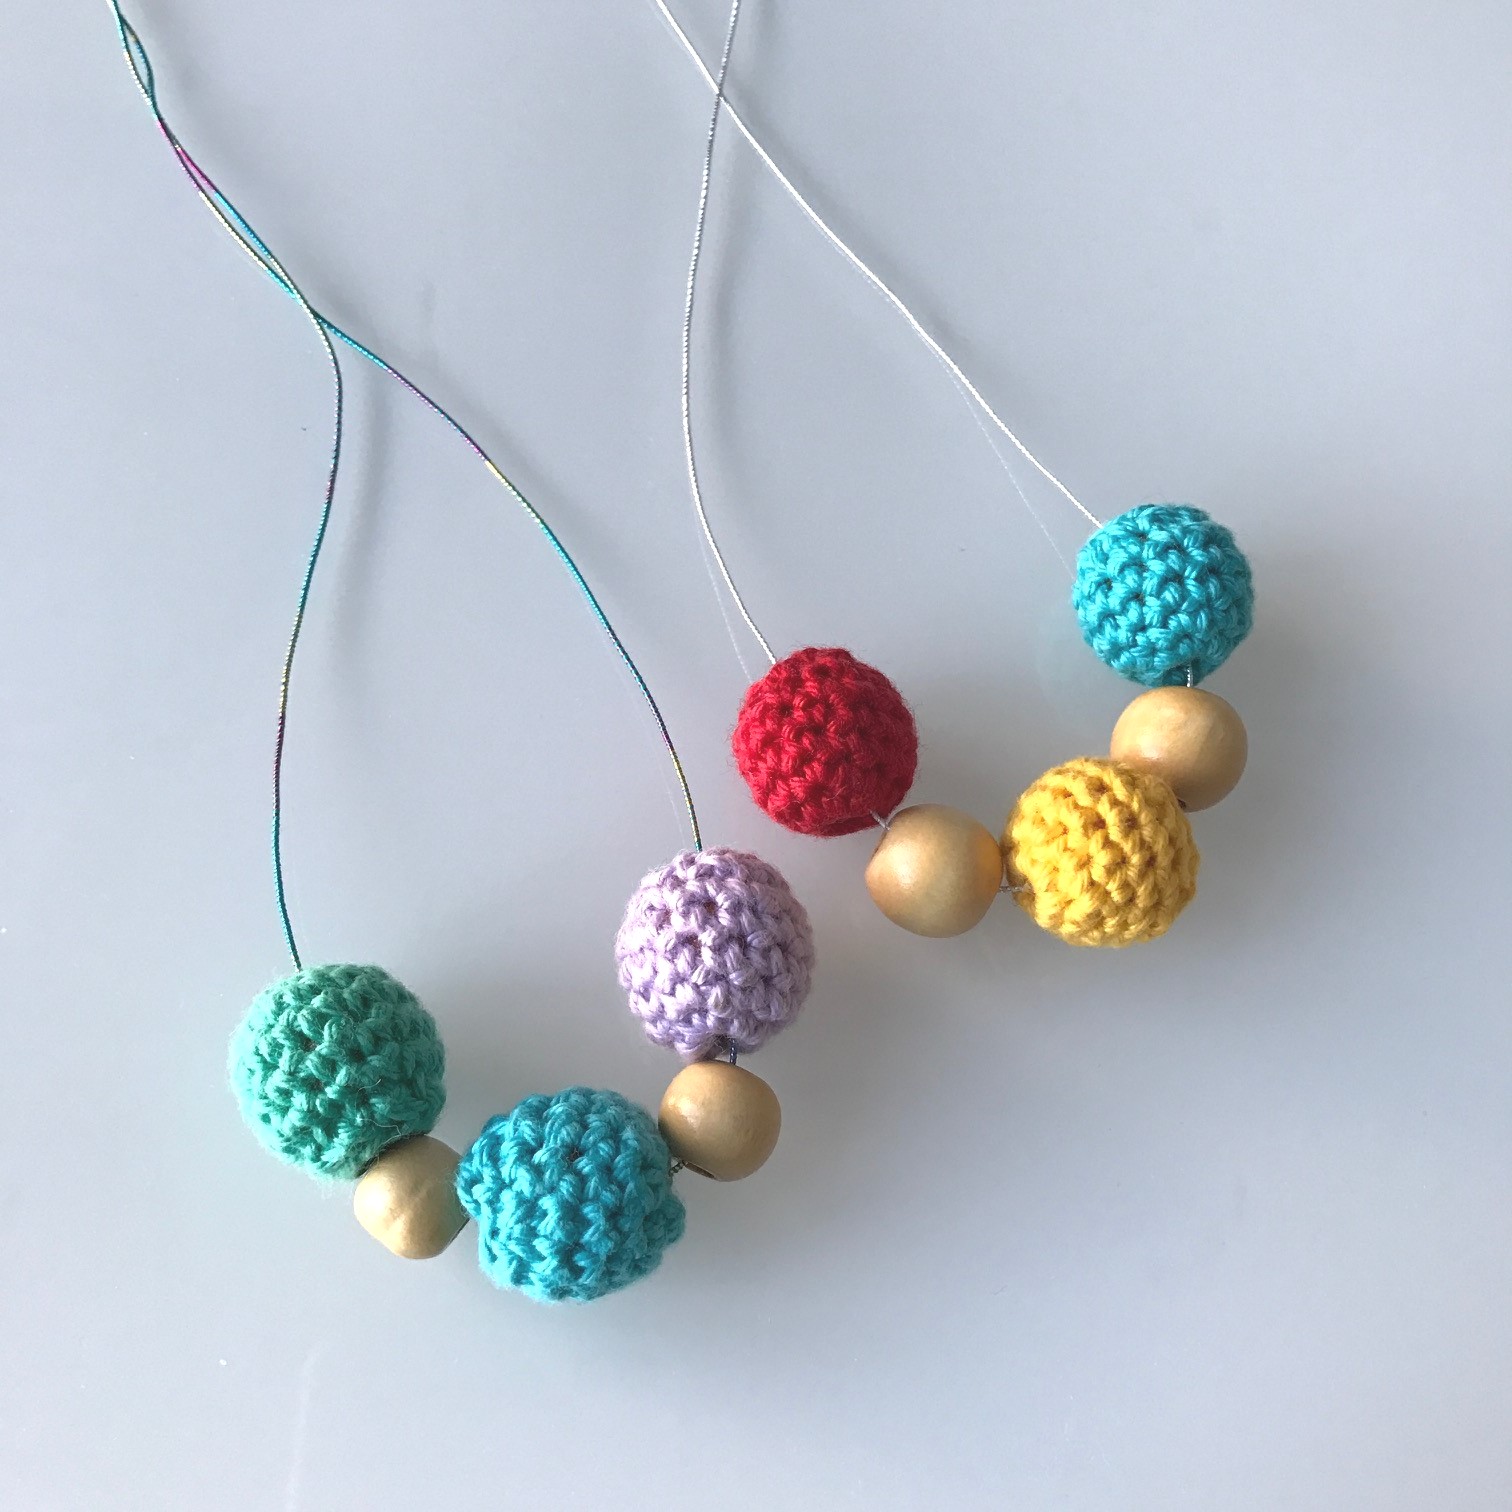
On a sidenote, you could also use these crocheted balls/beads to create chic necklaces for your toddlers! I made these necklaces for the girls by threading them onto stretchy elastic so that they can easily put them on and take them off by themselves. You can make them in your child’s favourite colours and they look super cute!
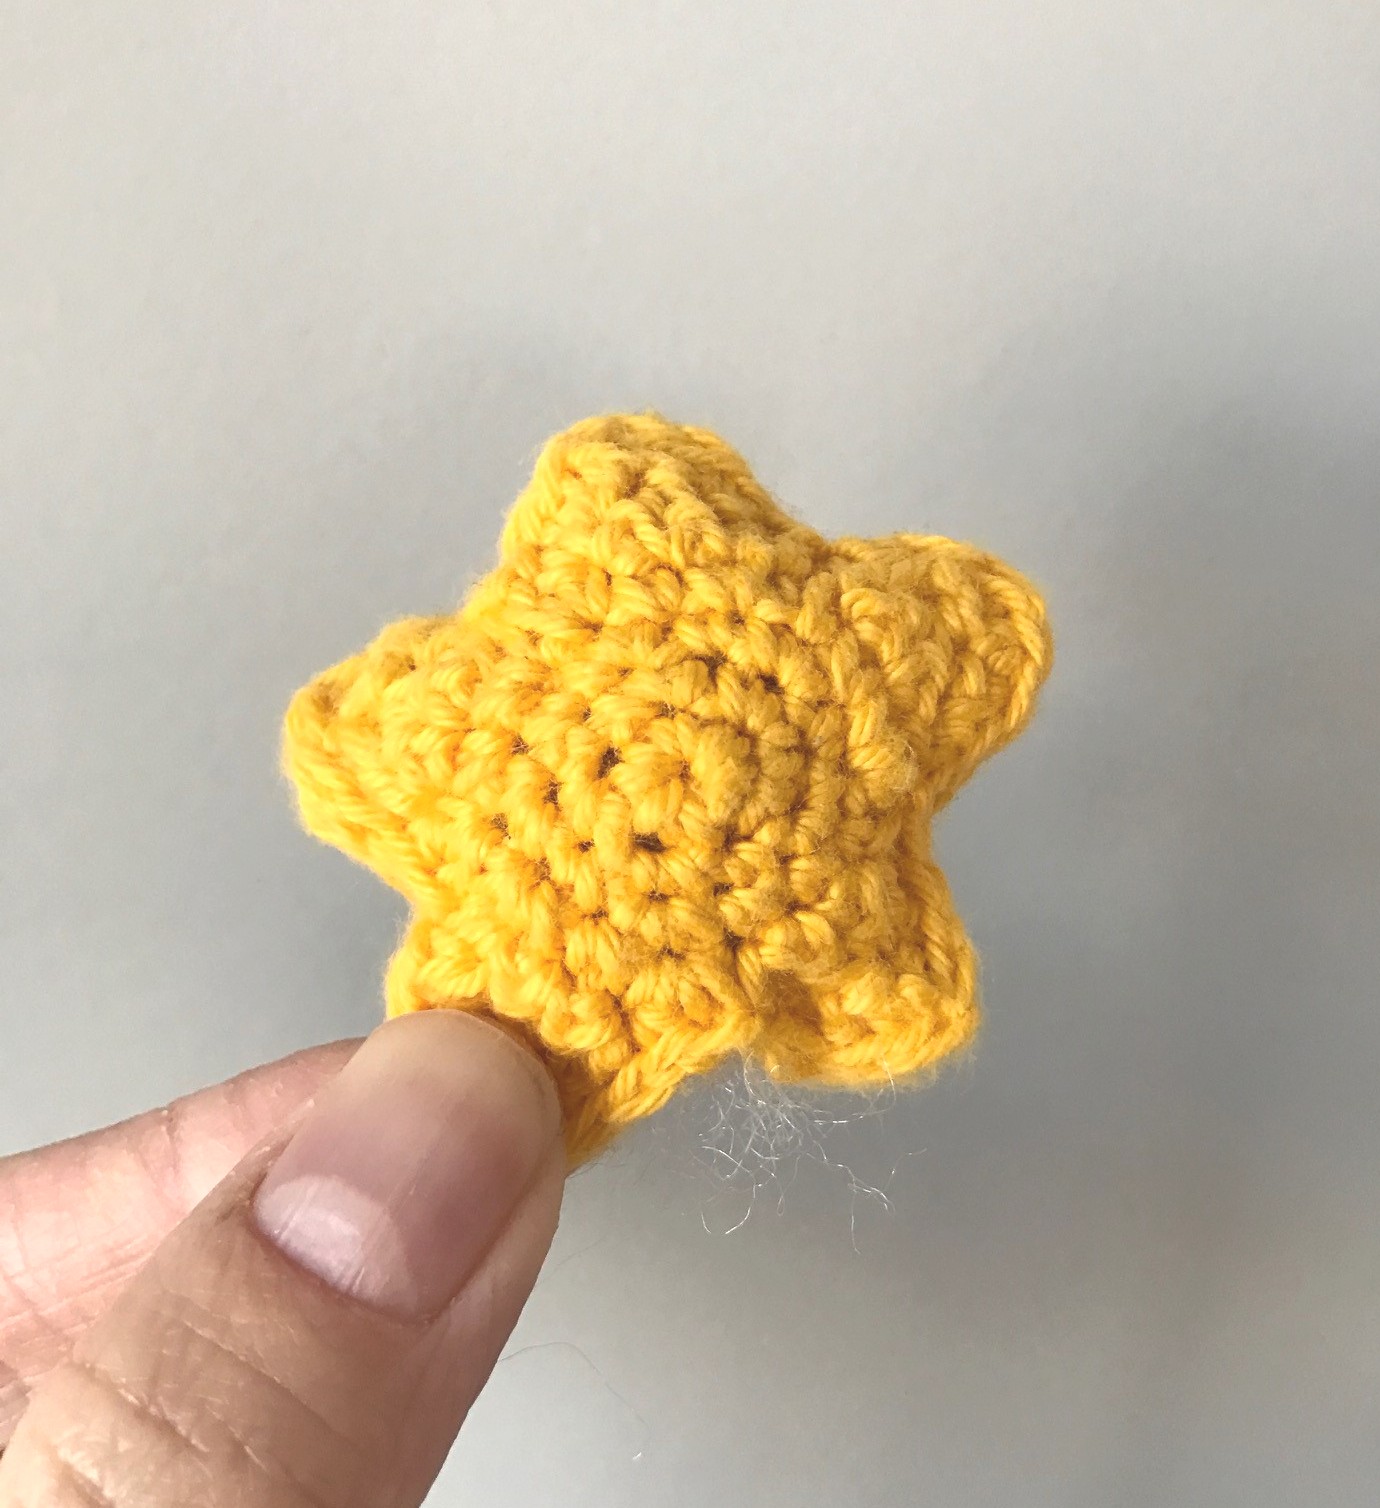
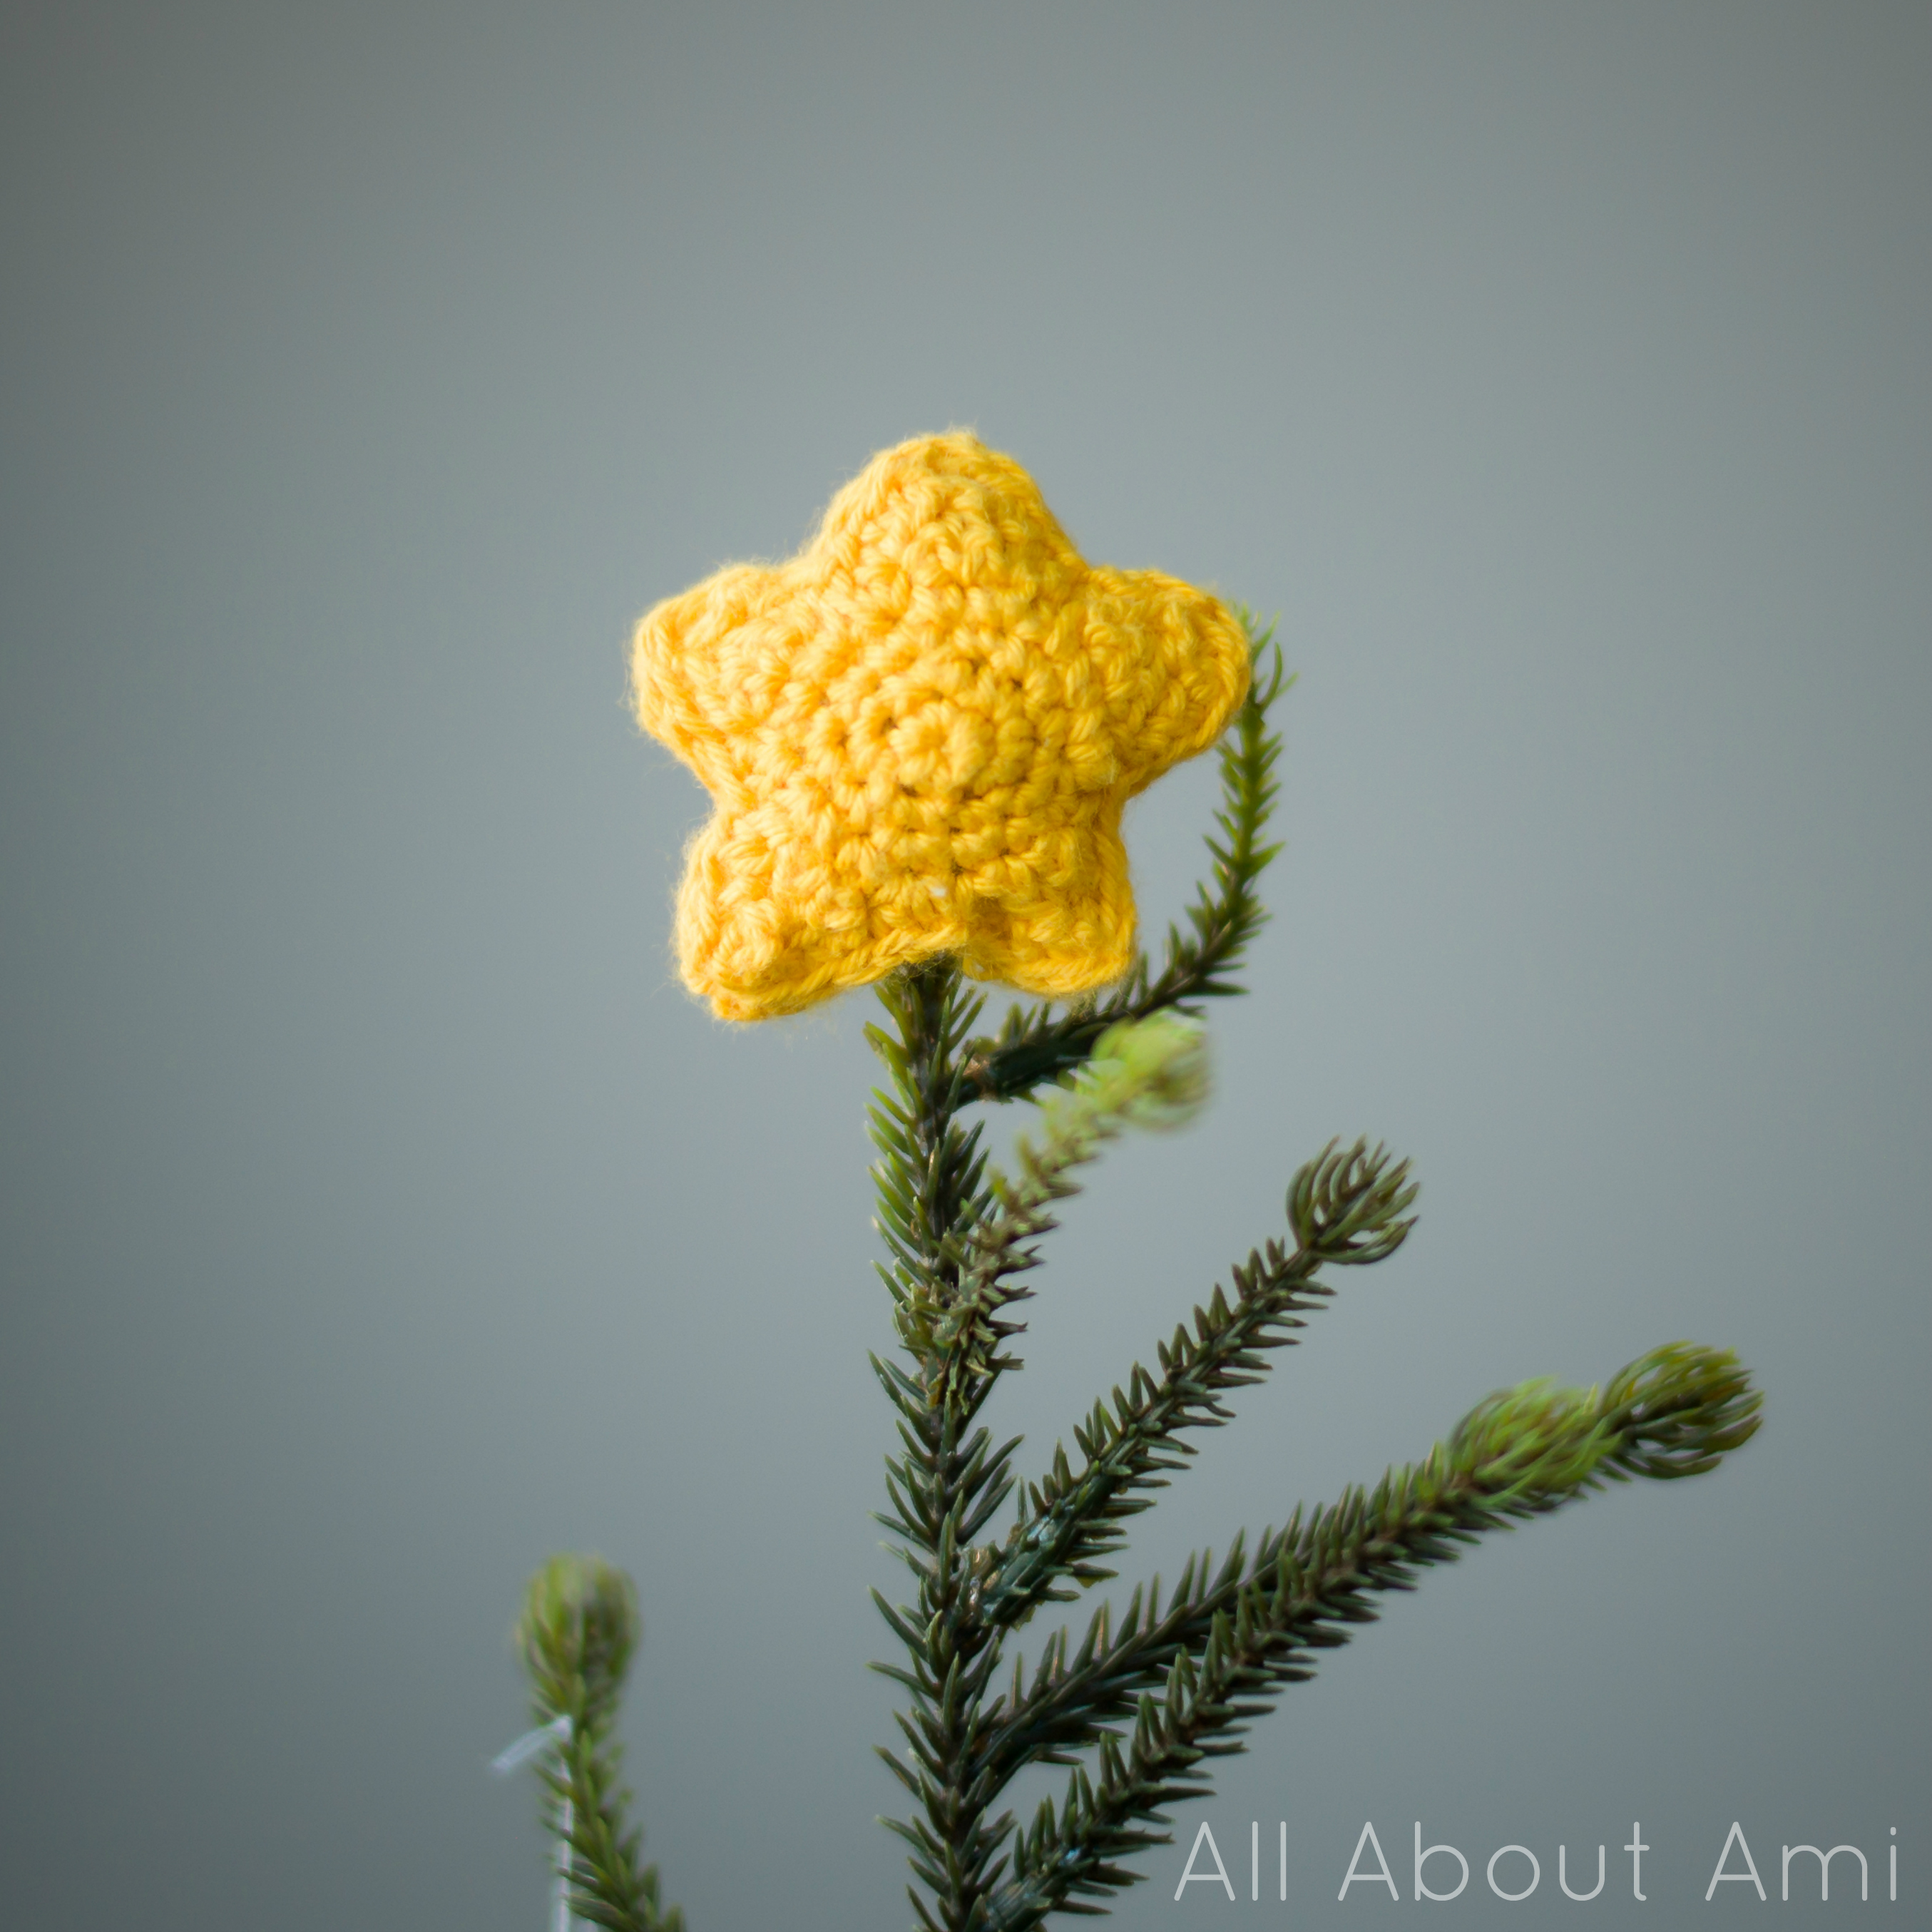
I found this pattern HERE for a puffy little crocheted star (it’s actually the Super Mario Invincibility Star haha) and adapted the sizing to fit my tree. I left the bottom slightly open so that I could stick it onto the tree!
*****************************************
Here is the pattern I made up for these Crochet Beads/Balls!
Materials:
- Wood beads (~15 mm in diameter)
- Fine or lightweight yarn, level 2 or 3 (I used Lion Brand Bonbons in the colour combo “Beach” & “Nature“)
- 2 mm Clover Amour crochet hook
- Yarn needle
- Fiberfill
- White thread
Crochet Ball/Bead
Round 1: 8 sc in Magic Ring. (8 sts)
R2: *Sc 1, Inc*, rep 4 times. (12 sts)
R3-4: Sc 12
Insert wood bead into sphere.
R5: Sc 12
R6: *Sc 1, Dec*, rep 4 times. (8 sts)
Fasten off and weave in end.
Using needle, thread white thread through top of bead. Tie ends into knot and hang onto tree.
To make puffy star, follow this pattern HERE and adapt for your own sizing.
*****************************************
I love our adorable little tree, and if you have a small space that needs some Christmas cheer such as an apartment or dorm that cannot fit a regular sized Christmas tree, this is a great option! It looks so clean and modern with the bright colours, and also has a touch of hominess and warmth since all the decorations are crocheted using yarn!
The puffy star at the top is adorable, and you can simply place it ontop of the tree by leaving a small gap at the bottom of the star!
These crochet beads/balls are fun to work up and look so lovely on our Christmas tree. They also look wonderful together as jewelry, and I’m tempted to make myself a fun and bright necklace as well!
Keep your eyes out for sales on these mini trees since you can always plan for next year too! The girls love decorating their little tree, and I’m so excited that I get to pull this out every year during Christmas! Thank you for reading, and I hope you are able to do some Christmas crafting!