***You can purchase an INEXPENSIVE AD-FREE PDF of this pattern on Etsy HERE! This beautifully formatted PDF includes the step-by-step pictures and pattern and is a total of 4 pages including the cover page! This pattern is also available in the “Crochet Cowls & Scarves PATTERN BUNDLE” which includes over 20 beautiful designs at a discounted price – check out the bundle HERE! Lion Brand Yarn has made a convenient kit HERE that includes the pattern and all the Go For Faux & Heartland yarn needed (3 different color combinations available)!
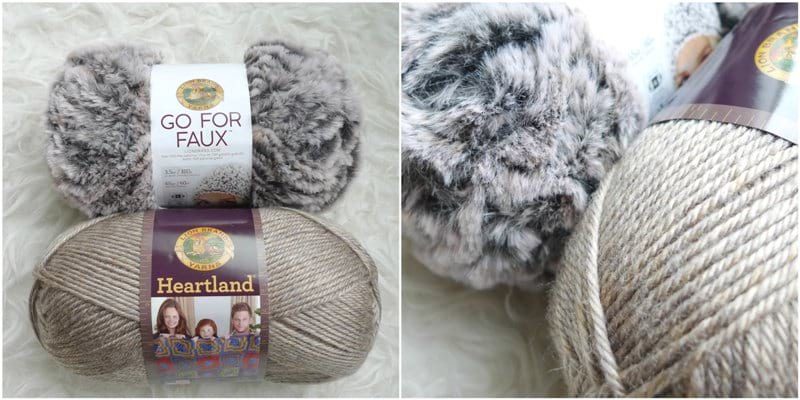
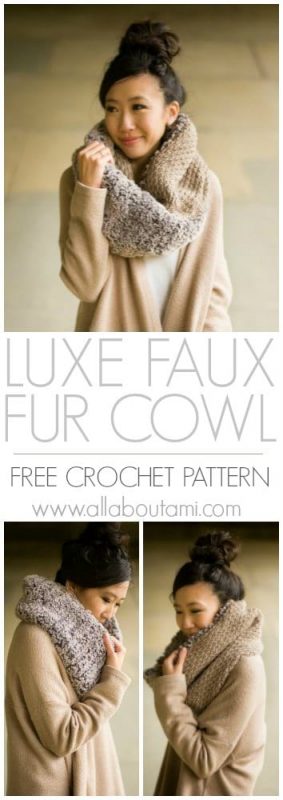
On our travels to Japan, I was inspired to create a cowl with contrasting textures that could be twisted and worn in various ways. I designed a knit version HERE that you all loved, and I am excited to present the crochet version to you now! I used these two beautiful complementary yarns for the crochet version of the Luxe Faux Fur Cowl: Go For Faux in “Mink” and Heartland in “Grand Canyon”.
For the faux fur portion, I used a 9 mm crochet hook and worked single crochets in the front loop only. When crocheting with this yarn, it can be difficult to see your stitches, so you need to feel for the next stitch with your hook. As I was crocheting across, I tried to verify that I was on the right track by approximating how many stitches I should have by a certain point (for example, if the total number of stitches per row is 25, I should be around 12 or 13 stitches by the halfway point). Since it can be difficult counting the number of rows, I kept track with a note on my phone.
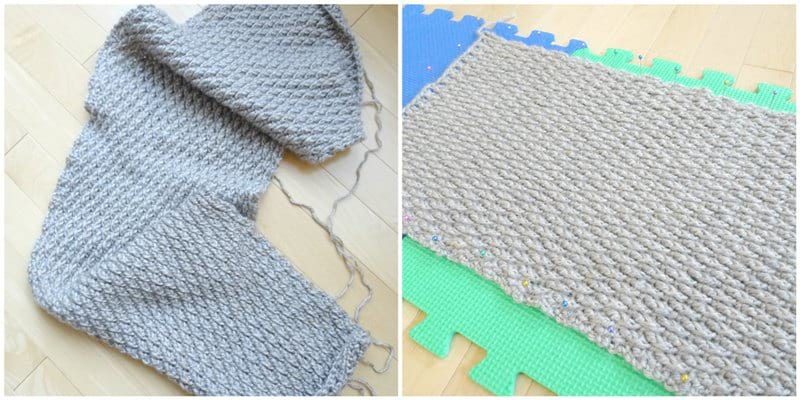
To achieve a beautiful textured side with the Heartland worsted weight yarn, I used the Alpine stitch. You can check out my step-by-step blog post and video tutorial HERE to learn how to crochet this neat stitch!
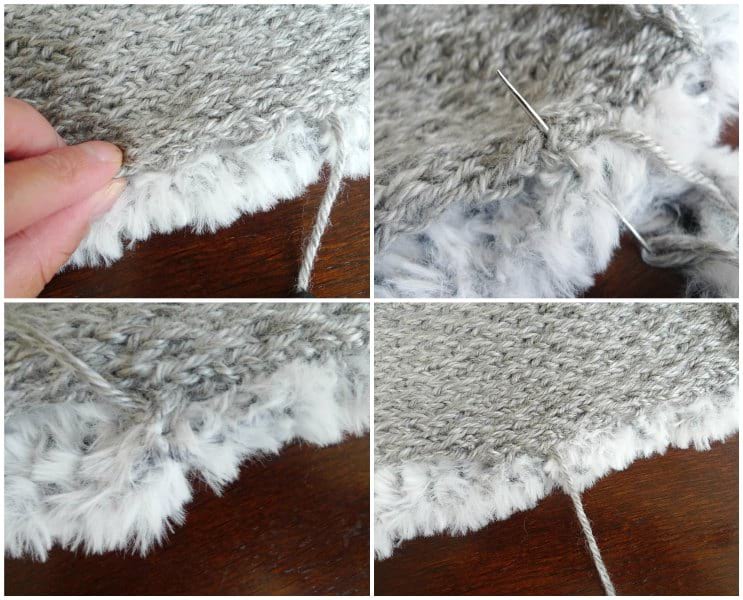
It is now time to seam both the faux fur and worsted weight rectangles together (note that the following pictures are taken from the knit version of the Luxe Faux Fur Cowl as the technique used is the same). Lay both rectangles ontop of each other, ensuring that the right side of the Alpine stitch is facing upwards (there is no right or wrong side of the faux fur rectangle, so do not worry about its orientation). Position the worsted weight yarn tail so that it is in the bottom right corner.

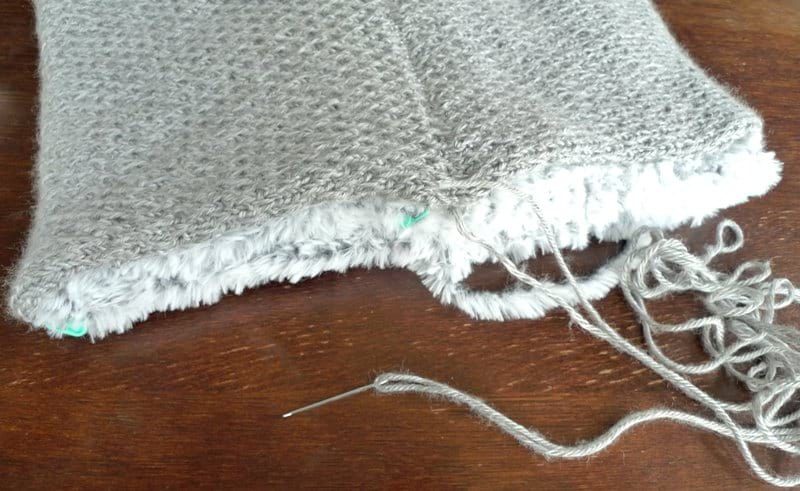
Using the worsted weight tail, whip stitch the worsted weight rectangle to the faux fur rectangle along the bottom length. Leave a slight faux fur edge along the bottom (i.e. do not pick up the faux fur stitches right along the bototm edge).
Using the worsted weight yarn tail, whip stitch the short sides of the worsted weight rectangles together.
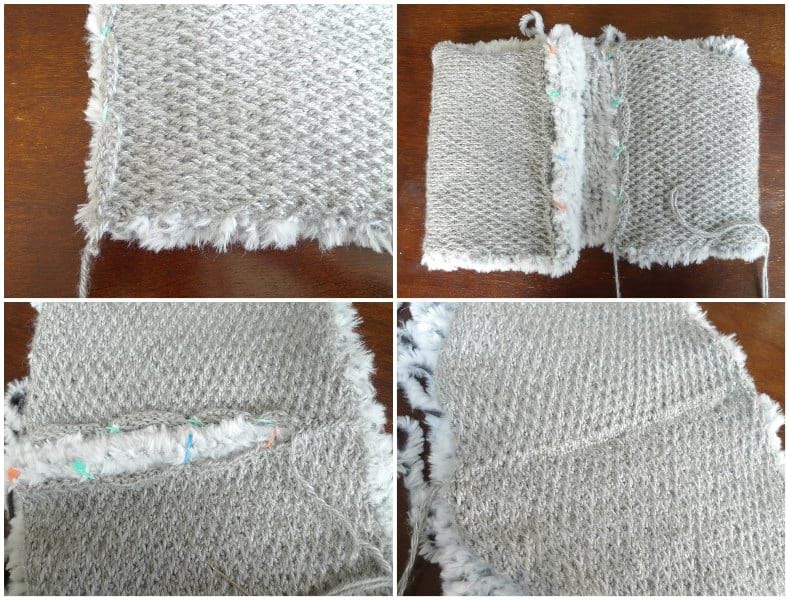
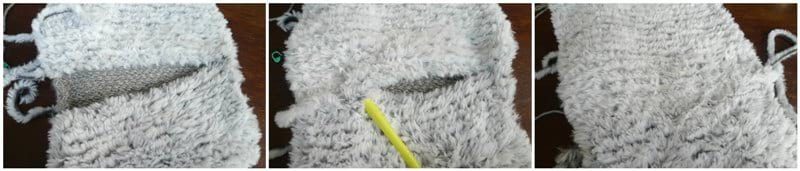
Using the faux fur yarn tail, seam the short sides of the faux fur rectangle together using the whip stitch.
Using the worsted weight yarn tail, whip stitch the worsted weight rectangle to the faux fur rectangle along the top length. Weave in all the ends.
*************************
Here is the free crochet pattern for the Luxe Faux Fur Cowl:
Materials:
- 3 skeins of Go For Faux Yarn in “Mink” (super bulky level 6 yarn)
- 2 skeins of Heartland Yarn in “Grand Canyon” (worsted level 4 yarn) [purchase the kit HERE containing all the required Go For Faux & Heartland yarn – 3 different colour combinations available]
- 9 mm and 5 mm Clover Amour hooks
- Lock ring stitch markers
- Bent tip tapestry needle
Notes:
- This luxurious cowl is composed of two separate rectangles that are crocheted in turned rows. The rectangles are seamed together to form a beautiful cowl: one rectangle is crocheted with Go For Faux yarn while the other rectangle is crocheted with Heartland yarn.
- The cowl can be worn in different ways to show the different sides/texture.
- The faux fur rectangle is created by working single crochets in the front loops only (FLO). Since it can be hard to count the number of rows using faux fur yarn, you can write down your number of rows on your phone or a piece of paper to help keep track.
- The worsted weight rectangle is crocheted using the Alpine Stitch which is worked over a 4 row repeat (the initial number of chains should be an odd number). The turning chain does not count as a stitch. Even rows are worked by single crocheting in each stitch across. The front post double crochets of the odd rows are worked around the posts of the double crochets from two rows back (e.g. the fpdc of Row 5 are working around the posts of the double crochets of Row 3).
- Both rectangles are capable of stretching quite a bit in width. As long as they are generally around the same width, they can be stretched to match each other. Getting exact gauge is not crucial.
- Adjust the length of the rectangles to your liking. Making the rectangles shorter (less than 41”) will make the cowl smaller in circumference so that the cowl is closer to your neck/more fitted. Once both rectangles are complete, they are seamed together along one side of the length. Next, the worsted weight short sides are seamed together using the whip stitch. Then the faux fur short sides are seamed together (a cowl has now been formed). Do NOT seam the worsted weight short side to the faux fur short side as this would tag it down into place, not allowing the cowl to be twisted to show the various textures. Lastly, the remaining long sides of both rectangles are seamed together.
- FLO: front loops only
- Fpdc (front post double crochet): Yarn over, insert hook from front to back to front around the post of the next st two rows below. YO, pull up a loop, YO, pull through 2 loops on hook, YO, pull through remaining two loops on hook.
Gauge:
- Faux fur side – 9 sts and 6 rows = 4″ (10 cm) in single crochet in front loop only
- Worsted weight side – 14 sts and 13 rows = 4″ (10 cm) in alpine stitch
Finished Measurements: 11.5″/29 cm wide, 41″/104 cm around
PATTERN:
***Faux Fur Rectangle
Using 9 mm hook
Chain 26
Row 1: Starting in second chain from hook, single crochet in front loops only across. (25 sts)
Row 2: Chain 1, turn. Starting in second st from hook, sc in FLO. (25 sts)
R3-64: Repeat R2 (or until rectangle is 41″ long or to desired length).
Fasten off and leave long end for sewing.
***Heartland/Worsted Weight Rectangle
Using 5 mm hook,
Chain 41
Row 1: Starting in 3rd chain from hook, dc across. (39 sts)
Row 2: Chain 1, turn. Starting in second st from hook, sc in each st across. (39 sts)
Row 3: Chain 2, turn. Dc in first st. *Fpdc around the dc below the next st, dc in next st*, repeat from * till end. (39 sts)
Row 4: Chain 1, turn. Starting in second st from hook, sc in each st across. (39 sts)
Row 5: Chain 2, turn. Dc in first 2 sts. *Fpdc around dc below next st, dc in next st*, repeat from * til last st. Dc in last st. (39 sts)
Row 6-136: Repeat Rows 2-5 or until desired length is achieved.
Fasten off and leave long end for sewing.
Assembly
- Lay both rectangles ontop of each other, ensuring the right side of the alpine stitch is facing upwards (there is no right or wrong side of the faux fur rectangle, so do not worry about its orientation) . Position the worsted weight yarn tail so that it is in the bottom right corner. Using the worsted weight tail, whip stitch the worsted weight rectangle to the faux fur rectangle along the bottom length. Leave a slight faux fur edge along the bottom (i.e. do not pick up the faux fur stitches right along the bottom edge).
- Using the worsted weight yarn tail, seam the short sides of the worsted weight rectangles together using the whip stitch.
- Using the faux fur yarn tail, seam the short sides of the faux fur rectangle together using the whip stitch.
- Using the worsted weight yarn tail, whip stitch the worsted weight rectangle to the faux fur rectangle along the top length.
- Weave in all the ends.
****************************
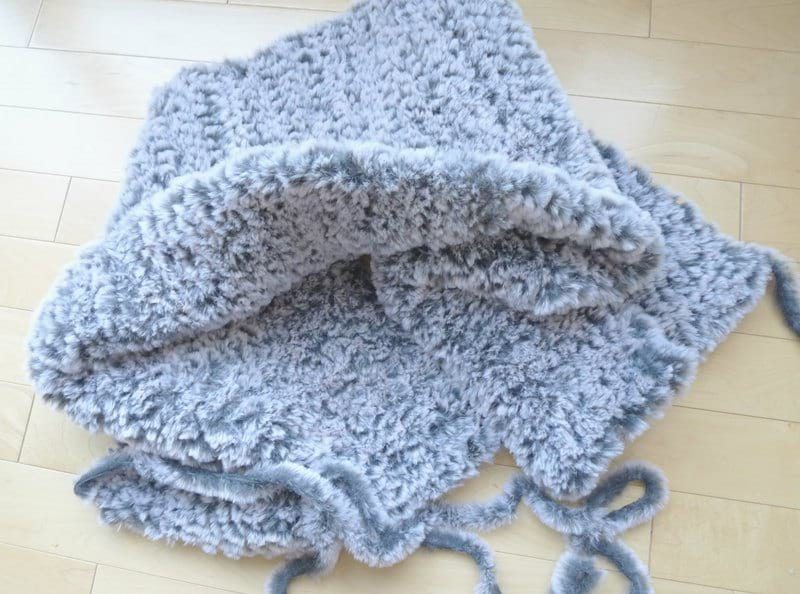
This cowl is the epitome of luxury with its gorgeous faux fur and bold size!
When you wear the cowl with the alpine stitch showing outwards, the soft faux fur is right up against your neck and face, and it is incredibly comfortable and warm.
This statement cowl is stunning and can be twisted in a myriad of ways to show the contrasting sides and textures. It is amazing being able to crochet something that looks store-bought, and that can elevate your outfit to a whole other level while keeping you warm!
We love being inspired to create items on our travels, and I am so glad that we were able to design both a knit and crochet version of this Luxe Faux Fur Cowl! I hope you will enjoy working up these statement pieces and making them as gifts for your loved ones! Once again, the convenient kit that contains all the yarn you need in various colour combinations can be found HERE! The concise PDF in my Etsy shop HERE contains the entire written-out pattern as well as the full step-by-step alpine stitch tutorial with all the accompanying pictures too. Happy crocheting, everyone!
{This post is sponsored by Lion Brand Yarn! I’ve loved working with their yarn throughout the years and I’m thrilled that I get to collaborate with them every month!}
This pattern is an original pattern by Stephanie Lau of All About Ami. Please do not claim this pattern as your own. If you wish to share this pattern, you may link to this pattern but please do not reprint it on your site. You may keep a copy for your own personal use but please DO NOT sell the pattern or distribute it.
You may sell products made from this pattern but please clearly credit the design to me, Stephanie Lau of All About Ami, and provide a link to my blog www.AllAboutAmi.com. Permission is NOT granted for mass production or factory manufacturing of any kind. Thank you for being respectful and for your understanding!