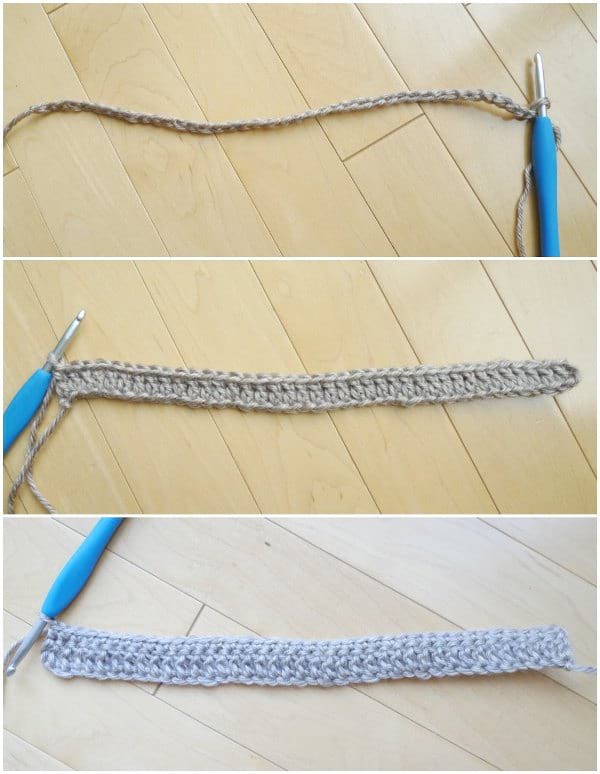
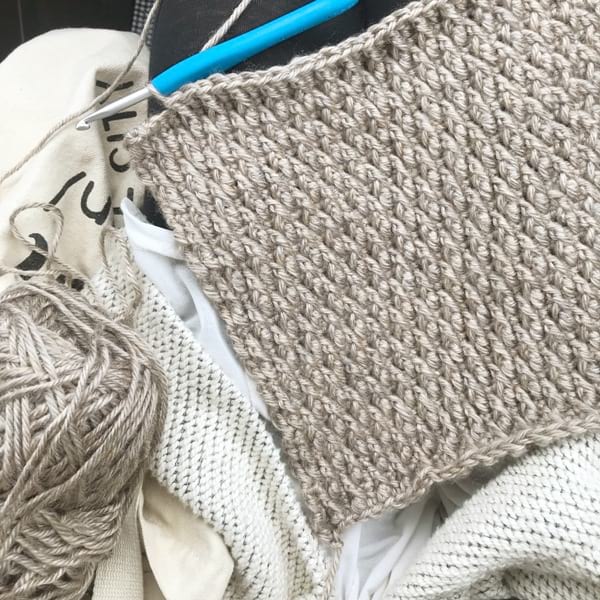
In this tutorial, I will teach you how to crochet a beautifully textured stitch called the Alpine stitch! The Alpine stitch is used in my crocheted Luxe Faux Fur Cowl (free pattern coming next week) and features beautifully raised and staggered stitches. I am using Heartland Yarn in “Grand Canyon” with a 5 mm hook for this tutorial. To begin, crochet an odd number of chains. Starting in the third chain from the hook, work double crochets across for Row 1. For Row 2, starting in the second stitch from the hook, work single crochets across.
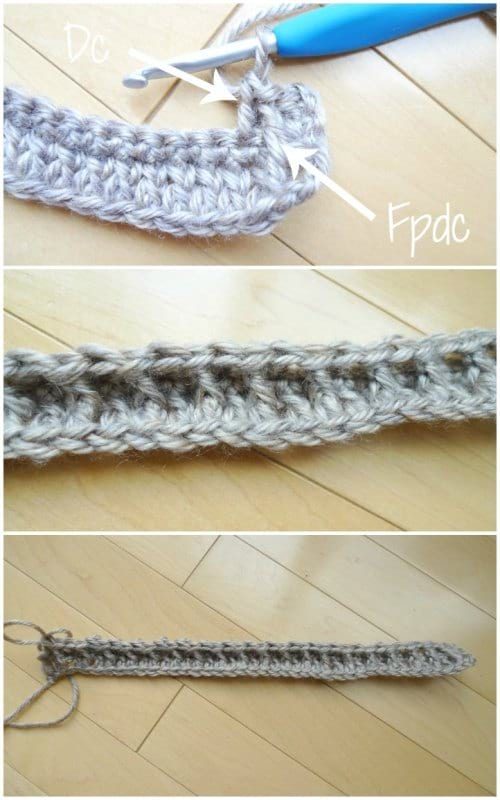
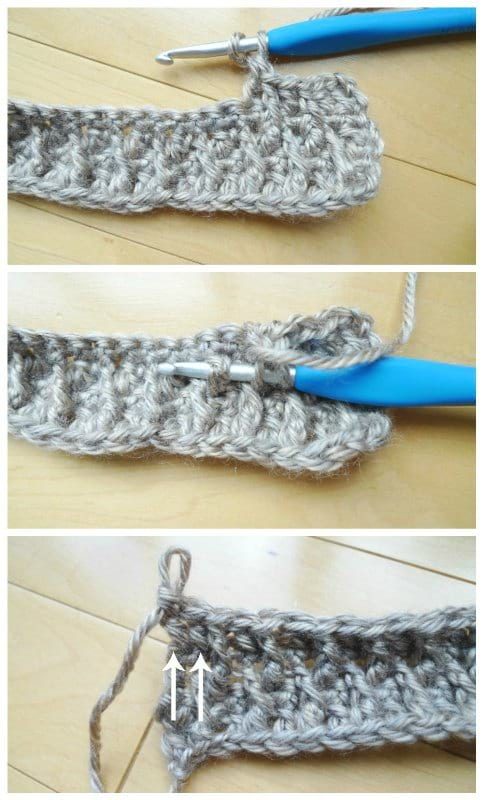
Now we will begin Row 3. Work 1 double crochet in the first stitch (note that the turning chains do not count as a stitch) . Next, we will work a Front post double crochet (Fpdc) around the double crochet below the next stitch. Note that we are NOT working this Fpdc around the single crochet from the previous row (Row 2). Instead, we are working this Fpdc around the post of the double crochet from Row 1. When working around the post, we insert our crochet hook behind the post and work a double crochet, giving this stitch a raised effect.

Next, we work a regular double crochet in the next stitch. You alternate working Fpdc around the posts from two rows below with regular double crochets. Row 3 ends with a regular double crochet in the last stitch.
For Row 4 (and all even rows), you will simply work single crochets across. Row 5 begins by working double crochets in the first two stitches (as indicated by the two arrows).
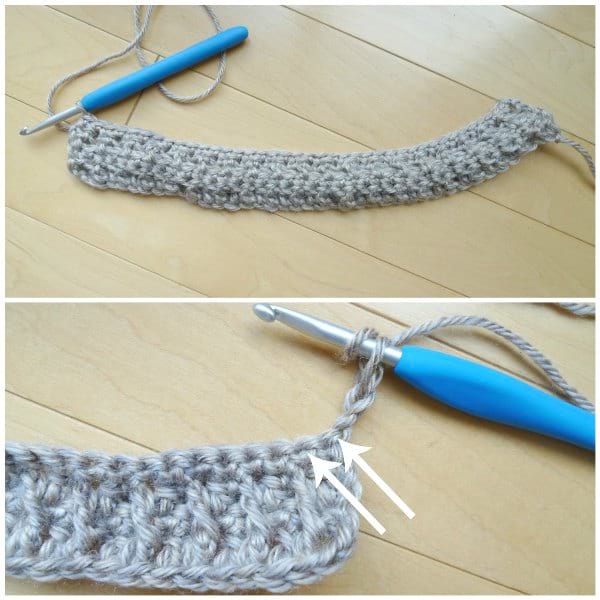
Next, you will work a Fpdc around the post of the dc below the next stitch (from Row 3), as indicated by the white arrow. Notice that this stitch is directly between two Fpdc’s (as indicated by the red arrows) that have been raised up. Insert your crochet hook behind this post and work a double crochet.
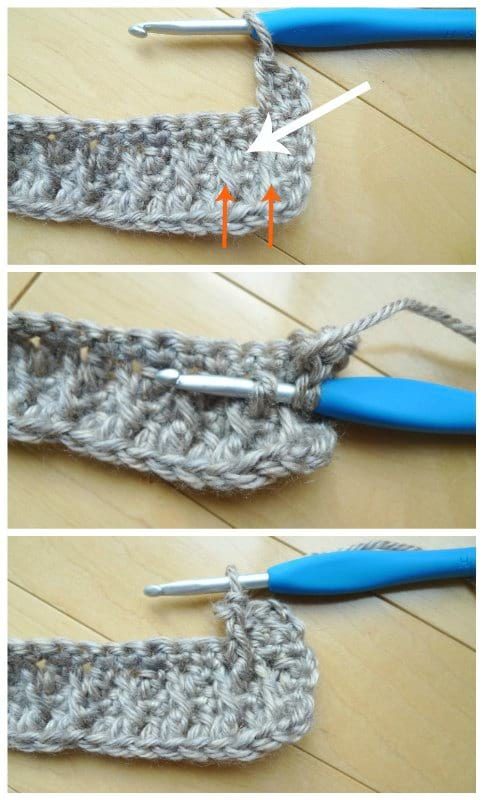
You keep going across this row alternating Fpdc’s with regular double crochets. Ensure that the raised stitches are staggered, so that you are inserting your hook around the post of the stitch that is sandwiched between two raised stitches (you should never have two raised stitches directly beside each other). This is what gives that lovely rippled texture. Just as this row started off with two regular double crochets, this row also ends with two regular double crochets.
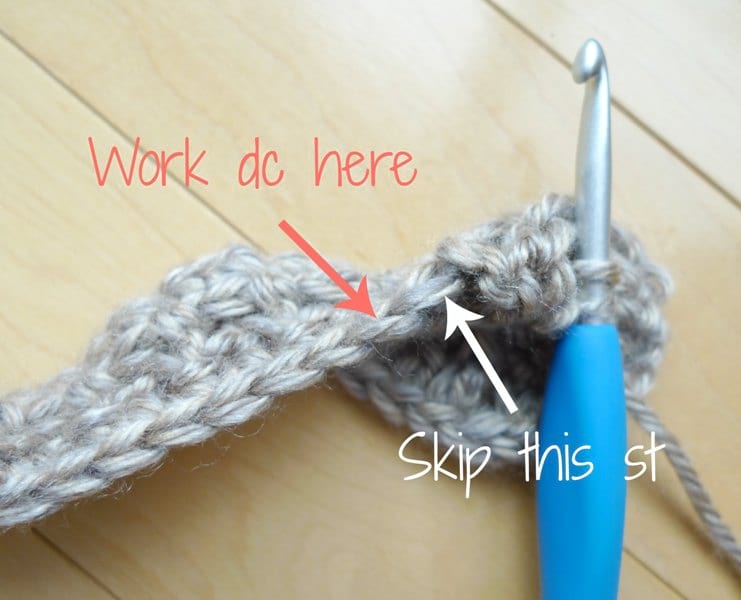
When you have finished working a Fpdc around the post of the stitch from two rows below, make sure you skip the stitch as indicated by the white arrow. The Fpdc that you have just completed belongs to this stitch, so we do not want to work another stitch here, otherwise you will increase your stitch count. The regular double crochet that is supposed to be worked next should be crocheted in the stitch as indicated by the red arrow!
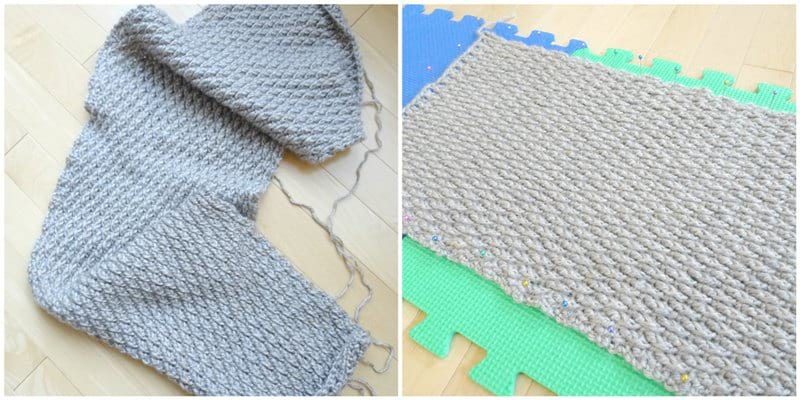
You keep repeating Rows 2-5 until your desired length is achieved! If you want, you can block your finished piece to flatten it out and get the desired dimensions. It is not required for the Crochet Luxe Faux Fur Cowl since you will be seaming this rectangle to the faux fur rectangle!
Here is a video I have made that demonstrates how to crochet the alpine stitch! I hope you find it helpful as I break down each row and show you where to insert your crochet hook and around which posts you should be working.
********************
This is the pattern for the Alpine stitch:
Notes:
- The Alpine Stitch is worked over a 4 row repeat (the initial number of chains should be an odd number). The turning chain does not count as a stitch. Even rows are worked by single crocheting in each stitch across. The front post double crochets of the odd rows are worked around the posts of the double crochets from two rows back (e.g. the fpdc of Row 5 are working around the posts of the double crochets of Row 3).
- Fpdc (front post double crochet): Yarn over, insert hook from front to back to front around the post of the next st two rows below. YO, pull up a loop, YO, pull through 2 loops on hook, YO, pull through remaining two loops on hook.
- Below is the pattern for the Heartland worsted weight rectangle that is used in the crochet Luxe Faux Fur Cowl! Two skeins of Heartland in “Grand Canyon” are used with a 5 mm crochet hook.
- Gauge: 14 sts and 13 rows = 4″ (10 cm) in alpine stitch
- Finished dimensions of rectangle: 11.5″/29 cm wide, 41″/104 cm long
Using 5 mm hook,
Chain 41
Row 1: Starting in 3rd chain from hook, dc across. (39 sts)
Row 2: Chain 1, turn. Starting in second st from hook, sc in each st across. (39 sts)
Row 3: Chain 2, turn. Dc in first st. *Fpdc around the dc below the next st, dc in next st*, repeat from * till end. (39 sts)
Row 4: Chain 1, turn. Starting in second st from hook, sc in each st across. (39 sts)
Row 5: Chain 2, turn. Dc in first 2 sts. *Fpdc around dc below next st, dc in next st*, repeat from * til last st. Dc in last st. (39 sts)
Row 6-136: Repeat Rows 2-5 or until desired length is achieved.
Fasten off and leave long end for sewing.
*****************
This is what the Alpine stitch looks like in a finished design: pictured here is my crocheted Luxe Faux Fur Cowl – the free pattern & tutorial will be coming next week! Sign up for my e-mail newsletter HERE to get all my latest designs and blog posts straight to your inbox! I hope you’re excited to crochet your own gorgeous textured cowl!