***You can purchase an INEXPENSIVE AD-FREE PDF of this pattern on Etsy HERE and on Craftsy HERE! This beautifully formatted PDF includes the step-by-step pictures and is a total of 3 pages including the cover page! You can also purchase a convenient kit HERE on the Lion Brand Yarn website that contains all the yarn you need as well as a copy of the pattern!
If you have always wanted to learn how to knit, now is a great opportunity because I am diving into my “Simple Knit Series“! In this series, I walk you through what supplies you will need, demonstrate some basic knit stitches, and show you some gorgeous projects you can make as a beginner!
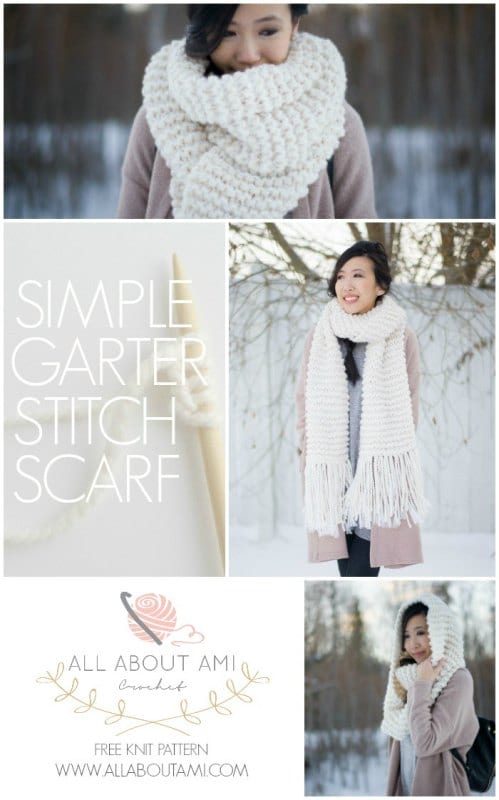
Part 1 is all about the most simple stitch: the Garter Stitch, which is created when you knit each stitch and turn after every row. I have designed this “Simple Garter Stitch Scarf” that uses only this stitch, and the results are incredibly luxurious! This is a different take on the typical beginner’s garter stitch scarf. Even if you are not a beginner, this is a fun project with amazing texture using large knitting needles!
The techniques you will need to know for this project are:
- Casting on stitches
- The Garter Stitch (knit stitch)
- Casting off stitches
Check out my “How to Knit the Garter Stitch” blog post HERE if you are unsure how to do any of the above techniques and watch this video below to see me demonstrating them! You can also view this video on YouTube HERE!
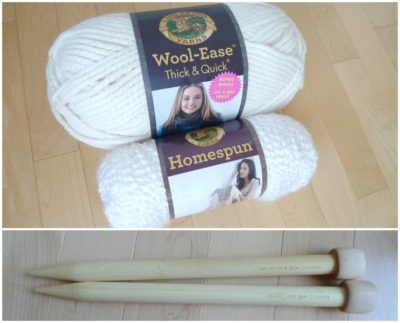
The materials needed for this project are 1 skein of Lion Brand Yarn’s “Wool-Ease Thick & Quick Bonus Bundle” in “Fisherman” and 1 skein of “Homespun” in “Hepplewhite” (on the Lion Brand site HERE). We will be holding one strand of Wool-Ease and one strand of Homespun together at the same time. Thus, we will use large 15 mm Clover Takumi bamboo knitting needles for this project to create big, luscious stitches! It is also very helpful to have Point Protectors for your knitting needles so that the stitches don’t slip off when you’ve put your knitting project down or when you are transporting them in a bag!
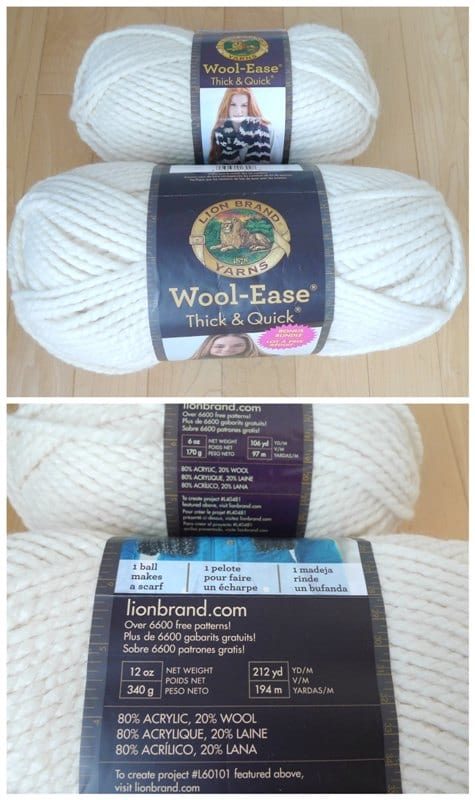
The Bonus Bundle is a great deal as you get double the yardage of a typical skein of Wool-Ease Thick & Quick without paying double the price! As a comparison, the Bonus Bundle contains 212 yards/194 m while a typical skein contains 106 yards/97 m! The Bonus Bundle can be found on the Lion Brand site HERE and at some of your local Michaels stores!
From now on, we will hold both strands of yarn together at the same time and treat them as if they were only one strand. Together, these two yarns create a magnificent texture. To begin, we start off with a slip knot on one needle.
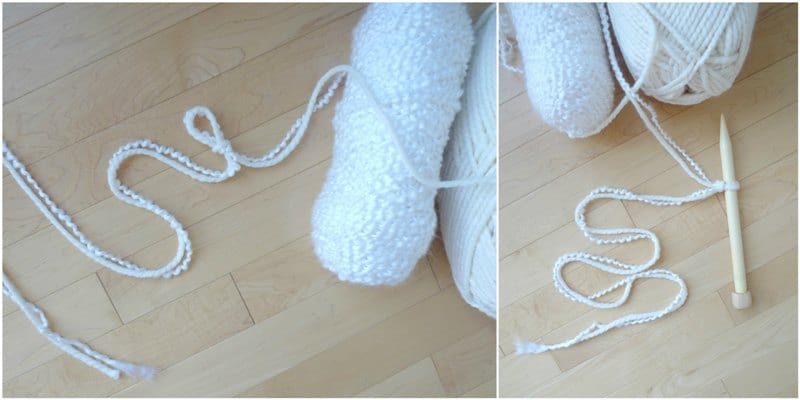
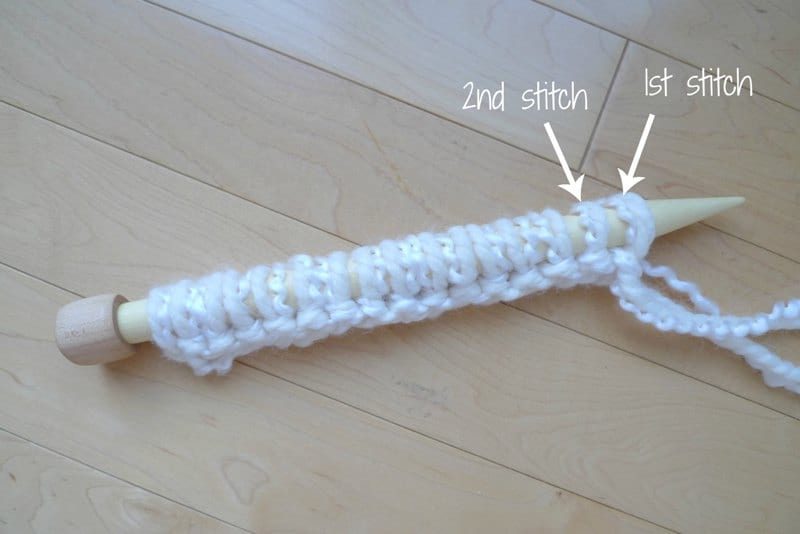
Then, we cast on 16 stitches using the long tail cast-on (leave about a 35″/89 cm tail). Remember that we are holding two strands of yarn together (1 Wool-Ease Thick & Quick and 1 Homespun), so each stitch is comprised of two strands of yarn as indicated below.
Next, you simply knit all the stitches, row by row, until you use up most of the yarn!
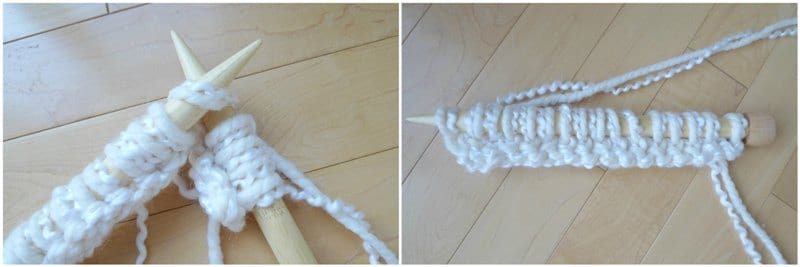
I completed about 165 rows. You can measure the scarf as you go to determine how long you want yours to be. It’s amazing watching this luxurious texture build up, and it goes by incredibly quickly using such large knitting needles and chunky yarn! You can see my point protectors in the picture below- I found them so helpful in keeping my stitches safely on my needles, especially when I was transporting the project around the house or in the car.
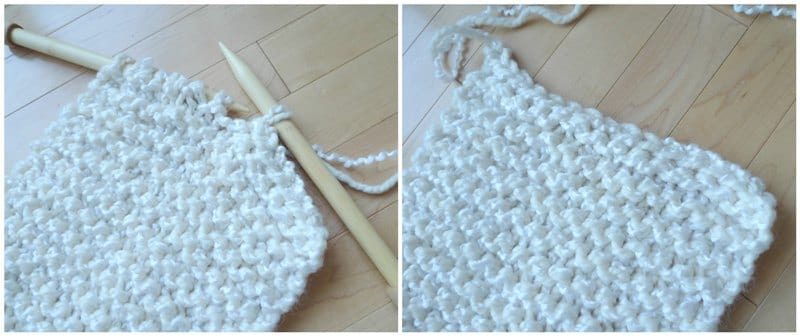
Then, you cast off all 16 stitches.
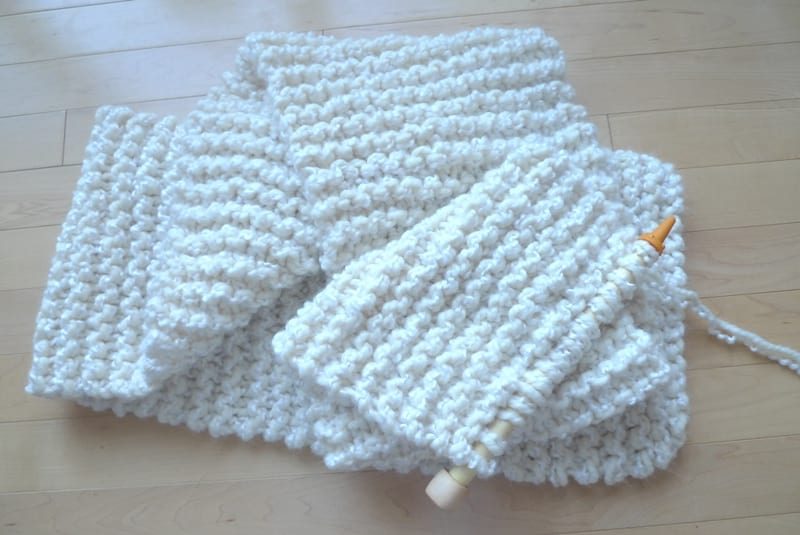
There are two versions of this scarf that you can make. If you want to make the cowl version, whip stitch the ends together as shown below.
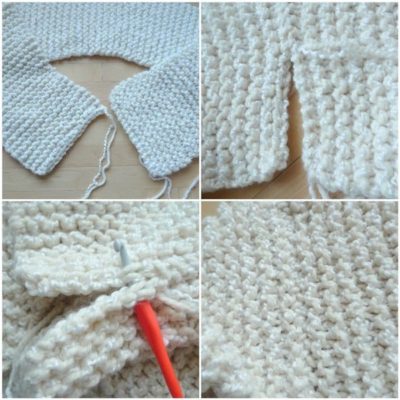
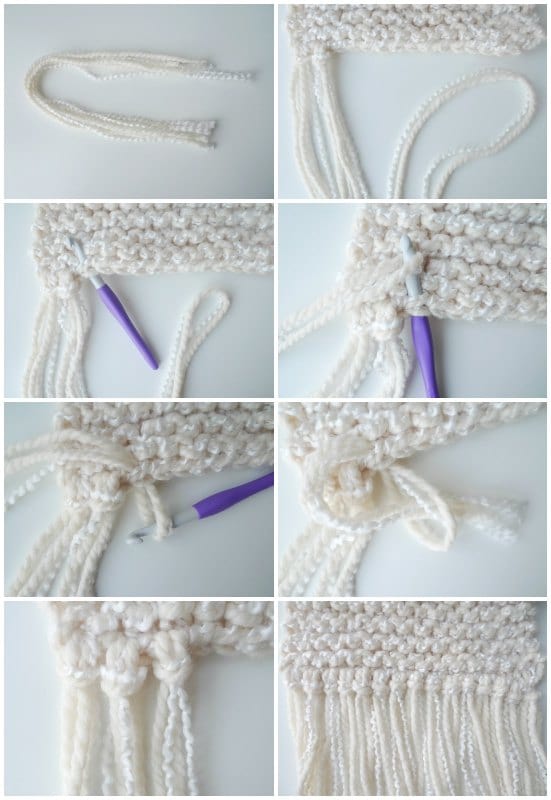
If you want to make the scarf version, simply leave it as is! To add a bit of luxury, you can add some fringe. Note that I had to use additional skeins of yarn to make the fringe. You can see how I added the fringe in the pictures below and as described in the formal pattern below!
*********************
Here is the free knitting pattern for my “Simple Garter Stitch Scarf“, perfect for beginners!
***You can purchase an INEXPENSIVE AD-FREE PDF of this pattern on Etsy HERE and on Craftsy HERE! This beautifully formatted PDF includes the step-by-step pictures and is a total of 3 pages including the cover page! You can also purchase a convenient kit HERE on the Lion Brand Yarn website that contains all the yarn you need as well as a copy of the pattern!
![]()
Materials:
- 1 skein of Lion Brand Yarn’s Wool-Ease Thick & Quick Bonus Bundle in Fisherman (super bulky, level 6 yarn) OR 2 skeins of the regular size Wool-Ease Thick & Quick – total 212 yds/194 m needed (more required if fringe wanted)
- 1 skein of Lion Brand Yarn’s Homespun Yarn in “Hepplewhite” (bulky, level 5 yarn), found on the Lion Brand site HERE
- 15 mm Clover Takumi bamboo knitting needles
- Jumbo Point Protectors (optional)
- Yarn needle or large crochet hook to whip stitch ends together for cowl version (optional)
Notes: Hold both strands of yarn together at the same time and treat them as one when knitting. If fringe is wanted, more yarn is required (or do less rows and leave enough yarn for the fringe). I used approximately 55 g of Thick & Quick for the fringe and 32 g of Homespun.
Gauge: 7 sts and 9 rows = 4″ (10 cm) in garter stitch
Pattern:
Cast on 16 stitches using long tail cast-on (leave 35″ tail). This cast-on counts as Row 1 as well.
Row 2: Knit all stitches.
Row 3-165: Repeat R2
Cast off stitches.
Cowl version:
Whip stitch ends together.
Scarf version with fringe:
Cut strands of yarn about 22″ long (you can wrap yarn around a book to get similar lengths). Take 1 strand of Wool-Ease Thick & Quick and 1 strand of Homespun. Fold in half and loop through bottom edge. Pull ends through loop. Repeat across bottom edge and on other side. Trim fringe as needed.
Final Measurements (without fringe): 70.5″/179 cm long, 9.5″/24 cm wide
******************
Oversized knits are so popular right now, and this particular cowl is incredibly soft and chunky! The cowl version can be looped twice around the neck and feels like a luxurious cloud around your neck!

I love how it is long and wide enough to be pulled over the head and worn as a chic hood!
![]()
If you prefer the traditional scarf rather than the circle scarf, seaming the ends together is one less step you need to do- easy peasy!
![]()
Fringe is so popular these days with its boho chic vibe. It gives off such a stylish and effortless look!
![]()
Sometimes I forget what a big difference wearing a cowl makes when trying to keep warm on a chilly day. Having that extra layer on your neck and chest really helps, and I love burrowing my face and nose into cowls! They are so functional and such a sophisticated accessory that brings your winter outfits to the next level!
![]()
If one of your goals for this new year is to learn how to knit, now is your chance to make this stylish scarf using the most basic of all knitting stitches! Once you get used to how to hold the knitting needles and how to throw/wrap the yarn around the knitting needle, you will fall into a beautiful rhythm. Lion Brand Yarn has put together a kit to make this beginner-friendly scarf on their site if you’re interested- you can purchase it HERE!
![]()
Stay tuned for Parts 2 and 3 of my Simple Knit Series where I will introduce some other basic knit stitches to you to make some modern and trendy projects! Happy knitting, everyone!
![]()
Feel free to pin the below collage to your Pinterest boards! Thanks for helping me spread the word about this pattern and tutorial!
Note: Thank you to Lion Brand Yarn for sponsoring this post and for providing the yarn. Thank you to Clover USA for providing the knitting needles.