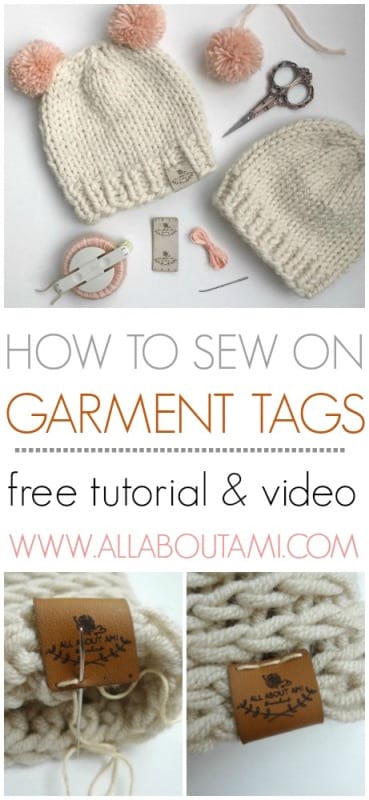
After finishing your crochet and knit pieces, there is a great way to add a beautiful and personalized finishing touch: garment tags! Even though I do not sell my finished work, I was looking into getting some personalized tags made so that I could add them to my own pieces and to pieces that I gift to friends and family! When I asked for recommendations, many people suggested Diane of Brickbubble! Diane is actually local to me and does an absolutely wonderful job of making these tags- she has a variety of materials available such as ultraleather, ultrasuede, wood and cork! Many people have requested that I post a tutorial on how I sew on my foldover garment tags, so I have taken the time to film a video and take step-by-step pictures of my process! Keep in mind that there are various ways to attach these tags, but this is how we do it!
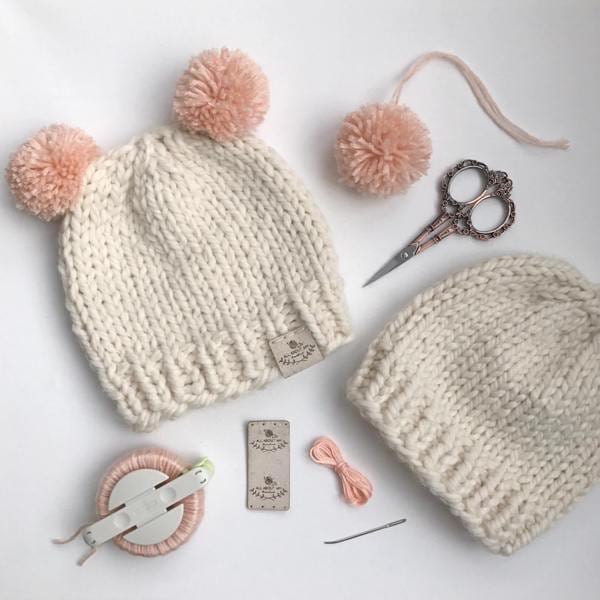
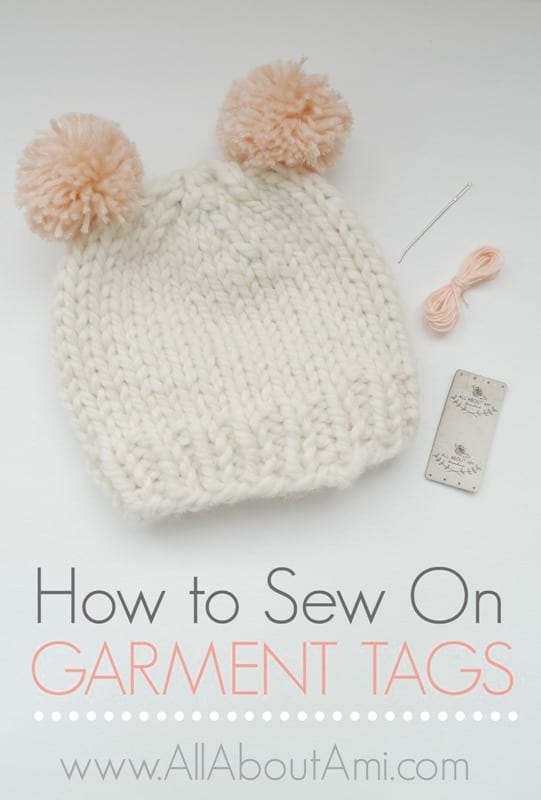
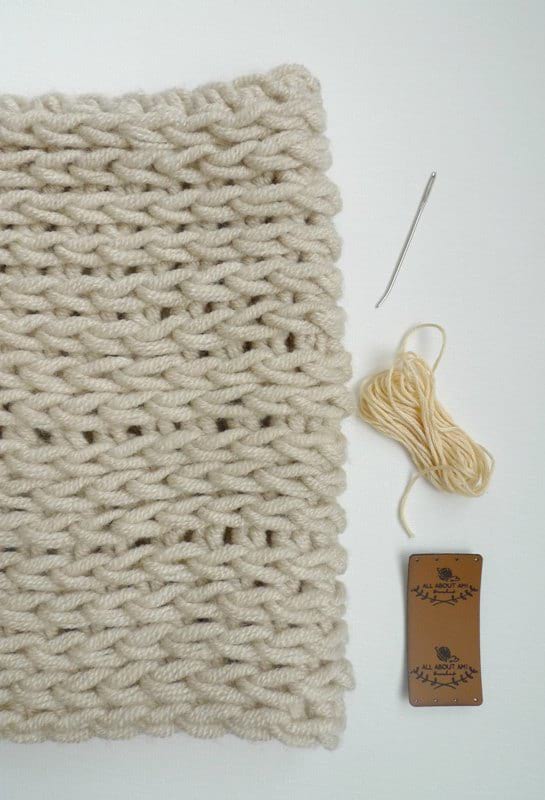
As soon as I am finished crocheting or knitting an item, the next step is to add a garment tag! The materials you will need are: a foldover garment tag, embroidery floss, and a needle. I like using these bent tip needles HERE as they are more ergonomic with the angle when you insert your needle! A sharp pair of scissors is also needed- the beautiful ones in my photos and videos are by Warm Crochet HERE (get 10% off with code “ALLABO“)! The beanie pictured in this tutorial and video later on is my free “Basic Knitted Baby Hat” pattern!
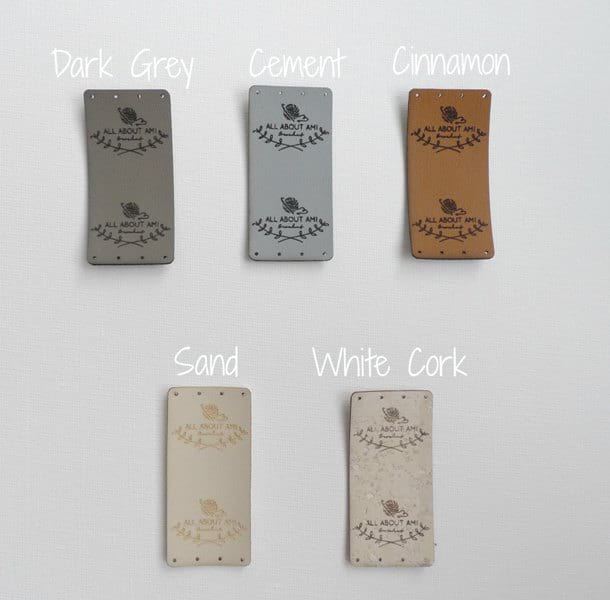
These are the colours available in the ultraleather and cork foldover options by Brickbubble: dark grey, cement, cinnamon, sand and white cork. The faux leather is a great way to add a touch of luxury to your pieces, and they are fully washable since they are synthetic leather. You send your logo to Diane, choose your sizing (pictured here is the size 1″ x 2.125″), how many labels you want and what colour, and then Diane sends them to you!
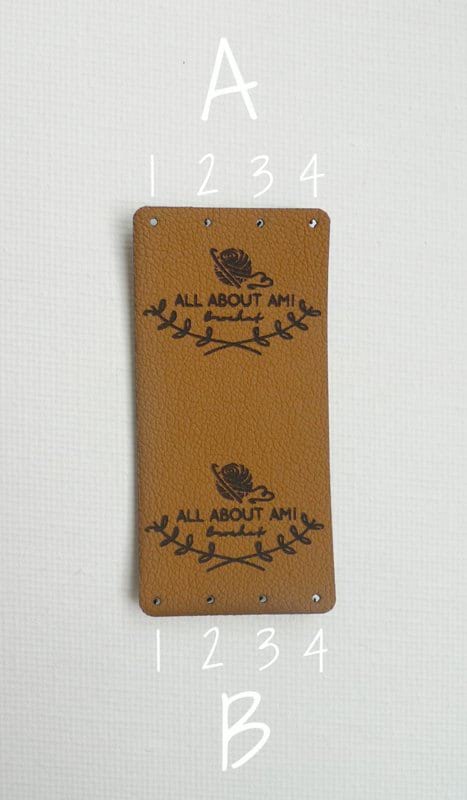
Below is a close-up of my cinnamon ultraleather tag! This is my go-to colour as it matches with pretty much everything. You’ll notice that the logo is printed both at the top and bottom with the correct orientation, which is the “Foldover upright” option. This ensures that if you sew your label onto the brim of a hat, the logo will still be positioned the correct way if the brim is flipped up and worn that way! You can also request to have “Foldover flipped” or “Foldover sideways” if you want the logo to be oriented in different ways (e.g. one right side up and one upside down). You’ll also notice that there are four pre-punched holes both at the top and the bottom of the label- the size of the holes are perfect for embroidery floss to be used! We will be referencing the various holes and the top/bottom part of the label in the tutorial below. The top part of the label will be referred to as “A” and the corresponding holes are 1, 2, 3 and 4. The bottom part of the label will be referred to as “B”, and the corresponding holes are 1, 2, 3 and 4.
I will be sewing my cinnamon ultraleather garment tag onto my Triple Luxe Cowl (free pattern HERE)! Your goal is to sew the garment tag onto the finished item by going through all the holes and ending off with the ends of the embroidery floss inside the garment tag (not visible on the outside) so we can tie knots and hide the knot within the garment tag. Let’s get right into it!
Insert your needle threaded with embroidery floss from the underside of the finished item through A3.

Next, insert your needle through A2, go through the finished item and come out through B2.
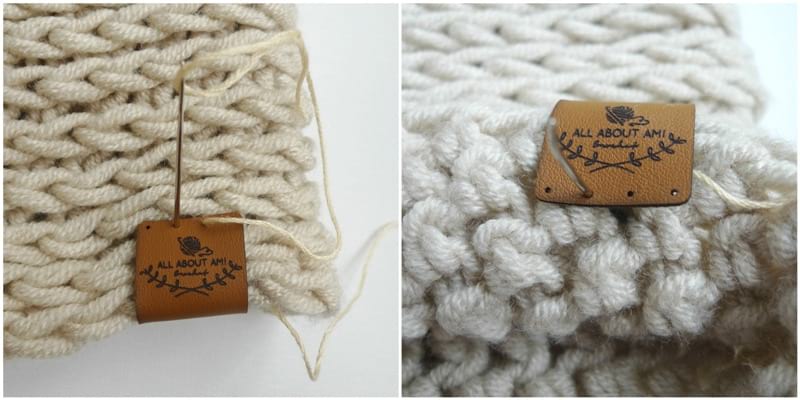
Insert your needle through B1, go through the finished item, and come out through A1.
Insert your needle through A2, go through the finished item, and come out through B2.
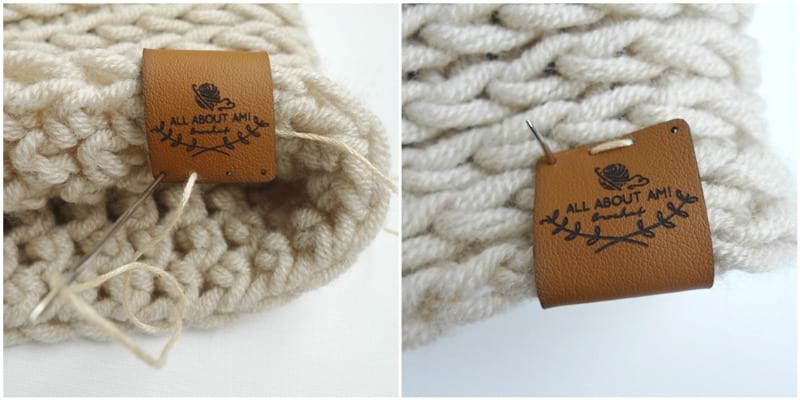
Insert your needle through B3, go through the finished item, and come out through A3.
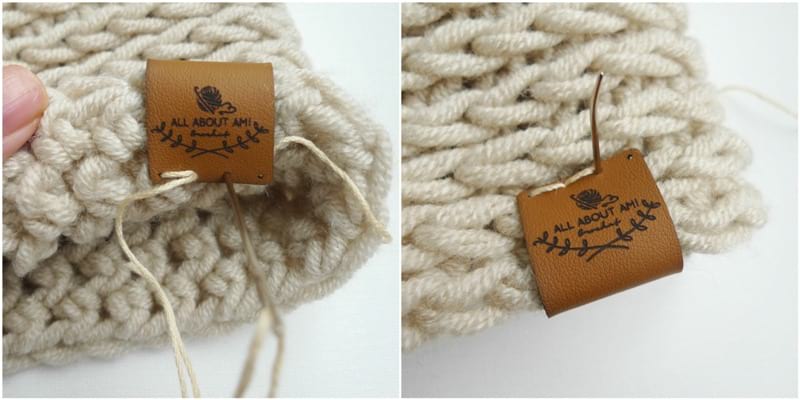
Insert your needle through A4, go through the finished item, and come out through B4. Ensure that your beginning end of embroidery floss is oriented towards the top of the label and not getting in the way of the bottom holes or getting caught towards the bottom of the label.
![]()
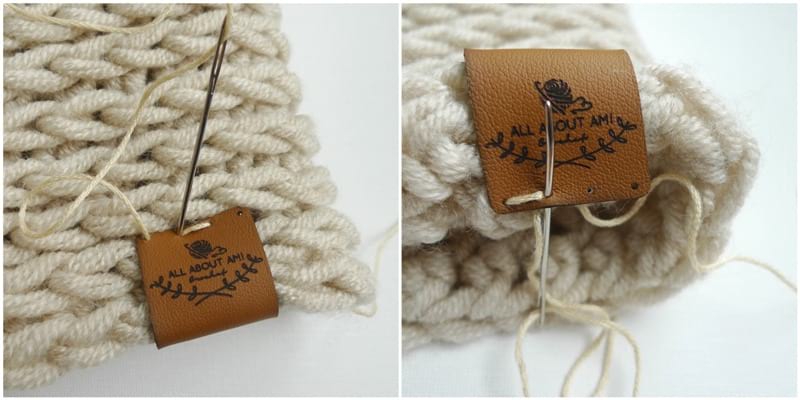
Insert your needle through B3. Rather than going through the finished item, have your needle immediately exit the garment tag. Both ends of embroidery floss are now in the same area between the garment tag and the underside of the finished item.
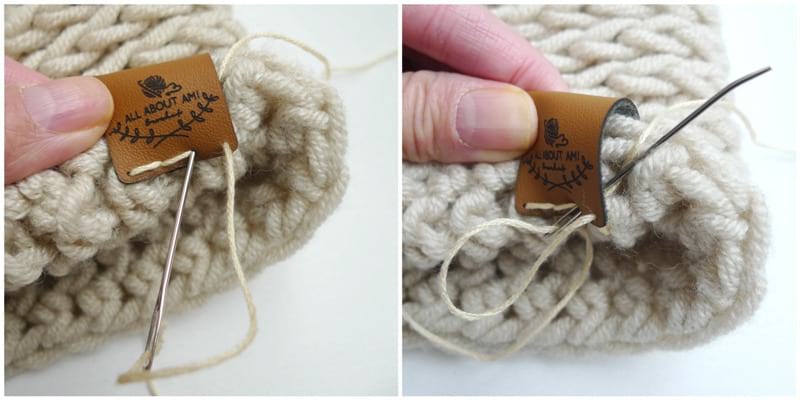
Using the two ends of embroidery floss, tightly tie a couple of knots.
![]()
Snip the ends of the embroidery floss and hide the ends within the garment tag so that they are no longer visible.
![]()
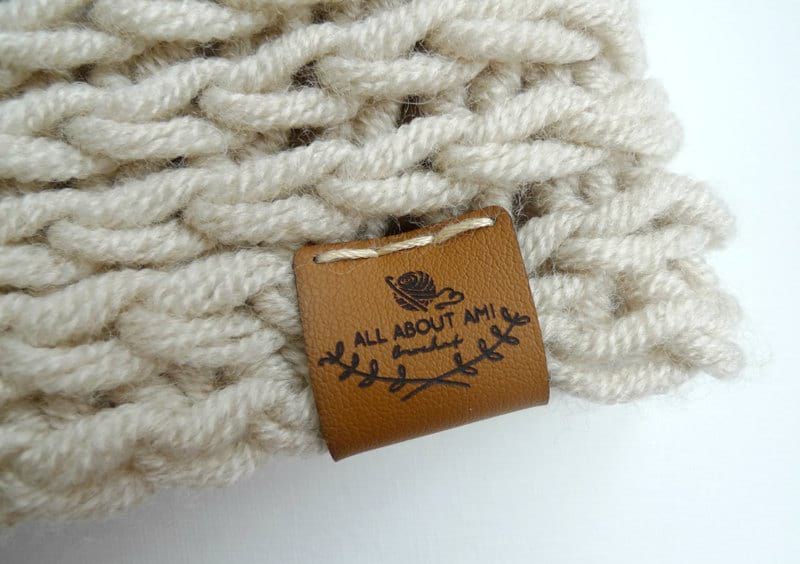
Ta-da! You have now successfully sewn the garment tag onto the finished item using all the holes, and the embroidery floss ends and knot are hidden within the garment tag!
Here are some points to keep in mind:
- Make sure you leave a long enough initial tail (a couple of inches) so that you can tie it into a knot at the end!
- Remember to keep that initial end up and out of the way when going through the other holes so that it is ready to be tied into a knot at the end!
- You can try and position the garment tag strategically: for example, there is often a slight jog at the beginning of knitted hats when you are working in the round. I cover that jog with the garment tag.
- Keep moving the garment tag so that it is flush with the edge of the finished item when you are going through the various holes as it is easy for the tag to shift position and become lopsided or for a gap to be created.
- Be creative when choosing embroidery floss colours! Sometimes I like to choose an accent colour from the project: for example, in the Baby Hat in the video, I use pink embroidery floss to highlight the pink pom poms! If your finished item is completely neutral, sometimes it’s fun to add a pop of colour with the embroidery floss (e.g a turquoise, mint green, or blush pink).
Watch this video to see all the above steps in action! In the video, I am sewing a white cork garment tag onto my Basic Knitted Baby Beanie (free pattern HERE)! You can also watch this video on YouTube HERE!
I hope you found this step-by-step tutorial and video helpful! If you own a shop or if you crochet items for yourself, friends and family, adding garment tags really elevates your pieces to the next level and adds such a professional and personalized touch! Once again, you can browse through the Brickbubble labels HERE! Feel free to pin this tutorial to your Pinterest boards so you can reference this blog post when the time comes to add your garment tags to your beautiful pieces!
Note: Thank you to Diane of Brickbubble for providing me with these garment tags! All opinions expressed are 100% my own!