***You can purchase an INEXPENSIVE AD-FREE PDF of the Crosswinds Triangle Scarf pattern on Etsy HERE and on LoveCrochet HERE! This beautifully formatted PDF includes the step-by-step pictures and is a total of 5 pages including the cover page! This pattern is also available in the “Crochet Cowls & Scarves PATTERN BUNDLE” which includes over 20 beautiful designs at a discounted price – check out the bundle HERE! You can also purchase a convenient kit HERE on the Lion Brand Yarn website (currently 35% OFF at $15.59) that includes the pattern and all the Wool-Ease Yarn you need (main color and complementary contrast color).
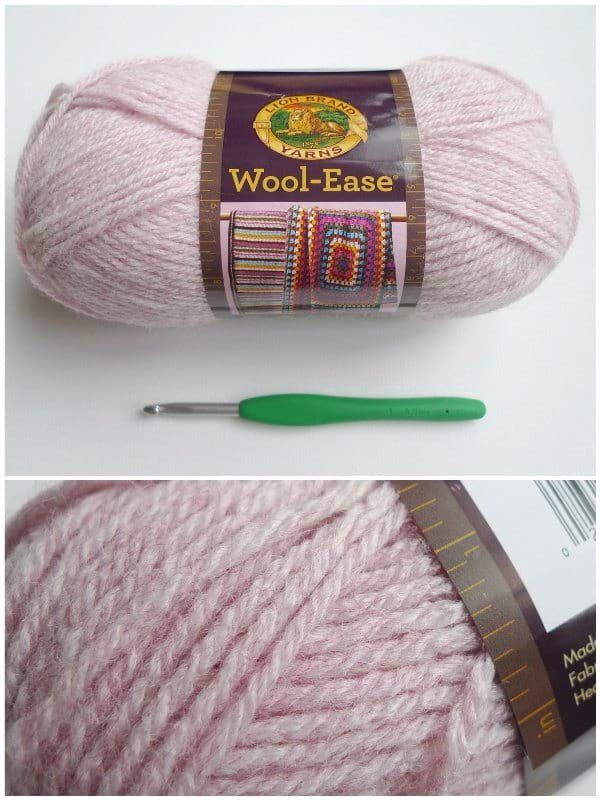
After designing my Boho Crochet Wrap and using worsted weight yarn for my Heartland Boho Crochet Wrap, I wanted to try making another triangle scarf with a slight variation in the stitches. I looked around for a pretty blush pink and found this beautiful shade called “Blush Heather” in Wool-Ease! I had never worked with Wool-Ease before (only the super bulky version) but was impressed with its 80% acrylic/20% wool composition. This lovely shade has some beige in it since it is a heathered pink. I grabbed my 5.5 mm Clover Amour hook and started working away!
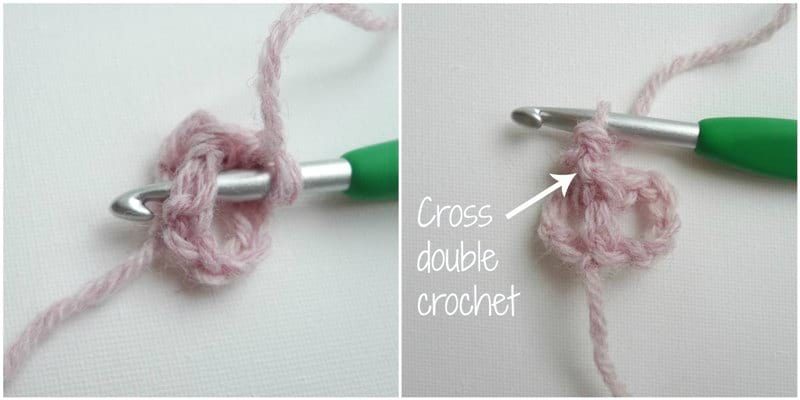
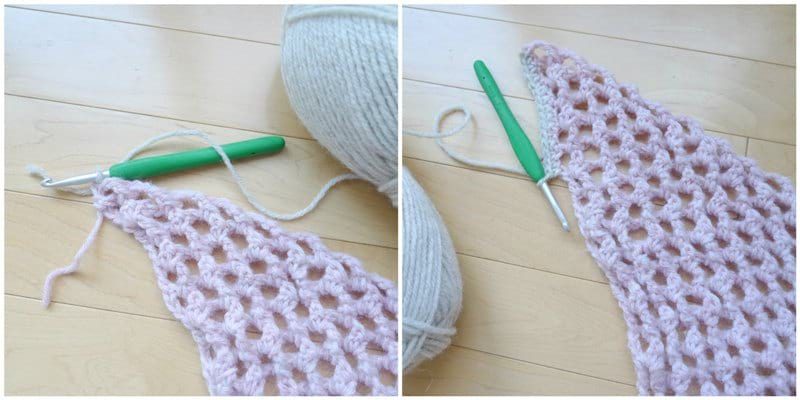
To begin, I chained 5 and slip stitched to the first chain to form a ring. Next, I chained 5 once again.
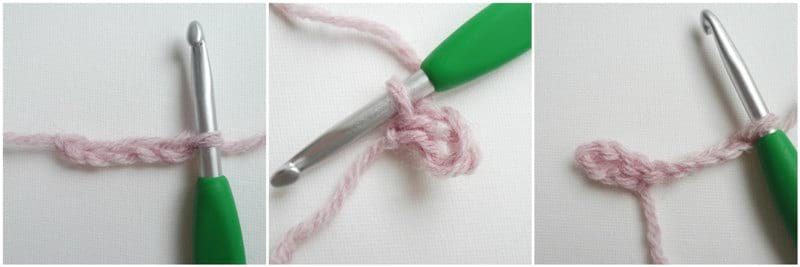
I worked one double crochet in the ring and then one single crochet in the ring.
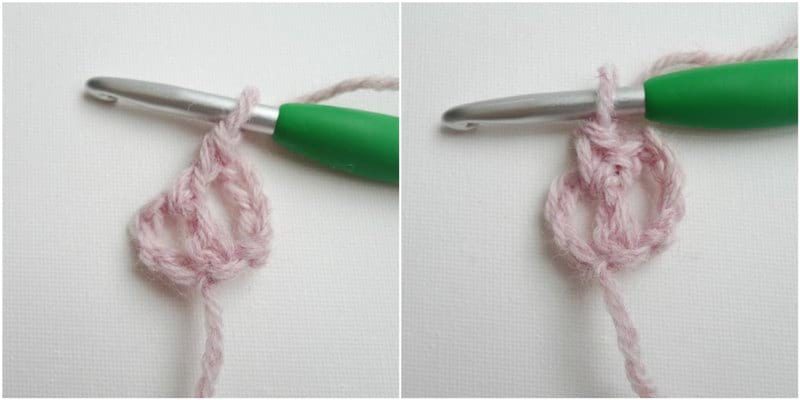
This next step is where the pattern varies from the Boho Crochet Wrap. Rather than simply working a double crochet, I worked a cross double crochet. To do this stitch, I crossed over the first double crochet and single crochet I just made and inserted my hook from back to front and worked a double crochet.
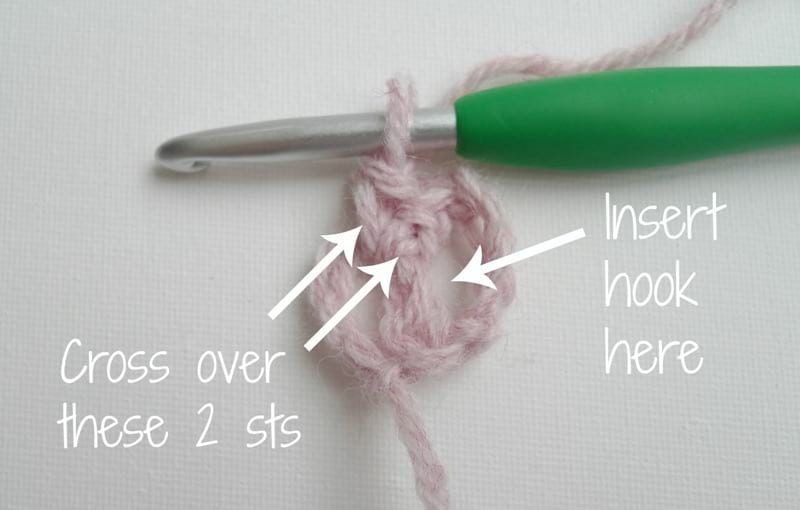
Here you can see where I insert my hook to work the cross double crochet. In this pattern, a shell consists of: {1 double crochet, 1 single crochet, 1 cross double crochet}.
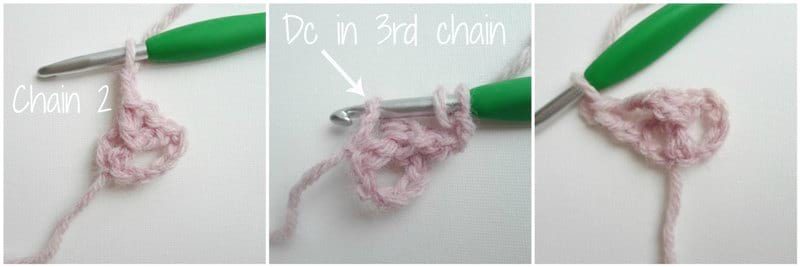
After working the shell, I chained 2 and completed the row by working a double crochet in the 3rd chain of the previous row’s Chain 5.
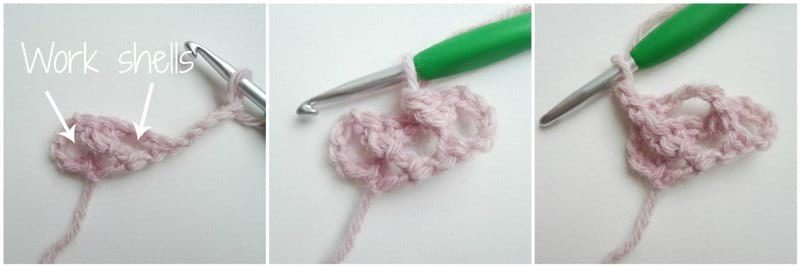
You will always work the shells in the Chain 2 spaces as indicated below. Row 1 consists of 1 shell, Row 2 will have 2 shells, Row 3 will have 3 shells, etc.
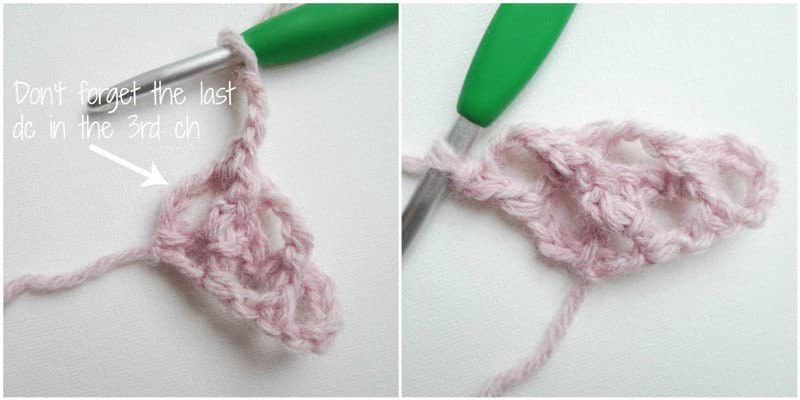
It is very important that you do not forget the last double crochet in the 3rd chain as this completes the row, and your triangle will not build up properly if you forget this last double crochet.
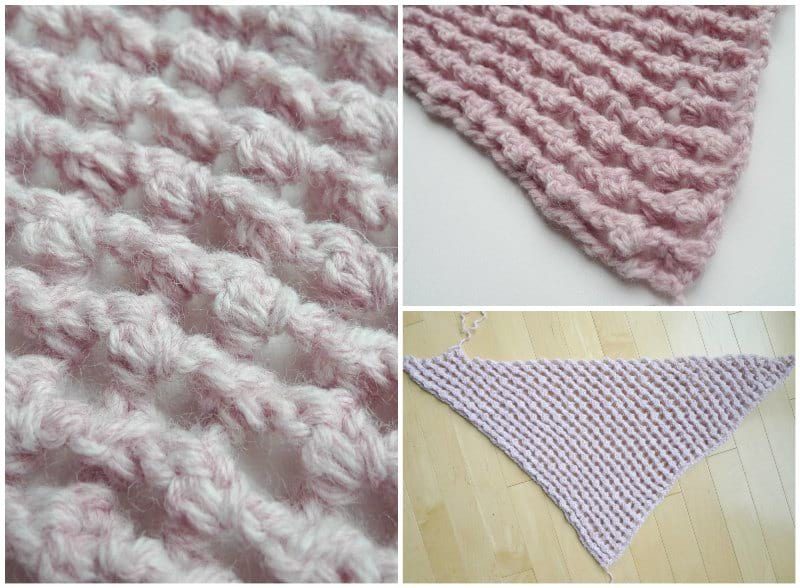
As you can see, the cross double crochets give this triangle scarf a beautiful texture with its raised effect. It gives such a gorgeous look with diagonal lines being formed! If you would like to see these stitches being demonstrated in action, there is a video later on in the written pattern!
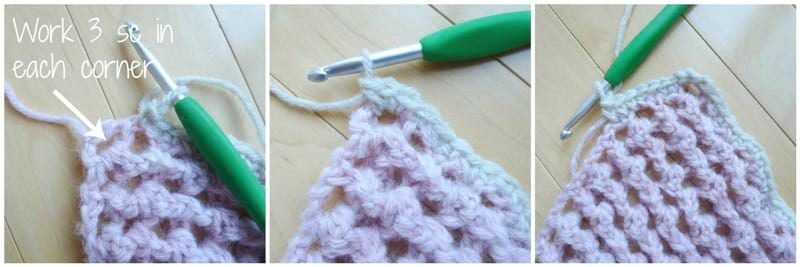
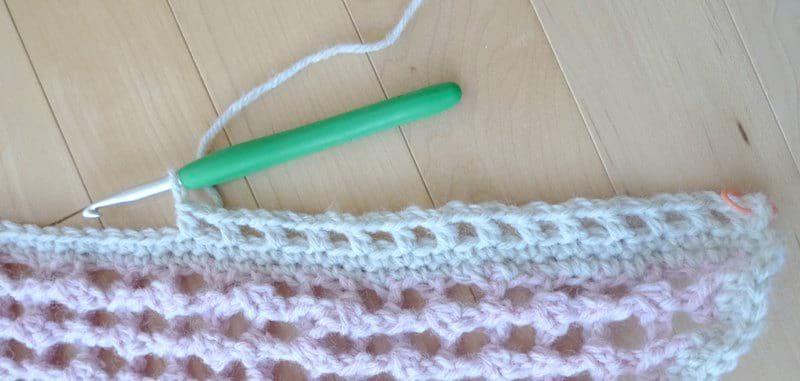
I wanted to add a contrast color for the border, so I used this complementary color called “Natural Heather“. Once my triangle was complete, I switched to this yarn color and began single crocheting around the perimeter of the triangle.
I worked three single crochets in each corner.
Along the top edge, I worked one single crochet in each Chain 2 gap (not 2 single crochets). I originally worked two single crochets in each space, but it resulted in heavy puckering and ruching!
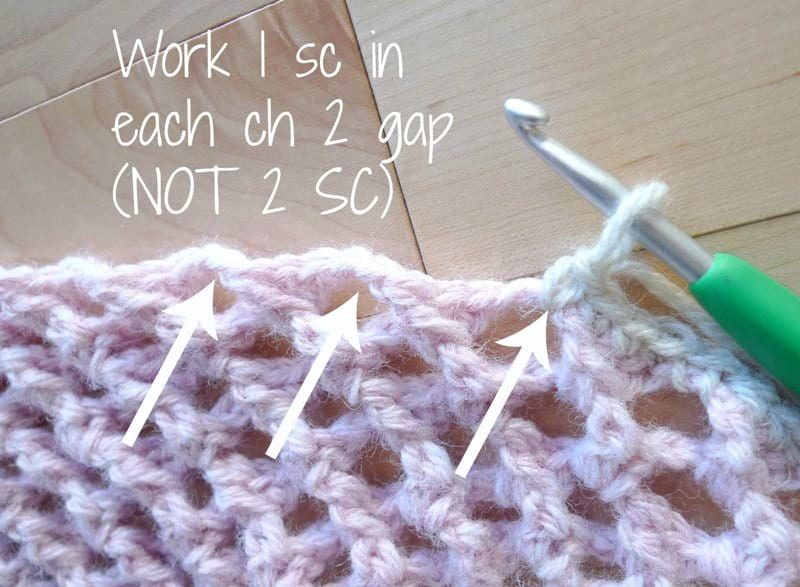
The diagram below shows you the direction in which you should work your single crochets.
For the last round of the border, I decided to work half double crochets with Chain 2’s in between for a delicate look!
Once the border/edging was complete, I wanted to add some decorative and luxurious touches to this triangle scarf: tassels! I wrapped the contrast color yarn around a book and snipped the ends along the bottom. I folded the strands in half and tied a knot at the top using another strand. I then tied another knot about 1.5″ below the top of the tassel and hid the ends with the rest of the strands.
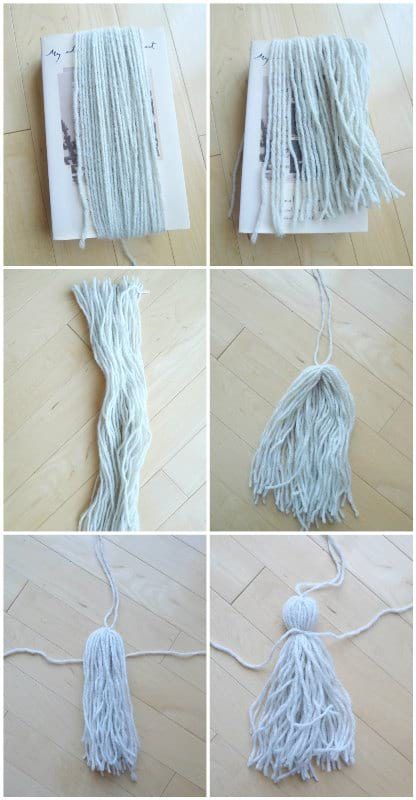
I attached the tassel to the corner of the triangle scarf and then trimmed the edges. In total, I made three tassels for the three ends of the triangle!

*******************************************
Here is the free pattern for “The Crosswinds Triangle Scarf”!
![]()
***You can purchase an INEXPENSIVE AD-FREE PDF of this pattern on Etsy HERE and on Craftsy HERE! This beautifully formatted PDF includes the step-by-step pictures and is a total of 5 pages including the cover page! You can also purchase a kit to make the Crosswinds Triangle Scarf HERE on the Lion Brand Yarn website! It contains all the yarn you need as well as a copy of this pattern!
Stitch abbreviations:
- Dc = double crochet
- Sc = single crochet
- Beg ch-5 = the beginning chain 5 (used to start each row)
- Ch-2 sp = chain 2 space
- Shell consists of {1 dc, 1 sc, 1 Cdc}
- Cdc = Cross double crochet (Inserting hook from back to front, cross over first two sts of shell (1 dc and 1 sc) and work double crochet
Materials:
- 5.5 mm Clover Amour hook
- Wool-Ease Yarn (worsted weight level 4 yarn)- 4 skeins of Main Color (I used Blush Heather) and 1 skein of Contrast Color (I used Natural Heather)
Gauge: Rows 1-8.5 = 4″ from beginning to center point.
Special Notes:
- Adjust the size to your liking: the great part about this design is that it keeps expanding row after row, so you can decide when you would like to stop and measure it against yourself as you go!
- When determining your size, remember that it will be larger after adding border/edging.
- If your triangle’s edges seem to be curving, try increasing the number of chains at the beginning of each row (e.g. Chain 6 or 7) as your tension might be tighter than mine.
TRIANGLE:
Using Main Color,
Chain 5, slip stitch in first chain to form ring.
Row 1: Chain 5, turn, work shell in ring. Chain 2, dc in 3rd ch of beg ch-5. (1 shell, 2 ch-2 spaces)
R2: Ch 5, turn. *Work shell in next ch-2 sp, ch 2*, rep twice. Dc in 3rd ch of beg ch-5. (2 shells, 3 ch-2 spaces).
R3-64: Ch 5, turn. *Work shell in next ch-2 sp, ch 2* across. Dc in 3rd ch of beg ch-5. (Row 64 will have 64 shells and 65 ch-2 spaces).
Use contrast color yarn for final yarn over of last stitch and switch to new color. Weave in end of Main Color. We will now work the border/edging of the triangle.
Please reference this video below to see the above stitches and instructions in action:
BORDER/EDGING:
Using Contrast Color,
Round 1: Single crochet around, making sure to work 3 sc in each of the 3 corners, and work 1 sc in each Ch 2 gap along the top.
R2: Single crochet around.
R3: Chain 2, Hdc in same stitch. *Ch 2, Skip 1 st, 1 hdc*, rep till end.
Fasten off and weave in end.
TASSELS (optional):
- Using contrast color, wrap yarn around a book of length 7″. Cut along the bottom to create strands that are 14.5″ long.
- Gather 35 strands and fold in half. Use another strand to loop it through the top of the folded strands and tie several knots.
- Use 18″ strand and wrap it 1.5″ below the top of the tassel. Tie multiple knots and hide ends with rest of fringe.
- Trim tassel so total length is approximately 5.5″.
- Using top strand, attach tassel onto corner.
- Repeat process to create 3 tassels in total and attach them to the 3 corners.
Final measurements:
Width: 80″/203 cm
Height (from tip of V to top): 30.3″/77 cm
*********************************************
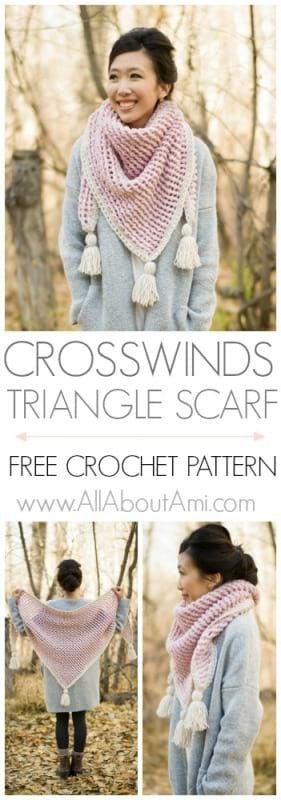
I think my Crosswinds Triangle Scarf is so pretty with its gorgeous texture and beautiful contrast color edging and tassels!
![]()
When I was brainstorming a name for this design, I looked up words similar to “diagonal or “parallel”” as I thought the diagonal lines were such a neat feature. The word “crosswinds” came up meaning “a wind blowing across one’s direction of travel” and I thought it sounded very romantic and fitting, particularly since this design uses cross double crochets!
![]()
The Crosswinds Triangle Scarf is very warm as it is 20% wool! It is such a luxurious scarf that is not only functional but stylish as well!
![]()
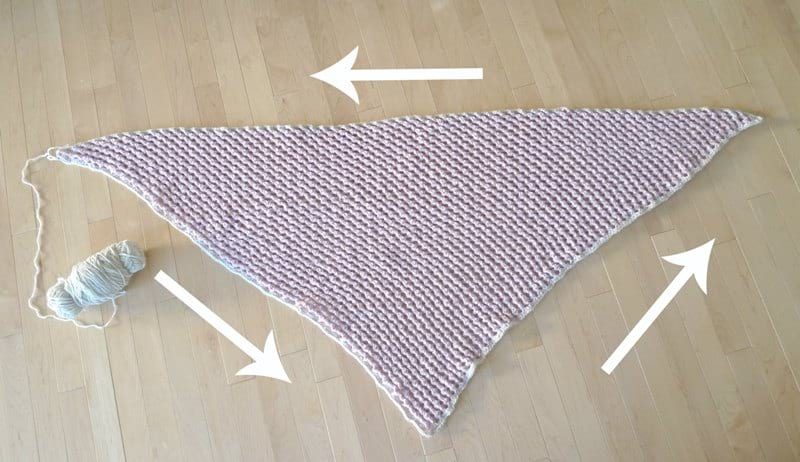
Doesn’t the scarf look stunning when you see its entirety? You can also wear it draped across your shoulders as a beautiful shawl!
![]()
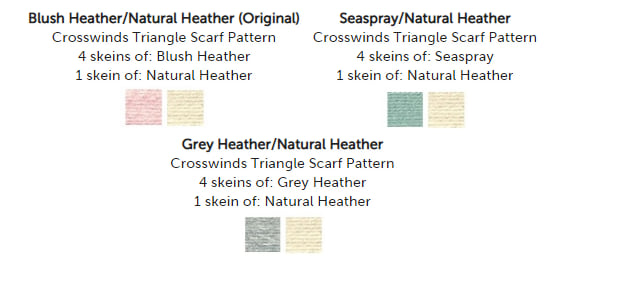
I adore how these two colors pair together as the Blush Heather and Natural Heather complement each other so well! Lion Brand Yarn has put together a kit with three complementary color combinations HERE so you can get all the Wool-Ease yarn you need to make your own triangle scarf! I personally requested the following three colors as the main colors as I think they would be gorgeous paired with the Natural Heather as you can see below: we have blush pink (which I used), Seaspray (a soft sea-foam green) and Grey Heather (perfect for neutral lovers).
I love my pink triangle scarf, and I hope I’ve inspired you to try making your own in some complementary colors as well! The beautiful texture created with cross double crochets is gorgeous, and the decorative edging and luxurious tassels make this scarf such a statement piece. Thank you for following along with my crochet and knit journey, everyone! Keep up to date with my projects through my e-mail newsletter HERE!
{This post is sponsored by Lion Brand Yarn! I’ve loved working with their yarn throughout the years and I’m thrilled that I get to collaborate with them every month!}
This pattern is an original pattern by Stephanie Lau of All About Ami. Please do not claim this pattern as your own. If you wish to share this pattern, you may link to this pattern but please do not reprint it on your site. You may keep a copy for your own personal use but please DO NOT sell the pattern or distribute it.
You may sell products made from this pattern but please clearly credit the design to me, Stephanie Lau of All About Ami, and provide a link to my blog www.AllAboutAmi.com. Permission is NOT granted for mass production or factory manufacturing of any kind. Thank you for being respectful and for your understanding!