***You can purchase an INEXPENSIVE AD-FREE PDF of this pattern on Etsy HERE! This beautifully formatted PDF includes ALL the step-by-step pictures and pattern and is a total of 10 pages including the cover page! Lion Brand Yarn has made a convenient kit HERE that includes the digital pattern and all the 24/7 Cotton yarn needed (choose any color combination you want) to crochet this beautiful bag!
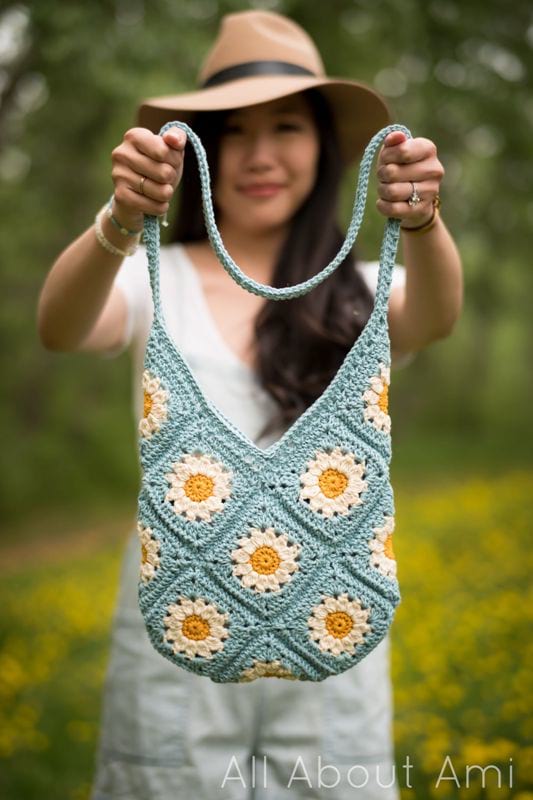
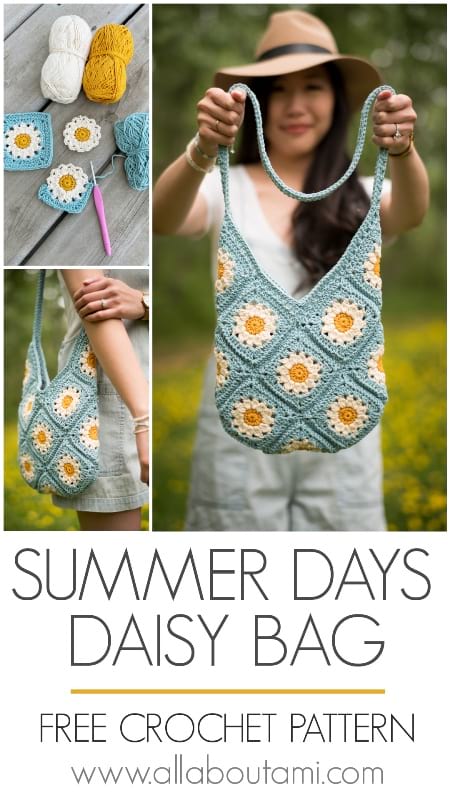
Pattern Description: Crochet this bright and cheery shoulder bag that brims with nostalgia! 15 daisy granny squares are seamed together in a clever way to form this beautiful bag.
Skill Level: Level 2 – Easy
Materials:
- 4 skeins of 24/7 Cotton (worsted weight level 4 yarn) – find the kit HERE (choose any color combination you want)
- Color A: 116 g/216 yds (Succulent) – 2 skeins
- Color B: 42 g/78 yds (Ecru) – 1 skein
- Color C: 24 g/45 yds (Goldenrod) – 1 skein
- 2.75 mm and 3.75 mm Clover Amour crochet hooks
- Yarn Needle (bent tip helpful for attaching)
- Lock ring stitch markers
- Steamer (optional for blocking granny squares – I use this affordable one HERE)
- Small purse organizer insert (optional to add zipper closure and compartments to this bag)- dimensions of the insert are: Length: 9“/23 cm, Height: 5.9“/15 cm
Gauge:
- Granny Square: 3.75” /9.5 cm x 3.75”/9.5 cm; diagonal is 4.75”/12 cm
Final Dimensions:
- Width: 9.5”/24 cm, Height: 12.5”/32 cm, Straps: 28”/71 cm
Abbreviations:
- Magic Ring (MR): Make a loop. Hold yarn where ends cross. Insert hook into loop and pull up working yarn. Yarn over and pull through. Work subsequent stitches in magic ring and then pull tight to close. See my Magic Ring tutorial HERE!
- Beginning cluster: Ch 2, [YO, insert hook in st, YO, pull up a loop, YO, draw through 2 loops], rep 3 times in same st, YO, draw through 4 loops on hook.
- Cluster: [YO, insert hook in st, YO, draw up a loop, YO, draw through 2 loops on hook], rep 4 times in same st, YO, draw through 5 loops on hook.
Special decreases used at the bottom of the V for the top edging:
- Half double crochet decrease: YO, insert hook into both indicated gaps. YO, pull through first 2 loops. YO, pull through remaining 3 loops.
- Invisible single crochet decrease (worked across 3 stitches in this pattern): Insert hook into front loops of next 3 stitches. YO, pull through 3 loops. YO, pull through both loops.
- Invisible slip stitch decrease (worked across 3 stitches in this pattern): Insert hook into front loops of next 3 stitches. YO, pull through all loops.
Notes:
- This bag is constructed of 15 granny squares that are seamed together in a special way.
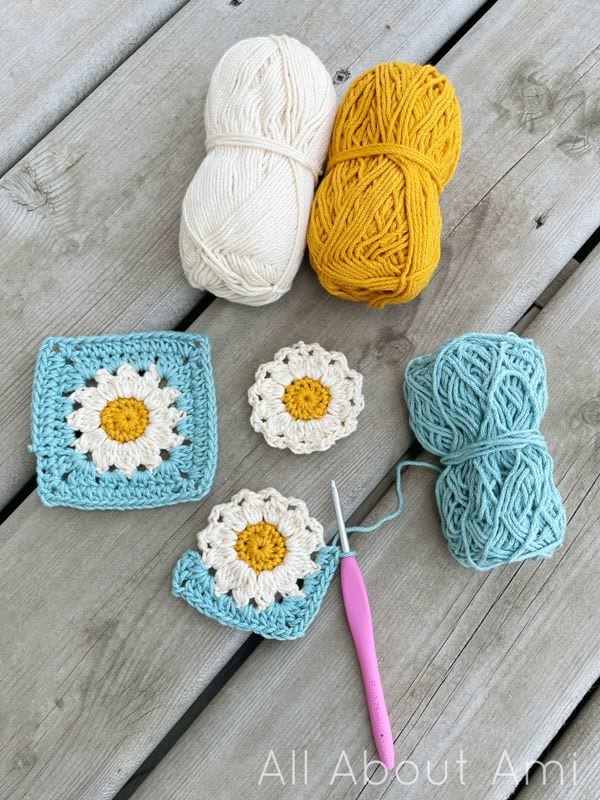
- Three different shades of 24/7 Cotton are used to crochet the daisy granny square. Color A is the background frame color (“Succulent” in this pattern), Color B is the color of the petals (“Ecru”) and Color C is the color of the daisy center (“Goldenrod”).
- The daisy granny square consists of 5 rounds: Rounds 1 and 2 are the center of the daisy (single crochet stitches), Round 3 consists of the petals (clusters), and Rounds 4 and 5 are the background frame (half double crochet and double crochet stitches).
- You can crochet over the yarn tails when switching yarn colors. I like to crochet over the yarn tails and also weave them in the opposite direction for added security.
- Once all 15 granny squares have been crocheted, they are laid out in a special arrangement and seamed together using a special slip stitch seaming method.
- Stitches are then picked up along the top edge of the bag to form the top edging and strap (half double crochets separated by chain 1’s to give a lovely eyelet detail).
- You can adjust the length of the strap based on where you want the bag to hang and whether you want to wear it as a cross-body bag. I am 5’6 for reference and the bag hits me at my hip when I wear it on one shoulder. I can wear it as a cross-body bag at this length too (sits higher up). Keep in mind that your bag will hang lower once you have filled it with contents and more weight is added to it.
- A round of single crochet stitches are then worked along one side of the top edging and strap. Next, a round of slip stitches are worked to help strengthen and widen the strap even more. This is then repeated along the other side of the top edging and strap.
- Special decrease stitches are worked at the bottom of the V for each round to ensure the stitches do not bunch up or puff out at this spot.
- Blocking helps to relax the fibres and give a smooth finish.
- You can purchase a small size interior bag organizer if you would like to add some compartments and zipper closure to this shoulder bag as it perfectly fits.
- You can try adding button closure to this bag (see details further down in the pattern).
- This bag is technically reversible as the “wrong side” has a very unique look with raised/pronounced edges that help define each granny square. You can wear the bag both ways depending on which look you prefer!
***Please watch my Daisy Granny Square video tutorial below so you can see how to crochet each and every round, and how to crochet over the yarn tails and weave in the ends!
*************************************
PATTERN INSTRUCTIONS
Daisy Granny Square
With Color C (Goldenrod),
Using 3.75 mm hook,
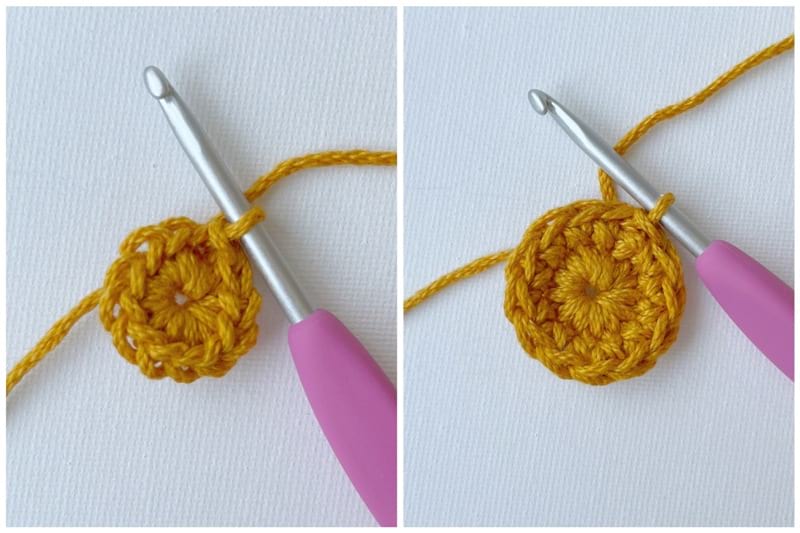
Round 1: 12 sc in Magic Ring. Sl st to first sc. (12 sts)
R2: Chain 1, sc in same st. Sc around. Sl st to first sc. Fasten off. (12 sts)
With Color B (Ecru),
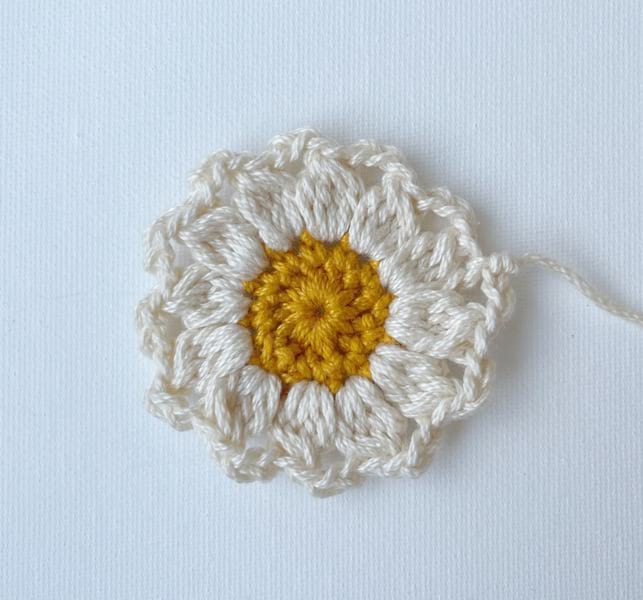
R3: Join with sl st in any sc. Work beginning cluster, chain 3. *Work cluster in next sc, chain 3* around. Slip stitch to top of beg cluster. Fasten off. (12 clusters and 12 ch-3 spaces)
With Color C (Succulent),
R4: Join with slip st in any ch-3 space. Chain 3 (counts as 1 dc), *2 dc, chain 2, 3 dc* in same space. Work 3 hdc in each of next 2 ch-3 spaces. [Work *3 dc, chain 2, 3 dc* in next ch-3 space. Work 3 hdc in each of next 2 ch-3 spaces.] Repeat everything between square brackets [ ] 2 more times. Slip stitch to top of chain 3. (48 sts and 4 ch-2 spaces).
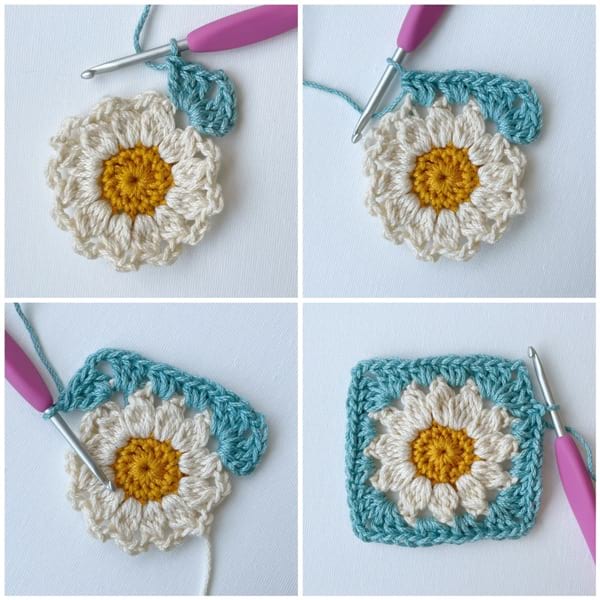
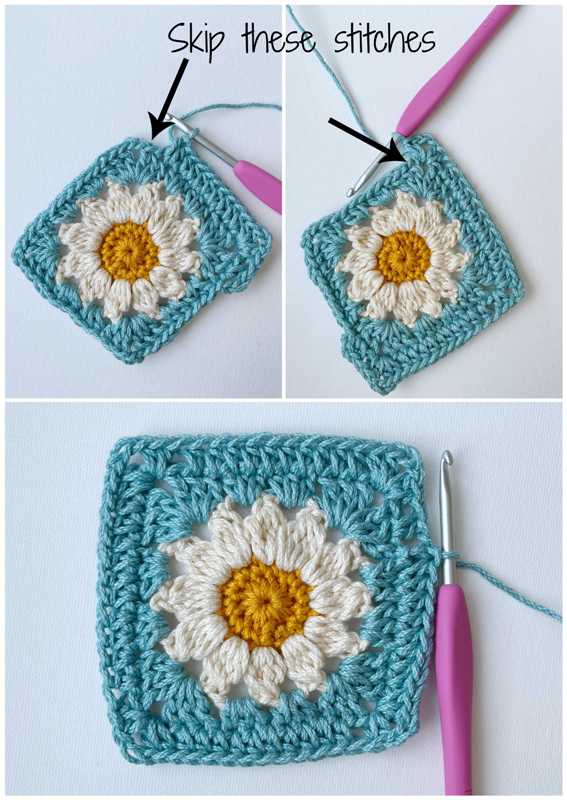
R5: Chain 2 (counts as 1 hdc). Work 1 hdc in next st. Skip next st, *2 hdc, chain 2, 2 hdc* in chain-2 space. [Skip next st, hdc across until reach st before Ch 2 space (10 hdc). Skip next st, *2 hdc, chain 2, 2 hdc* in ch-2 space.]. Repeat everything between square brackets [ ] 2 more times. Skip next st, hdc 8. Slip st to top of chain 2. Fasten off. (56 sts and 4 ch-2 spaces).
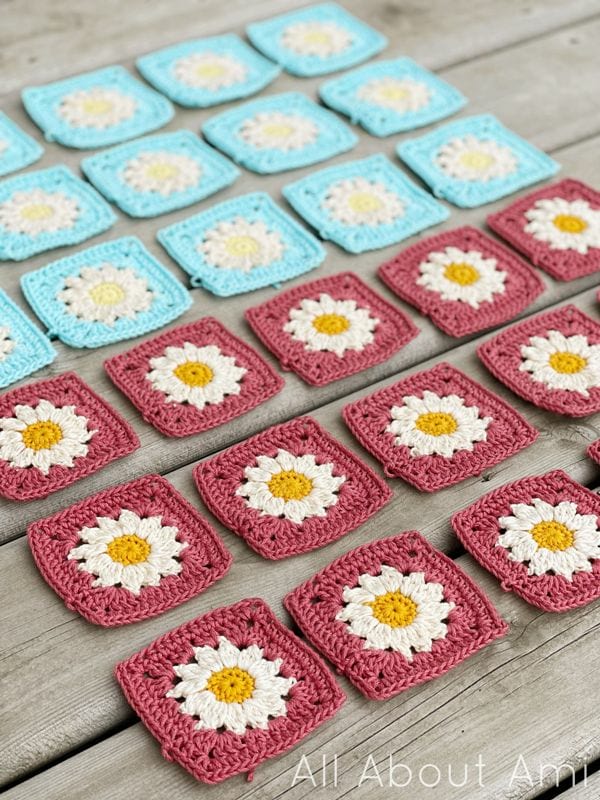
Crochet 15 granny squares in total. You can block the squares to give them defined edges and to smooth out the stitches.
The Summer Days Daisy Bag is constructed the exact same way as the Wildrose Shoulder Bag – the only difference is the granny square. Thus, to finish crocheting the bag, please reference the following blog posts:
- Assemble the 15 granny squares together using the slip stitch seaming technique HERE.
- Crochet the top edging and strap HERE.
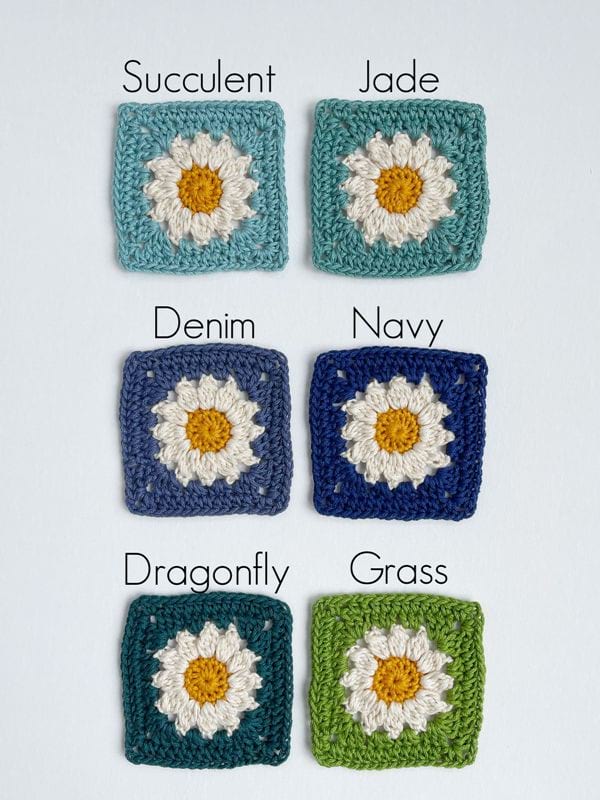
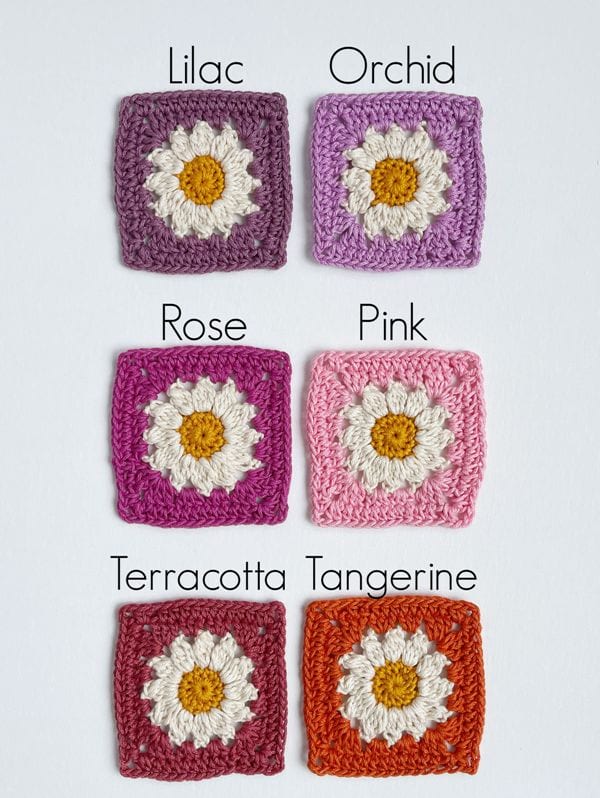
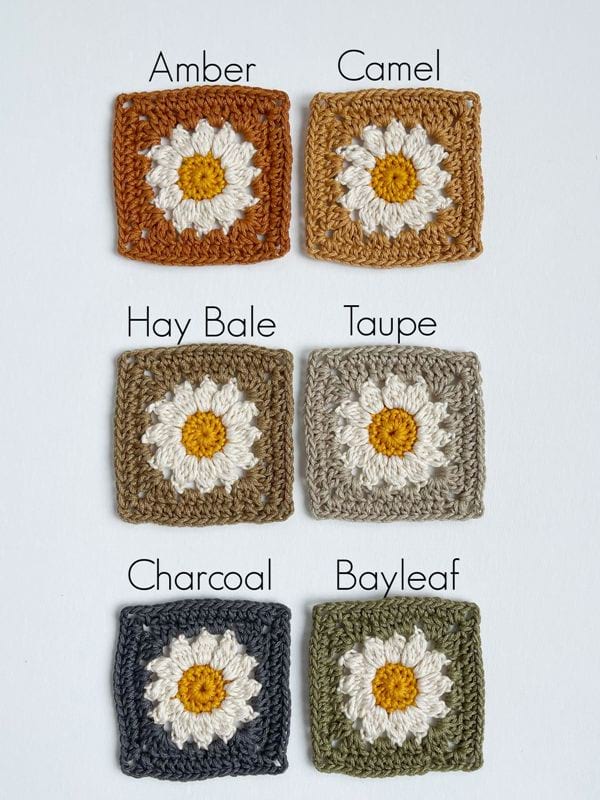
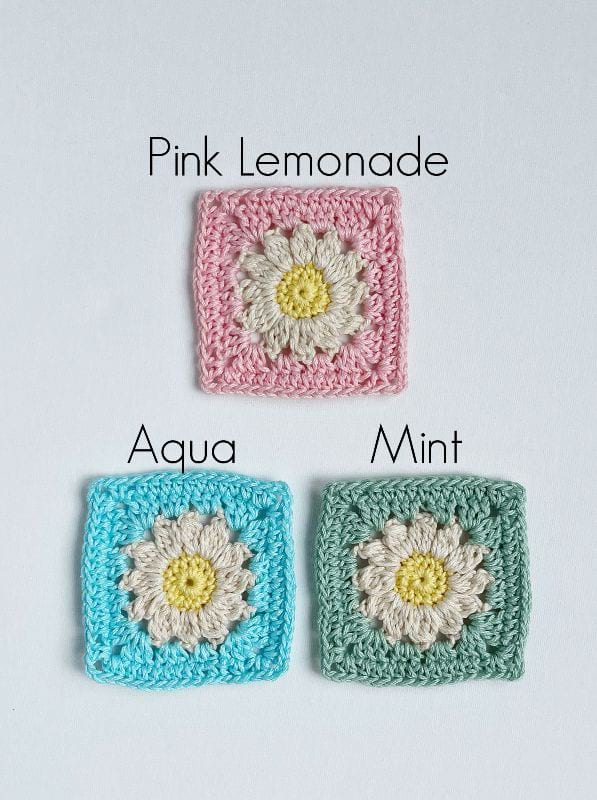
To give you some ideas for various color combinations, I have worked up the daisy granny square in all the 24/7 Cotton Yarn colors that I have in my stash! See all the different granny squares I worked up below:
Here are the blue and green shades:
Here are the purple/pink/red/orange shades:
Here are the neutral shades:
Here are the pastel shades with “Lemon” (pale sunny yellow) as the middle yellow color rather than “Goldenrod” (warm golden yellow) which was used in all the above squares:
*************************************
The Summer Days Daisy Bag is such a fun and pretty bag to work up! Each daisy granny square works up quickly, and it is so satisfying being able to crochet a few squares whenever you have some time. It is magical when you seam and fold the squares together to watch your gorgeous bag take shape!
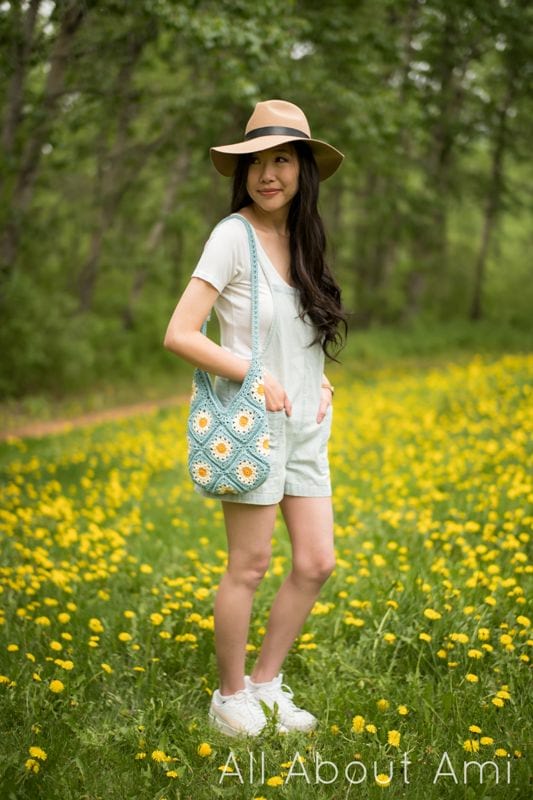
I adore this color combination and was so happy when I worked up the test square since I was trying out various color combinations. This design holds a lot of nostalgia for me as I used to crochet daisy granny squares when I was a child. In fact, you can see the very first daisy granny square bag that I made as a child in my first blog post HERE (written in January 2011). I added a delicate daisy beading to the strap of my childhood bag, and I wore a handmade daisy bracelet during this photoshoot as a sort of homage to that original bag!
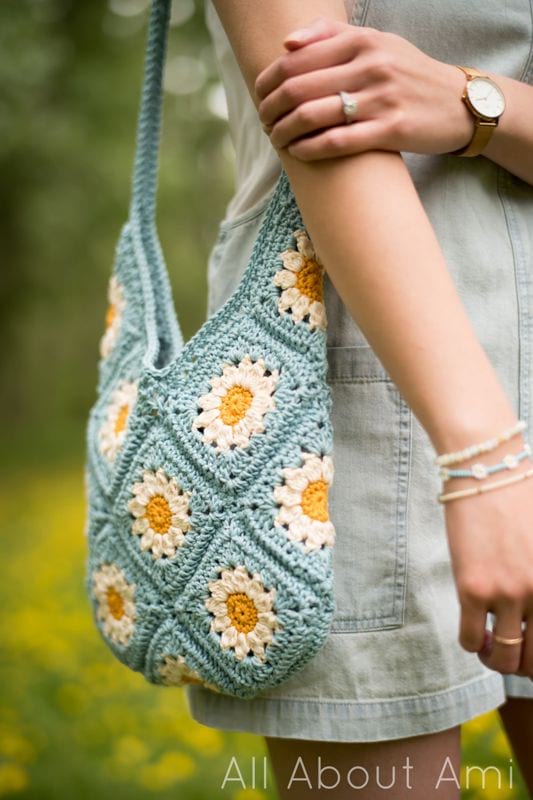
I love bags that can be worn cross-body as it is so easy to throw your essentials inside, sling it over your body, and go out and about on your day while being hands-free! Don’t forget that a small size bag organizer fits perfectly inside (I designed this to be the case), so you can instantly add zipper closure and compartments – it makes a big difference!
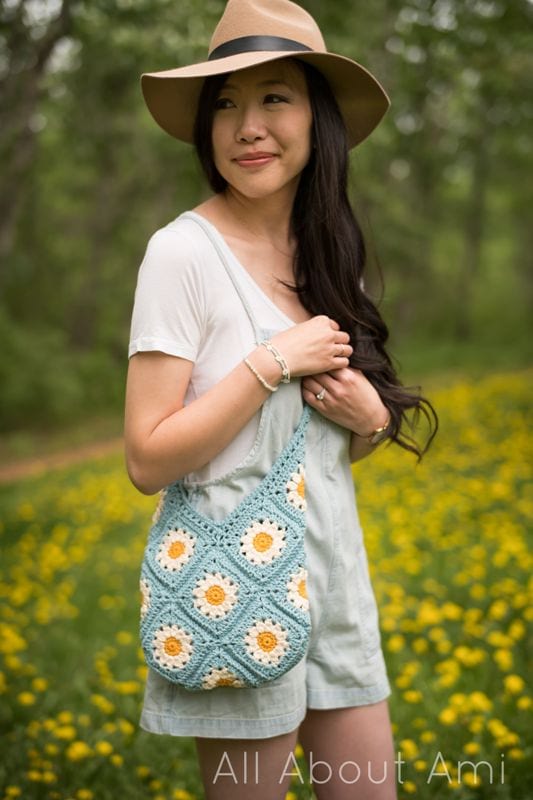
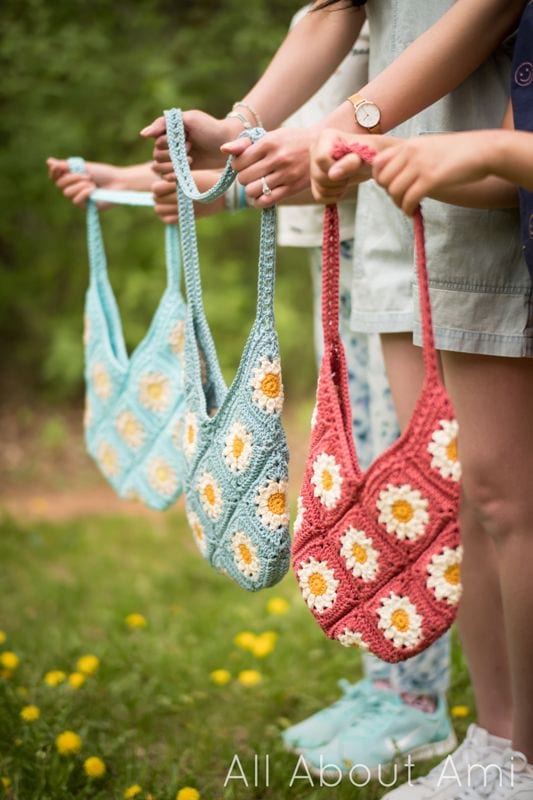
When a pattern is fun to work up, I always like to make some for my two daughters as well! They chose their own color combinations as you can see below. Brielle chose the beautiful red shade called “Terracotta” which looks very striking with the daisies as well. Myla chose the “Aqua” colorway, and I thought it paired well with the pale sunny yellow “Lemon” shade in the center. When choosing your color combinations, you can choose which yellow you want for the center. I think the beautiful off-white “Ecru” looks so good as the shade for the petals!
I hope you enjoy crocheting your daisy bags as much as I did! These daisy bags hold so much warmth and nostalgia for me, and it brings such a big smile to my face whenever I look at these bright and cheery bags! You can use the hashtag #summerdaysdaisybag when you post on social media so that we can all see your gorgeous color combinations and lovely daisy squares! Have a wonderful summer, everyone, and thank you for your support!
{This post is sponsored by Lion Brand Yarn! I’ve loved working with their yarn throughout the years and I’m thrilled that I get to collaborate with them every month!}
This pattern is an original pattern by Stephanie Lau of All About Ami. Please do not claim this pattern as your own. If you wish to share this pattern, you may link to this pattern but please do not reprint it on your site. You may keep a copy for your own personal use but please DO NOT sell the pattern or distribute it.
You may sell products made from this pattern but please clearly credit the design to me, Stephanie Lau of All About Ami, and provide a link to my blog www.AllAboutAmi.com. Permission is NOT granted for mass production or factory manufacturing of any kind. Thank you for being respectful and for your understanding!
