Last month I blogged about finding Calypso Gray’s wonderful free pattern for beautiful crocheted slippers and the modifications I made to her pattern. Please refer to my blog post called “Crochet Slippers Part 1” to see step-by-step photos of the making of a pair of slippers from the toe-cap to the sole to the upper portion. I love this pattern because the slippers are crocheted in one piece and no seams are required. The sky’s the limit in terms of the modifications and additions you can make, so please join me as I show you how I made five different pairs of slippers, each unique in their own way!
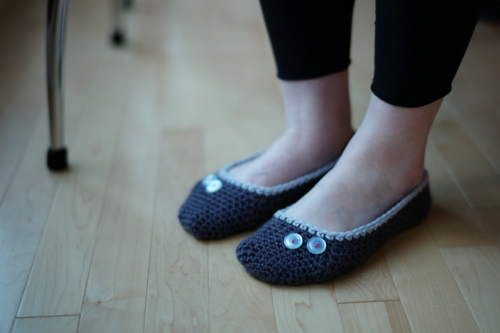
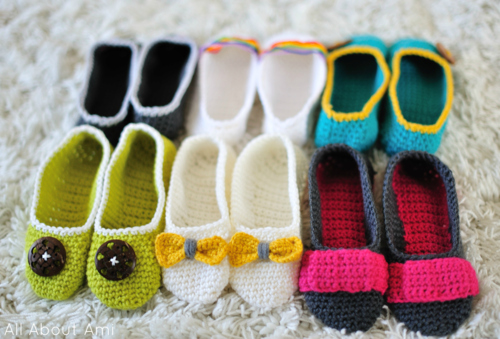
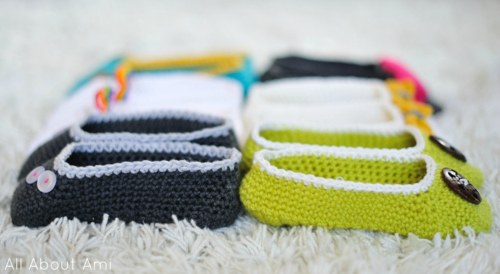
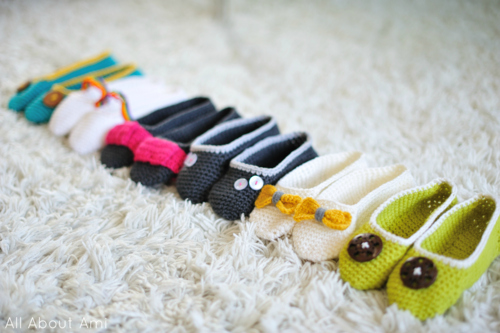
I knew I wanted to make my mom a pair of slippers as soon as I found this pattern. Mother’s Day was coming up, and it’s wonderful being able to give hand-made gifts that are so practical too! I knew my mom would prefer a darker colour for her slippers so they wouldn’t get dirty as easily, so I chose a grey theme. I used a dark grey for the body of the slipper and a light grey for the edging. To add a little “pizzaz”, we picked up these small translucent buttons and sewed them on using hot pink thread. The result is a clean, modern look that my mom absolutely loved!
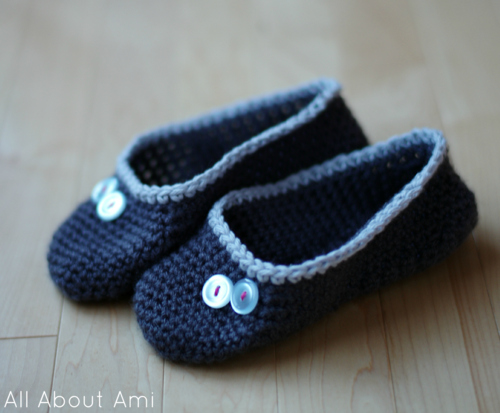
The only tricky thing about making these slippers and giving them as gifts is sizing. The pattern calls for a 5 mm crochet hook, and my first pair of slippers that I made using this hook fit my size 8-8.5 feet perfectly. However, all subsequent slippers I made ended up being a little too tight! I tried my best to keep consistent gauge, but the end result can vary a lot depending on the yarn you use, even if it states that the weight is the same. Thus, I used a 5.5 mm crochet hook for my own slippers so they fit me comfortably. Knowing that my mom has slightly smaller feet than mine, I stuck with a 5 mm crochet hook for hers. Don’t they look great on her?
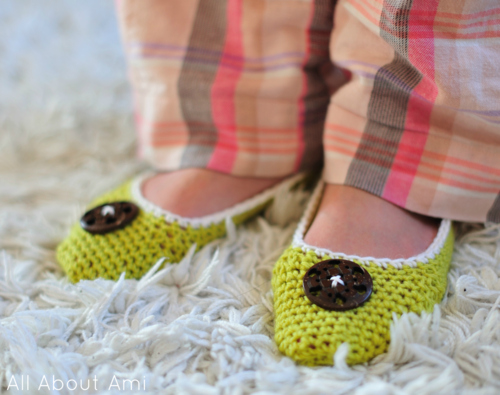
I absolutely LOVED this yarn colour when I saw it at the store, so I picked it up to make a fun, bright pair of slippers. The colour is called “lemongrass”, and we used a similar colour in our wedding theme along with a fuscia pink. Isn’t it a gorgeous colour? We used white on the edging for contrast. Ryan and I found these stunning buttons at Michaels and thought they’d be a great statement piece on our slippers.
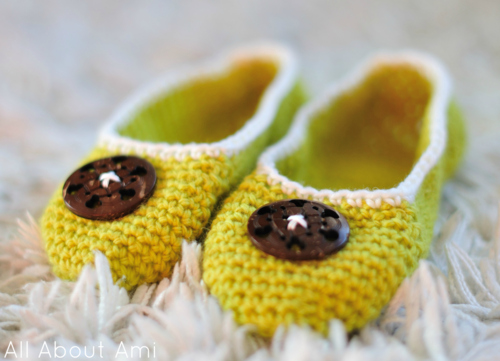
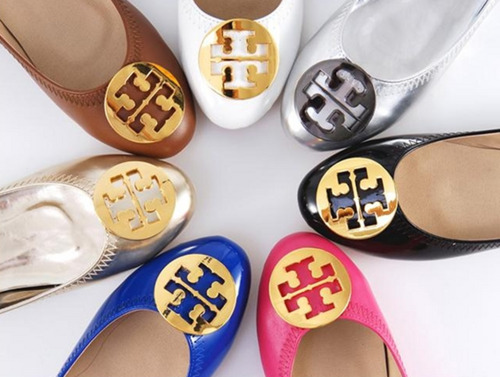
They kind of remind me of the medallions found on the super chic Tory Burch flats!
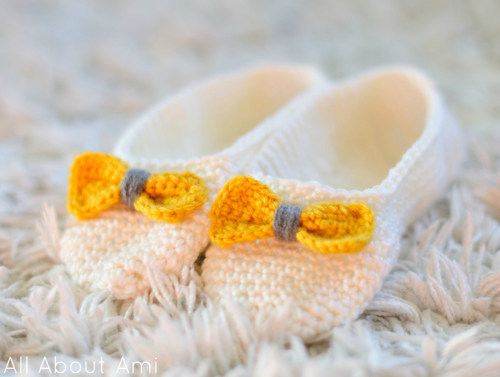
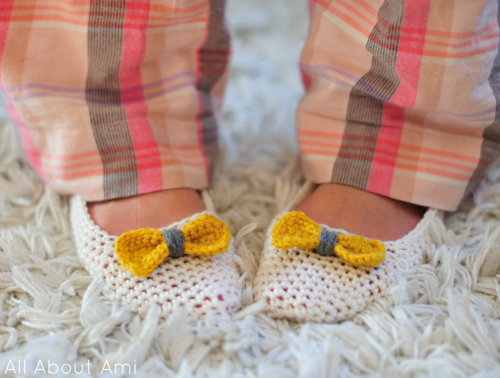
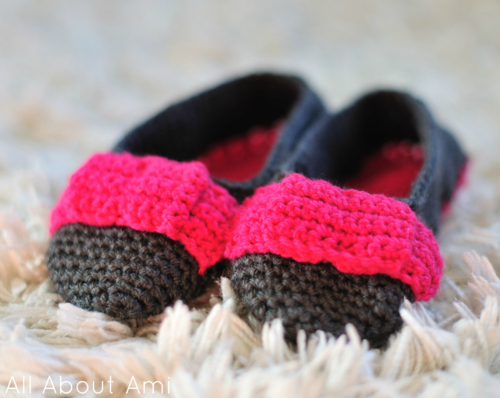
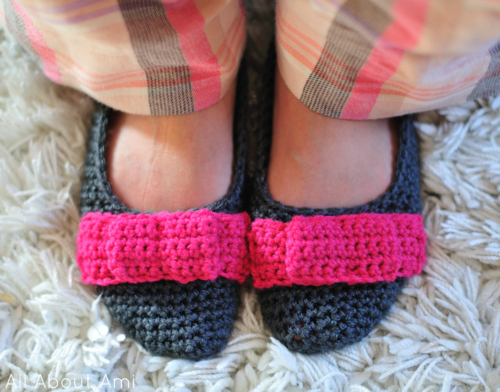
I really wanted to make a pair of slippers adorned with sweet little bows. They make the slippers look so dainty and ladylike, and it’s fun choosing bright colours and figuring out which colours go well together.
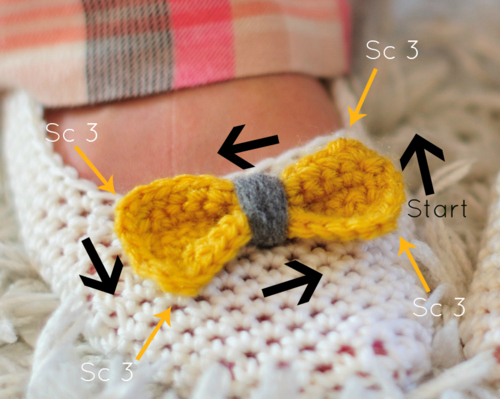
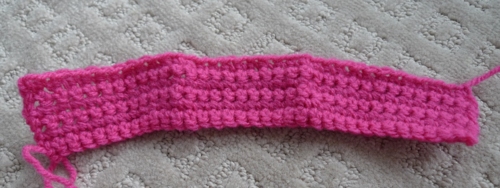
I followed this video here to get a general idea of how to crochet a bow. Then I figured out what size i wanted for my slippers and made up the following pattern:
Using a 2 mm crochet hook, Ch 12
R1: Starting in second chain from hook, Sc 11.
R2-4: Ch 1. Turn. Sc 11
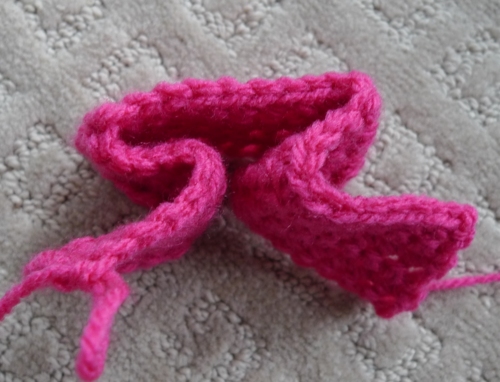
From there, I single crocheted up the right side of the resulting rectangle, across the top, down the left side and across the bottom, doing three single crochets in each corner stitch. Please see the picture below for clarification. Doing three single crochets in each corner gives the bow a nice rounded look. I then scrunched the bow slightly and wrapped yarn around the centre, then attaching it to the slipper.
Prettyness! Bows are just so cute 🙂 I made these slippers for my sister because she loves all things cute and pretty!
When I went shopping I noticed that many flats and heels had a modern twist on the traditional bow with straighter lines, giving the bows a more geometric shape. A reader pointed out that they kind of look like ruffles too!
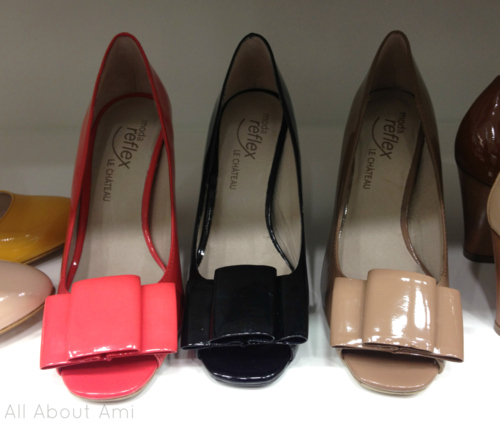
I thought these grey and pink flats from Zara were super cute! The pink square in the middle was quite the statement.
And so, I tried to emulate these Zara flats by crocheting some grey and pink slippers with a similar pink design ontop. I wanted to add more pink to this slipper so I used grey for the toe-cap, switched to pink for the sole, and then switched back to grey for the upper portion. The pink sole adds a bright pop of colour!
I crocheted a long rectangular strip with the following pattern:
Using a 3.5 mm crochet hook, Ch 36
R1: Starting in second chain from hook, Sc 35.
R2-6: Ch 1. Turn. Sc 35
We folded the rectangular piece inwards towards the middle and sewed the piece in place, flattening it so it would not be too puffy.
I then sewed this pink piece onto the grey slippers. They’re pretty unique-looking! And they match perfectly with my pajama pants 🙂
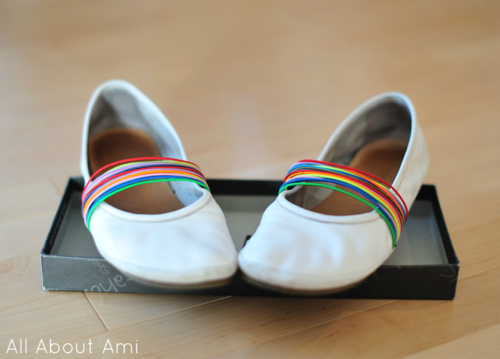
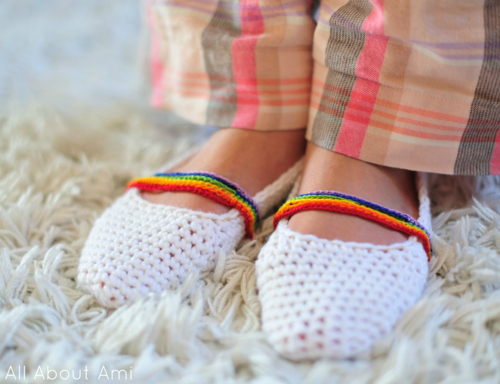
Since it was so much fun crocheting a pair of slippers based on some flats I saw in store, I wanted to crochet another pair of slippers inspired by some of my favourite flats of all-time! I bought these white flats with elastic rainbow straps years ago from Town Shoes and I’ve managed to keep them fairly clean! They are incredibly comfortable as the leather molds to my feet…it feels like I’m wearing socks when I wear these! Aren’t these flats awesome?
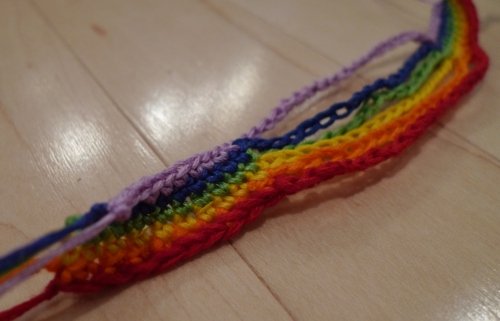
To start off the rainbow strap, I did a series of chain stitches using red embroidery floss. I then single crocheted ontop of the red embroidery floss using orange for about ten stitches and then did more chain stitches so that the orange would then be disconnected/independent from the red. I then joined the orange back with the red by single crocheting the last ten stitches.

I continued with this pattern for the rest of the colours. I followed good ol’ “ROY G. BIV” (red, orange, yellow, green, blue, indigo and violet) to get a range of colours for my rainbow strap!
We then attached the rainbow straps to my white crocheted slippers! Ryan also embroidered a border across the edge of the slipper using brown embroidery floss to make them more similar to my flats.
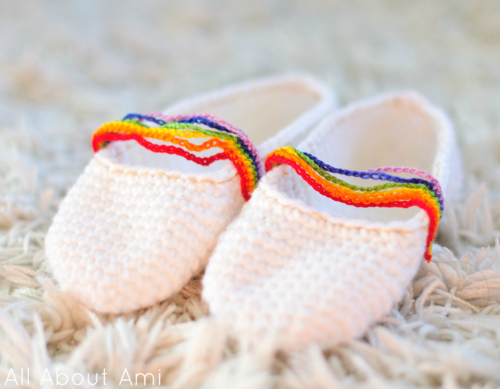
The rainbow straps make these flats so fun, colourful and unexpected!
It was quite a whirlwind when I went on this slipper-making frenzy!
I felt like a shoe designer, dreaming up what designs I wanted to make and wear!
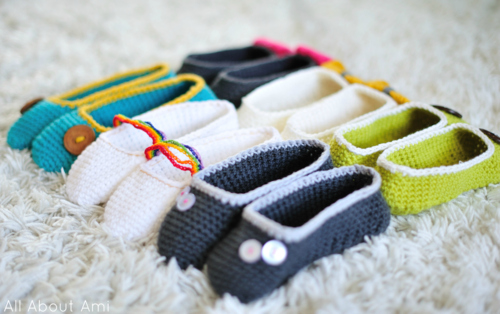
It is so simple to personalize these slippers as there are many great yarn colours to use and many fun buttons and great little crochet embellishments (bows, hearts, flowers) that you can add.
Which one of these crochet slippers are your favourite?
I hope I’ve given you some ideas on how you can adapt and modify a basic pattern to make many different designs! Do you have any favourite flats or shoes that could be made into a pair of slippers? Inspiration can come from anywhere! Once again, the free base pattern can be found here and you can check out my step-by-step blog post with plenty of pictures and a detailed list of the modifications I made here. Thanks for reading this heavy post and continuing along this crochet journey with me!
[UPDATE: I recently found a great way to make these slippers non-slip with a rubber spray coating called “Plasti Dip”! Read all about it HERE!]