Exactly one year ago in July/August 2014, we announced that we were expecting our second child with our “21 weeks old/21 weeks pregnant” blog post HERE! In that blog post, I stated how I wanted to crochet some special items for our second baby, and I asked my readers for any suggestions they might have! One of my loyal readers named Kristin Isabella Lee listed some great patterns on Facebook, and one of them that caught my eye was a “Crochet Amish Puzzle Ball” by Dedri Uys of “Look At What I Made”! This was such a different project compared to my typical baby hats and bibs, so I thought I would give this free pattern a try!
Choosing contrasting colours for this puzzle ball is fun since you can use your child’s favourite colours or your own, hehe…I love the combination of pink and grey and I always seem to have some pink and grey yarn in my stash! Dedri recommends using a worsted weight yarn for a denser structure which I fully agree with! I actually made one puzzle ball with thin yarn and a small crochet hook but it didn’t turn out very well…the stuffing was visible and and it didn’t hold its structure as it appeared kind of limp I tried this pattern out again with a worsted weight yarn that tends to lean on the thicker side called “Loops & Threads Impeccable” and the results were much better!
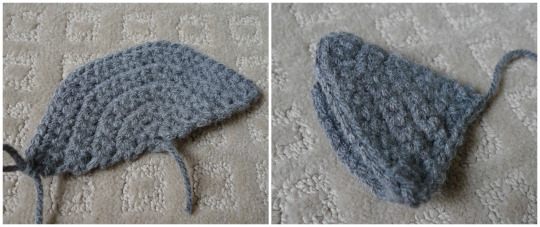
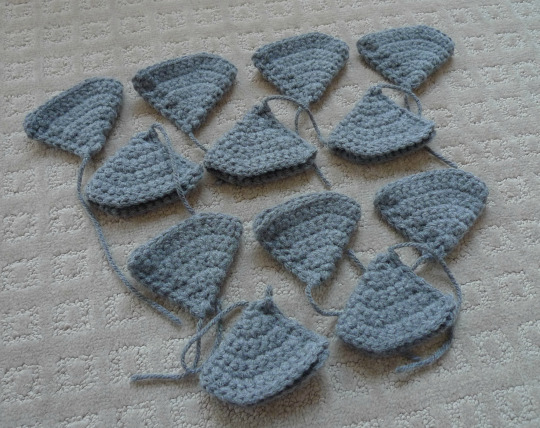
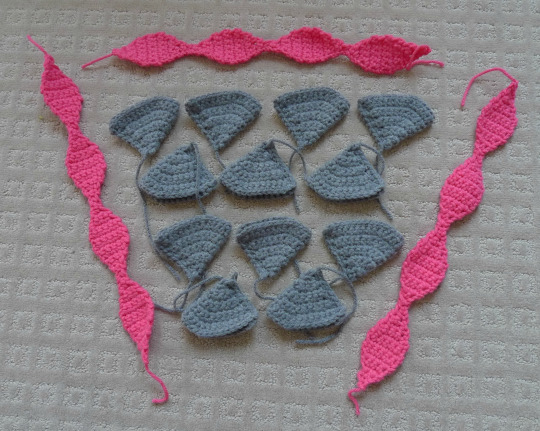
First off, I used the grey yarn to crochet the wedges which consist of half-circles folded in half! In the instructions, Dedri states that you can turn the wedges inside-out so that you don’t end up with a seam. She personally recommends leaving the seam so that the puzzle ball interlocks better when assembled- I myself also left the seam!
You need 12 of these wedges…
Next I crocheted the chain of “lids” using this bright pink yarn!
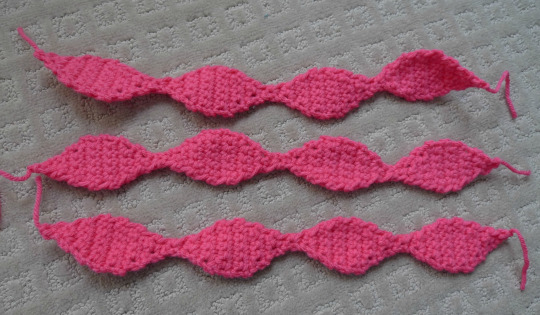
Crocheting these pieces is pretty quick once you get the hang of it. If you were to show people these interesting shapes below, they would probably have a hard time guessing what you were making!
Next it was time to assemble the wedges and chain of ‘lids’ together using the grey yarn. The lids fit perfectly onto the wedges when you open them up, and you stuff the wedges along the way!
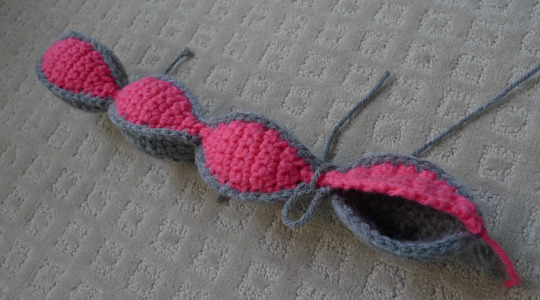
I quite enjoyed attaching these pieces together as they have such a clean look! As Dedri points out, it is important to stuff these pieces very well so they are nice and plump. If you add too little stuffing, the ball will likely become lifeless after being stretched and pulled over time!

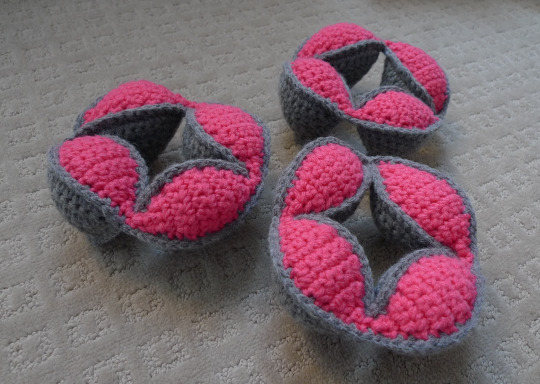
Next it was time to “close” the wedges by forming a ring! The Amish puzzle ball is comprised of three of these rings/segments!
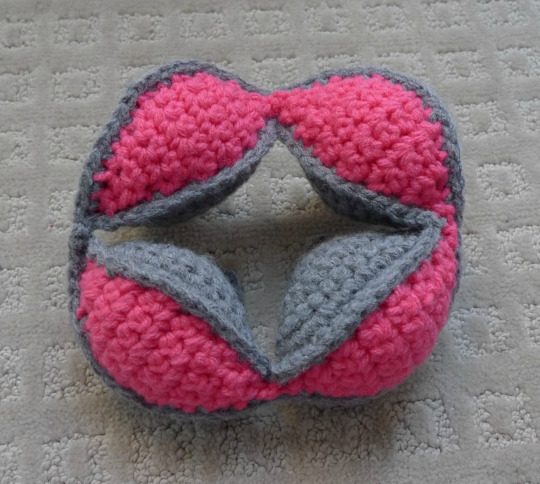
As you can see below, the wedges can be rotated, giving the segments a different look depending on how the wedges are oriented.
It felt so satisfying once all three rings/segments were completed!
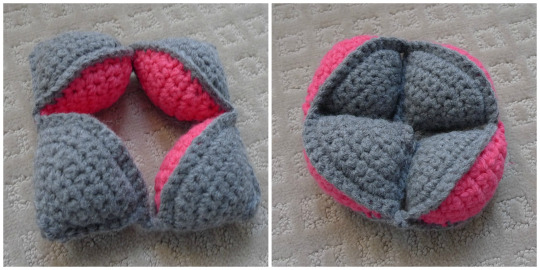
Another view of the completed three segments! I actually crocheted most of this ball while waiting for my obstetrician appointments. I was probably known as the “crocheting lady” in the waiting room 🙂 I would frequently see the same pregnant women during my appointments, and while most of them were on their phones, there was one other lady who would always be knitting…we had a tacit friendship 🙂

Now came the fun part….assembling the Amish puzzle ball!
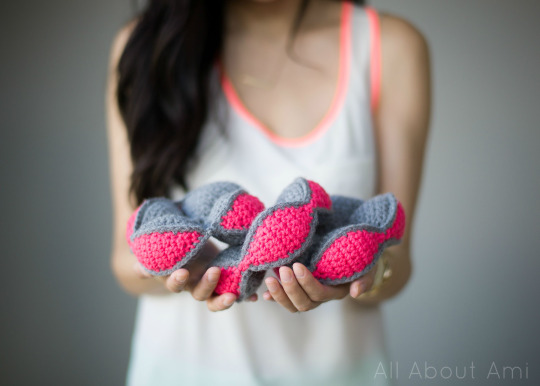
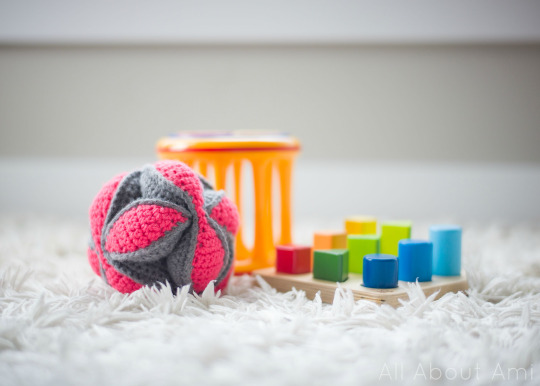
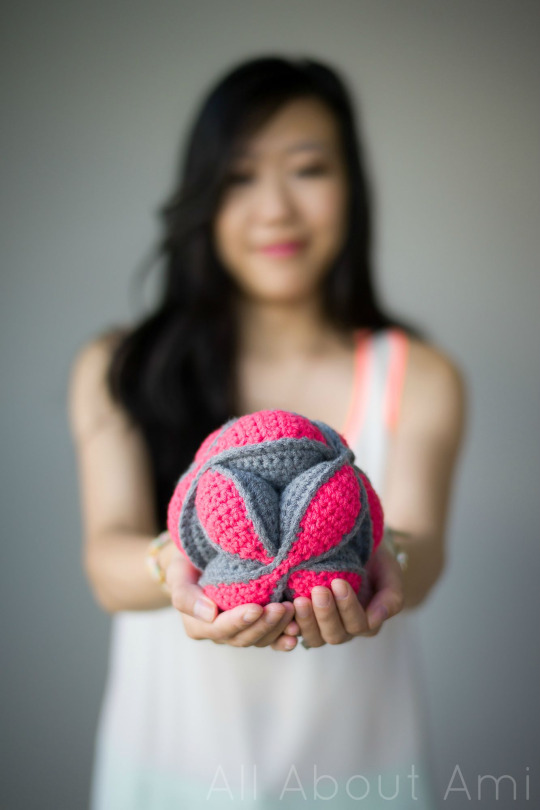
I think the construction of these puzzle balls is so genius. Traditionally they are made out of fabric, but I am so glad that Dedri made a crocheted version for us all to enjoy! Doesn’t the finished puzzle ball look awesome?
In case you are curious how to assemble these puzzle balls, check out this video we filmed 🙂 I definitely had to practice assembling the ball so that I could do it within the 15 second Instagram video time limit!
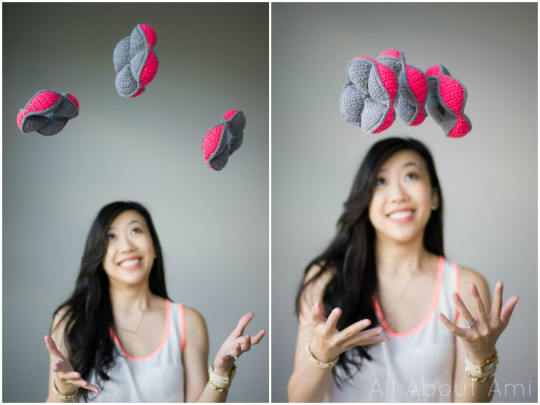
Ryan thought it would be neat to do a shot of me throwing the three segments in the air! I learned several things while attempting this shot: I learned that it is very difficult to throw three objects in the air and keep them all within the frame (not too high, not too low and not blocking my face). I also learned that I look like a deranged person with crazy eyes when I attempt to throw and catch objects 😛 Haha we had a good laugh as we went through the photos and tried to choose the “best” one out of a series of fail photos!
We were so excited to give baby Brielle this special puzzle ball that I crocheted for her!
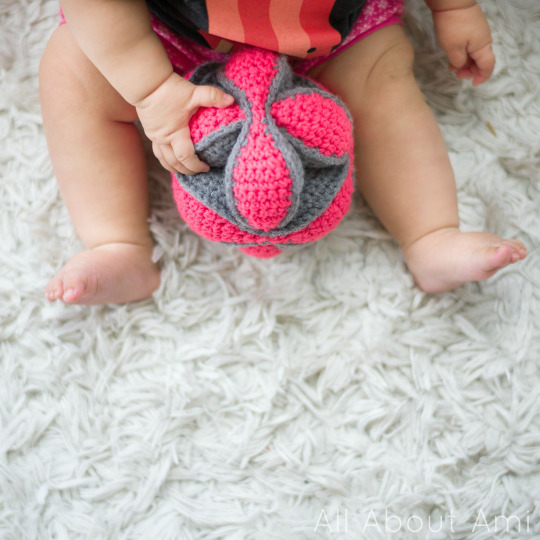
I love how chunky this puzzle ball is! The wedges make this ball perfect for little hands to grab as normal round balls can be difficult for babies to keep a hold of.
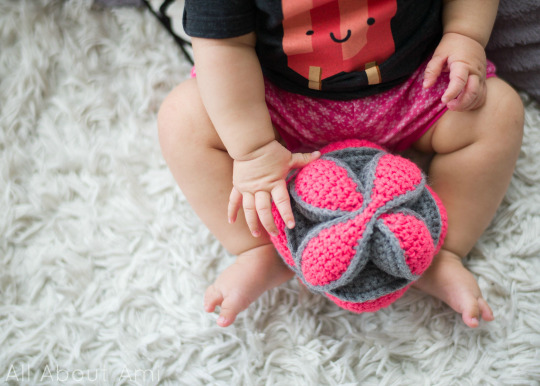
Our baby Brielle is such a smiley and joyful baby! Isn’t she a sweetheart?

We can roll this ball to Brie and entice her to crawl! And what kid doesn’t love playing with balls?

Her arm and leg rolls are just too irresistible-ahhhh! And if you’re curious where her smiley popsicle shirt is from, it’s by the Canadian family-run Whistle & Flute Clothing! They also have a smiley ice cream and other kawaii shirts for kids 🙂

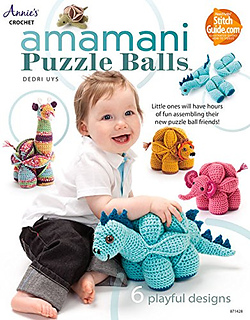
Dedri has also adapted her traditional Amish crochet puzzle ball pattern to make “Amigurumi Amish Puzzle Animals” or “Amamani” for short! She has published a book called “Amamani Puzzle Balls” which contains different patterns such as a dinosaur, elephant and giraffe. Her book is available for purchase on Amazon HERE! Some of Dedri’s Amamani patterns are available for free (such as her octopus and kiwi) while others are available for purchase in her Ravelry store (such as her rhino and horse). You can see all the details about these Amamani Puzzle balls HERE on Dedri’s blog!
I really enjoyed making this puzzle ball and am so happy that Kristin recommended it to me! Dedri did a great job explaining how to crochet the pieces and assemble them together with her step-by-step photos and clear instructions. You can access her free pattern on her blog HERE! It’s such a fun and unique toy, so if you have any little ones in your life (your own or friends’ kids or soon-to-arrive babies), I highly recommend this project! Thanks again to Dedri for this wonderful pattern!