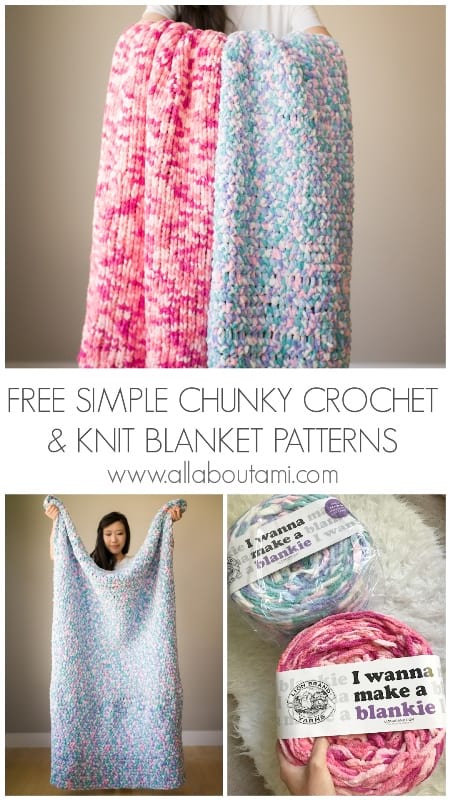
I love knitting and crocheting blankets, so when I saw Lion Brand Yarn’s “I Wanna Make a Blankie” yarn, I knew I definitely wanted to give it a try! I think it is brilliant to have such a giant cake of yarn since you can work continuously without needing to add individual balls of yarn. This reduces the need to tie knots and weave in the ends throughout your project! This yarn is 100% polyester (machine washable and dryable), and each giant chenille cake weighs 800 g/28 oz and has 437 yds/400 m. It is a level 6 super bulky yarn and there are 6 different shades available. Note that you can find this yarn on the Lion Brand site, LoveCrafts, Amazon, Herrschners and YarnCanada.
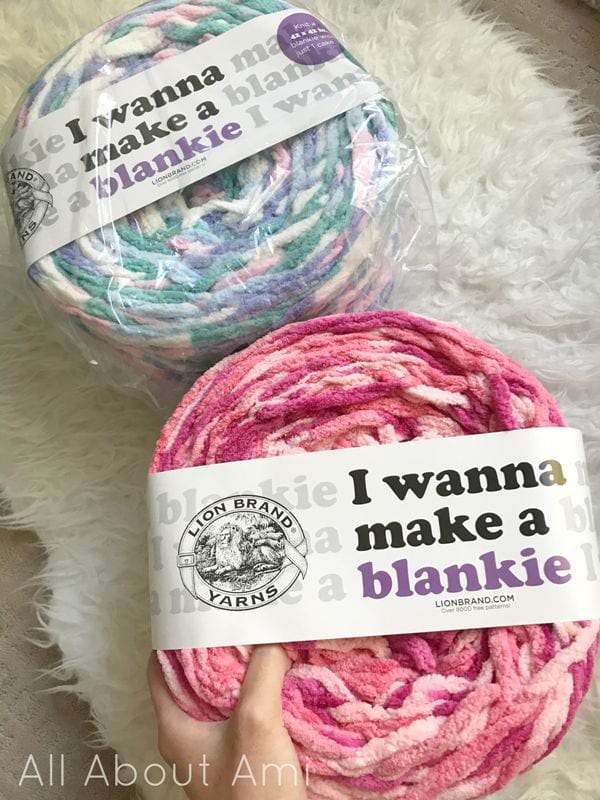
On the label, it says you can “Knit a 42″ x 42″ blankie with 1 cake” or “Crochet a 33″ x 33″ blankie instead“, and there are patterns available inside the yarn label. I wanted to make blankets for my daughters, and I knew I wanted to make them larger than the stated dimensions, so I used 2 cakes for each blanket. My older daughter chose the colorway “Calluna” (Stripes of Light Ballerina Pink, Light Teal, Light Periwinkle, Pale Purple, and Optic White) and my younger daughter chose the colorway “Zinnia” (Stripes of Magenta, Pale Light, and Baby Pink).

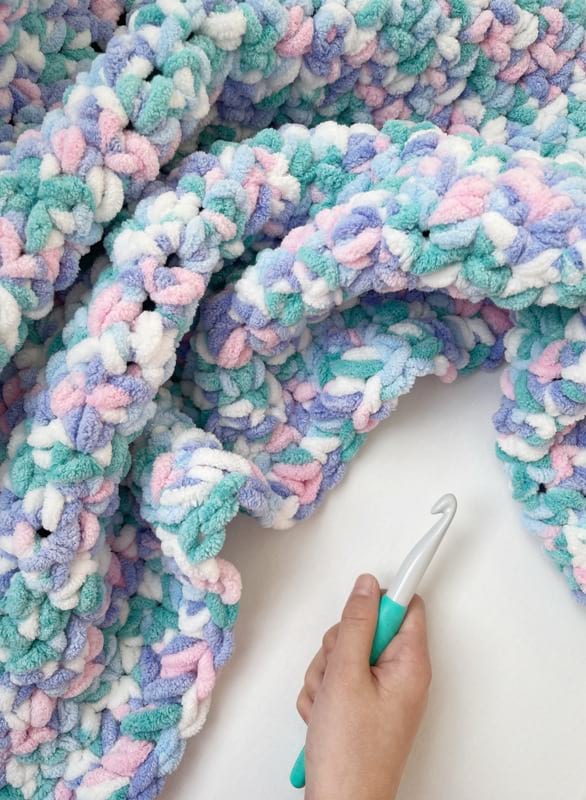
First, I will talk about the crochet blanket that I made with my 8 year old daughter Myla! Myla has been crocheting chains for a very long time, and she learned how to do single crochet stitches about a year ago. She has crocheted stuffed animals, cowls, mini blankets and cushions all with the single crochet stitch, so I thought we could work on a large blanket together using this same stitch. I am glad we worked on this project together as a blanket is a large undertaking – I remember starting numerous afghans as a child but never finishing them as I ran out of steam and motivation. Myla would work on a couple of rows, and then I would help her work on some rows. We used a large 12 mm hook to get big squishy stitches, and the blanket worked up pretty quickly. Since we used a larger hook, the blanket has some drape while having a good weight to it – if you were to use a smaller crochet hook, you would get denser and heavier stitches. We were pleased with the final dimensions of our final blanket! Note that we started off with a certain amount of stitches (65 sts) but gained some along the way, but overall this is generally the pattern we used:
********************
CROCHET BLANKET PATTERN
Materials:
- 2 cakes of “I Wanna Make a Blankie” yarn in the colorway “Calluna” (super bulky level 6 yarn); this yarn is also available through LoveCrafts, Amazon, Herrschners and YarnCanada
- 12 mm Clover Amour hook
Chain 74
Row 1: Starting in second st from hook, sc across. (73 sts)
Row 2. Chain 1, turn. Starting in second st from hook, sc across. (73 sts)
R3-80: Repeat Row 2.
Single crochet around the perimeter of the blanket for a clean edge.
Final dimensions: 60″/152 cm x 50″/127 cm
You can watch this quick video below showing our crochet blanket:
@allaboutami My 8 year old daughter & I crocheted this blanket together 😍 Love this colourway she chose 💙##easycrochet ##chunkyyarnblanket ##handmadeblanket
♬ Healing – In Love With A Ghost
********************
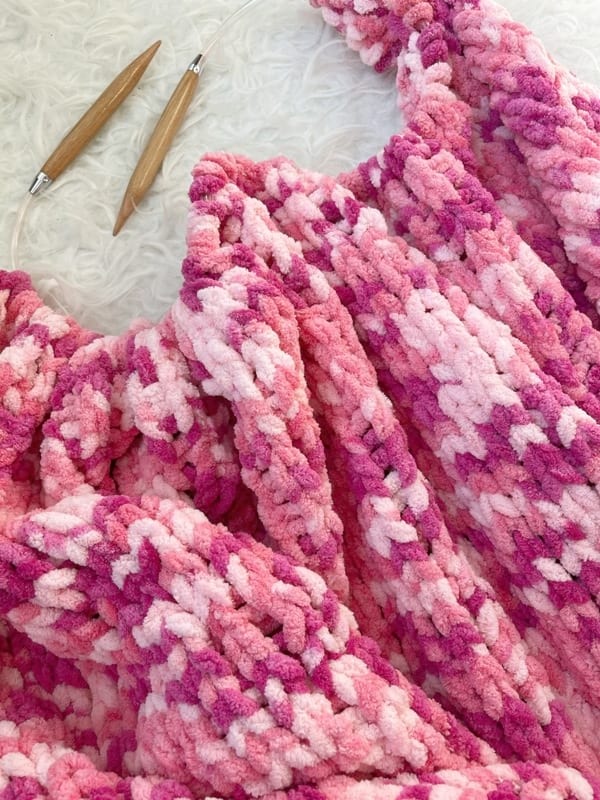
For my younger daughter Brielle’s knit blanket, I also used larger 12.75 mm needles with a 40″ cord. I used the stockinette stitch and it was a very relaxing knit. Usually pieces that use stockinette stitch tend to curl – however, since I used such large needles, I found that the edges did not curl too much. I ended up using only 1.5 cakes for the knit blanket, and it was a very large size. I will show you what I made with the remainder of the yarn too! This is the pattern I used for the knit blanket:
********************
KNIT BLANKET PATTERN
Materials:
- 1.5 cakes of “I Wanna Make a Blankie” yarn in the colorway “Zinnia” (~1134 g/620 yds) – super bulky level 6 yarn; this yarn is also available through LoveCrafts, Amazon, Herrschners and YarnCanada
- 12.75 mm ChiaoGoo Circular 40 inch (102cm) Wooden Knitting Needle Size US 17
Using long tail cast-on, loosely cast on 70 sts.
Row 1: Purl all stitches.
R2: Knit all stitches.
R3-159: Repeat Rows 1 and 2.
Loosely cast off all stitches.
Final dimensions: 58″/147 cm x 70″/178 cm
*******************
With so much yarn left over from the second cake, I decided to knit a matching chunky pillow to go with the blanket. After that, I still had yarn left over, so I suggested to Brielle that I could crochet her a teddy bear, and she was THRILLED! I used an existing pattern I already had and just followed it using a larger crochet hook. Brielle loves cuddling this soft teddy bear and has affectionately named it “Tenny”. Then, I knit a little blanket and pillow for the teddy bear as Brielle loves tucking Tenny in and putting him to sleep. As you can see, this yarn goes a LONG way as you can make so many projects with two cakes! Here are the patterns I used:
******************
KNIT CUSHION PATTERN
Materials:
- 220 g/120 yds of “I Wanna Make a Blankie” yarn in colorway “Zinnia” (super bulky level 6 yarn)
- 12.75 mm ChiaoGoo Circular 40 inch (102cm) Wooden Knitting Needle Size US 17
- 20″ x 20″ pillow insert (I used the “ULLKAKTUS” from IKEA); you can find pillow forms on Amazon HERE
- Bent tip tapestry needle
Using long tail cast-on, cast on 22 sts.
Row 1: Purl all stitches.
R2: Knit all stitches.
R3-91: Repeat Rows 1 and 2.
Loosely cast off all stitches and leave long end for seaming. Fold piece in half. With wrong sides facing outwards, whip stitch 3 sides together. Flip inside out so right sides are facing outwards. Insert pillow insert and whip stitch final side together. Fasten off and weave in end.
Final dimensions: 20″/51 cm x 20″/51 cm
******************
CROCHET TEDDY BEAR
Materials:
- 92 g/50 yds of “I Wanna Make a Blankie” yarn in colorway “Zinnia” (super bulky level 6 yarn)
- 7 mm Clover Amour hook
- 12 mm safety eyes
- Fiberfill stuffing
- Bent tip tapestry needle
- Lock ring stitch marker
- Worsted weight black yarn to embroider nose
I followed the pattern for my “Baby P.J. Teddy” found HERE! The only modification I made is that I worked one less round for the body. I embroidered the nose with black yarn by making an upside down triangle with one line going straight down.
KNIT BLANKET & CUSHION FOR TEDDY BEAR
- 133 g/75 yds of “I Wanna Make a Blankie” yarn in colorway “Zinnia” (super bulky level 6 yarn)
- 12.75 mm ChiaoGoo Circular 40 inch (102cm) Wooden Knitting Needle Size US 17
- Bent tip tapestry needle
- Pillow insert or fiberfill stuffing for cushion
Blanket for Teddy:
Using long tail cast-on, loosely cast on 17 stitches.
Row 1: Purl all stitches.
R2: Knit all stitches.
R3-39: Repeat Rows 1 and 2.
Loosely cast off all stitches.
Final dimensions: 13.5″/34 cm x 16″/41 cm
Pillow for Teddy:
Using long tail cast-on, loosely cast on 9 stitches.
Row 1: Purl all stitches.
R2: Knit all stitches.
R3-41: Repeat Rows 1 and 2.
Loosely cast off all stitches and leave long end for seaming. Fold piece in half. With wrong sides facing outwards, whip stitch 3 sides together. Flip inside out so right sides are facing outwards. Insert pillow insert or fiberfill and whip stitch final side together. Fasten off and weave in end.
Final dimensions: 8″/20 cm x 7.5″/19 cm
You can watch this video below to see all the projects I made using the “Zinnia” colourway:
@allaboutami Look how much I can make with two cakes of this yarn 😍🎂 ##chunkyyarnblanket ##handknitblanket ##lionbrandyarn ##knittersgonnaknit
♬ Send Me on My Way – Vibe Street
***************************
I love all the projects we made using “I Wanna Make a Blankie” yarn and I am so happy we tried this cake yarn out! It is such a soft yarn and I love how it is easy to care for. Note that I found some reviews for this yarn where people stated that they found numerous knots/joins in their cakes. I agree that this would be troublesome since one of the key benefits of this massive yarn cake is not having to worry about joining individual balls and hiding the ends! I personally worked with four cakes of yarn, and only two balls each had one knot in them. Of course, I’m sure this varies from cake to cake but I am thankful that mine did not have many joins/knots at all.
I love the colorways available and I would definitely recommend this yarn and use it again for future projects. I hope you enjoyed reading about all the different crochet and knit projects I made using this fun yarn, from blankets and cushions to an adorable teddy bear! I hope you enjoy working with this fun yarn as well!
Note: Thank you to Lion Brand Yarn for providing the yarn for these projects!