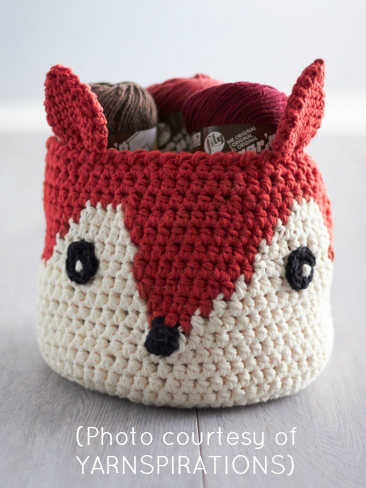
This past weekend I attended a good friend’s baby shower, and I was so happy to gift her with some crocheted goodies! A while back, I came across a really cute pattern for a “Foxy Stash Basket” on the “Yarnspirations” website HERE. I thought it would be a wonderful gift as it would not only make an adorable addition to the baby’s nursery, but also have the functional ability of storing items such as little hats, socks or towels! I had a lot of fun crocheting baskets in the past (see posts HERE and HERE), so I was very excited to make a cute animal basket!
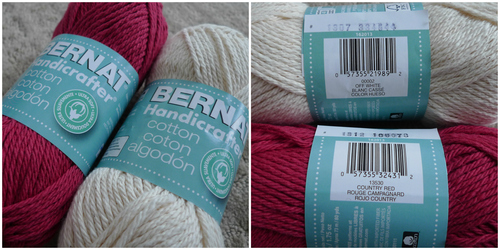
I went out and looked for red and beige cotton yarn: I ended up purchasing “Bernat Handicrafter Cotton” yarn in “Off White” and “Country Red”. You need to hold two strands of yarn together when crocheting this basket. I did not buy enough skeins of yarn during my first shopping trip- in total, I used 4 skeins of the beige yarn and 2 skeins of the red yarn! Some black yarn is also needed for the eyes and nose, but I simply used some black acrylic worsted weight yarn that I already had in my stash.
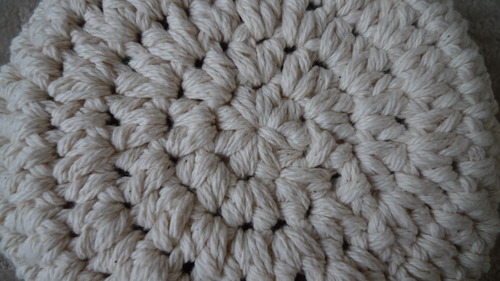
I began by working on the base of the basket with the beige yarn. I loved the look and feel of it already! I used a 6 mm crochet hook for the basket and a 4 mm crochet hook for the ears and eyes as recommended in the pattern.
After crocheting the base, the basket started to build upwards…
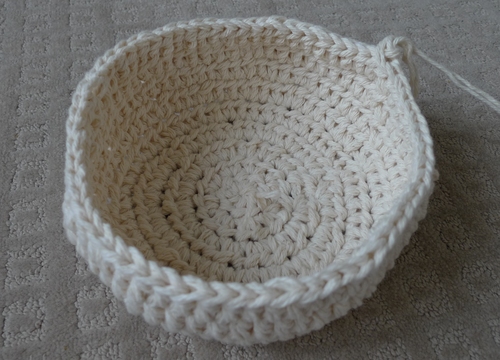
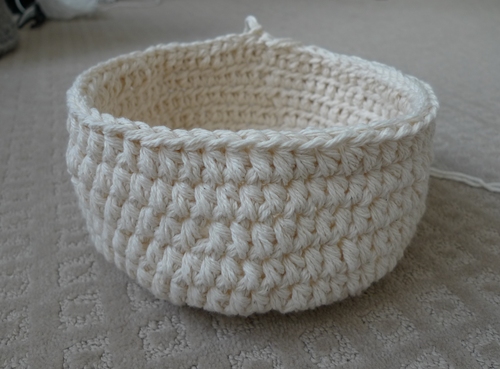
Then after all the increase rounds, it was time to build up the height of the basket!
Next, I added the nose with some black yarn!
I was excited to begin working with the red yarn! Rather than cutting the yarn every time you need to switch colours, this basket is worked with the tapestry method of crochet in which you hold both colours at the same time, carrying and crocheting around the strands that are not currently in use. If you are unfamiliar with this technique, check out this video HERE to see it in action! Since you are working with two colours in the round, that essentially means that you are working with two strands of one colour while carrying along two strands of the other colour (thus four strands going at once)!
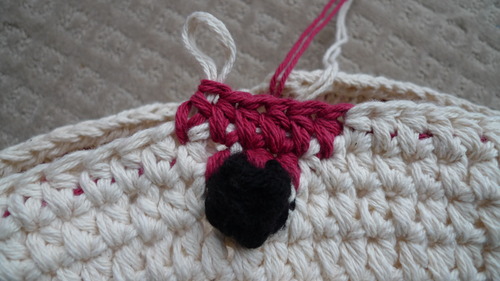
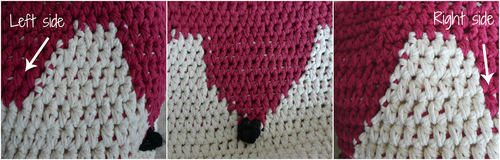
As I was following the pattern exactly and building up the red in subsequent rounds, I noticed that the red appeared to be going lopsided upwards. Even in the photo provided in the pattern (appearing below), I thought that the face looked crooked or lopsided. When I read the pattern through, I thought it made sense in theory if each stitch were placed exactly ontop of one another round after round. However, as you can see, stitches are not exactly aligned ontop of each other (e.g. third stitch of Round 3 will not be perfectly below third stitch of Round 4), as they tend to build up at an angle. Thus, I tried to make some modifications and eyeballed it as I went along, trying to make the face as symmetrical as I could!
This is what I came up with as I crocheted more and more of the face…
Then it was time to cut off the beige yarn and continue working only with the red yarn!
I tried my best, but I admit that I did not do a perfect job of making the face exactly symmetrical. As you can see in the image below, the sides are not identical (left side curves more at an angle while right side falls more steeply). I did not have the patience to undo my work and start that part over again, but you can always give it a try yourself and see what you come up with!
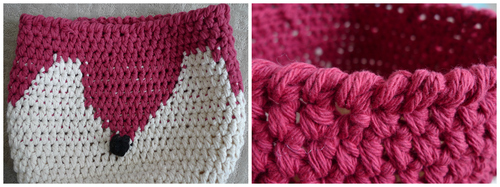
After some decrease rounds, the last round was given a nice finishing touch as it was worked with the reverse single crochet. I absolutely love the beautiful roped and textured feel that the reverse single crochet gives to the basket!
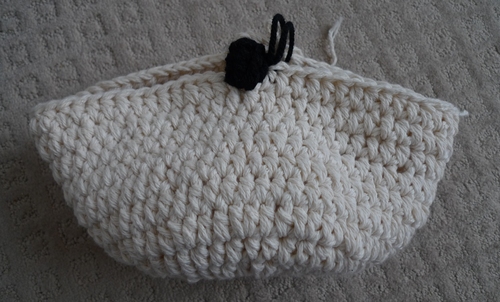
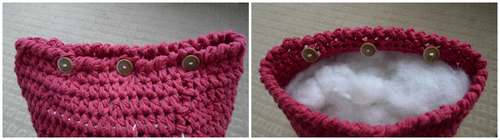
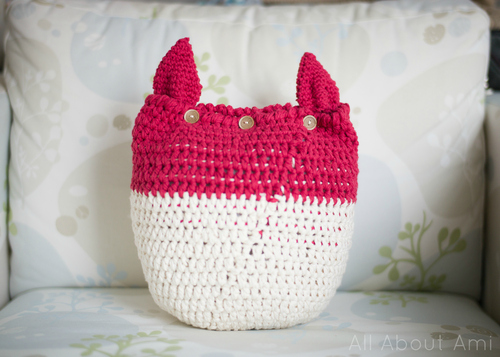
The basket was not as sturdy as I expected it to be (compared to the other baskets which I had crocheted using two strands of super bulky yarn and using an 8 mm crochet hook). Thus, we thought it would be neat to give this basket another function: by adding buttons to the top, the basket could be closed up to be a pillow or cushion!
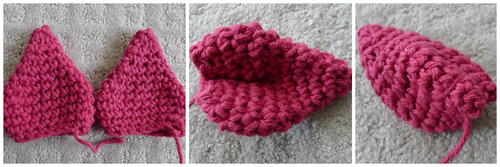
I enjoyed crocheting the ears as they were worked from the bottom to the top which is opposite to how I usually make my ears. The shape turned out beautifully, and I love the pointed tips! To give a bit more shaping and dimension, we pinched the ears in the middle and sewed the back, giving them a creased look.
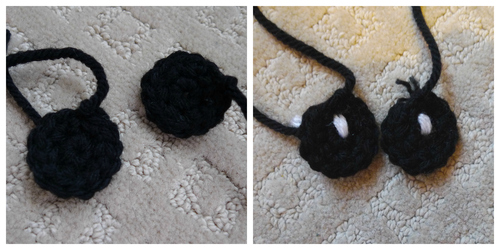
The eyes were simple to crochet as they were simply black circles with some white strands of yarn added!
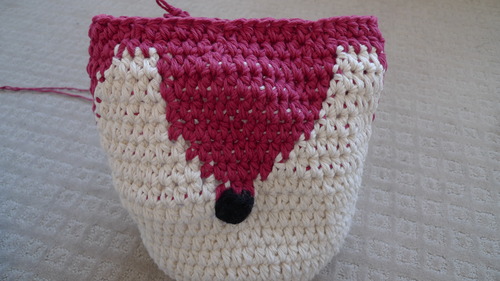
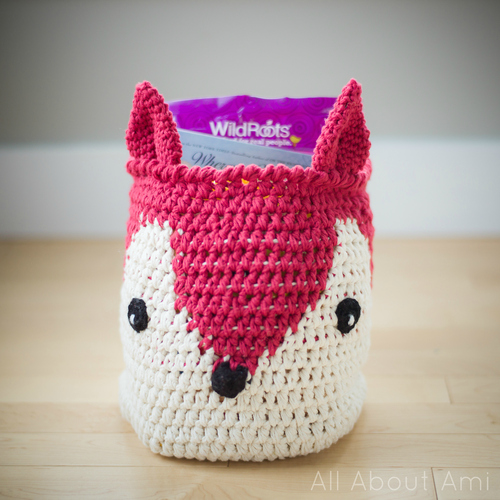
After attaching the ears and eyes, here was our finished product!
******************************************
The free pattern for this basket can be found HERE. These are the modifications I made to the original “Foxy Stash Basket” pattern by Yarnspirations (all modifications made to the FACE part, not the base):
- 3rd rnd: With A, 1 hdc in each of next 6 hdc.
- 4th rnd: With A, 1 hdc in each of next 9 hdc.
- 5th rnd: …………..Do not break MC. With A, 1 hdc in each of next 12 hdc…………..
- 6th rnd: With A, ch 2, 1 hdc in each of next 21 hdc……….With MC, 1 hdc in each of next 7 hdc…With A,, 1 hdc in each of next 13 hdc………
- 7th rnd: WIth A, ch 2. 1 hdc in each of next 22 hdc…..Do not break MC. WIth A, 1 hdc in each of next 14 hdc…….
- 8th rnd: With A, ch 2. 1 hdc in each of next 24 hdc…..With A, 1 hdc in each of next 15 hdc………….
******************************************
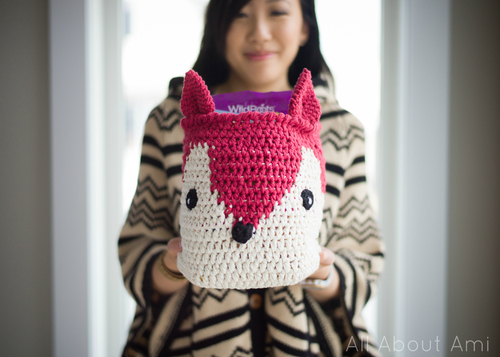
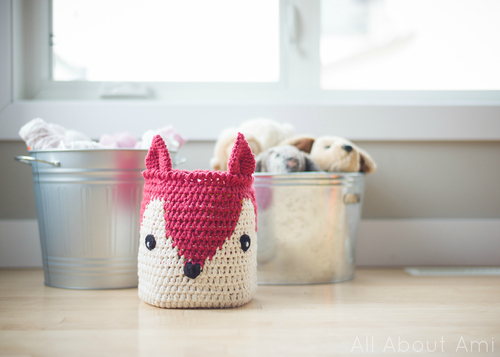
I presented this Fox Basket packed with some goodies to my friend during her baby shower, and it was a hit! I think it look so cute, don’t you?
It would be such a beautiful and whimsical addition to the nursery of any baby boy or girl! Here it is pictured with some of the steel bins from Myla’s nursery (purchased from Ikea and Home Sense). Most of Myla’s stuffies in her nursery were actually my previous stuffies that I brought from home….that goes to show how much stuffies can be loved and cherished and passed down the generations, amigurumi included 🙂
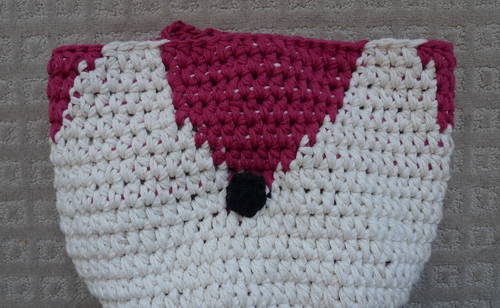
Here is the Fox Basket serving its dual purpose as a cushion or pillow! Doesn’t it look so huggable? And how adorable would this fox pillow look on any sofa or bed?
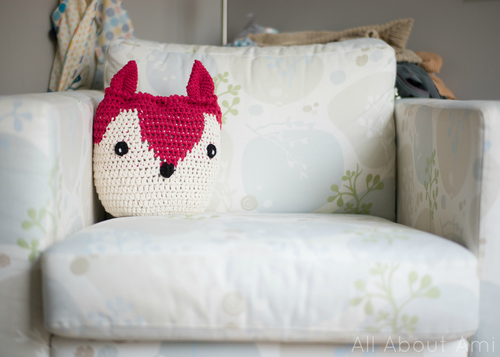
Thus, if you don’t feel like using the basket as storage anymore or if a cute pillow is needed for a big boy or girl bed, it can be converted easily into a cushion or pillow simply by closing up the top with the buttons!
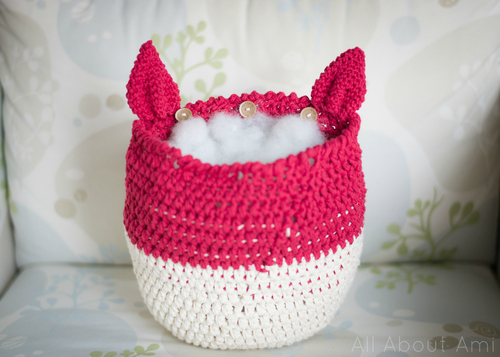
We used fiberfill to show what it looked like stuffed as a cushion, but we would not recommend using it as the actual stuffing unless you sewed the top shut (hazardous for children as they might remove it, play with it or eat it)! You could try finding a small pillow or cushion that would fit inside to keep the button closure and to easily switch from using this as a basket or a pillow!
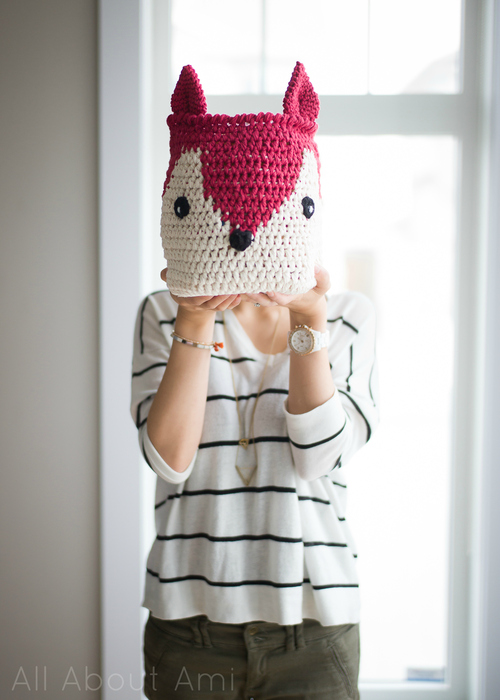
And here’s a third use for the basket….as a Fox Mask! Haha all joking aside, I thought it was funny how this basket was pretty much head size!
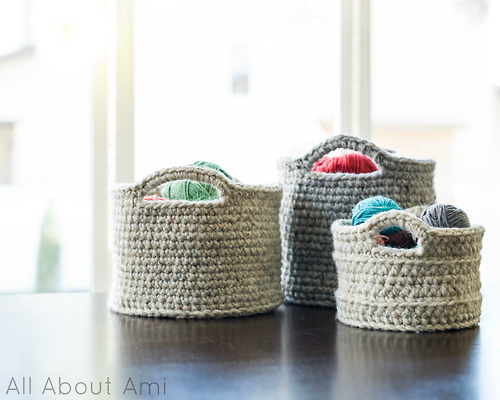
If you liked this basket, check out these baskets pictured below that I crocheted HERE. I still use them to this day in Myla’s nursery and my workspace as they hold so much and look so beautiful.
If you’re interested in crocheting a matching amigurumi fox, here’s a round-up of some cute FREE fox patterns that I found on-line:
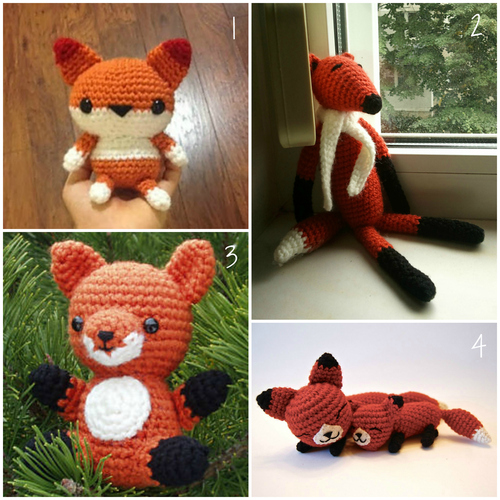
{1. “Cute Amigurumi Fox” by Anna S. of “Spool of Sunshine”, 2. “Amigurumi Fox” by Timea Venter of “Timic’s Home”, 3. “Fox Amigurumi” by Nimoe Galad of “Nimoe’s Blog”, 4. “Mother Fox and Baby Fox” by Allison Hoffman}
As I mentioned above, I think this Fox Basket would be so cute in a nursery, particularly if it had a “Woodland Forest Theme”. I enjoy looking through the beautiful handiwork of different artists on Etsy, and I found the following items that would go perfectly in such a themed nursery!
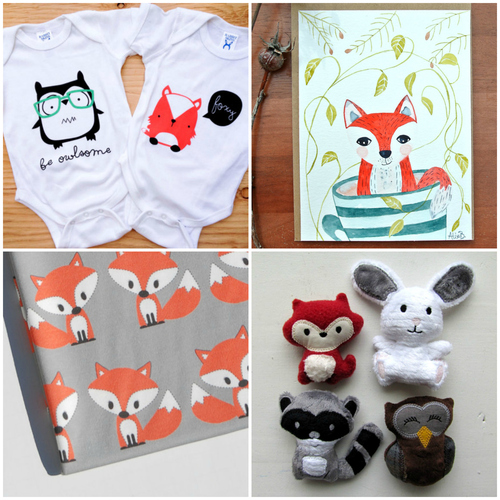
{“Charlie the Fox Baby Toddler Onesie” by Le Trango, “Teacup Fox Original Watercolor Painting” by Alisa Belzil of Sweet Afternoons, “Organic Kawaii Fox Baby Swaddle Blanket” by Simply Boco Baby, “Mini Plush Woodland Animal Set” by A Little Bit of Joy }
Hope you enjoyed reading about the making of this fun project and how we made some modifications to the original pattern and made it convertible from a basket to a pillow! Keep in mind that the Yarnspirations website gives it a 3 out of 4 “Intermediate” difficulty level as it does involve switching yarn colours using tapestry crochet. To access the free pattern, click HERE and download it! I love this idea of making baskets into animals- you could add bunny ears, cat ears, bear ears…the sky’s the limit! Thank you for reading, and don’t forget to stay updated with my work by following me on Facebook, Twitter and Instagram!