With a new school year upon us, I was searching for a bee puppet for our church’s children’s ministry! The number of young families in our church is growing, and I am so thankful that we are all having children around the same time so we can support one another- as the saying goes, it takes a village to raise a child! I was looking for a bee puppet for the hello song in the young children’s routine- it goes like this: “Ickity bickity bumble bee, won’t you say your name for me? Myla, Myla, well that’s a very nice name!” The child gets a chance to say his or her name and the rest of the children repeat it so that they can learn the name too! Since I couldn’t find a bee puppet, I decided to crochet a bee stuffie! I have been connecting with a fellow amigurumi artist and mama named Annie from Hong Kong (@anniegurumi on Instagram), and I saw that she had just released a free Chubby Bee pattern (download the pattern HERE)! It was perfect timing, so I decided to follow her pattern! I found some worsted weight black, yellow, and white yarn in my stash and started crocheting with my 4 mm hook!
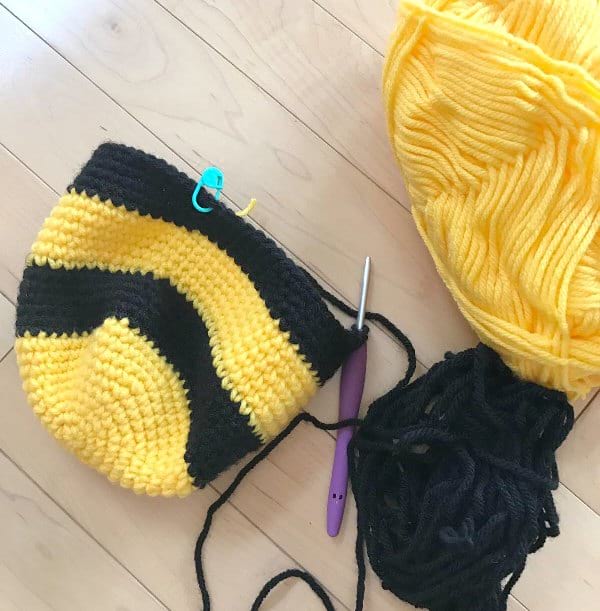
This pattern is perfect for beginners as you can practice increasing and decreasing, and there is minimal attaching required. We added our own stinger at the bottom and added one more increase round to the wings to make them a bit bigger.
We also decided to add antennae to our bee! I will share the pattern I used for the stinger and the antennae below in case you want to add them to your Chubby Bees too!

************
Find the FREE PATTERN for Annie’s Chubby Bee pattern HERE!
ADDITIONS (both using black yarn and a 4 mm crochet hook):
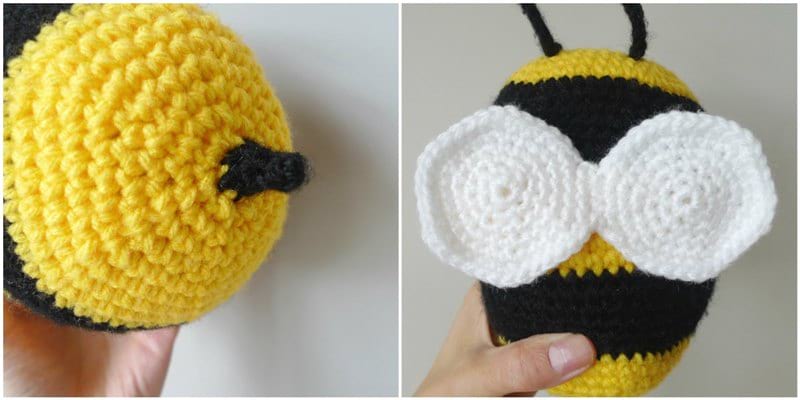
Stinger:
Round 1: 3 sc in Magic Ring
Round 2: Sc 3
Round 3: Inc, Sc 1, Inc
Fasten off and leave long end for sewing. Attach to last round of yellow/bottom part of bee.
Antennae (make 2):
4 sc in Magic Ring, slip stitch to first sc to close. Continue chaining 10, turn. Starting in 2nd st from hook, slip stitch down back bumps of chain stitches. Sl st to st in MR. Fasten off and weave in end (you can add fabric glue to secure the end too). Attach to Round 7 of yellow face, about 5 stitches apart.
For reference, we used 12 mm safety eyes and placed them between Rounds 5 and 6, about 7 stitches apart. Mouth is stitched on between Rounds 3 and 4 using black embroidery floss. We used a pink sharpie to add the blushing cheeks!
****************
I absolutely adore our chubby bee and his sweet face! As soon as the children saw this friendly bee at church, their faces lit up and they got so excited! They enjoyed telling Mr. Bee their name and cuddling him around the circle while singing the song!
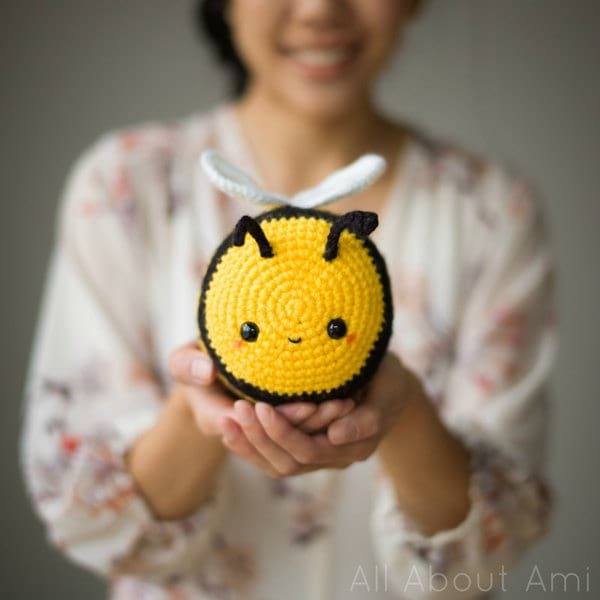
He is so round and the perfect huggable size!

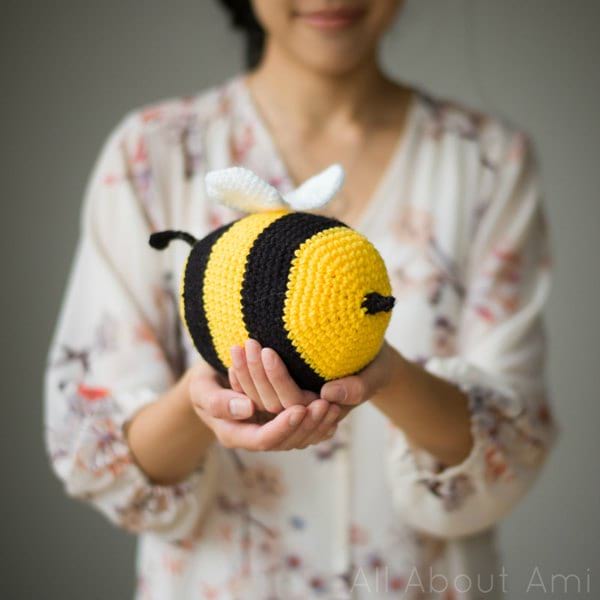
The little stinger at the bottom is a cute addition too!
Here is a boomerang video I filmed for Instagram showing off how adorably chubby this sweet bee is (click on the triangle in the middle to play it)!
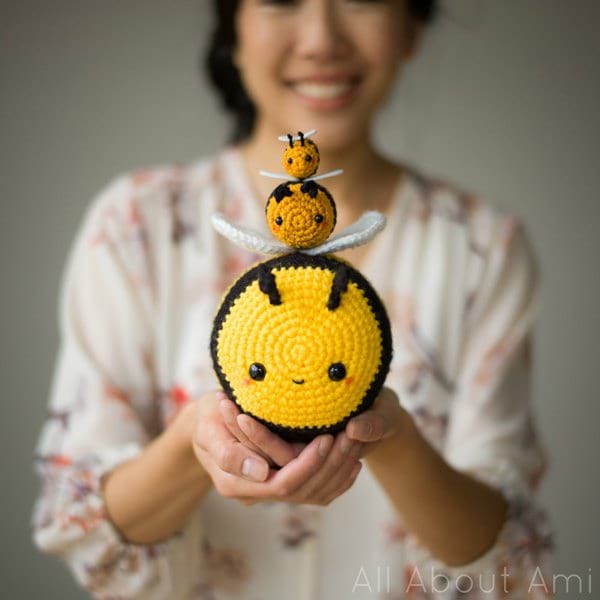
In February I made some amigurumi bees for Myla’s friends for Valentine’s Day! We used the little bees as pencil toppers, and they would be absolutely adorable as keychains or rearview mirror decorations as well! Just look how cute they are all stacked ontop of one another! At the top we have Bumble, the Queen Bee, and now our Chubby Bee! Find the free pattern for the smaller bees HERE!
Crocheting toys is so much fun, and this Chubby Bee would be perfect in nurseries, as gifts for little ones, or even as a small pillow/cushion in a child’s room! Find the free pattern HERE and once again, thank you so much to Annie of Anniegurumi for sharing this delightful pattern with us all! You can check out Annie’s Etsy shop HERE (where she also sells finished products), her blog, Facebook, and Instagram too! Stay tuned next week for a brand new crochet design that I will be sharing with you all!