Two months ago I received a lovely comment from a reader named “Alicia H.” who said that she had crocheted several of the scarves, hats and slippers that I had blogged about, and that she enjoyed my taste in crochet patterns. And so, she wanted to share a pattern for fingerless gloves that she had come across on Ravelry as she said they reminded her of something that I would blog about. To my delight, when I clicked through to the free pattern by Julee Reeves I LOVED what I saw! I was amazed that such beautiful cabling could be achieved through crochet since I was so used to cabling being only for knitting. Alicia was right in thinking that this pattern was right up my alley and totally my style- I excitedly began working on them amidst some other projects that I had on the go!
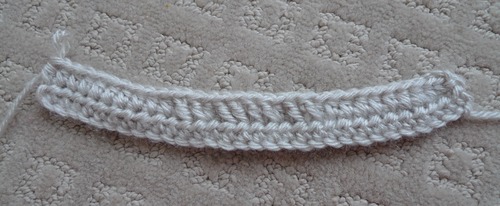
I actually used yarn from several years ago from a project that didn’t end up working out. I no longer had the label, but I used Lion Brand’s “Vanna’s Choice” (I believe the colour was “Linen”). When I first glanced through the pattern, it looked somewhat complicated with so many different stitches but it ended up being very simple. The beginning consisted of half double crochets, front post double crochets (that help give the stitches the raised effect) and back post double crochets (that help push the stitches back). Be sure to look up tutorials on how do these stitches for a quick review (see here) and to ensure you are placing your crochet hook in the correct areas!
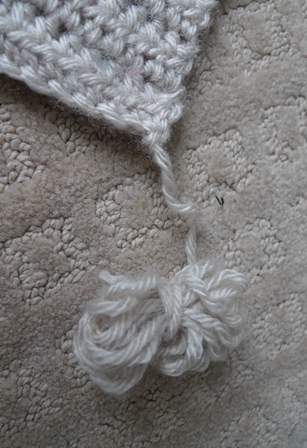
You also need to measure off yarn at the beginning as you will be using it to crochet the edging around the wrist warmer at the very end. I bundled it up like so to keep it out of the way.
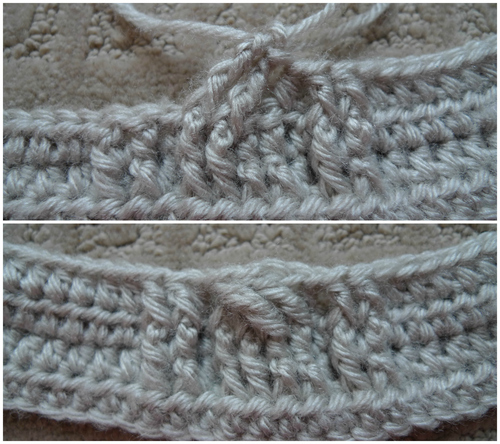
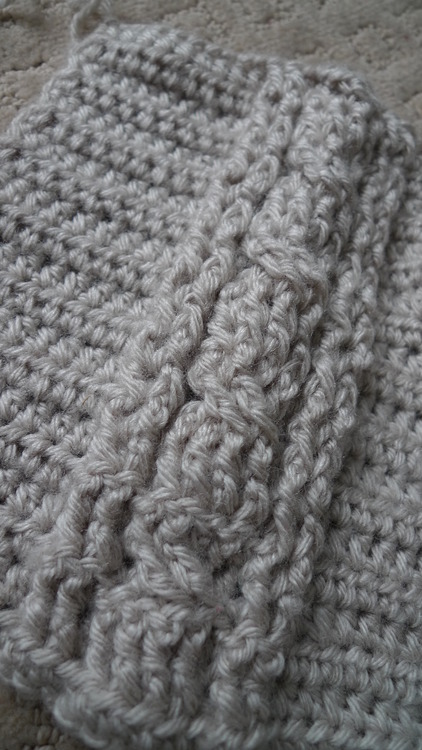
The fun part is when the cabling begins! This occurs when you skip the next two double crochets and FRONT POST TRIPLE CROCHET (note the triple as it is easy to misread it and think it’s a front post double crochet) around the next two double crochets. Then you go back and front post triple crochet around the two double crochets that you skipped. This is what gives the overlapping and crossing over cabled effect. If this sounds confusing, don’t worry- it’s all very clearly written out in the pattern!
As the pattern continues to build, you’ll see these beautiful raised stitches with the cables taking shape! Be sure to begin this project when you can fully concentrate and focus as you do not want to accidentally skip any stitches or misread the pattern!
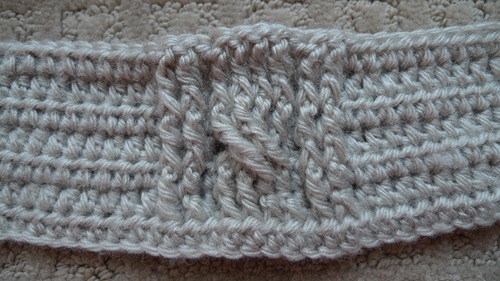
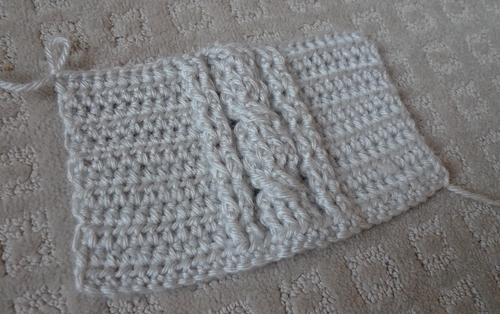
The pattern continues to repeat itself and once you get the hang of it, you don’t actually need to reference the written pattern anymore until the end! It works up quite quickly once you get going.
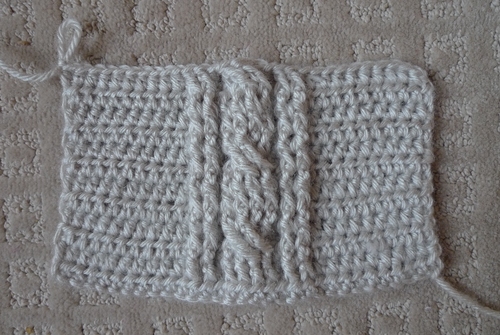
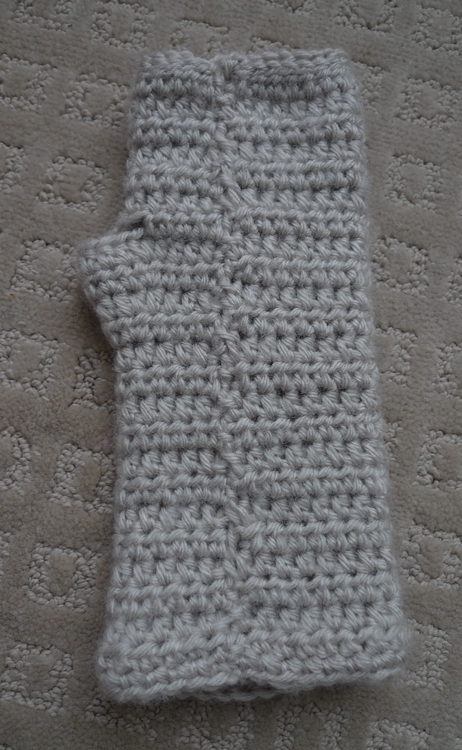
As you can see, this wrist warmer is worked in rows which is different than other gloves and wrist warmers I’ve seen that are worked in rounds!
Creating the thumbholes is very simple, and there are instructions on how to make them for both the left and right hand since you need to make the holes on opposite sides!
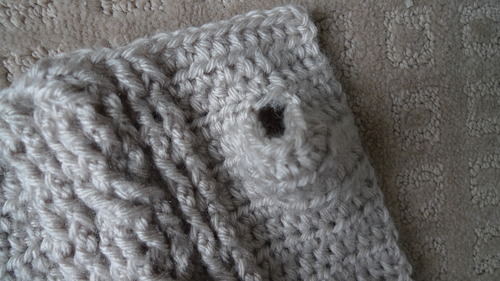
Once the cabling is all complete, you do some edging consisting of slip stitches to finish off the top.
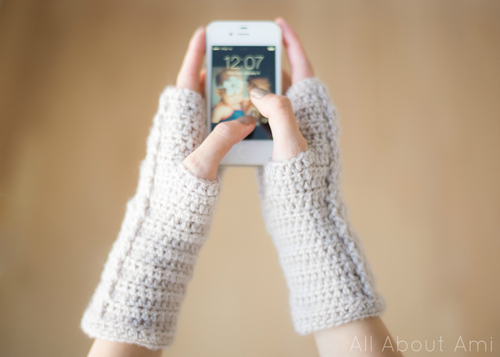
Here is a close-up of the cabling! I was surprised how easy it was to do this cabling as I always thought it was very difficult!
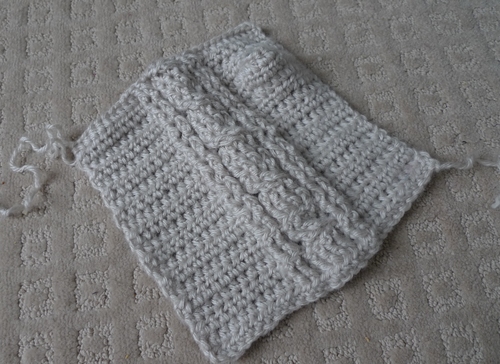
To finish off the wrist warmer, you match the ends of the rows and sew them together. Then you use the yarn that you bundled up from the very beginning to crochet an edging all around the bottom!
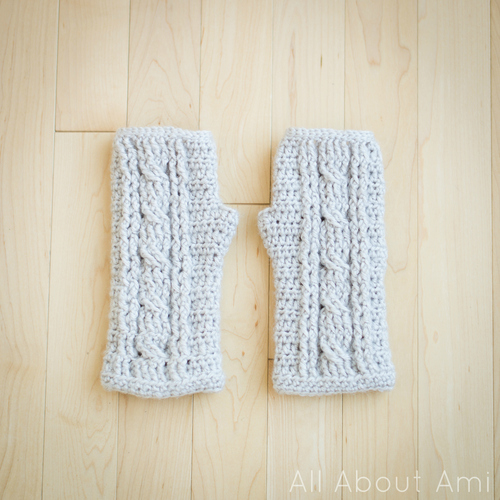
And here are my finished cabled wrist warmers! Don’t they look beautiful? The cabled pattern appears so intricate and complicated when in fact it is very easy to do! I was very impressed with this pattern and I cannot wait to apply this cabling technique to future projects!
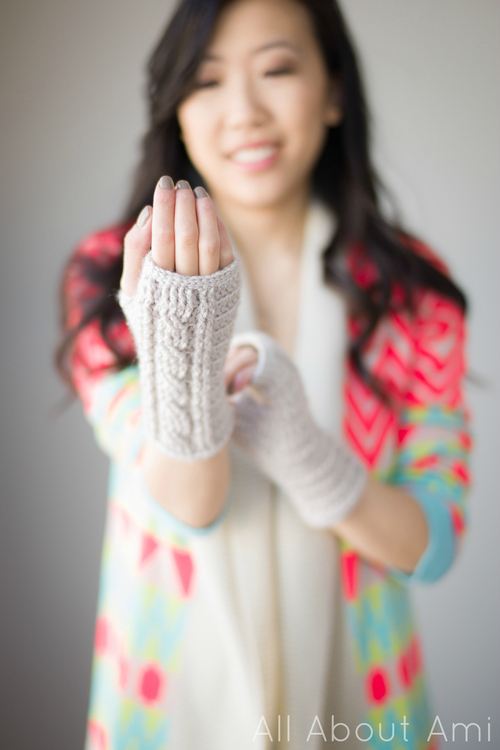
Trying on my wrist warmers- they fit perfectly…not too tight and not too loose! The pattern indicates what crochet hook to use to get different sizes (F or G hook). I would recommend doing a gauge swatch as well to ensure that the sizing turns out alright. I myself used a 3.75 mm (F) hook as I have smaller hands and wrists!
This is my very first time making, owning and wearing wrist warmers!
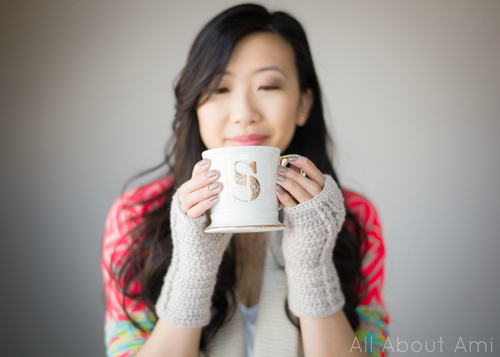
You can wear these if it’s a bit chilly indoors and you want to keep your hands warm while also being able to write, read a book, type on the keyboard or take a sip of tea!
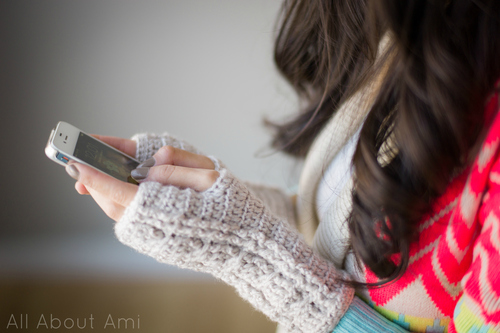
Of course, fingerless gloves also allow you the dexterity of your fingers so that you can text and go on your phone!
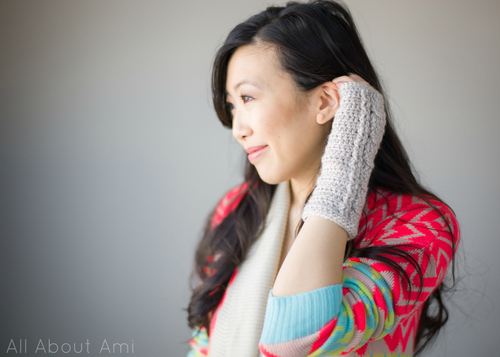
I think these wrist warmers look so elegant, romantic and delicate with the beautiful cabled design!
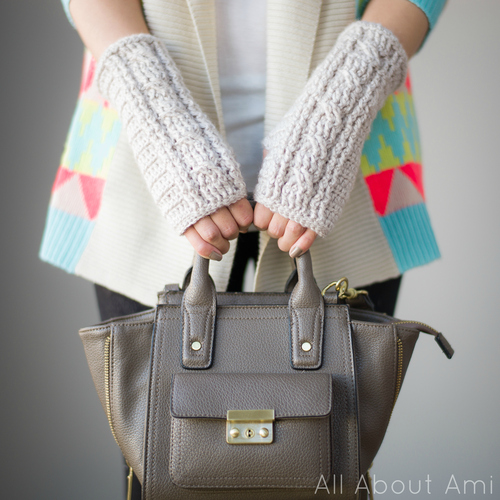
[Neon Jacquard Cardigan: Simons, Leggings: American Eagle Outfitters, Purse: Phillip Lim for Target, Wrist Warmers: Me!, Nail Polish: “Under My Trench Coat” by Sephora by OPI]
We had to include these next two photos because they were just too cute! As we were doing the shoot for these wrist warmers, look who decided to photobomb!
*Myla casually strolls in*: “Hey, whatcha guys doing over here? Taking some photos?”
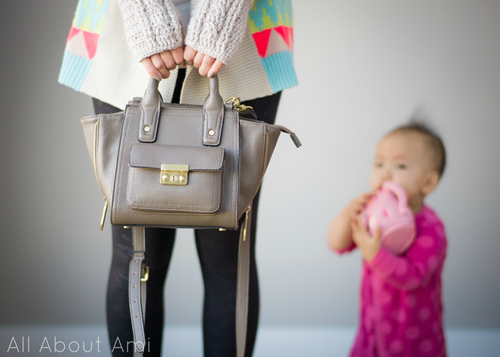
Myla: “Well don’t mind me…I’m just gonna stand here in the back and play with my musical teapot! Carry on with your business!” Gah…I love her cheeks…she is too kissable and huggable!!!
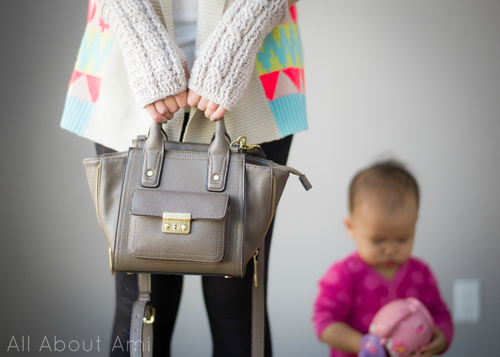
Cutest. Photobomb. EVER.
Thank you so much to Alicia H. for recommending this pattern to me! I am so happy with how these cabled wrist warmers turned out and I still cannot believe how easy the pattern was and how beautifully they turned out! You can find the free pattern by Julee Reeves HERE (Ravelry download) or HERE (pattern in blog post).
Some of you have messaged me, saying that you admire my work and that you have similar taste as mine- that is extremely flattering and I am so happy that my blog posts and projects are being so well-received! If there are any patterns that you have come across or that you have designed that you think I might like, please direct them to me! You can connect with me through e-mail (all_about_ami@hotmail.com), Facebook, Twitter or Instagram (@AllAboutAmi)! I love discovering new patterns and new techniques! I will definitely be applying this cabling technique to future projects and designs….perhaps some hats or scarves? Have you ever done cabling in crochet before? Let me know if you’ll be trying this pattern out and what you think of it!