
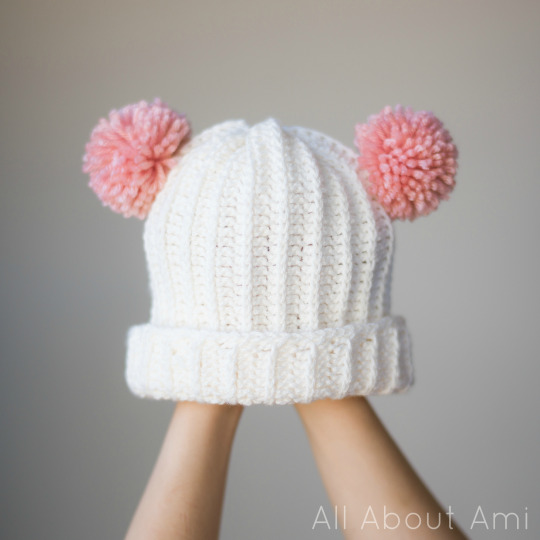
Last winter I saw some incredibly adorable baby hats in stores and on-line that I absolutely had to make: rather than placing the usual single pom pom ontop of the beanie, these hats had TWO pom poms ontop to make them look like bear ears! I thought they looked so cute and kept this idea tucked away for next fall/winter!
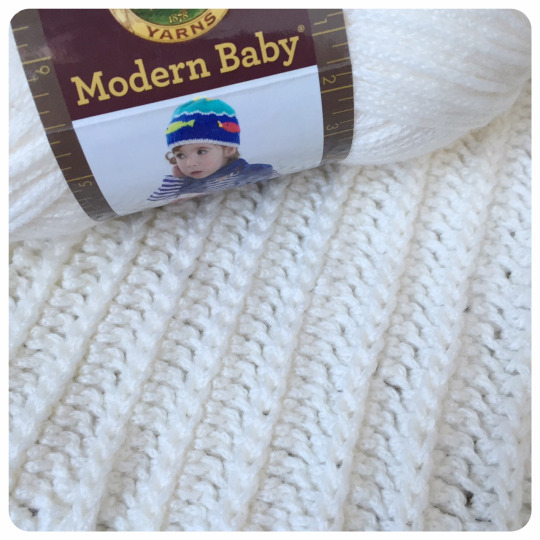
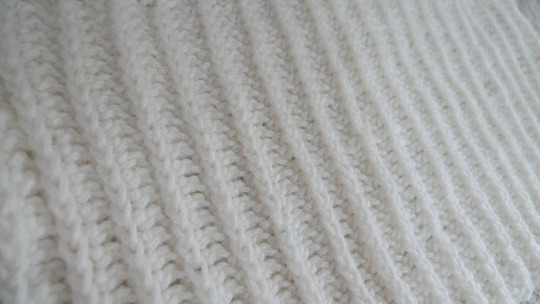
As I pondered what style of beanie to make and what yarn to use, I thought it would be the perfect opportunity to try out the beautiful cream “Modern Baby” yarn that Lion Brand had sent me. It is a light (level 3) yarn that is 50% acrylic and 50% nylon. The chainette construction of the yarn makes it appear that a single strand is composed of many different strands braided together. It has a great feel to it, does not fuzz up easily, and comes in some wonderful basic colours. As you can see in the picture below, the stitches come out very clean and distinct-looking. Some of you may be wondering how to achieve this almost “knit-like” pattern below…it’s very simple!
Let’s start off by explaining how to do the basic technique of crocheting in the third loop of half double crochets, row by row. First off, foundation half double crochet to your desired length. If you are unfamiliar with foundation stitches, this is a great way to avoid working into a series of chain stitches as the chain stitches and first row are all combined into one step! You can also determine the length as you go rather than having to guess with the series of chain stitches and possibly having to frog your work. To learn how to foundation half double crochet, see Moogly’s video and photo tutorial HERE! The initial length of these foundation half double crochets will be the HEIGHT of your hat (for a chart of suggested crochet hat heights, see HERE– keep in mind that you might want to allot for extra height if you want to fold the rim of the hat up like I did). This pattern is easily adaptable for all different sizes as you will soon see!
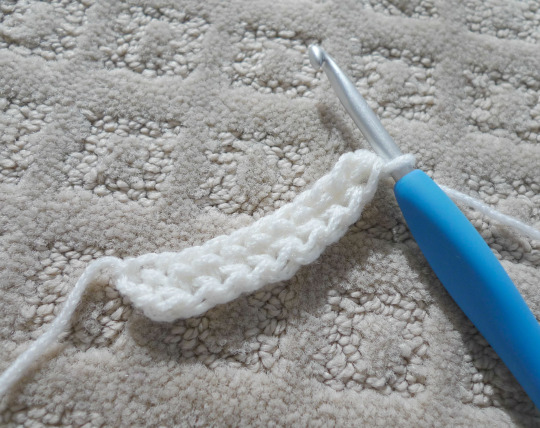
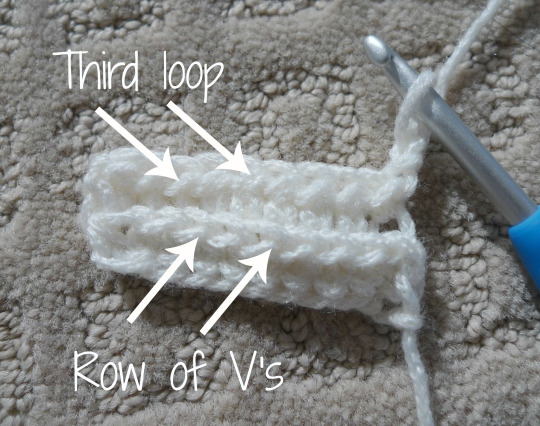
After you turn your work, you will see that there is a third loop behind the usual two loops that you work into. This third loop is where you will be doing your half double crochets from now on. For a detailed tutorial on how to find the third loop of half double crochets, see HERE. You may be familiar with half double crocheting in the third loop if you worked on my “Triple Luxe Cowl” pattern from last year! This is very similar, except now we are working row by row rather than in a round.

When you have finished half double crocheting in all the third loops, you then turn your work…
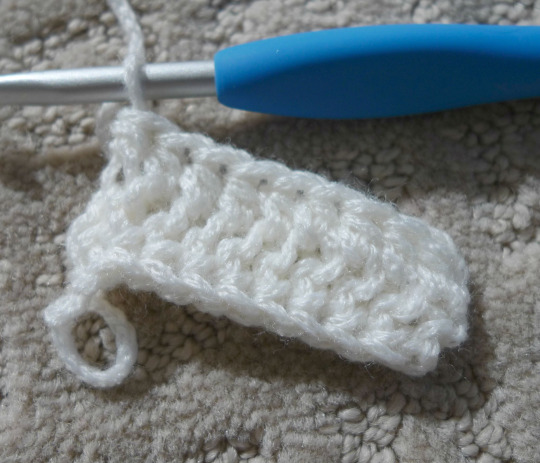
You will now see that by crocheting in the third loops, a row of V’s was pushed forward as shown below. You simply repeat this pattern and keep crocheting in the third loops which will always be facing you (rather than when working in the round when the third loop is on the side away from you).
This is how this beautiful pattern is developed!
You keep crocheting row by row until you have the desired width of your hat (or circumference of the hat). Keep in mind that this construction can stretch quite a bit too! As an optional step, you can slip stitch LOOSELY along the edge to give the rim a more polished look. If you slip stitch too tightly, you will lose the stretchiness of the hat and it will be difficult to wear. In addition, if you want the V’s to be pointing upwards in your final product (as I did), make sure they are pointing downwards during this step when you are slip stitching along the edge.
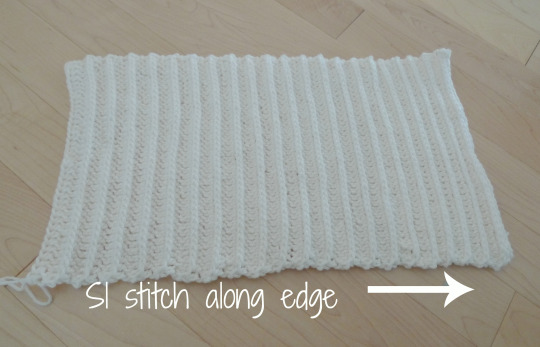
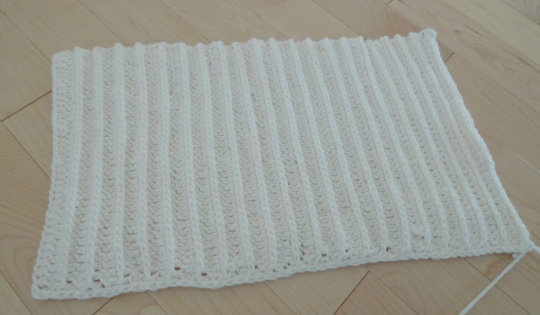
After slip stitching along the edge…
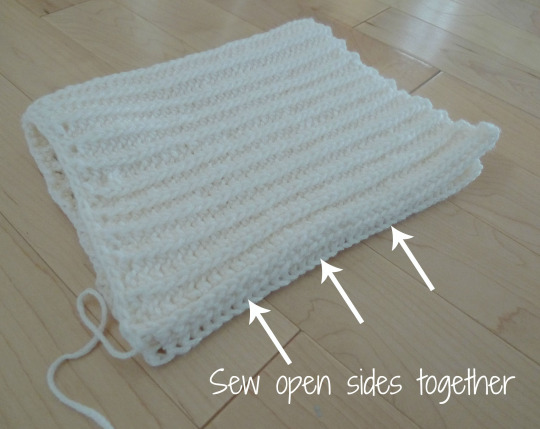
Fold your piece in half so that the right side of the slip stitches are on the outside (so you can see the slip stitches).
Sew the open ends together by whip stitching with a yarn needle or crochet hook (see tutorial HERE if help is needed).
After the sides have been sewn shut!
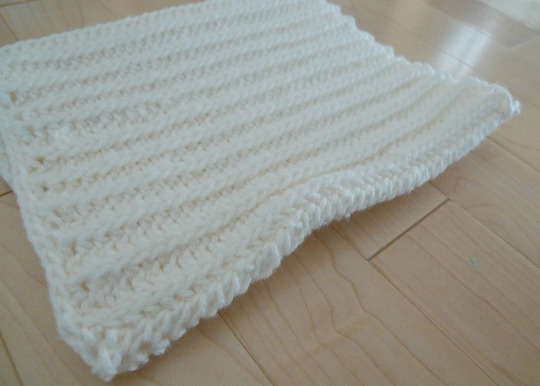
Next, fold the piece inside out so that the V’s are now pointing upwards (and the slip stitches are facing the inside). Alternatively, you could also seam up the side with the V’s pointing upwards and the slip stitches on the inside of the hat to begin with if you don’t want to fold the piece inside out. Close up the top of the beanie by sewing it shut. I kept pinching opposite ends together and sewing them shut with a yarn needle. You could also use this technique HERE to seam up the top!
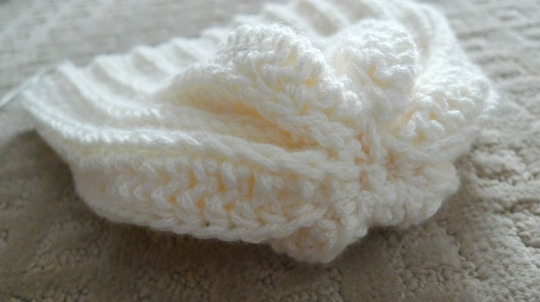
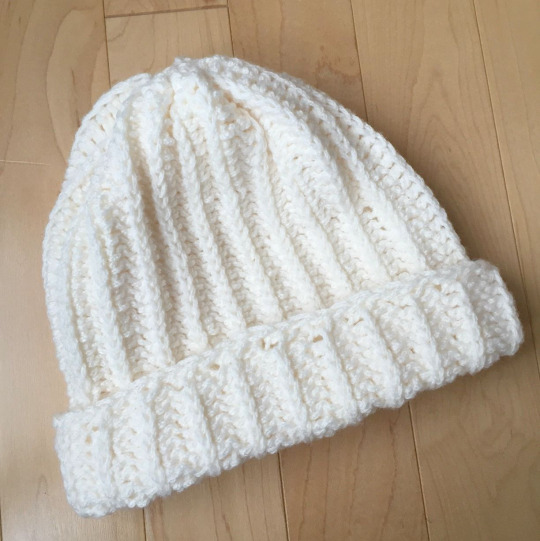
Hurray, here is the completed beanie with a nice thick rim folded up! As you can see in the photo below, the V’s are all facing upwards and the row of slip stitches is now visible with the rim flipped upwards. These slip stitches give a more polished look to the rim!
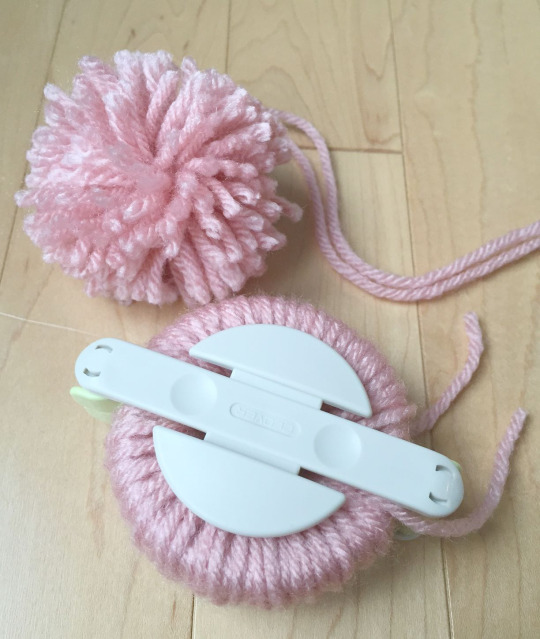
Now the fun part…pom pom time! I used my trusty Clover pom pom maker (the smaller green one) to make two light pink pom poms using Vanna’s Choice yarn in Pink.
I tied the two pink pom poms onto my cream beanie and it was complete!
************************
Here is the pattern for my “BEAR POM BEANIE”!
Materials:
- Cream yarn (I used Modern Baby) and Pink yarn (Vanna’s Choice)
- 5 mm Clover Amour crochet hook
- Yarn needle
- Optional: Clover Pom Pom Maker
***I sized this hat to fit my 9 month old daughter, but this pattern can be easily adapted for various sizes and people of all ages!
Row 1: Foundation half double crochet 40, or to desired length. This length will be the HEIGHT of the hat. See chart HERE for sizing- add additional length for folded up rim if desired).
Row 2: Chain 2, turn. Working in third loops only, hdc across.
Repeat Row 2 until desired width to achieve desired circumference of the hat. I crocheted until Round 43 and my finished rectangle was 35.5 cm by 19.5 cm.
Slip stitch VERY LOOSELY across one side (across the rows) if more polished look is desired. Fold rectangle in half. Sew open ends together and seam up top of beanie using a yarn needle (see video HERE for help).
Make two pom poms (use Clover Pom Pom maker for added ease). Attach pom poms to sides of beanie (I tied mine about 6 cm from the center of the top on each side).
************************
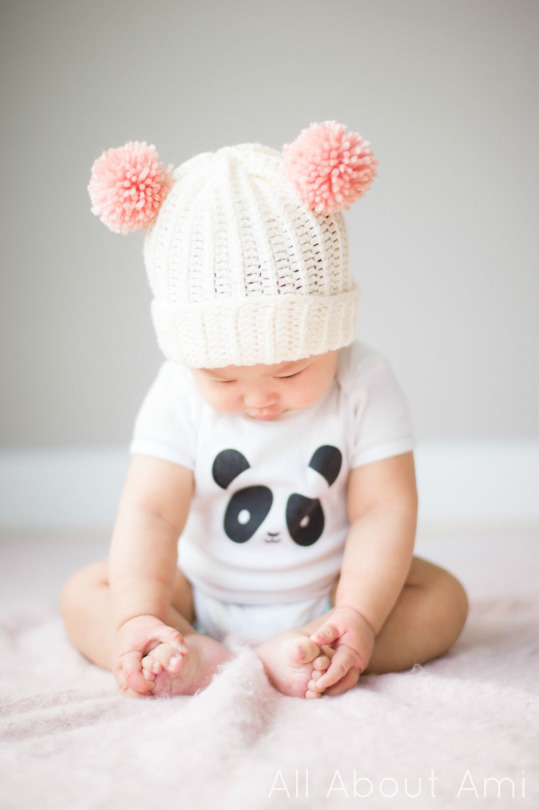
Doesn’t our baby Brielle look incredibly adorable wearing her new beanie? I couldn’t stop squealing the first time we put it on her as she just looked so darn cute. Here she is at 9 months old and she is just as smiley as ever! She now proudly has fourth teeth as you can see!

This beanie is very warm and will be able to fit her for a while since it stretches quite a bit and the cuff can be adjusted. I think the light pink pom poms against the cream yarn look sooo sweet. You could make a cream/white base for the hat and change up the colours of the pom poms for all different looks! You could easily swap out the pom poms by simply tying multiple bows to secure them to the beanie rather than tight knots. Blue pom poms, grey pom poms, black pom poms…they’d all look so cute and very modern!

The ribbed texture of this beanie is beautiful and gives a gorgeous knitted look! And in case you’re wondering where her adorable bodysuit is from, it’s the “Kawaii Panda Bodysuit” by the Canadian family-run business Whistle & Flute (use discount code “ALLABOUTAMI” to get 10% off your order)!
Discovering her toes! I just loove her little droopy cheeks 🙂
I adore crocheting these special items for my girls, and I know that Brielle will be wearing this Bear Pom Beanie a lot this winter- it pretty much matches with everything and will keep her very warm!

Thank you for reading this post and I hope that you enjoying making your own “Bear Pom Beanies” for all the little bear cubs in your life! They would be so special for your own little ones or as gifts for your friends’ and families’ little ones! You can adjust the sizing for absolutely anyone from a newborn to an adult since the construction is so simple. You can also try using this lovely ribbing pattern with chunkier yarn or for a slouchier beanie! I know I will be using this pattern for a beanie of my own in the future 😉
If you’ve been following my blog for a while, you may recognize that the construction is essentially the “Easy Ribbed Pom Pom Beanie” which you can read about HERE! Have fun spreading the pom pom love and don’t forget to follow me on
on Facebook, Twitter (@AllAboutAmi) and Instagram (@AllAboutAmi) to keep up with my work!

{On me: Berg & Betts Gold Chained Watch in Cream, Forever XXI Black & White Striped Sweater (old) & Cotton On top (old)}
This pattern is an original pattern by Stephanie Lau of All About Ami. Please do not claim this pattern as your own. If you wish to share this pattern, you may link to this pattern but please do not reprint it on your site. You may keep a copy for your own personal use but please DO NOT sell the pattern or distribute it.
You may sell products made from this pattern but please clearly credit the design to me, Stephanie Lau of All About Ami, and provide a link to my blog www.AllAboutAmi.com. Permission is NOT granted for mass production or factory manufacturing of any kind. Thank you for being respectful and for your understanding!
Amazon affiliate links:
Lion Brand Yarn Modern Baby Yarn, Cream
