***This post is sponsored by Boye Yarn Crafts! Please note that this is the step-by-step blog post for our amigurumi turtle- the free pattern can be found HERE! You can also purchase an INEXPENSIVE AD-FREE PDF of this pattern on Etsy HERE and on Craftsy HERE! This beautifully formatted PDF includes the step-by-step pictures and is a total of 5 pages including the cover page! You can also find the Turtle PDF in my new Amigurumi PATTERN BUNDLE HERE!
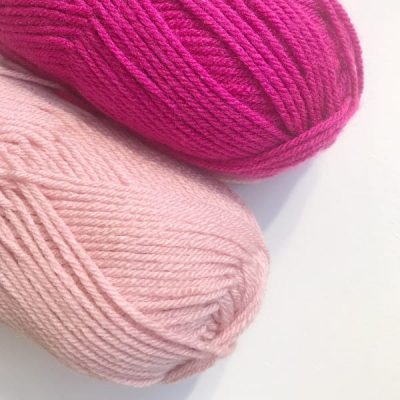
Two years ago, Boye Yarn Crafts reached out to me and asked if I would be interested in designing an amigurumi pattern for their website. I happily accepted and was thrilled that I would be able to post the pattern on my blog as well! Ryan and I had always wanted to try designing a turtle and we wanted to steer clear of any of the zodiac animals since our tradition is to crochet each zodiac animal when it is their year (e.g. 2018 is the Year of the Dog). After sketching our design, we settled upon using a favorite acrylic yarn of many: Vanna’s Choice by Lion Brand Yarn. We went with a cream colour for the head, limbs and bottom of the shell; white for a tube that would go around the shell; and two shades of one colour for the shell (one darker and one lighter), for example dark and light green, or dark and light pink as pictured below.
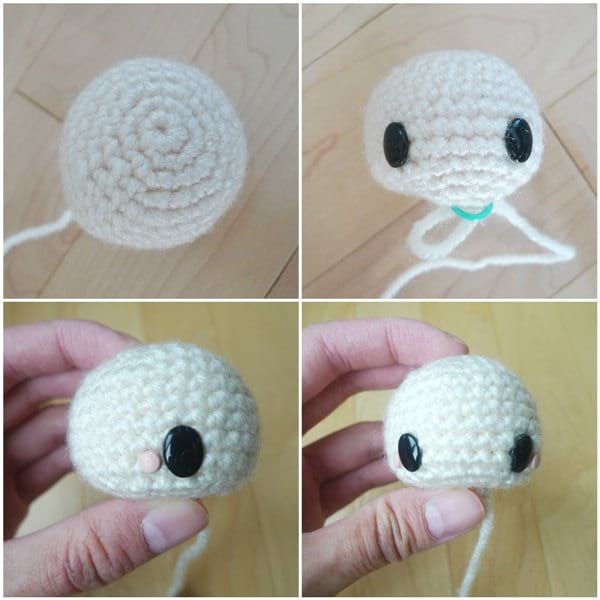
We started off by crocheting the head- rather than using normal round safety eyes, we opted to use oval safety eyes for a different look! We also used pink brads for the rosy cheeks which give a very clean effect.
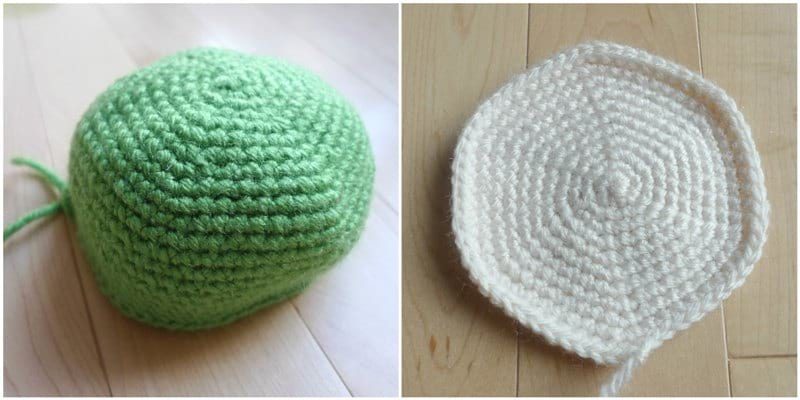
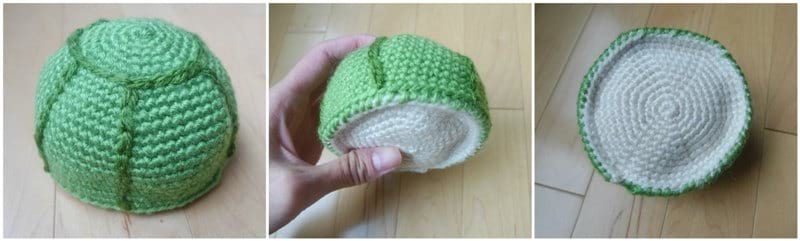
Using the lighter green yarn, I crocheted half a sphere for the shell. I then used the cream yarn to crochet the bottom of the shell.
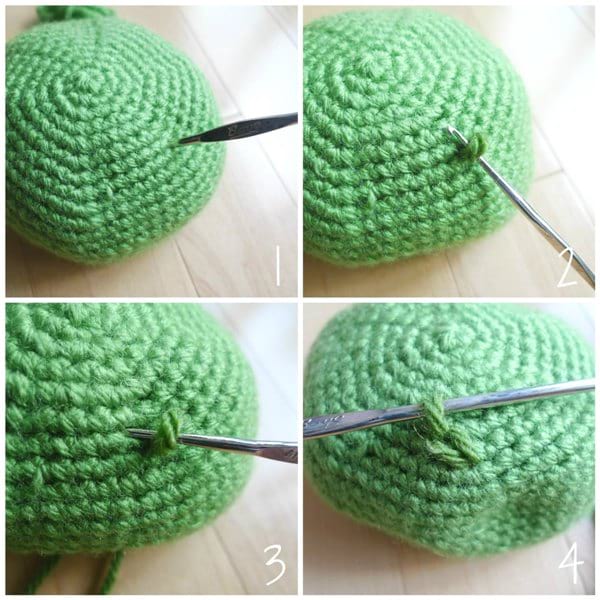
To add some detail and accents to the turtle shell, we used a technique called surface crochet with the darker green yarn. I learned how to surface crochet using Moogly’s very helpful tutorial and video HERE! Surface crochet is a way to add slip stitches onto the surface of a piece that gives a very clean look, and you can choose any direction you would like to crochet (it’s very free form as you could even stitch a letter or a design).
- Insert your crochet hook into the turtle shell where you would like to begin.
- With the darker green yarn being underneath the shell, pull up a loop.
- Insert your crochet hook back into the shell in the direction that you would like to surface crochet.
- Pull up the darker green yarn from underneath the shell and continue to pull through the loop on the hook. One stitch has been surface crocheted onto the shell!
I continued in this manner and crocheted a circle around the shell between Rounds 6 and 7. Next, I surface crocheted six lines originating from the circle downwards towards the bottom of the shell, making sure the lines were all evenly spaced.
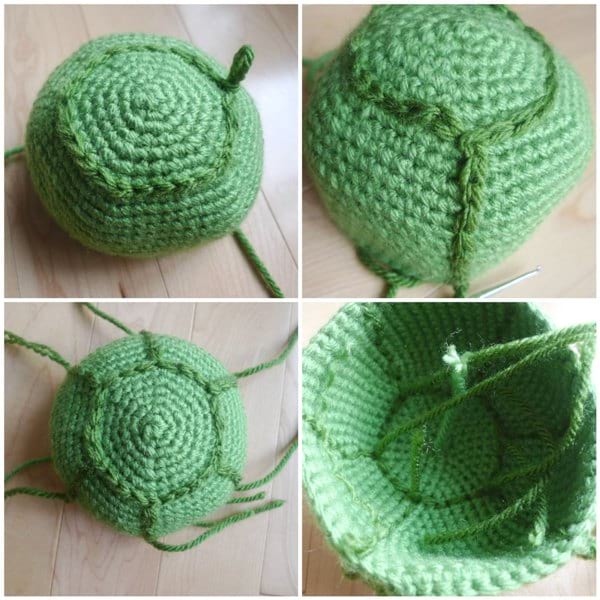
We then stuffed the shell gently and sewed the cream piece onto the bottom of the shell (we made sure not to overstuff the shell otherwise the bottom part would puff out). Thankfully all the tail ends from the surface crochet were now hidden within the shell!
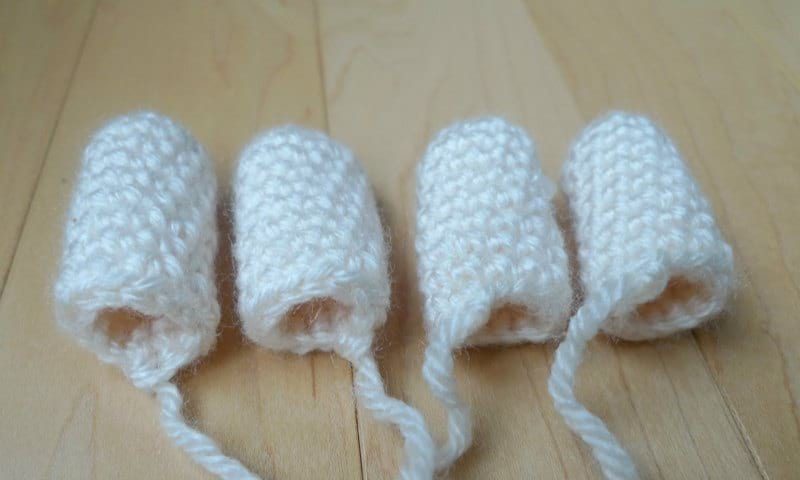
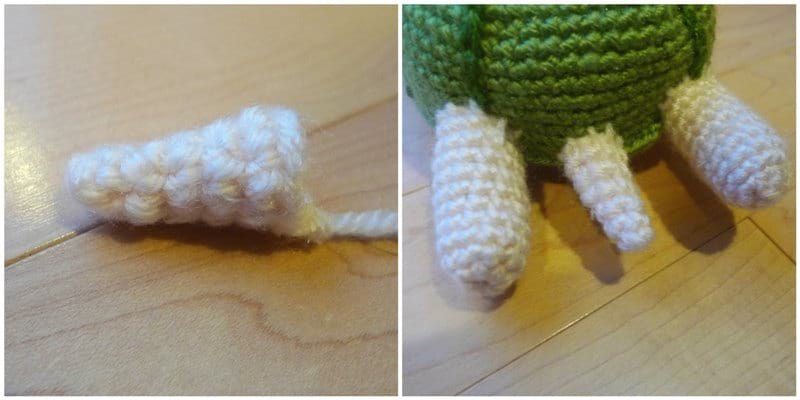
I crocheted four tubular limbs: two arms and two legs.
First we attached the head to the top. Next, we positioned the arms on either side of the head and attached it to the shell. We then attached the legs to the back of the shell.
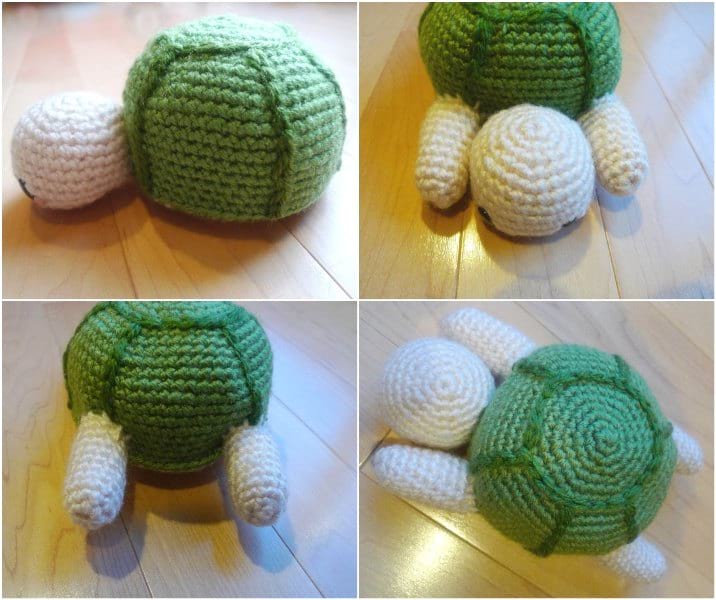
We crocheted a small conical tail and attached it between the legs.
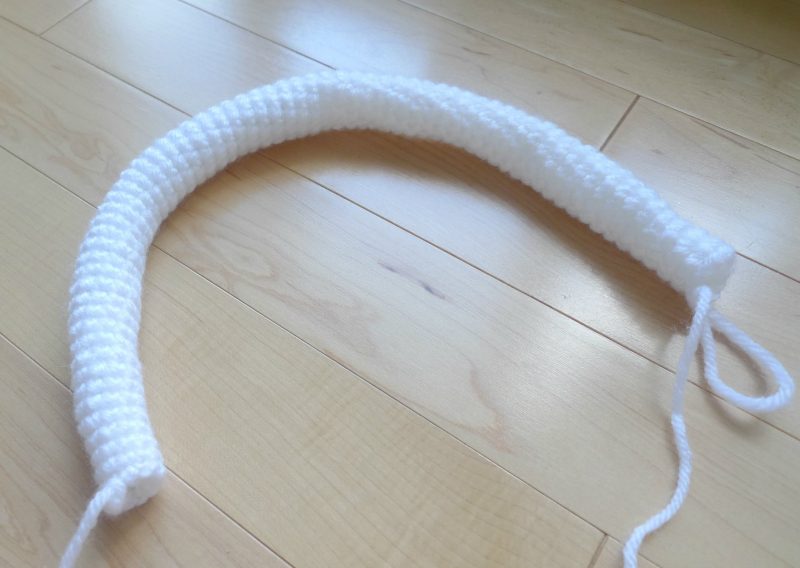
Using white yarn, we crocheted a long tube and stuffed it as we went along. I would recommend using a pen, chopstick or the back of the crochet hook to help push the stuffing into this tube. After sewing the open ends together to form a circle, it was ready to be attached to the turtle shell.
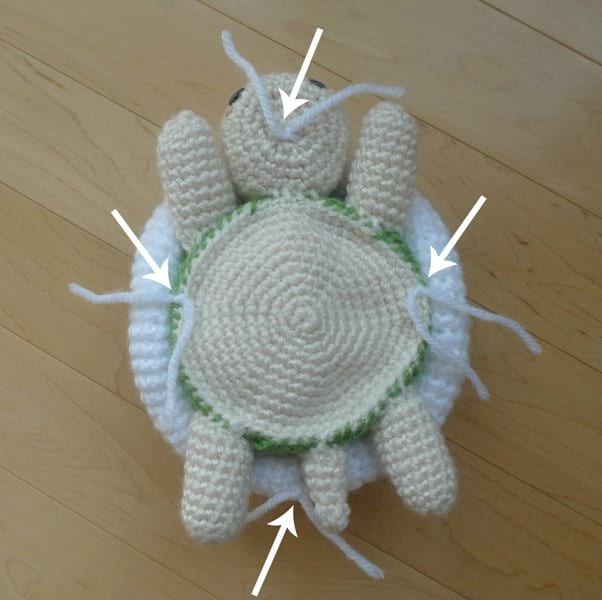
After placing the white tube onto the shell of the turtle, we then secured it into place. Rather than whip stitching around the entire tube, we found that using several points of attachment was sufficient. We cut a strand of white yarn, inserted it through the bottom of the turtle, through the bottom of the tube, and back down through the turtle (about one stitch away from point of first insertion) and tied several knots. For our turtle, we used FIVE points of attachment to secure the white tube into place: in the head (which tags down two spots- see further explanation below), on both sides of the shell, and towards the tail (for this point we inserted the needle through the tube first, then the shell, and then back through the tube).
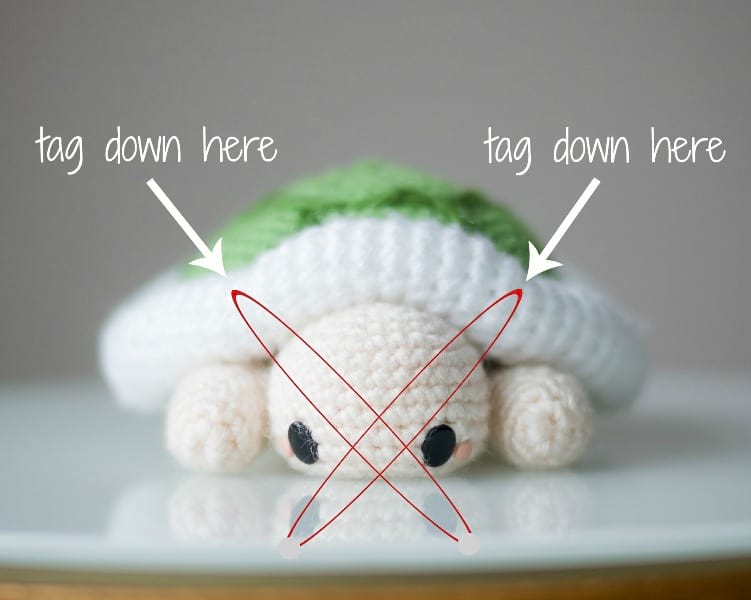
In order to make the white tube wrap around the head more snugly, we tagged the white tube down in two different locations through the head as shown below.
Here is our finished turtle!
![]()
I love his special puffy shell and rosy cheeks! Isn’t his side profile so adorable?
![]()
The surface crochet stitches are a great way to add some detailing and visual interest to the shell – you could even stitch on a special letter or design when personalizing your own turtle!
![]()
Another function for this sweet turtle could be as a pin or needle cushion atop your desk or in your workspace! We immediately took the pins out of our crochet pal after snapping this pic as we didn’t have the heart to keep the needles poked in his shell haha…
![]()
We needed to send our green turtle away to Boye for photographing, so we parted ways with our sweet turtle and packaged him up. Of course, I wanted to have an amigurumi turtle for our own collection, and it was a great way for me to double check our pattern- thus, we made a pink turtle!
![]()
For our pink turtle, we gave her eylelashes and a different smile, like a sideways 3. You can opt to omit a smile, embroider a simple smile or perhaps a line- change up the expressions to your liking! Pink is my favourite colour, and I love how it’s such a whimsical colour choice for a turtle shell.
![]()
Can you imagine making a whole collection of turtles using all the colours of the rainbow? Yellow, purple, blue and orange shells…they would all look adorable and oh so bright! You just need to find two shades of the same colour! Vanna’s Choice is a great yarn option since there are so many shades of different colours available in this line!
![]()
The crochet turtles look so sweet when they are stacked upon one another, don’t they?
![]()
Once again, you can find the free pattern for our crochet amigurumi turtle HERE! Can’t wait to see all your colourful turtles! If you love this turtle design, do check out my new Amigurumi PATTERN BUNDLE HERE! This bundle contains all 27 of my original amigurumi designs that we created since we started blogging in 2011, and it’s a great way to have all my patterns stored in one place, ready to be printed out and used whenever you want! Thank you for your support!