***You can purchase an INEXPENSIVE AD-FREE PDF of this pattern on Etsy HERE and on LoveCrochet HERE! This beautifully formatted PDF includes the step-by-step pictures and is a total of 4 pages including the cover page! There is also a kit available on the Lion Brand Site, and you can make TWO purses with one kit HERE!
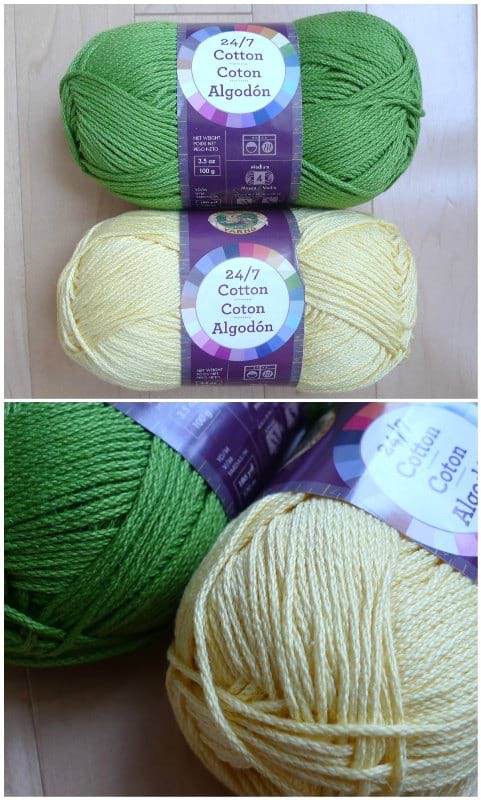
I love how versatile crochet is as one day you can be making a sweater, and the next day you can be making a tiny stuffed animal! I designed and crocheted an elegant “Regency Reticule” for a Pride & Prejudice ball that we attended, and when I posted about it on social media, a follower named Carmen left a comment on Instagram saying that she had turned this delicate reticule into a pineapple! I thought this was such a brilliant idea as the general shape did indeed look like a pineapple with it cinching towards the top. I was curious to see how using yellow and green would completely change the look, so I decided to try making a pineapple as well! I knew exactly what yarn I wanted to use for this pineapple project: Lion Brand Yarn‘s 24/7 Cotton with its crisp stitch definition and vibrant colours! It is a worsted weight (level 4) mercerized cotton that has 100 g in each ball- I used the colours “Lemon” and “Grass”.
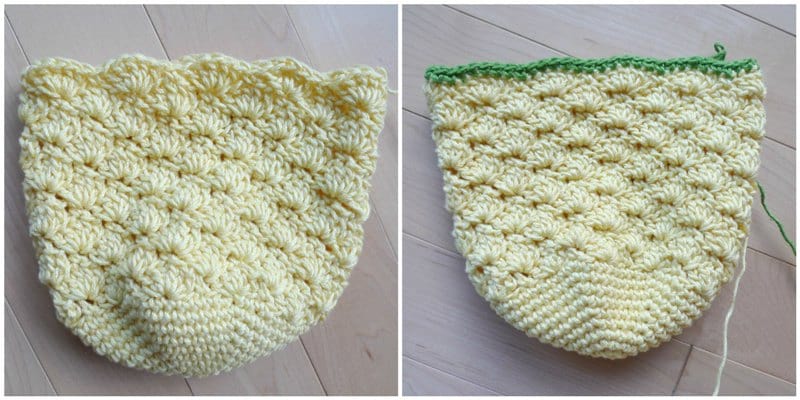
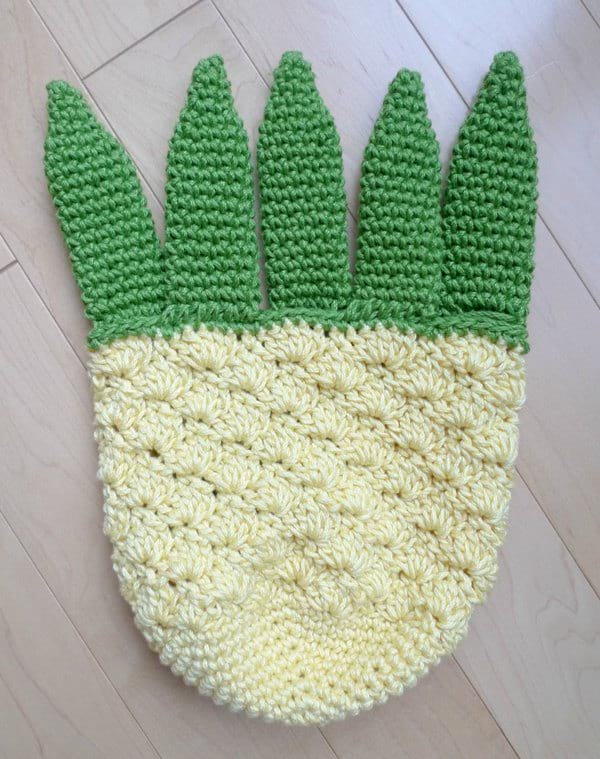
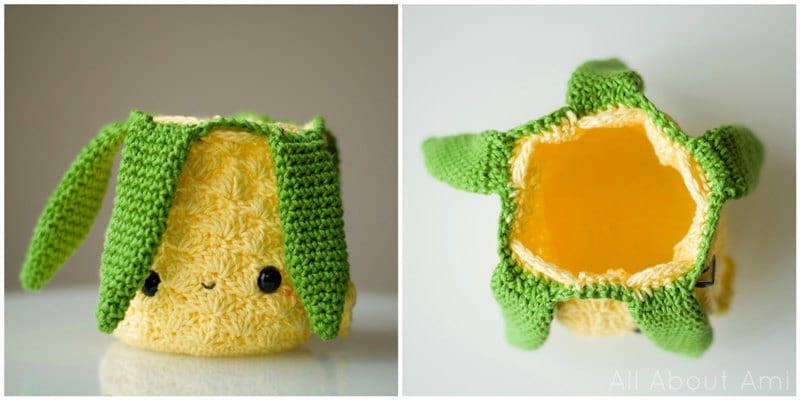
To begin, I crocheted the flat base at the bottom working single crochets in a continuous round, increasing round by round using a 3.5 mm hook. It was tricky figuring out the sizing as I did not want my pineapple purse to be as large as the regency reticule. I ended up making it too big twice and had to frog my work. After reaching 60 stitches in the last round, this ended up being a good size to begin the solid shell stitch rounds.
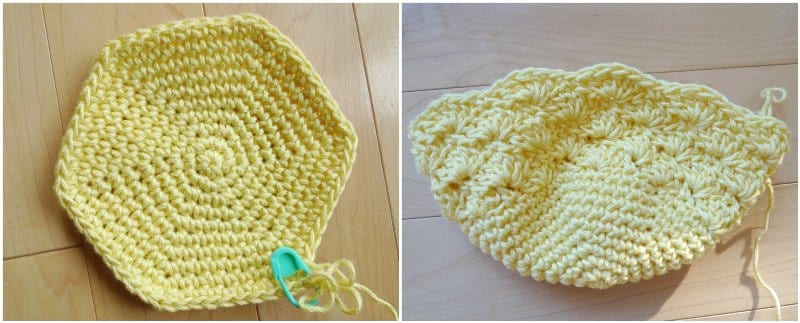
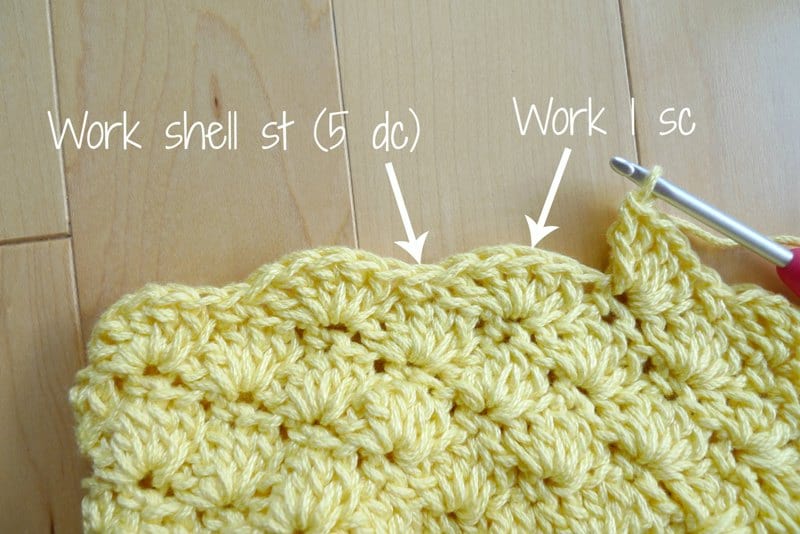
The solid shell stitch gives a very delicate and romantic look and is very simple to crochet. The shell stitch is created by working 5 double crochets in one stitch, and these shells are alternated with 1 sc that help form the “dips” between the shells. In subsequent rounds, always remember that 1 sc is worked at the top of the shells from the previous round (i.e. in the 3rd double crochet), and the shells (i.e. 5 dc’s) are worked in the dips or lone single crochet from the previous round. This stitch is very fun to work round by round and goes by quickly! To see a video of this stitch in action, check out Moogly’s tutorial HERE!
After 11 rounds of solid shell stitch, I switched to green yarn and worked 1 round of single crochets to help smooth out the shells at the top.
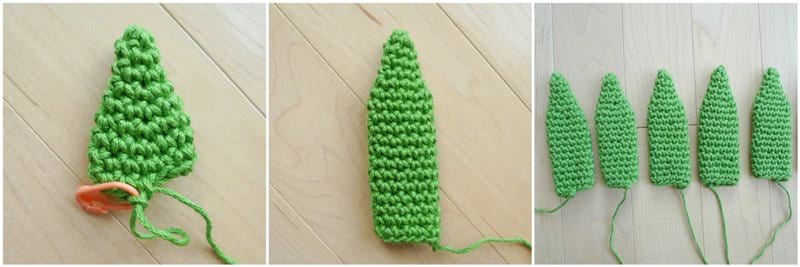
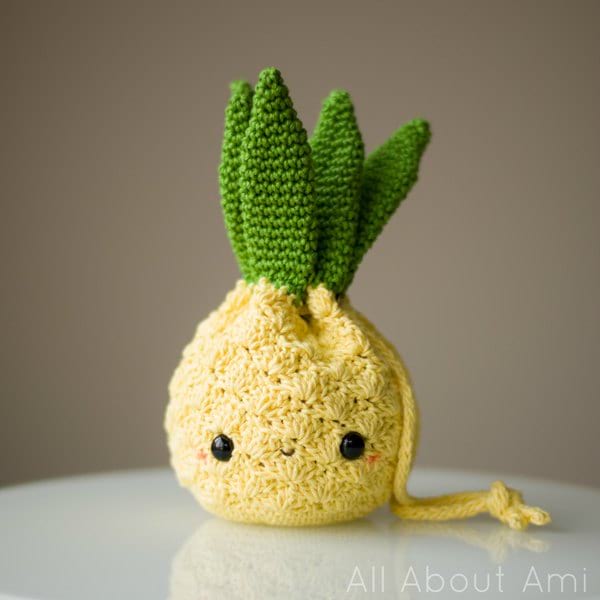
Next, it was time to crochet the leaves using green yarn! I shaped a pointy tip towards the top, expanded outwards, and then maintained the same size for the rest of the rounds. I crocheted 6 leaves but ended up only using 5 of them in the finished pineapple!
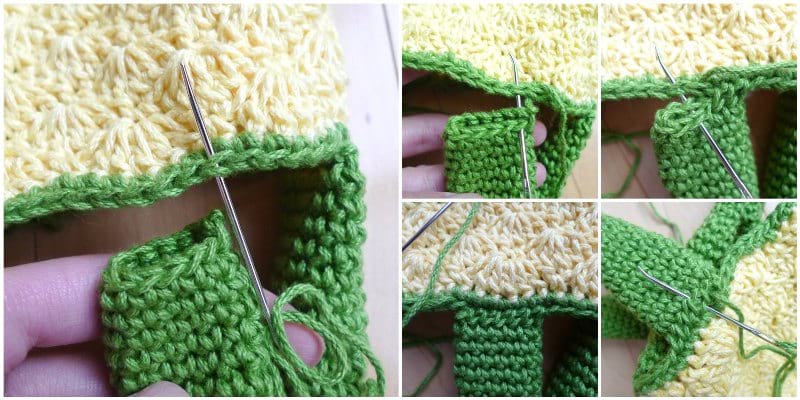
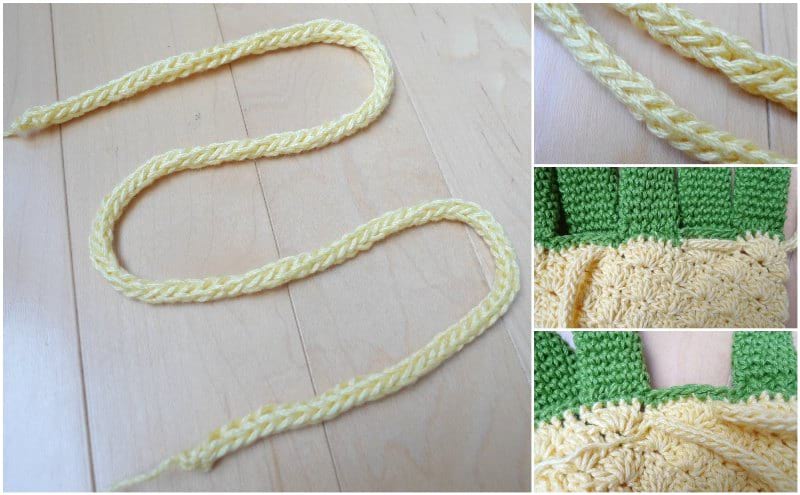
I then used my bent tip yarn needle to sew the leaves onto the pineapple purse. I positioned each leaf onto a shell stitch from the last shell stitch round. I flattened the leaves and inserted my needle into both the front and back stitches of the leaf (to seam it shut at the same time) and the green stitch on the pineapple purse, whip stitching these stitches together. To make this attachment extra secure, I whip stitched back the other way as well.
After securing the first leaf, I attached the next leaf two shell stitches away, thereby leaving one shell stitch gap in between each leaf.
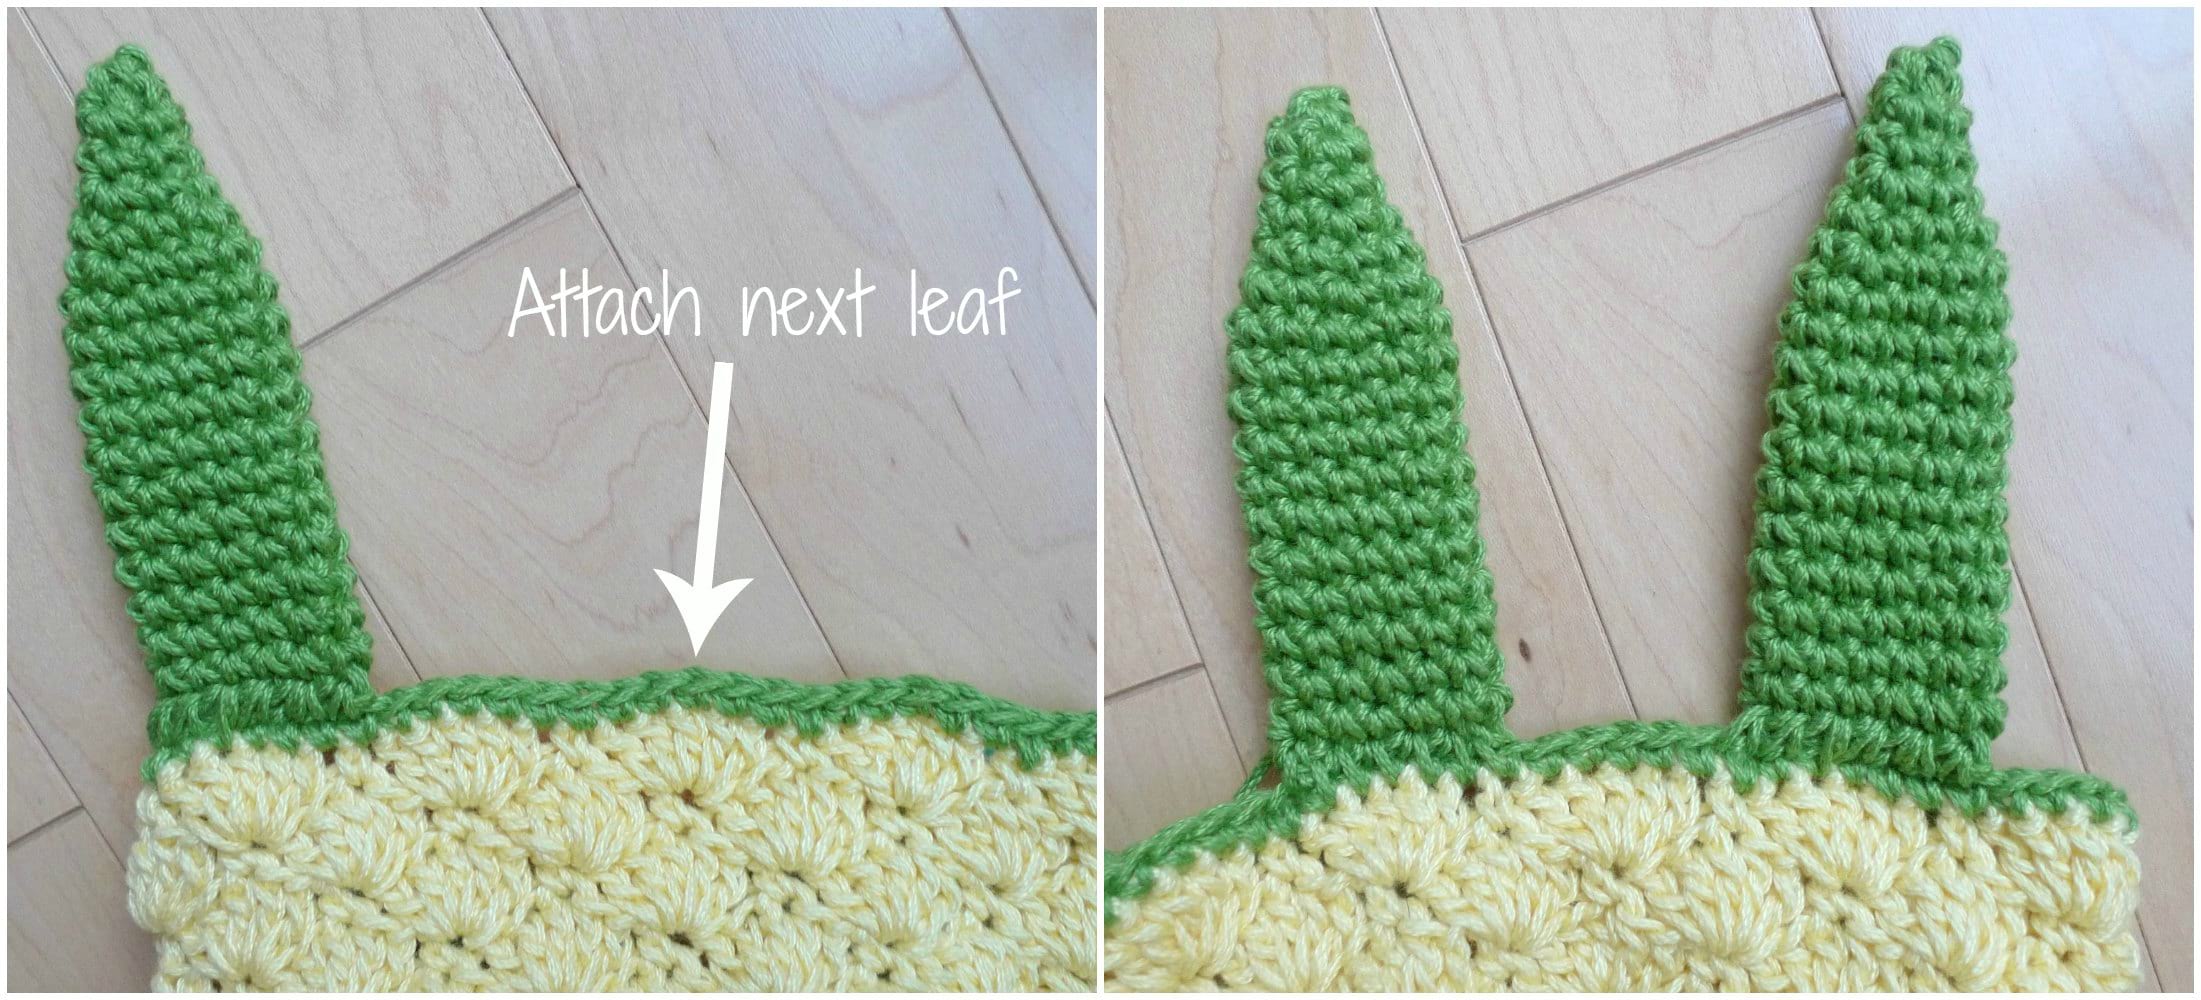
After attaching all five leaves onto the top of the pineapple, the green leaf portion was complete!
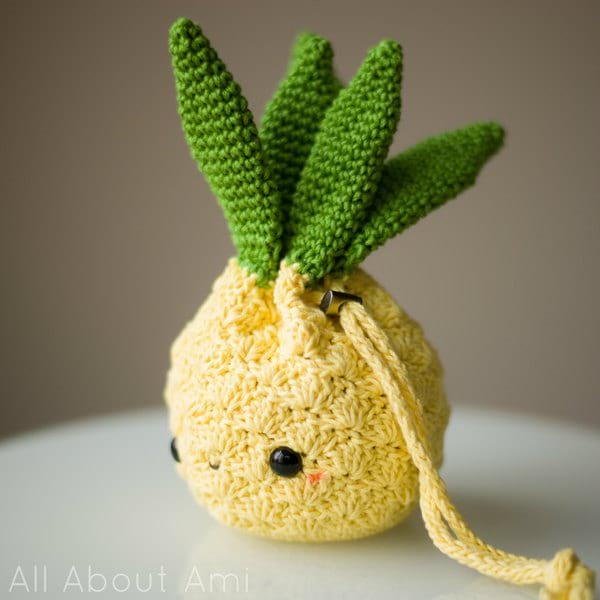
To form the drawstring closure, I learned how to crochet an I-cord using Planet June’s helpful tutorial HERE! To make a tighter cord, I used a 2 mm hook and made my drawstring 20.5″ long. I then weaved this I-cord in and out of the spaces between the shell stitches at the top of the yellow portion of the pineapple purse (between Rounds 21 and 22).
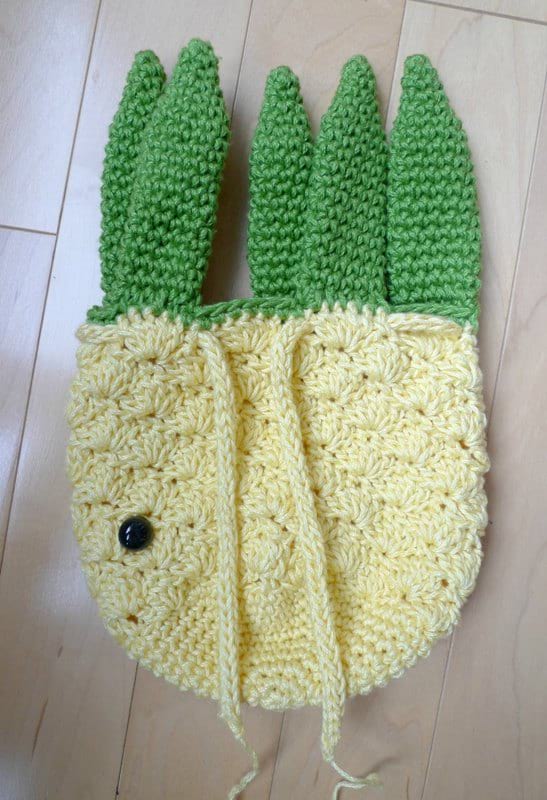
After weaving the I-cord around the entire circumference of the opening, both ends were protruding from the same side.
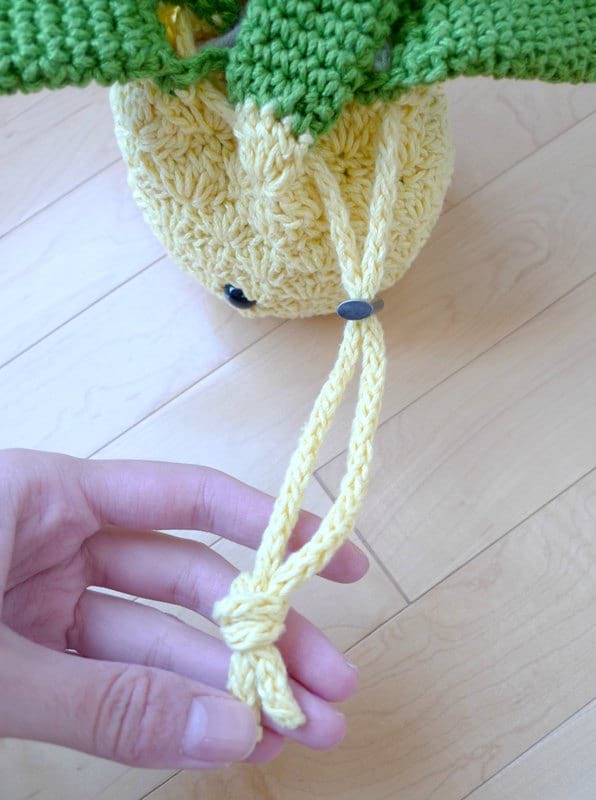
We found a cord lock from Fabricland and threaded both ends into it (I would recommend finding a larger cord lock if possible as it is a tight squeeze in this cord lock that we found). Next, we tied the ends into a knot and the closure was complete!
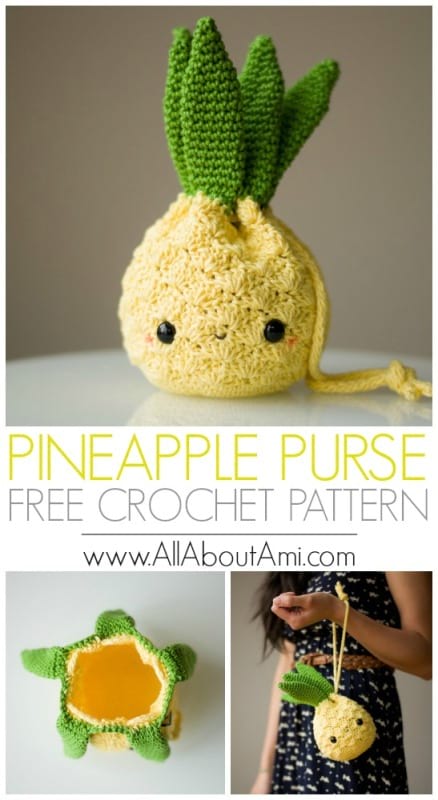
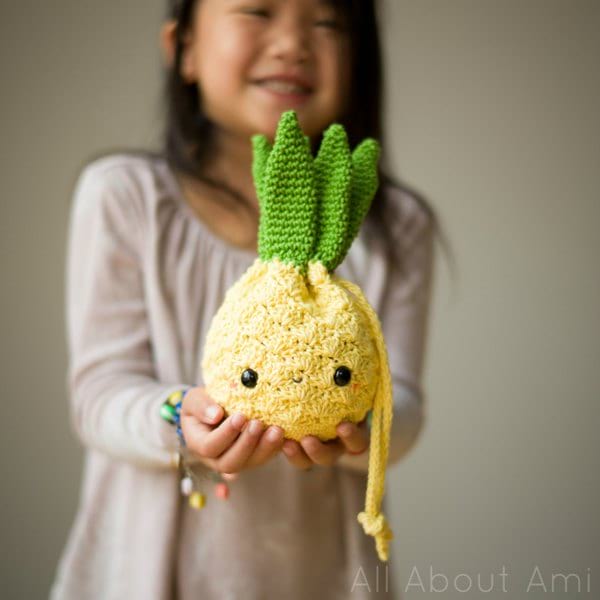
Somewhere along the way, Ryan and I were chatting about how cute it would be to give this pineapple purse a face and make it an amigurumi! I’m so glad we did as adding a face really brings this sweet pineapple to life! We added the eyes between Rounds 13 and 14 about 3 stitches apart. Ryan used brown embroidery floss to add a tiny smile and a pink Sharpie to add sweet cheeks!

**************************************************************
Here is the free pattern for my Amigurumi Pineapple Purse:
***You can purchase an INEXPENSIVE AD-FREE PDF of this pattern on Etsy HERE and on Craftsy HERE! This beautifully formatted PDF includes the step-by-step pictures and is a total of 4 pages including the cover page! There is also a kit available on the Lion Brand Site, and you can make TWO purses with one kit HERE!
Materials:
- 3.5 mm Clover Amour hook and 2 mm Clover Amour hook (for I-cord)
- Yellow and green worsted weight cotton yarn (I used 24/7 Cotton by Lion Brand Yarn in Lemon and Grass- on the Lion Brand site HERE): ~ 45 grams of yellow and 33 g of green needed (you can actually make TWO pineapple purses with 1 skein of Lemon and 1 skein of Grass!)
- Cord Lock
- 12 mm safety eyes
- Brown embroidery floss for mouth
- Yarn needle (bent tip helpful for attaching amigurumi parts- see HERE)
- Stitch Markers
- Pink sharpie (for cheeks)
- Rope (optional if you do not want to crochet an I-cord for closure)
- Fiberfill (optional if only amigurumi is wanted, not a purse option)
Finished Dimensions: 8″/20.3 cm tall (from bottom of pineapple to tip of leaf) and 13.5″/34 cm in circumference when stuffed
Note: See Moogly’s blog post and accompanying video HERE to see how to work the solid shell stitch.
Yellow Pineapple Base
We will begin by crocheting the base of the pineapple Work in unjoined rounds. Using yellow yarn and 3.5 mm hook,
Round 1: 6 sc in Magic Ring. (6 sts)
R2: *Inc*, rep 6 times. (12 sts)
R3: *Sc 1, Inc*, rep 6 times. (18 sts)
R4: *Sc 2, Inc*, rep 6 times. (24 sts)
R5: *Sc 3, Inc*, rep 6 times. (30 sts)
R6: *Sc 4, Inc*, rep 6 times. (36 sts)
R7: *Sc 5, Inc*, rep 6 times. (42 sts)
R8: *Sc 6, Inc*, rep 6 times. (48 sts)
R9: *Sc 7, Inc*, rep 6 times. (54 sts)
R10: *Sc 8, Inc*, rep 6 times. (60 sts)
We will now begin the solid shell stitch rounds. Work in joined rounds.
R11: Ch 1, sc in the 1st st. *Skip 2 sts, work 5 dc in the next st, skip 2 sts, sc in the next st. Repeat from * until 2 sts remain. Skip 2 sts, join with a sl st to the first sc of the round. (10 shells)
R12: Ch 3 (counts as first dc), work 2 dc in the same (1st) st. *Skip 2 sts, sc in the next st (top of the shell from previous round), skip 2 sts, 5 dc in the next st (the sc from previous round). Repeat from * until 2 sts remain. Work 2 dc in the same st you started the round with. Join with a sl st to the top of the ch 3. (10 shells)
R13-21: Repeat Rounds 11-12 or until desired height is achieved.
Switch to green yarn,
R22: Sc around.
Fasten off and weave in ends.
Leaf (make 5)
Work in unjoined rounds. Using green yarn and 3.5 mm hook,
R1: Work 4 sc in Magic Ring. (4 sts)
R2: *Sc 1, Inc*, rep 2 times. (6 sts)
R3: Sc 6. (6 sts)
R4: *Sc 2, Inc*, rep 2 times. (8 sts)
R5: Sc 8. (8 sts)
R6: *Sc 1, Inc*, rep 4 times. (12 sts)
R7-18: Sc 12. (12 sts)
Fasten off and leave long end for sewing.
Attaching leaf to pineapple base:
- Position leaf onto shell stitch from the last shell stitch round.
- Flatten leaf and insert needle into both the front and back stitches of the leaf (to seam it shut at the same time) and the green stitch on the pineapple purse, whip stitching these stitches together.
- To make the attachment extra secure, whip stitch back the other way as well.
- Skip the next shell. Sew green leaf onto every other shell stitch until all 5 leaves have been attached.
Drawstring Closure:
- Using 2 mm hook and yellow yarn, crochet an I-cord (see HERE) 20.5″ in length (adjust length to your liking) and weave in ends. Alternatively, you could use some rope.
- Weave I-cord in and out of the spaces between the shell stitches at the top of the yellow portion of the pineapple purse (between Rounds 21 and 22). Once I-cord has been woven all the way around the opening of the pineapple purse, pull the ends tight to make sure that it shuts properly.
- Add a cord lock for more secure closure (or simply tie the ends in a bow or simple knot). Tie the ends of the I-cord together to form a knot.
- If only an amigurumi is wanted (not a purse), weave yellow yarn in and out of last round of shell stitches. Stuff the pineapple with fiberfill, pull the yarn tightly, tie a knot, and weave in the ends.
Adding facial details:
- Position face so that drawstring ends are coming out of the right side (or left side) when looking at him. Do not position the face right where the ends are coming from or directly behind the drawstring ends as you will not be able to see the face well when carrying the purse.
- Add 12 mm safety eyes between Rounds 13 and 14, about 3 shell stitches apart.
- Embroider small smile at top of Round 13 (at tallest tip of middle shell stitch) between the eyes using brown embroidery floss.
- Add pink cheeks using pink Sharpie.
**************************************************************
This Amigurumi Pineapple Purse turned out so amazingly cute! Can you resist that kawaii face?
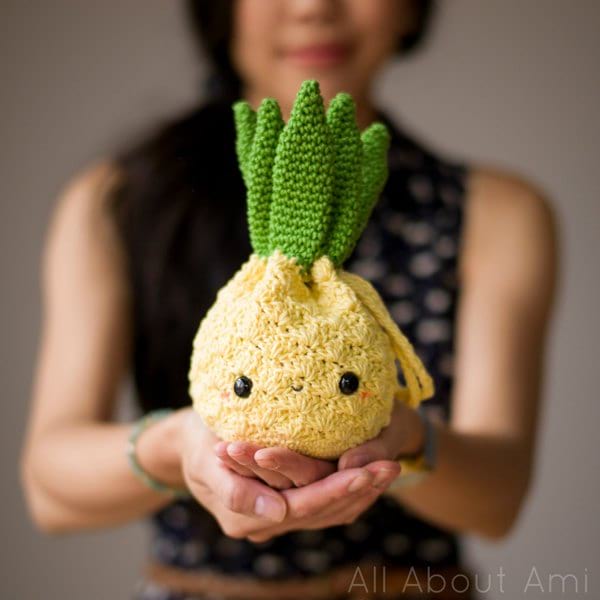
One of the best parts is how it’s practical too! You can store goodies in this functional bag. Your little ones will love storing their treasure in such a cute purse, and grown-ups can use them to store essentials like sunglasses, sunscreen, cell phone and some cash at the beach!
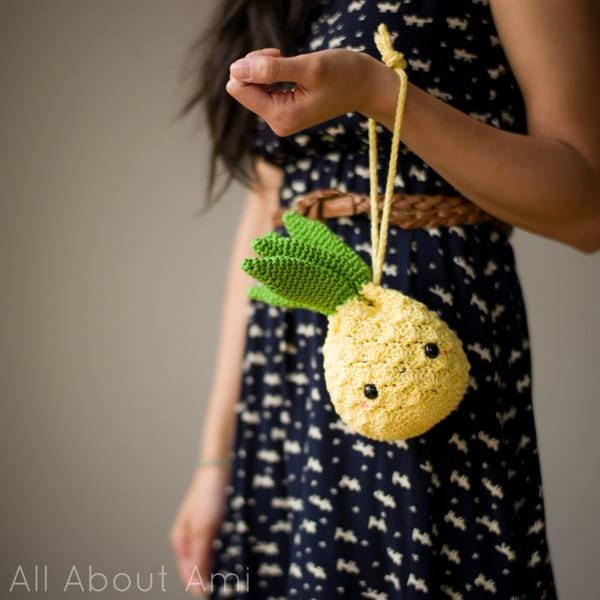
It would also be an AMAZING way to wrap a gift with functional wrapping that can be used again and again as well! I love its cute size, and with how much yarn is used, you can actually make TWO pineapple purses with 1 skein of yellow and 1 skein of green 24/7 Cotton! Hehe that means you can make one as a gift and keep one for yourself! Doesn’t our little pineapple look hilarious when the leaves are flopping downwards? It’s amazing how they stand straight up when the drawstring is pulled close!
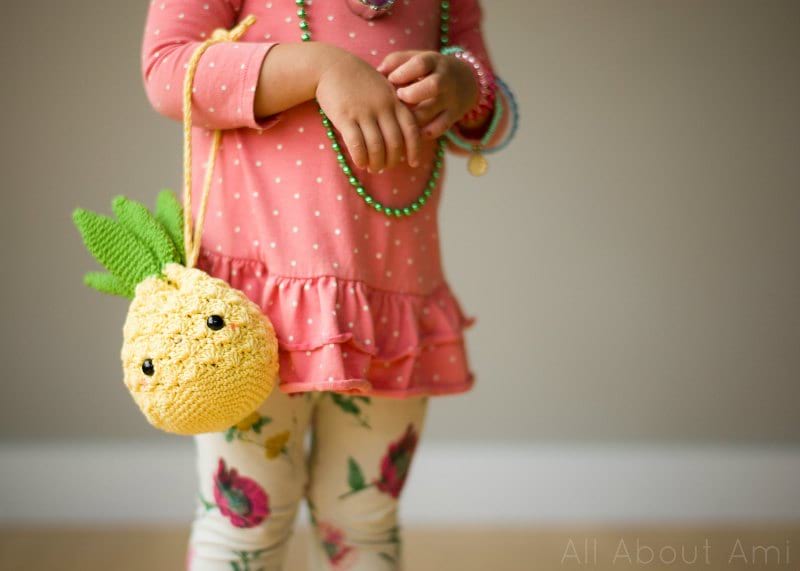
After Ryan finished snapping photos of me holding the Pineapple Purse, the girls casually walked towards us all decked out in their jewelry that they had chosen for themselves. I asked them if they wanted to be in the photoshoot too and they excitedly said yes (which doesn’t always happen!). Here is sweet Brielle showing you how the Pineapple Purse looks when worn with the strap!
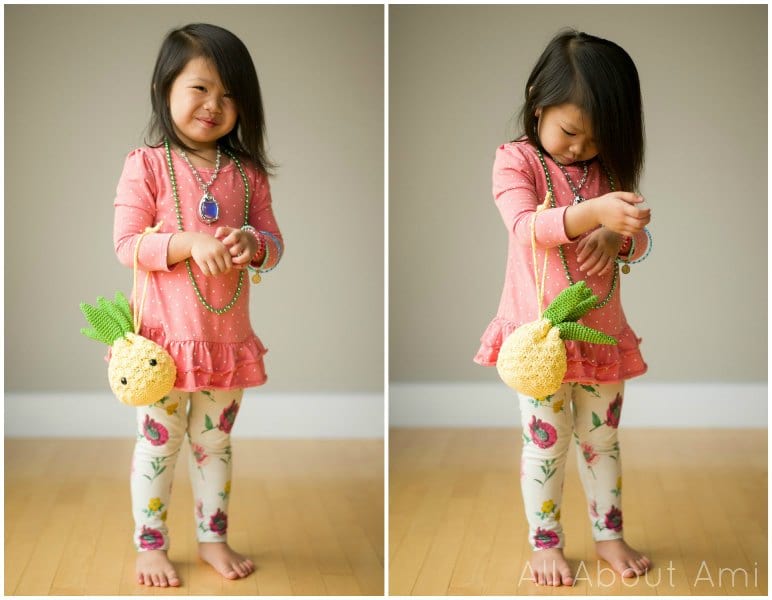
You can always adjust the strap to your liking to make it longer for a cross-body bag. Don’t you love all the bracelets that Brie is wearing?
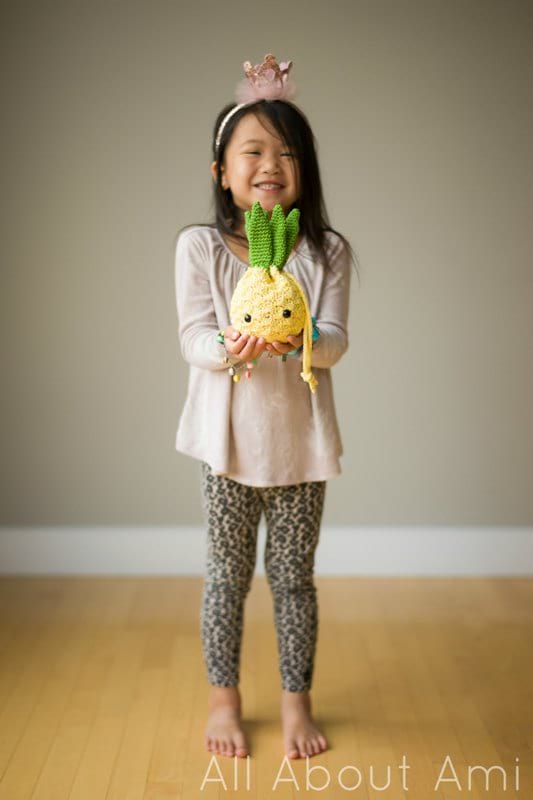
Next it was Myla’s turn to pose with our sweet Pineapple! I love her excited and proud smile and how she chose a princess crown headband to randomly wear!
This Pineapple Purse is a great year-round project as it’s fun for summer but also back-to-school! Wouldn’t this sweet pineapple bring a smile to your little ones’ faces as they can store their pencils, erasers or snacks? This would make the perfect apple or orange cozy too!
Here is a photo showing how one design inspired a completely different design. The Regency Reticule is so elegant and from a completely different time period while the Pineapple Purse is so sweet and kawaii. Both can carry your essentials and are a great way for you to carry something practical and handmade with you all the time! While I won’t be carrying the Pineapple Purse to any Pride & Prejudice balls (can you imagine how hilarious and out of place that would be?), our sweet fruity friend can be carried around day-to-day and is a great conversation starter! Keep in mind that if you do not want to make your pineapple a purse, you could stuff the pineapple with fiberfill and use a piece of yarn to seam up the top and knot the ends! How cute would this pineapple be sitting atop your desk? When I had people guess what I was making simply by showing the green leaves, several people mentioned the Pokemon named Oddish. You could TOTALLY make an Oddish purse by using blue/purple yarn instead of yellow yarn- what an amazing gift that would be for a Pokemon fan! A friend of mine named Jenna also suggested embroidering a “Shopkins” style face on the purse and using it as a cute way to store and carry those small popular Shopkins toys!

Inspiration comes from everywhere, and I love how this whole project came about from a comment that Carmen made on my Instagram! I love this little guy so much and can’t wait to see your Amigurumi Pineapple Purses! Don’t forget to subscribe to my newsletter HERE to get my newest crochet and knit designs straight to your inboxes! I am busily working away on fall/winter designs now and am excited to share my ideas with you!
Note: Thank you to Lion Brand Yarn for sponsoring this post and for always being so supportive of my work!