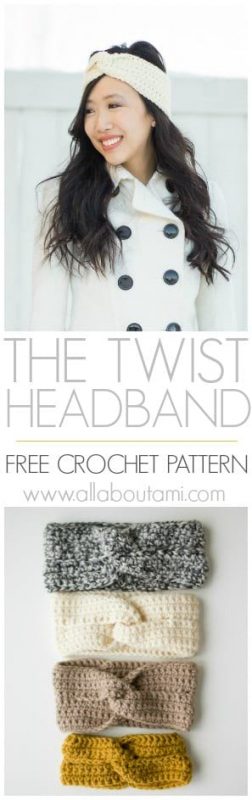
This fall and winter season I have loved designing and wearing headbands and earwarmers! I think they are such versatile pieces that not only help keep you warm, but also make such a stylish fashion statement! At the beginning of the fall, I designed a 3 part headband series that included my “Black & White Knotted Headband” and my “Triple Luxe Headband”. Now, I am excited to show you the last headband that I made…”The Twist Headband”!
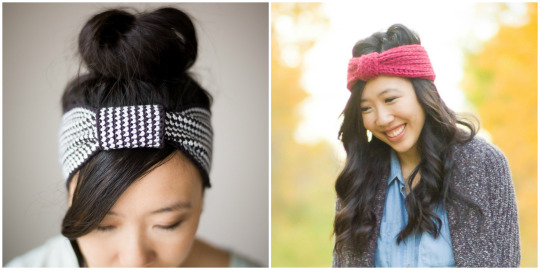
A year ago I had so much fun designing “The Twist Cowl” as a part of Lion Brand Yarn’s #Scarfie campaign! The twist adds such a beautiful fold to the cowl and allows for two different patterns to be displayed. It’s neat to think that Brielle was in my belly during this photoshoot! With this in mind, I wanted to design a headband with a twist to it too!
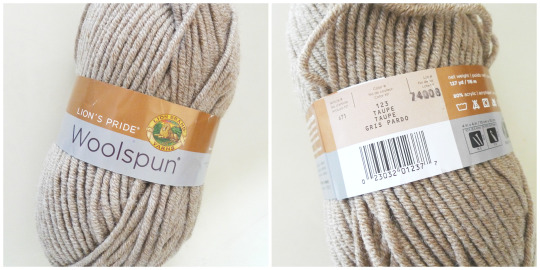
I decided to use Lion Brand Yarn’s beautiful Woolspun yarn as I love the “squish” of the yarn as well as the colours available. I enjoyed working with it for my “Triple Luxe Headband” and wanted to use it for this design as well! As a reminder, Woolspun is a level 5 bulky yarn!
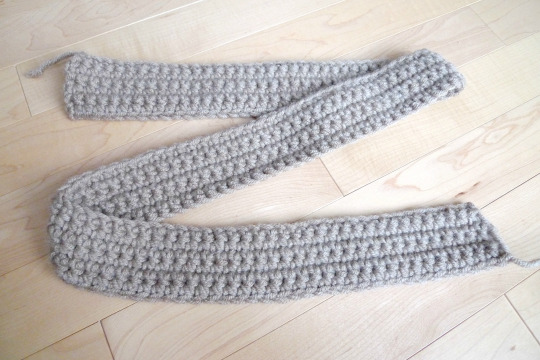
Crocheting the actual headband itself is extremely simple as it is one long strip. I used my 6.5 mm Clover Amour hook and used foundation single crochets to determine the length as I went. If you’re not familiar with this technique, you HAVE to check it out (see Moogly’s tutorial HERE) as this eliminates the need to do a series of chain stitches in the beginning. It is very important for this headband in particular since you determine the length right off the bat and you can measure it around yourself after you complete the first row. It also gives a looser and “stretchier” feel to the headband as chain stitches do not allow much give.
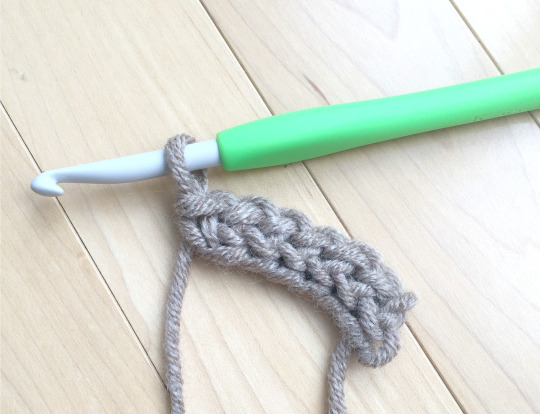
Once you’ve determined your length, you work six rows of single crochets to form one long strip. Keep in mind that the height of this strip will actually be HALF the final height of the headband as you’ll see later on. The crocheting is now complete! Be sure to leave a very long tail when cutting your yarn as you will be doing a lot of sewing. Another alternative is to crochet the width right off the bat with the first row and keep on working up the length. I myself prefer the look of the horizontal rows and stitches of the final headband versus vertical rows and “sideways” stitches!
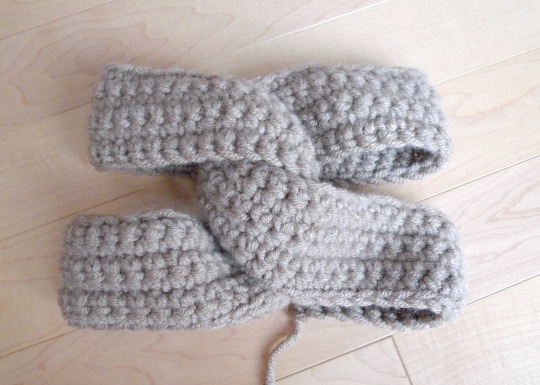
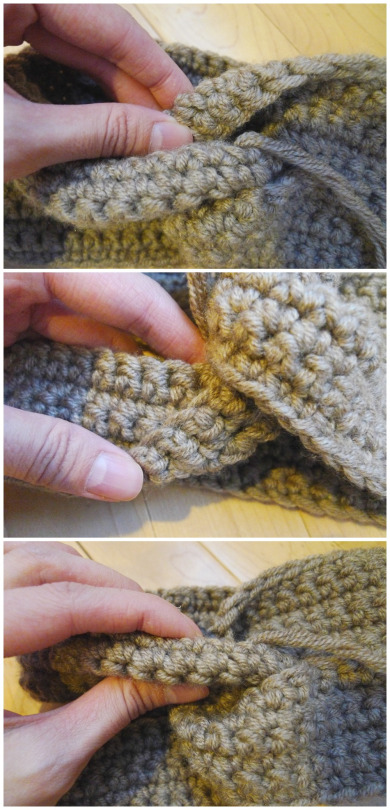
Now it’s time for the trickiest part: the TWIST! You fold your strip like so, crossing one side over the other.
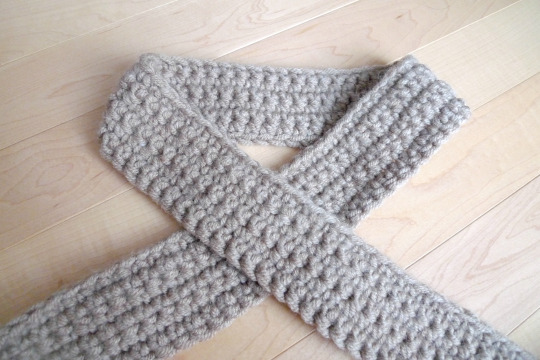
Then you twist the ends one more time, which results in a “knot” in the middle:

Here is a view of the whole strip once it has been twisted! You can follow along with this picture to get your strip folded and curving in the right directions.
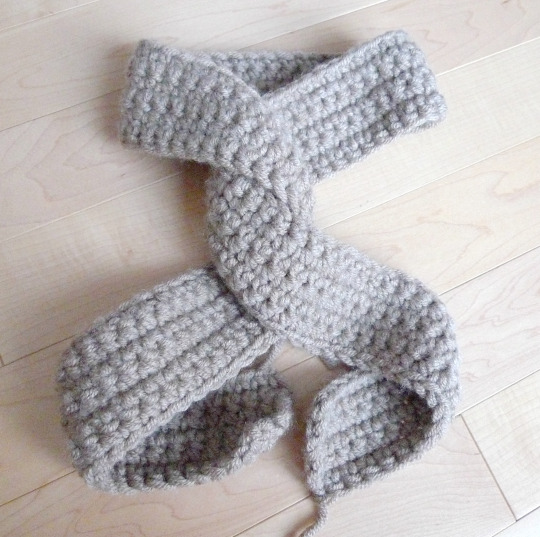
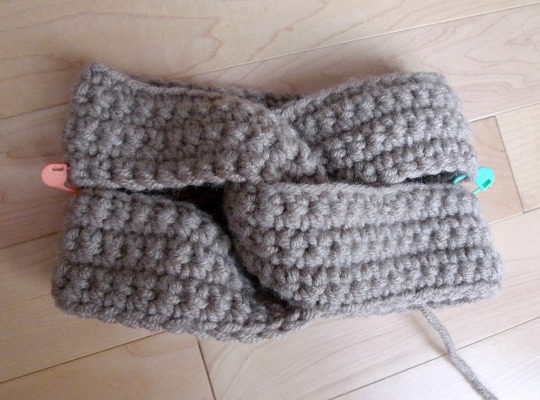
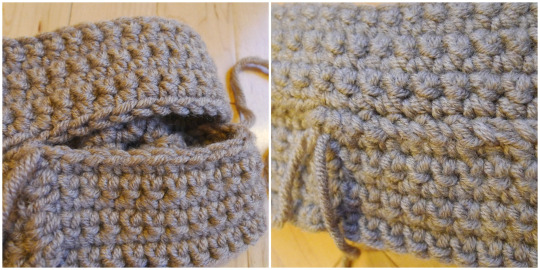
Next you sew the open ends together with a whip stitch.
Once you push the top and bottom closer together, it is starting to look more like a headband!
I used my locking stitch markers to hold the sides in place and to prevent it from untwisting while I was sewing the headband together!
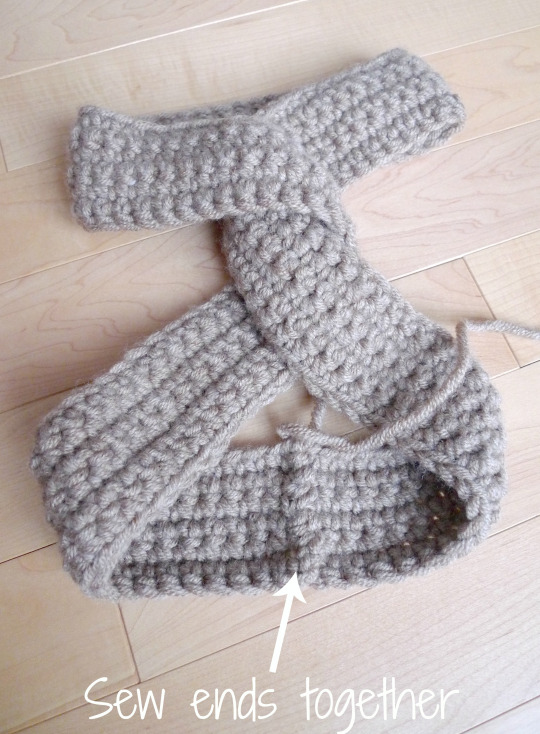
Here is the backside of the headband! I started whip stitching the top and bottom of the headband together, starting from the middle since this is where the yarn tail began.
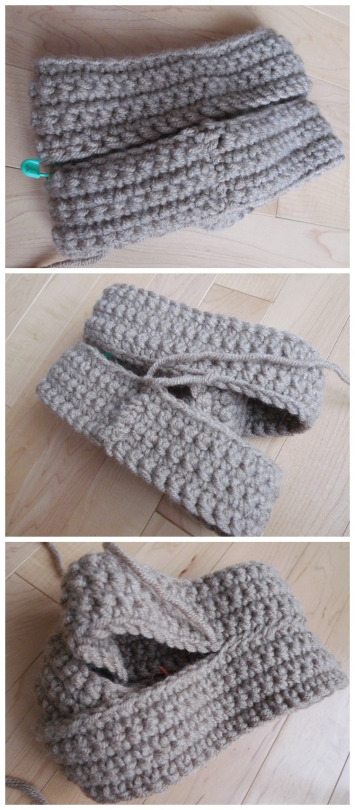
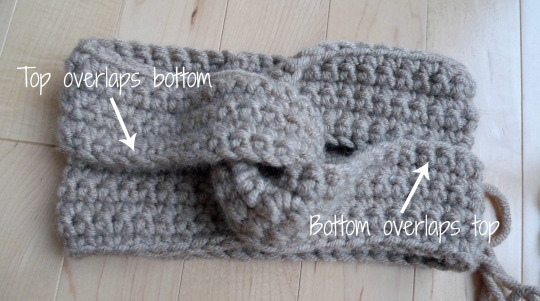
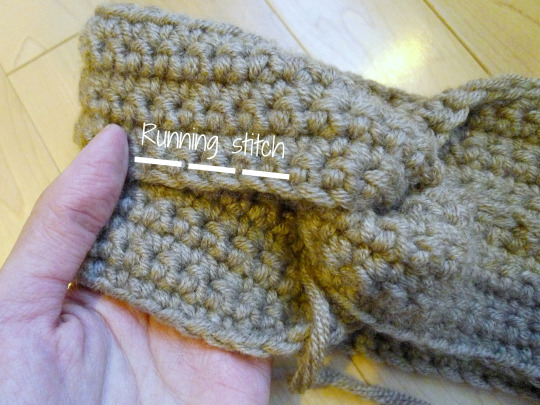
As I approached the front of the headband, I overlapped the top and bottom to emphasize the twist shape as shown below:
I also pinched the ends coming out of the twisted knot and sewed them into place to emphasize the twist even more. It’s important to note that I left a bit of a gap (about 1″ on each side of the knot) where I did not sew the bottom and top halves together. I found that if I sewed too close to the center knot, it flattened it too much and morphed the shape.
Furthermore, I used a running stitch (see HERE) when sewing the front part of the headband since the top and bottom parts overlap. This made the stitches less visible compared to the whip stitch so that the overlap was emphasized.
When it was time to finish up the sewing as I approached the back of the headband, I used the whip stitch again!
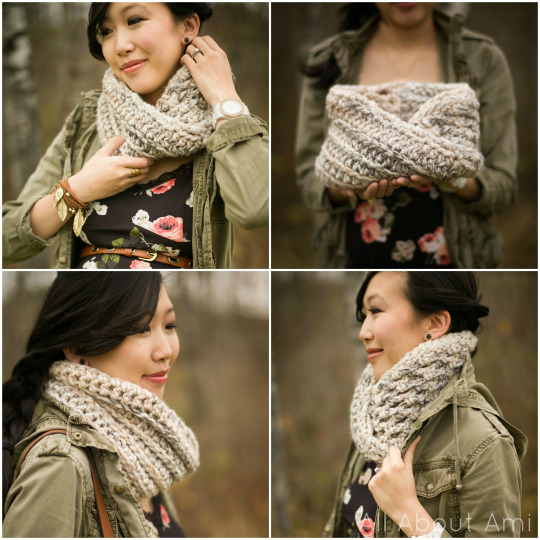
Here are the final Twist Headbands! I ended up making one for myself, my sister Ashley, Myla and Brielle!

Here is the free pattern for “The Twist Headband”!
*********************************
Materials:
- Bulky level 5 yarn (I used Lion Brand Yarn’s Woolspun in Taupe, Honey, Fisherman & Stone Mix )- less than 1 skein for each headband
- 6.5 mm crochet hook ( I used my Clover Amour 6.5 mm hook)
- Yarn needle (I used this bent tip tapestry needle HERE)
Notes:
- Use foundation single crochets to determine the length as you go.
- After completing Row 1, measure your strip against the subject’s head by preliminarily doing the twist to make sure it will fit. Keep in mind that it will also stretch with wear.
- When whip stitching the headband together, try to have the wrong sides facing you (the inside of the headband) to make the seam less visible.
***ADULT sizing– Length: 9-9.5″/23-24 cm, Height: 4″/10cm
Row 1: Foundation single crochet 112 or to desired length (mine was 97 cm or 38″ long unstretched). (112 sc)
R2: Chain 1, turn. Starting in second st from hook, sc in each st across. (112 sc)
R3-6: Repeat Round 2.
***TODDLER sizing-
Length: 8″/20 cm, Height: 4″/10 cm
Row 1: Foundation single crochet 105 or to desired length. (105 sc)
R2: Chain 1, turn. Starting in second st from hook, sc in each st across. (105 sc)
R3-6: Repeat Round 2.
***BABY sizing- Length: 7″/18 cm, Height: 3″/7.5 cm
Row 1: Foundation single crochet 94 or to desired length. (94 sc)
R2: Chain 1, turn. Starting in second st from hook, sc in each st across. (94 sc)
R3-4: Repeat Round 2.
[This was sized for my 1 year old daughter- if you are trying to make it for an infant, I would try somewhere between 80-90 sc).
Construction:
- Fasten off and leave a very long tail for sewing.
- Overlap and twist sides of strip as shown above.
- Sew open ends together. Use stitch markers to hold sides in place.
- Using long tail, whip stitch top and bottom together of headband together.
- When approaching the front, overlap the top and bottom as shown above in diagram. Use running stitch when sewing top and bottom together.
- Leave 1″ gap on either side of the middle knot where you do not attach top and bottom to prevent knot from flattening too much.
- Pinch ends coming out of twisted knot and sew them into place.
- Finish whip stitching headband together and weave in ends.
***Another way you can do the twist is by wrapping your long strip around a hat or your own head! Check out this quick video I made showing this as well as the final headbands HERE on Instagram!
*********************************
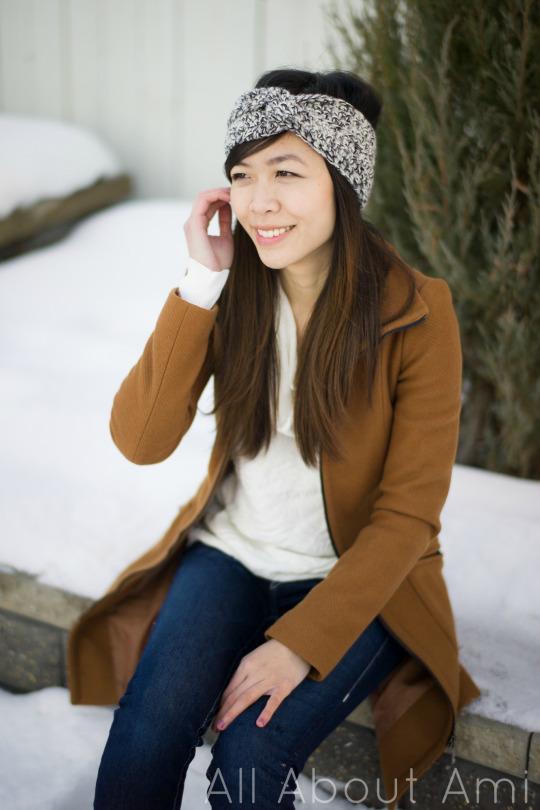
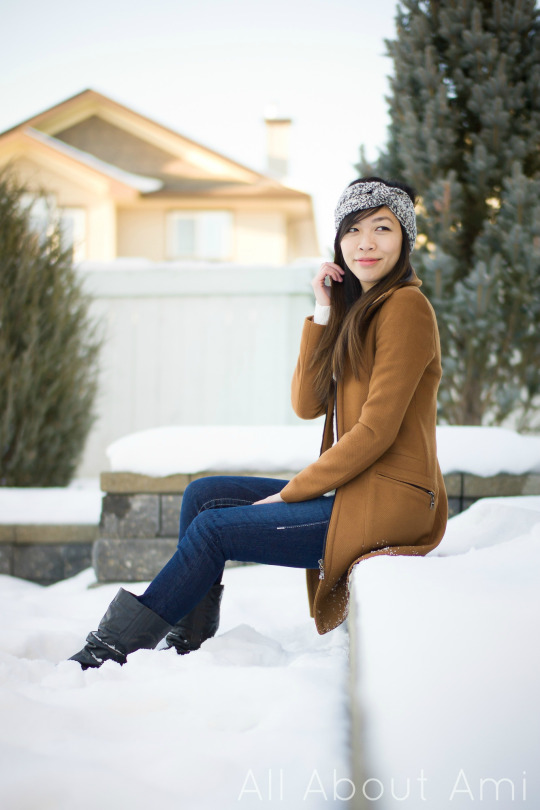
I love the beautiful and chic twist of this headband!
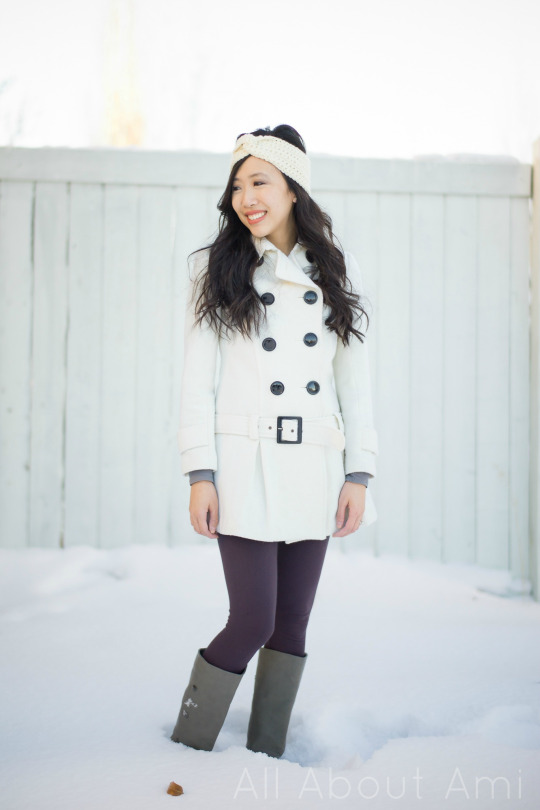
It was fun choosing different colours for these headbands, and I’m glad I went with this white for myself as it looks so striking against my black hair!

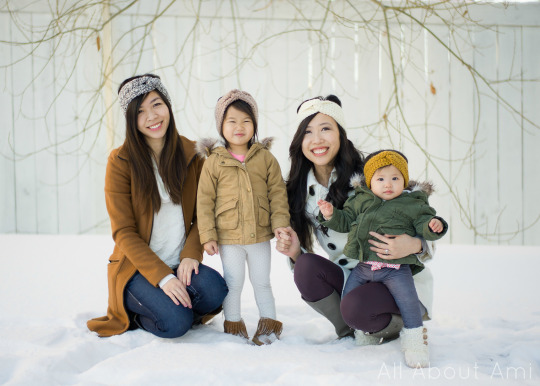
I was so happy that my younger sister Ashley could join us for this photoshoot! The last time she appeared on the blog was during our “Knotted Headband” photoshoot which was 4 years ago!
I love the marbled look of the Stone Mix colourway!
People could always tell we were sisters growing up- do you think we look alike? We even got mistaken for twins before haha…

Here is our sweet Myla wearing her Twist Headband! She was so excited to wear her own headband to match with her mommy, auntie, and sister!
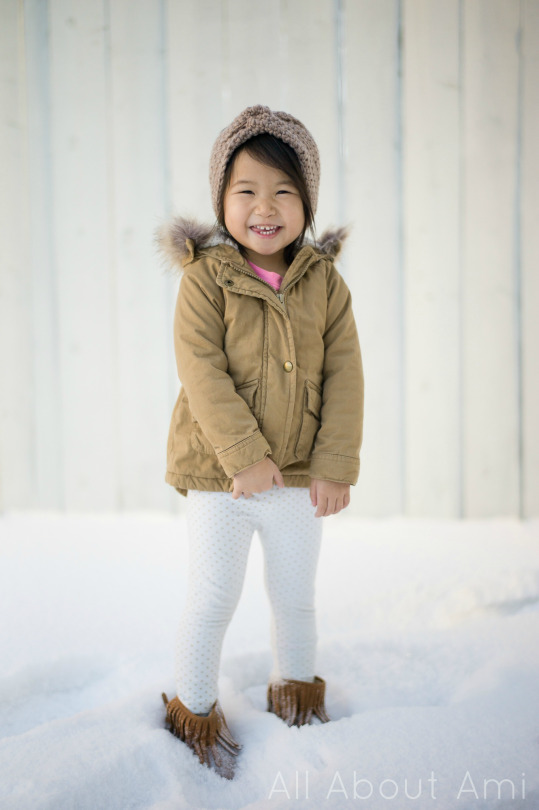
Don’t you love her adorable smile? What a character!

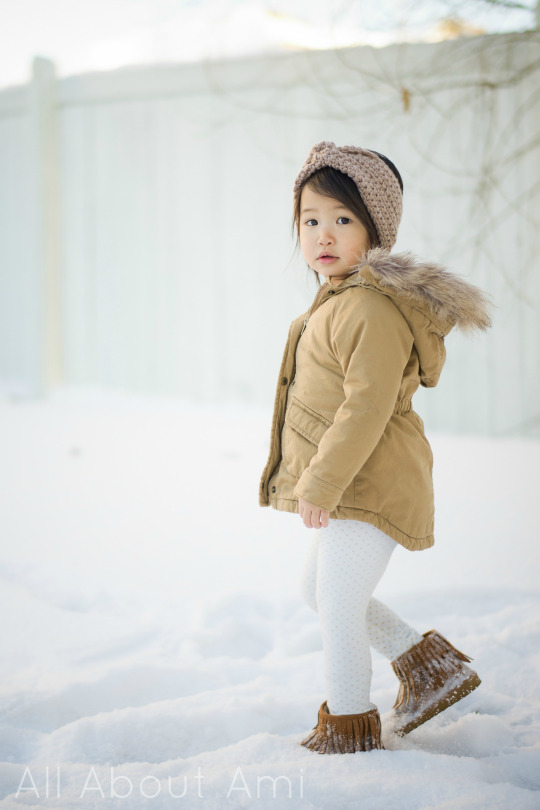
I think she looks so sweet walking along nonchalantly! She has grown so much- I love having conversations with her and listening to what her imaginative little mind has dreamed up!
How sweet are my two girls holding hands? Brie is unsure about being in the toboggan but Myla is reassuring her that she’s okay! You can see the twist in Myla’s headband so well in this photo too!

Four years ago during that photoshoot with Ashley for “The Knotted Headband”, I wasn’t even pregnant. And now here I am so blessed with two amazing girls! It’s sometimes hard for me to remember a time before we became parents as it has been so life-changing!

They are also very blessed as they have so many amazing aunties and uncles who love them very much, not only within our family, but in our church as well! Love how there are two sets of sisters in this special pic!
If you’ve been wanting to make a headband like this, I hope you found my tutorial helpful! The twist itself is the hardest part, but once you’ve got it and sewn it into place, it looks awesome! It’s such a simple design that adds such a fun statement to any outfit! To end off this post, here’s one of our favourite photos from this shoot- we had a blast throwing snow in the air! You might spot the “Cozy Crochet Mittens” that I’m wearing too (free pattern HERE)! Let’s try and “Throw Kindness Around Like Confetti”…or in this case, snow! Follow me on Facebook, Twitter and Instagram to keep up to date with my work!

{This post is sponsored by Lion Brand Yarn! I’ve loved working with their yarn throughout the years and I’m thrilled that I get to collaborate with them!}
This pattern is an original pattern by Stephanie Lau of All About Ami. Please do not claim this pattern as your own. If you wish to share this pattern, you may link to this pattern but please do not reprint it on your site. You may keep a copy for your own personal use but please DO NOT sell the pattern or distribute it.
You may sell products made from this pattern but please clearly credit the design to me, Stephanie Lau of All About Ami, and provide a link to my blog www.AllAboutAmi.com. Permission is NOT granted for mass production or factory manufacturing of any kind. Thank you for being respectful and for your understanding!