***You can purchase an INEXPENSIVE AD-FREE PDF of this pattern on Etsy HERE! This beautifully formatted PDF includes the step-by-step pictures and 4 patterns (Puff Stitch Scarf, Puff Stitch Cowl, Jumbo Puff Stitch Cowl & Child Puff Stitch Cowl,) and is a total of 13 pages including the cover pages. This pattern is also available in the “Crochet Cowls & Scarves PATTERN BUNDLE” which includes over 20 beautiful designs at a discounted price – check out the bundle HERE!
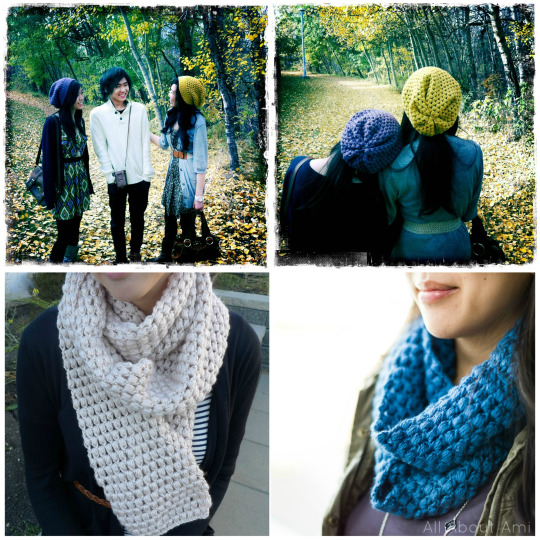
The “Puff Stitch Scarf” was the very first scarf/cowl that I ever designed four years ago in November 2011. I had just learned how to do the puff stitch because of the “Urban Jungle Slouchy Beanie” (see below), so I wanted to use this new stitch to make a scarf for my mom! I loved the beautiful texture that resulted as I made a long scarf by working the puff stitches row by row. I later made my sister a blue Puff Stitch Cowl by sewing the two ends of the scarf together!
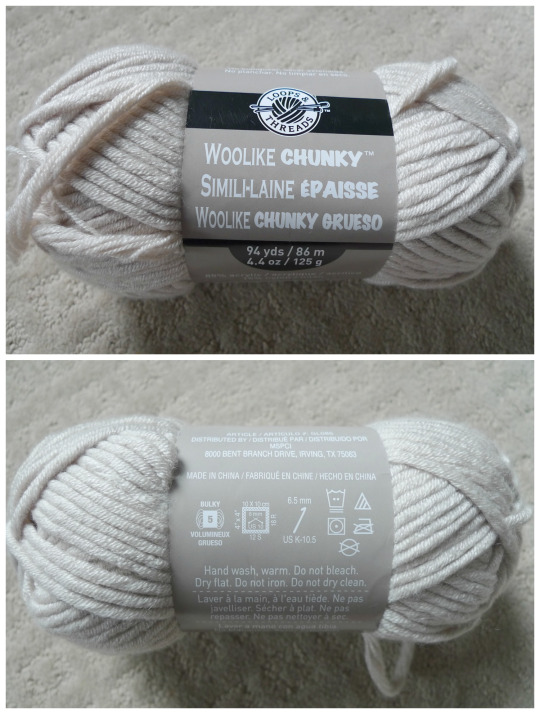
This year, I wanted to revisit puff stitches, but this time working them in a round and using bulkier yarn! I fell in love with this gorgeous “Woolike Chunky” yarn by “Loops & Threads” as it is very soft and has a great bounce and “squish” to it. It is a bulky level 5 yarn, and I decided to use my size 9.0 mm (M/N) Clover Amour hook with it. You know I love my neutrals, so I used the colour “Beige”!
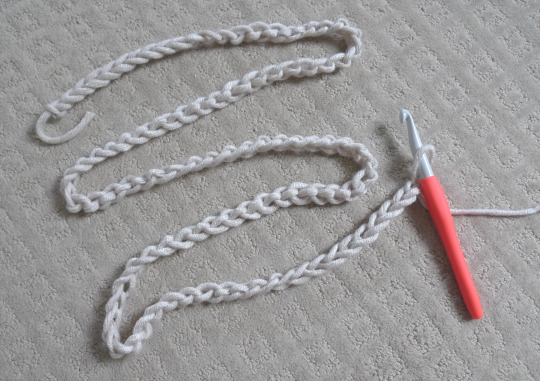
I started off by crocheting a series of 100 chain stitches. I wanted this cowl to be long enough to loop around twice and tall enough to wear over my head as a snood too!
Then I joined the round with a slip stitch to the first chain.
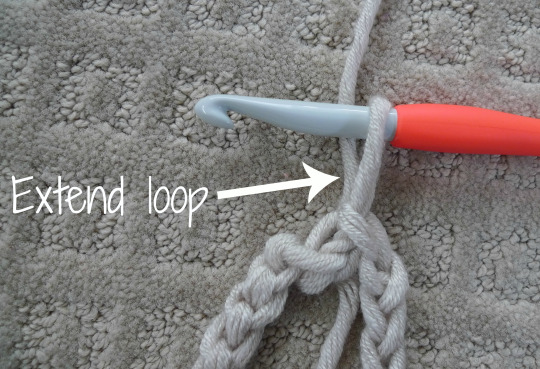
One of my biggest pet peeves when working in a round is the seam. I love how there are no visible seams in amigurumi since you work in unjoined rounds! I did not like the slanted seam in the “Urban Jungle Slouchy Beanie”, so I tried to figure out a way to get a more invisible seam. This method works great as you’ll later see! After you’ve worked your slip stitch, extend the loop that is already on your hook. You want to extend it to the height of how tall your puff stitch will be!
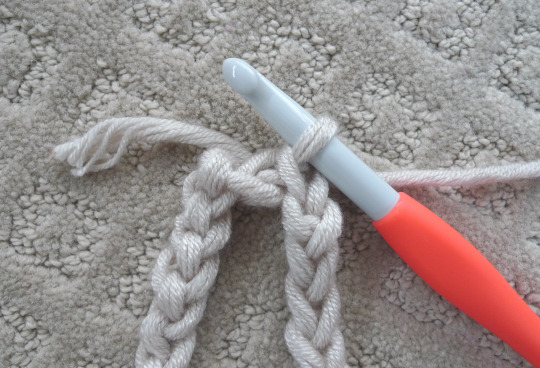
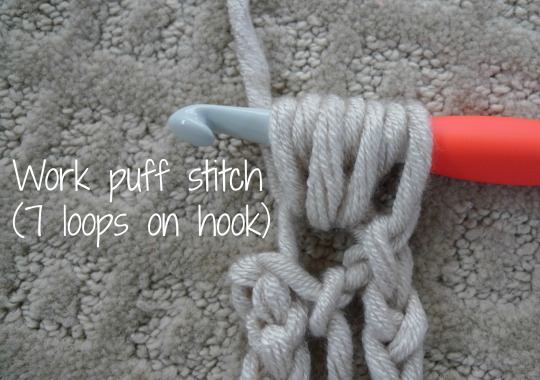
Next, you work your puff stitch as follows: Yarn over, insert hook in indicated stitch and draw up a loop (3 loops on hook), [yarn over, insert hook in same stitch and draw up a loop] 2 times (7 loops on hook), yarn over and draw through first 6 loops on hook, yarn over and draw through remaining 2 loops on hook. I know I’m ready to draw through the loops when I have seven loops on my hook as pictured below!
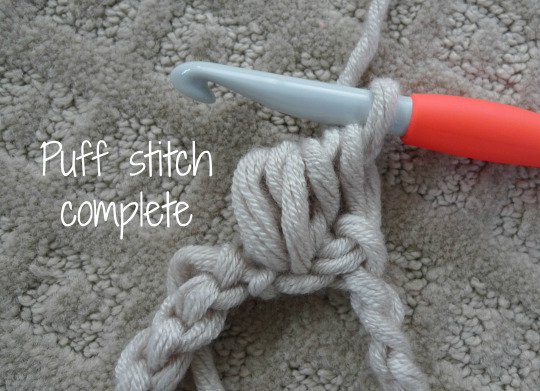
Your puff stitch is complete!
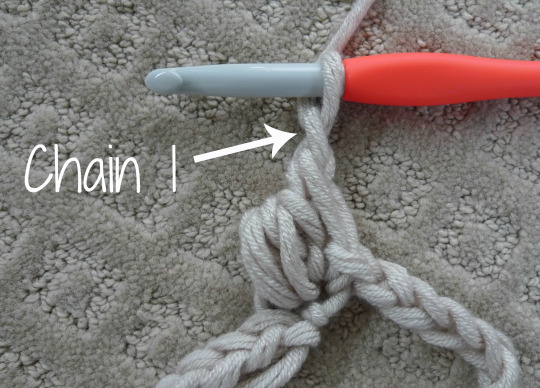
Then you chain 1…
Skip 1 chain and work your second puff stitch in the next chain.
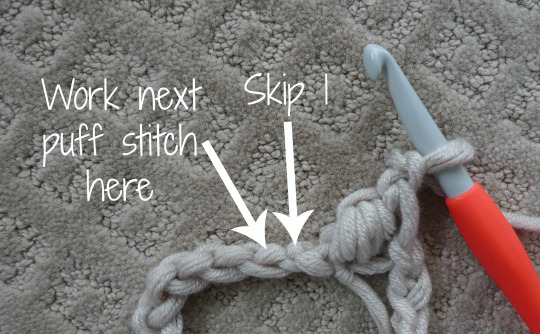
Two puff stitches are complete, separated by a chain 1! You continue working this pattern all around, chaining 1 and skipping 1 chain between each puff stitch!

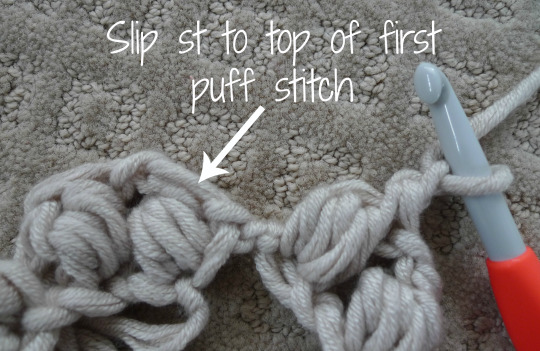
Once you’ve reached the end and completed a chain 1, you slip stitch to the top of the first puff stitch.
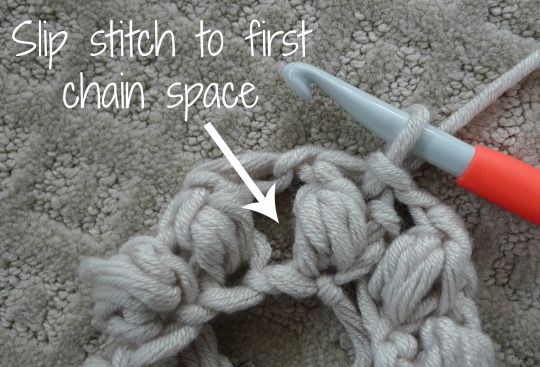
Then you slip stitch to the first chain space as indicated below.
You extend the loop on your hook just as you did above and then work your first puff stitch. As you can see, with this method you do not need to do any initial chains at the beginning of each round to bring you to the correct height.
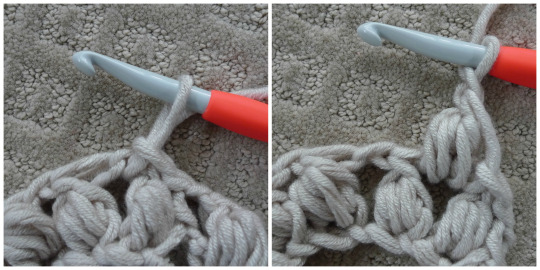
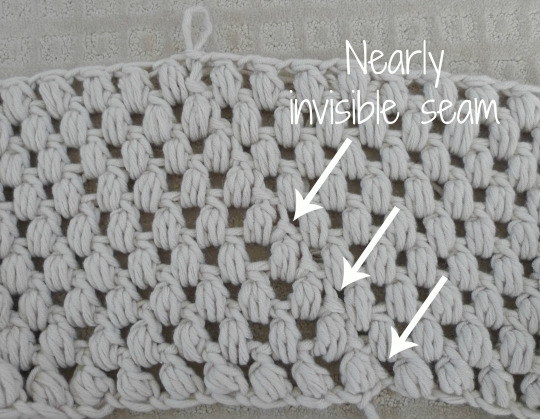
This ensures that you have a nearly invisible seam that blends in with the rest of the puff stitches beautifully! If I ever make another “Urban Jungle Slouchy Beanie”, I will definitely use this method!
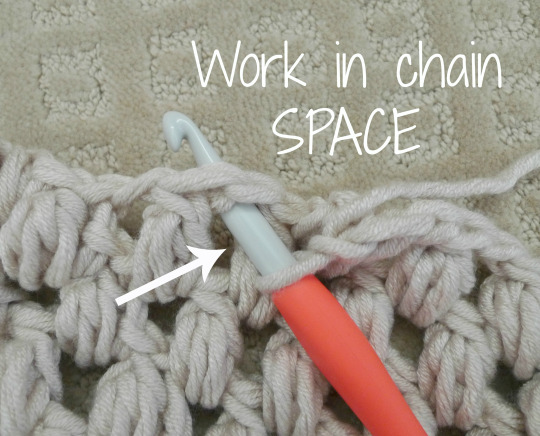
I thought I would also include some pointers that people might have trouble with when crocheting this cowl! Remember that you work each puff stitch in the chain SPACE between the puff stitches (see video HERE). I love working in the chain space since it goes by quickly as you easily insert your hook in the gap.
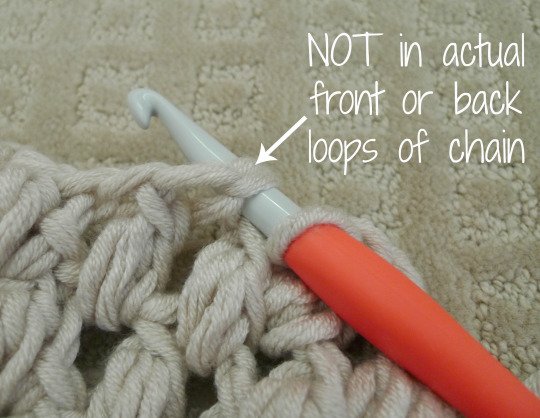
Working in the chain space means that you DO NOT insert your hook into the actual front or back loops of the chain!
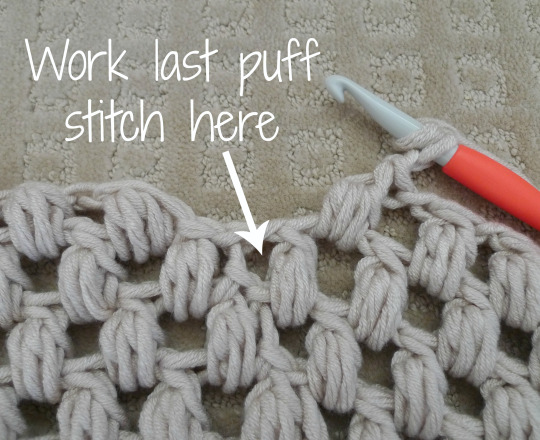
When you’re approaching the end of a round, don’t forget to work that last puff stitch in the space indicated below!
Furthermore, don’t forget to chain 1 before closing up the round as there will be no space between the first and last puff stitches of this round if you forget to do so. I did this by accident a couple of times and the puff stitches were tightly squished together!

After 15 rounds, my Jumbo Puff Stitch Cowl was complete!
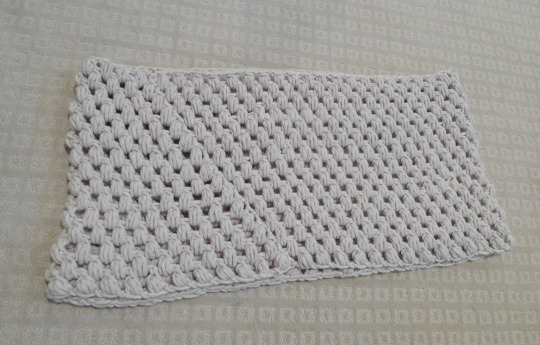
Doesn’t the seam blend in so well?
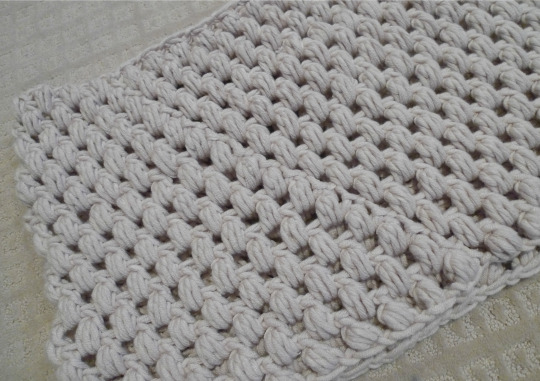
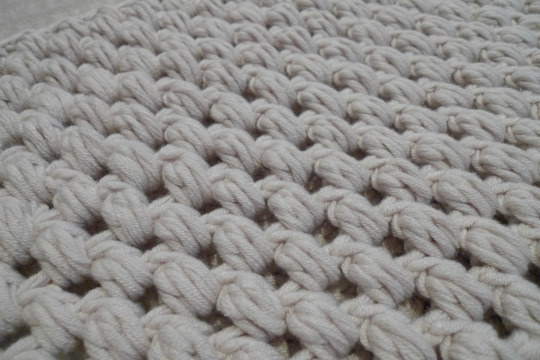
These puff stitches are just so luscious and full! I really adore the beautiful texture of puff stitches!
Here is the FREE pattern for my “Jumbo Puff Stitch Cowl”!
*****************
Materials:
- 9 mm Clover Amour crochet hook
- Bulky yarn (5)- I used 5 skeins of “Woolike Chunky” by Loops & Threads
Puff stitch:
Yarn over, insert hook in indicated stitch and draw up a loop (3 loops on hook), [yarn over, insert hook in same stitch and draw up a loop] 2 times (7 loops on hook), yarn over and draw through first 6 loops on hook, yarn over and draw through remaining 2 loops on hook.
Chain 100. Join with slip stitch to first chain, being careful not to twist the chain.
Round 1: Extend loop on hook to height of first puff stitch that you will soon complete. Work first puff stitch in same chain where you worked sl st. *Chain 1, Skip 1, puff stitch* around. Chain 1, slip stitch to top of first puff stitch.
Round 2: Slip stitch into Ch 1 space. Extend loop on hook. Work first puff stitch into same chain space. *Chain 1, Skip 1, puff stitch* around. Chain 1, slip stitch to top of first puff stitch.
Round 3-15: Repeat Round 2
Finished dimensions: 58″/147 cm circumference and 10″ (25 cm) tall.
*****************
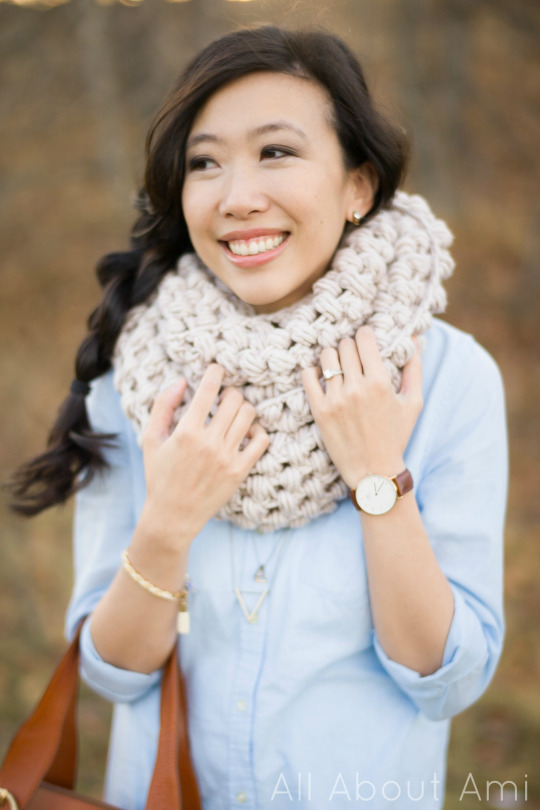
Let me tell you, this cowl is incredibly soft and luxurious! It has a great structure and fullness to it because of the puff stitches!
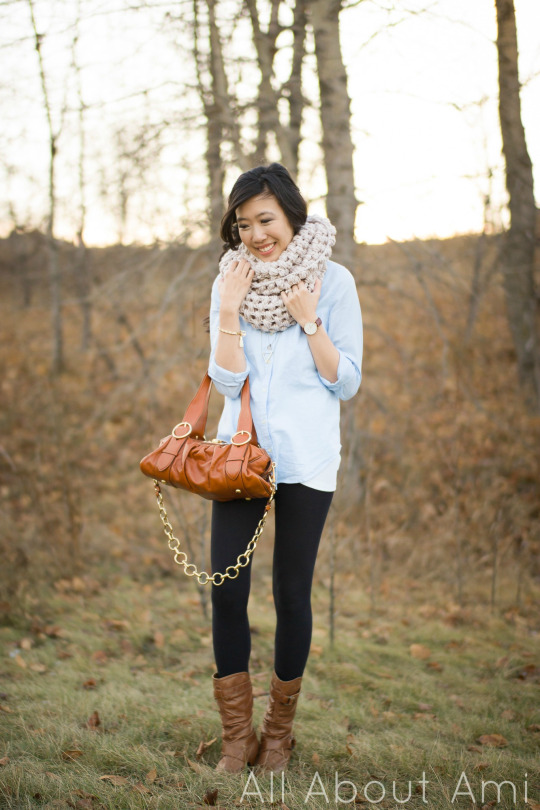
These special stitches give such a unique look to the cowl! I love how it folds when you loop it around twice.
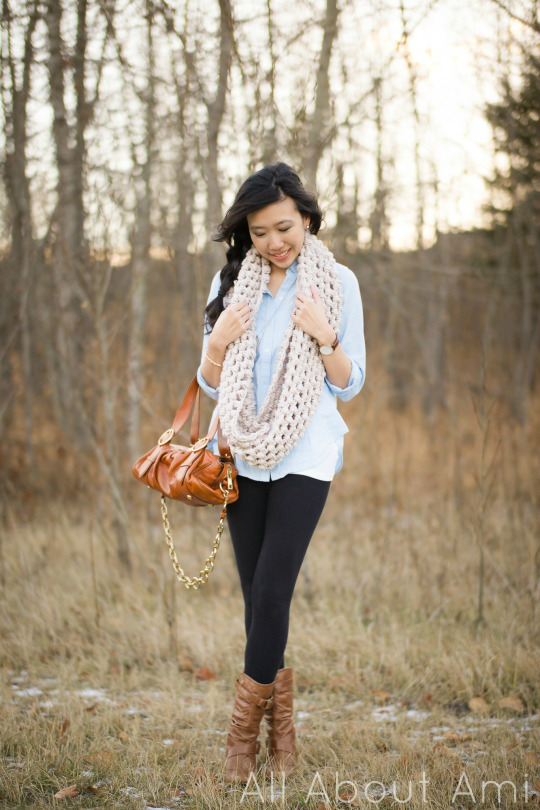
This is how long it is when you just loop it once!
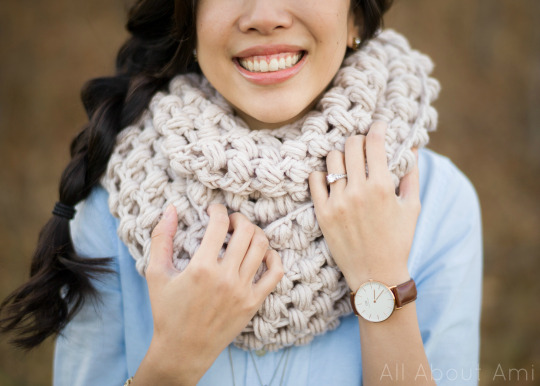
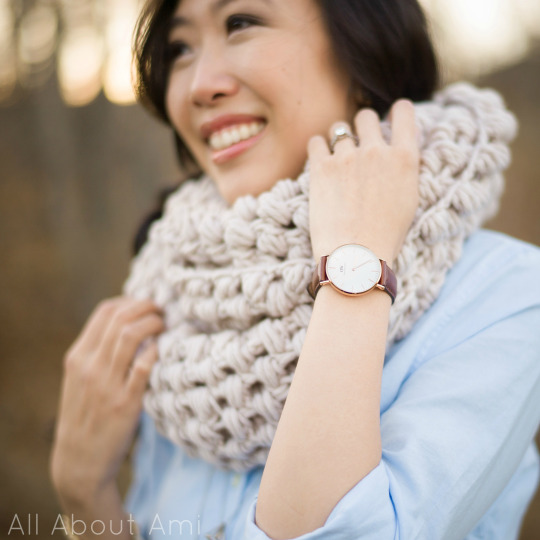
You may remember that I worked with Daniel Wellington last year as I shared about my beautiful watch HERE! I am pleased to say that I am collaborating with them again this year and you can get 15% off your order and free worldwide shipping with the code “AMIDW”! I’ve loved wearing my “Classic St Mawes” watch all throughout the year as the rose gold face and brown leather strap are so timeless and really match with everything!
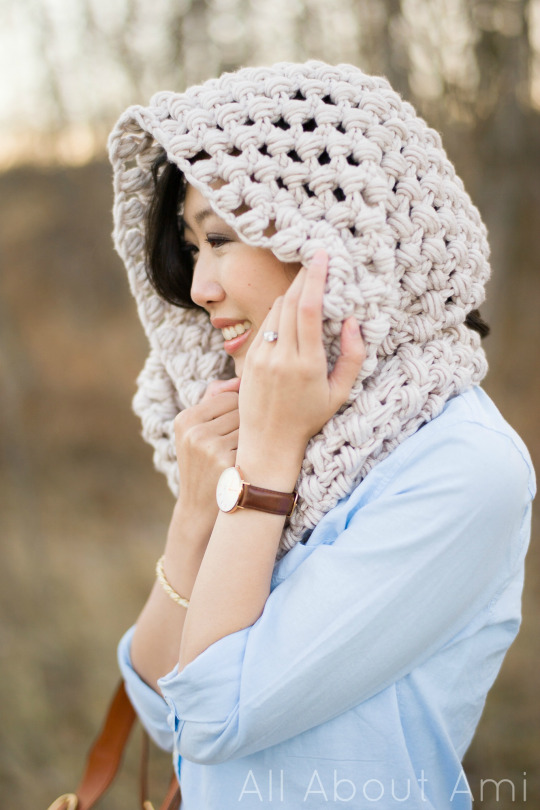
I wanted to make my cowl tall enough so that it could double as a snood! In case you’re wondering, a snood is a “wide ring of knitted material worn as a hood or scarf”. Essentially it’s a tubular scarf that sits higher on the neck so that it can be pulled over the head and act like a hood!
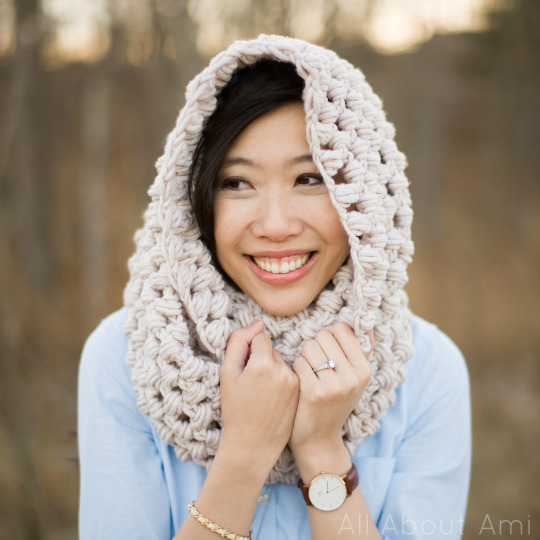
Snoods are very warm since they protect not only your neck, but also your head and hair! Hehe I love how the word “snood” sounds 🙂 Any cowl can be made into a snood if you just make it tall enough so that it can be pulled over the head!
Puff stitches eat up TONS of yarn, which is why I had to use 5 skeins to get the height that I wanted. Of course, you could always use just 2-3 skeins to achieve a full look that is not as tall. You could also make a singular tube that does not loop twice to save on yarn too!
[Blue Classic Oxford Shirt: Old Navy, Leggings: American Eagle, Purse: Marc Jacobs, Classic St Mawes Watch: Daniel Wellington, Heart & Tassel Bracelet: Mikaylove, Earrings: CoutuKitsch, Jumbo Puff Stitch Cowl: Me!]
I love how my Jumbo Puff Stitch Cowl turned out as it is definitely a statement piece that you don’t see everyday! I know many of you loved making my original “Puff Stitch Scarf”, so I hope that you’ll enjoy making this cowl variation as well. Stay tuned for a very exciting wearable item that I will be blogging about soon- I’ve been designing it for a while and it’s now one of my favourite crocheted pieces! Keep up to date with my work through
Facebook page, Twitter (@AllAboutAmi) or Instagram (@AllAboutAmi)!
This pattern is an original pattern by Stephanie Lau of All About Ami. Please do not claim this pattern as your own. If you wish to share this pattern, you may link to this pattern but please do not reprint it on your site. You may keep a copy for your own personal use but please DO NOT sell the pattern or distribute it.
You may sell products made from this pattern but please clearly credit the design to me, Stephanie Lau of All About Ami, and provide a link to my blog www.AllAboutAmi.com. Permission is NOT granted for mass production or factory manufacturing of any kind. Thank you for being respectful and for your understanding!