**You can purchase an INEXPENSIVE AD-FREE PDF of this pattern on Etsy HERE and on Craftsy HERE! This beautifully formatted PDF includes the step-by-step pictures and is a total of 6 pages including the cover page! Note that this is the STEP-BY-STEP blog post – the free pattern can be found HERE! You can also purchase a kit HERE on the Lion Brand Yarn website that includes the pattern and all the yarn needed to make this poncho!
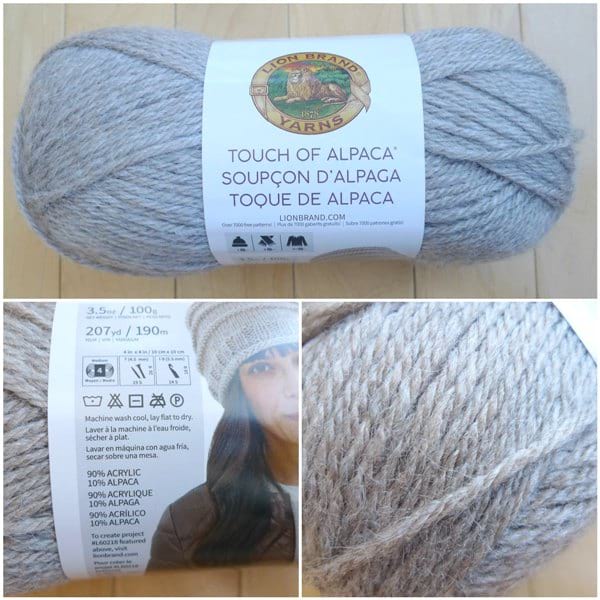
I love reading a range of blogs, from craft and food to travel and style. Last year, I noticed a couple of my favourite fashion bloggers sporting ponchos, and as soon as I saw how cute they looked layered, I knew I HAD to try designing one for myself with yarn! I wanted to use very simple construction (essentially two rectangles) and one of my favourite crochet stitches for beautiful drape: the granite stitch. Lion Brand Yarn released their Touch of Alpaca yarn around the time when I was dreaming up this poncho, and I thought it would be the perfect fit with the beautiful neutral and jewel tone colours available. Touch of Alpaca is a worsted weight yarn (level 4) that is 90% acrylic and 10% alpaca. I love how it is easy to wash and take care of, but there is some natural fibre in it for warmth and luxury. I chose the “Taupe” colour for a beautiful neutral that would match with everything.
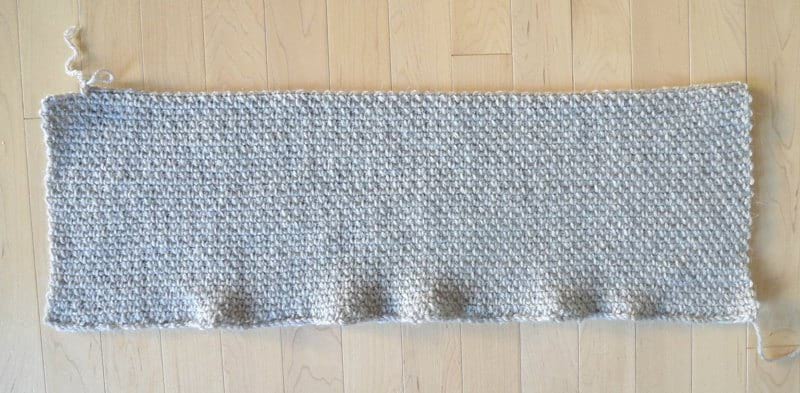
I started off crocheting the two body panels of my poncho! If you are unfamiliar with the granite stitch, please reference my Granite Cape post HERE for step-by-step instructions! I’ve also used this stitch to make my Granite Cardigan, so this poncho is the third installment of the Granite series! The picture below shows how much you can crochet with one skein of Touch of Alpaca yarn!
You can also reference this video below that I made demonstrating the granite stitch for my Granite Cardigan!
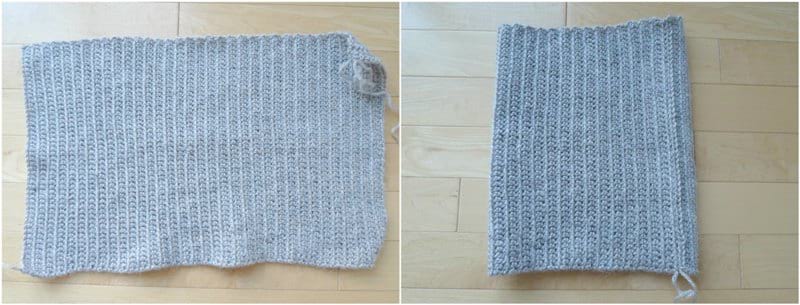
Crocheting the two body panels is very relaxing and one of those projects you can work on while watching television or being the passenger in the car as there is no counting or intense concentration required! Here are my two completed body panels!
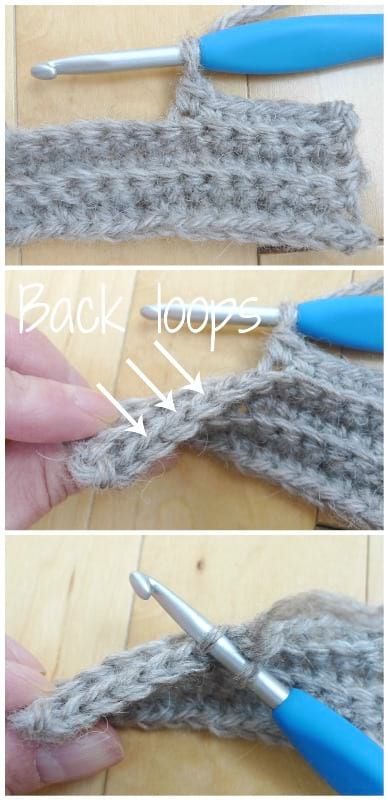
Next, I crocheted all the ribbing: two side ribbing pieces and two bottom ribbing pieces. The ribbing is crocheted by single crocheting in the back loops only as indicated below.
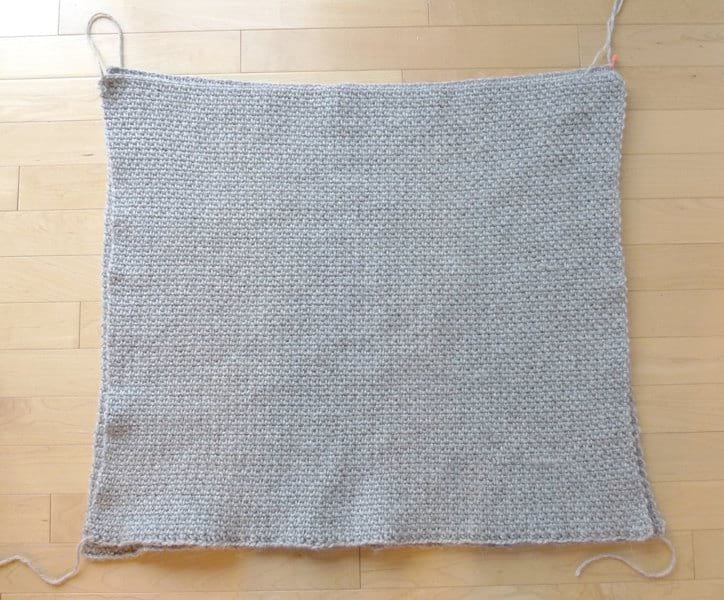
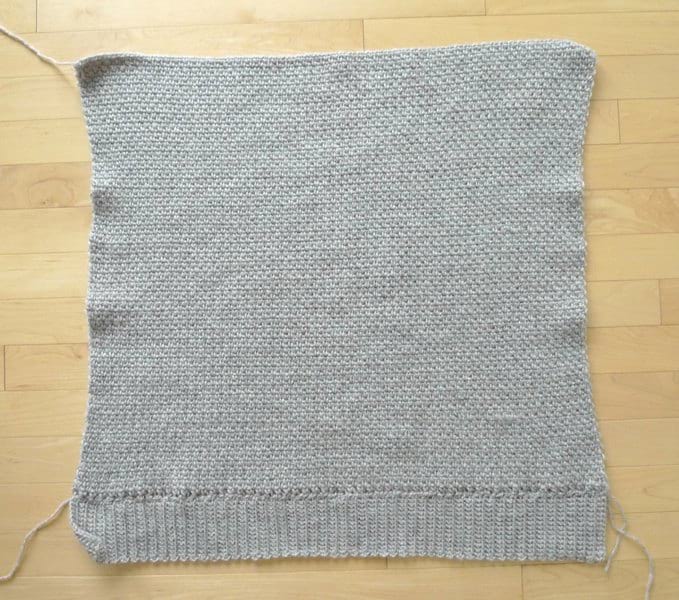
Here are my two body rectangles with the side and bottom ribbing!
I whip stitched the bottom ribbing to the bottom of the body panels. Alternatively, you could crochet the bottom ribbing first, pick up slip stitches along the side of the ribbing, and then crochet the body panel from the bottom up (thereby omitting the step of having to whip stitch the bottom ribbing to the body panel).
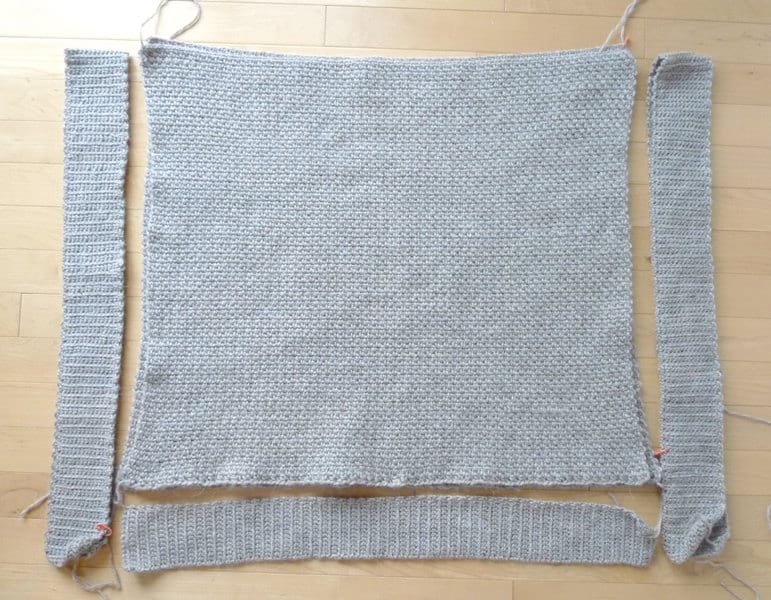
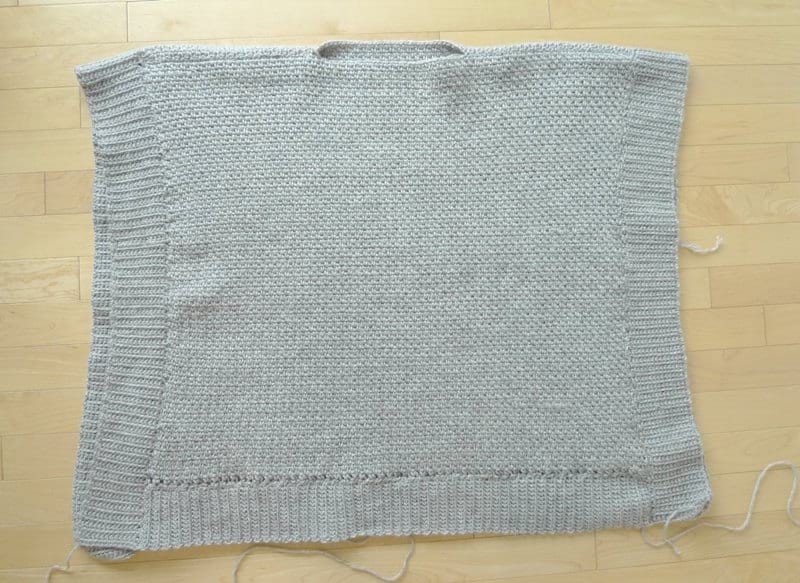
Here are all the pieces laid out! As you can see, there are two body panels that have the bottom ribbing already attached. The side ribbing needs to be attached as well.

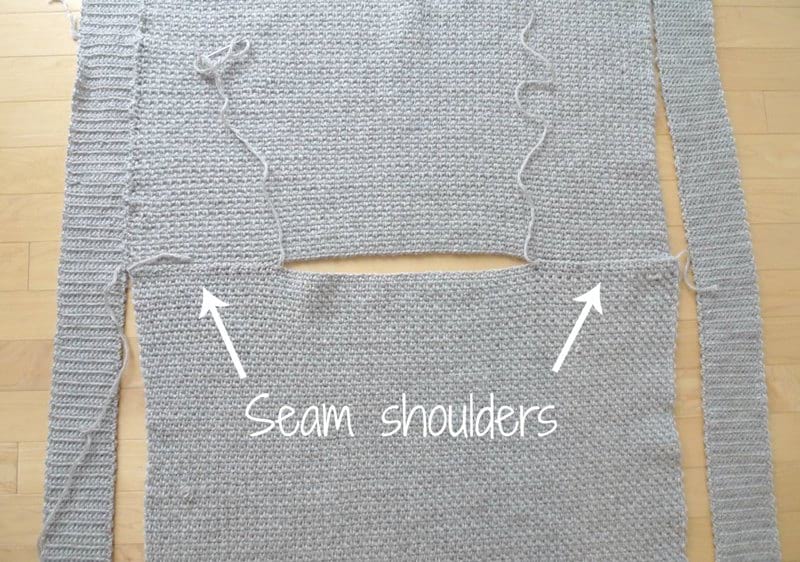
I seamed the shoulders first by whip stitching part of the body panels together, leaving a neck hole where the turtleneck would be attached later on.
I then whip stitched the side ribbing to the body panels! I made my side ribbing a tad too long (you can see they extend past the bottom ribbing a bit), so keep in mind that the ribbing will stretch too. Adjust the length of your ribbing as needed and measure it up against your pieces!
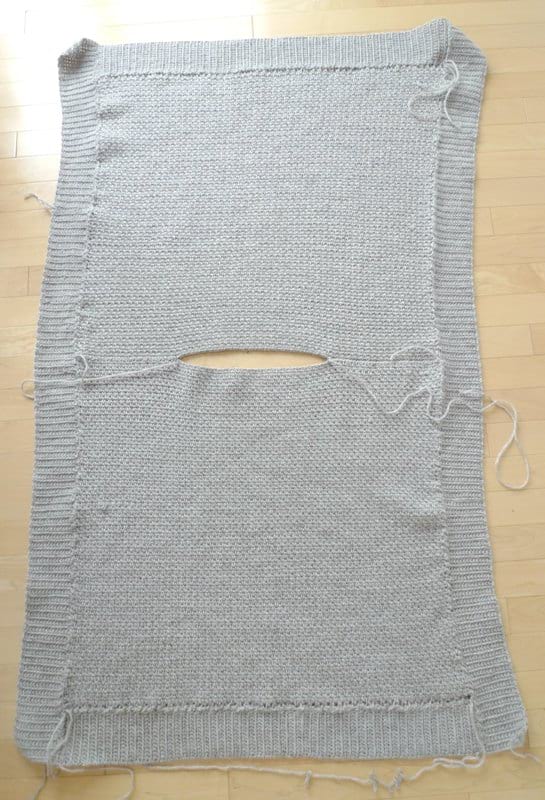
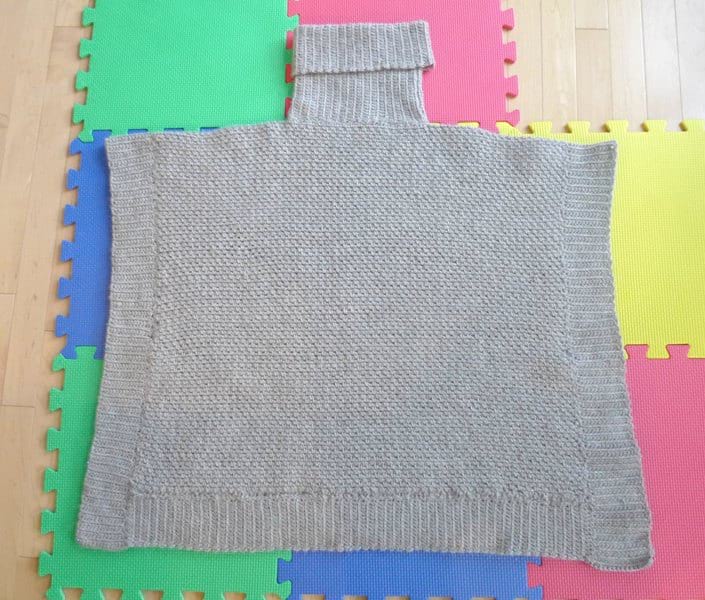
Here is my poncho with all the ribbing attached and with the neck hole visible!
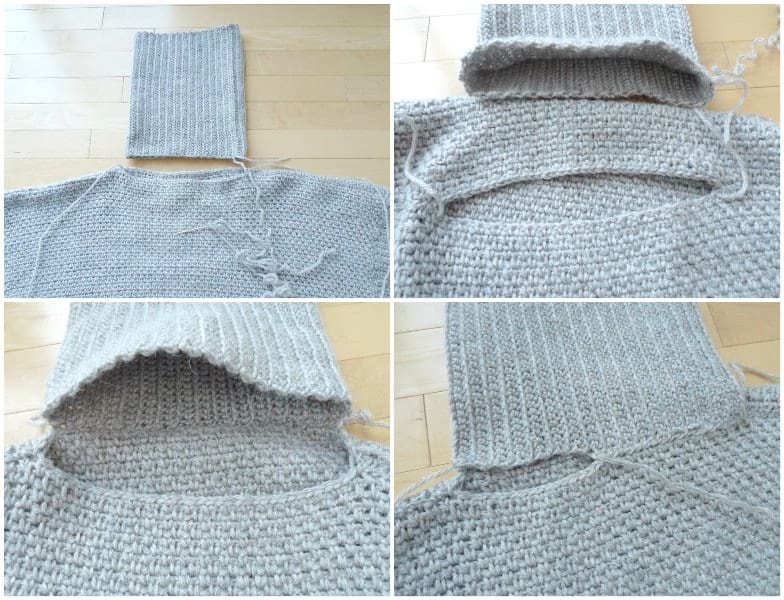
Next it was time to crochet the turtleneck! I followed the same design as the ribbing, folded it into a circle and then whip stitched the edges together.
Then, I attached the bottom of the turtleneck to the neck hole!
I folded the turtleneck down in half for a cozy look!
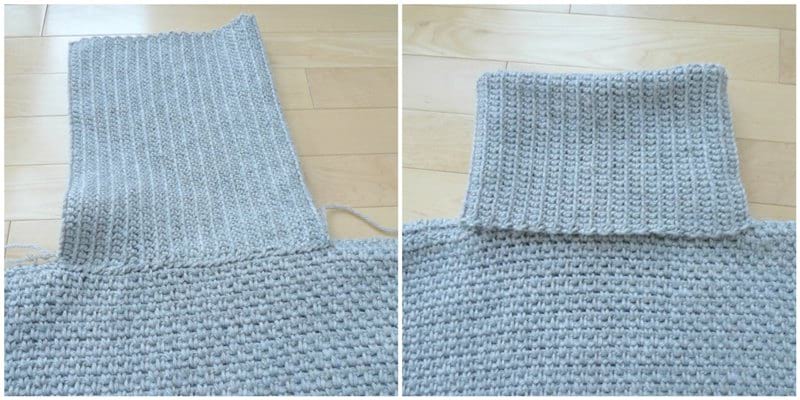
Here is my poncho with the turtleneck attached!
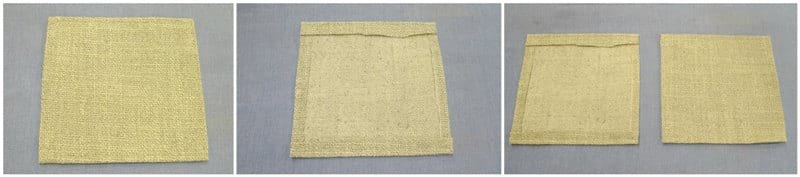
We wanted to add some fabric pockets to our crochet poncho as we love mixing materials! And doesn’t adding pockets make garments that much better? I love having a cozy place to rest my hands! Ryan cut two squares out of some thick grey fabric and left a 1/4″ seam allowance.
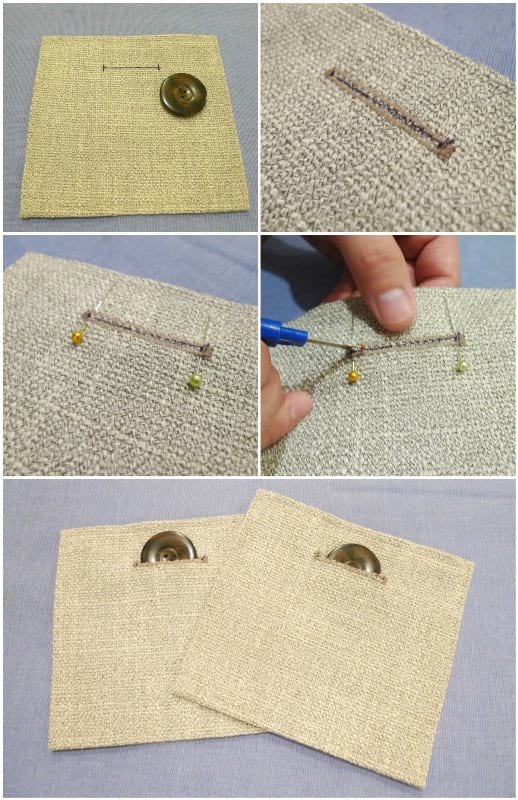
Ryan then added button holes! It was our first time sewing button holes, and I was so impressed when Ryan learned how to do it on YouTube and did it with our sewing machine! He stitched a narrow rectangle with the sewing machine. Then, he added pins on either side and used a seam ripper to create the opening so the buttons would perfectly slip in!
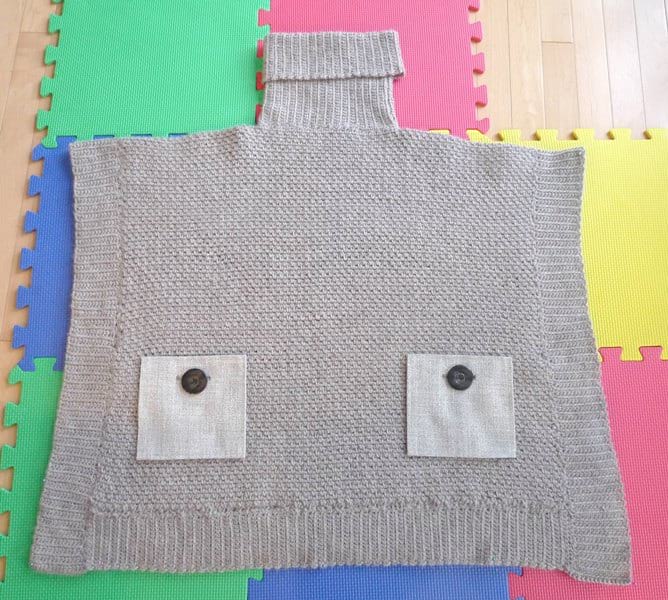
Ryan then hand sewed the pockets to the poncho with embroidery floss!
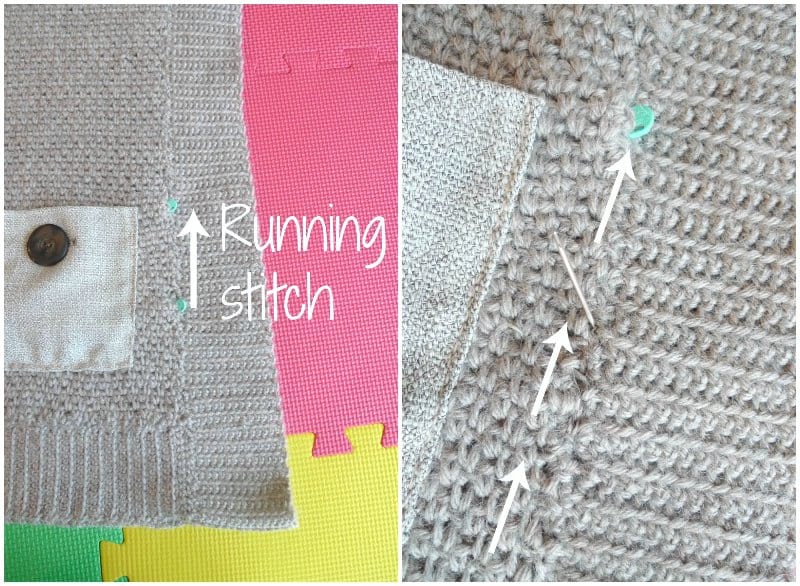
You could leave the sides of your poncho open, but I wanted to add a bit of closure and create some arm holes. I used some yarn and worked the running stitch between the two green stitch markers indicated below.
I was so incredibly excited to slip on my poncho and see how it fit and draped! I actually wore my poncho around the house for a couple of days to stretch out the length and width and to get the drape I wanted! Then, we went out and took some photos on a warmish weekend in February so I could show you how it looks when worn!
![]()
Isn’t it super cute? I’ve layered my Granite Poncho over black leggings and a grey long-sleeve shirt along with my black floppy hat and ankle booties!
![]()
Ponchos are such wonderful layering pieces and are perfect for the transitional weather when you don’t need to wear a jacket but still need to stay warm!
![]()
This is the back of the poncho! Wearing garments that you yourself create is so incredibly special! And it’s amazing how this garment has absolutely no increasing or decreasing, making it very beginner-friendly!
![]()
The Granite Poncho is so warm and cozy with the turtleneck and alpaca blend yarn. You can see where we’ve seamed together the sides in the picture below so that the sides are not completely open! Ideally, you want your poncho to have enough width so that the sides hit right around or past your elbows, so keep this in mind when you are sizing, blocking and stretching out your piece!
![]()
I think the pockets add such a cute touch with the grey fabric and bold buttons! I love being able to keep my hands and fingers cozy in these pockets! Some readers on Instagram mentioned how this poncho could work as a nursing cover and would also grow with your baby bump during pregnancy- what great ideas!
![]()
I am delighted with the newest addition to my handmade wardrobe and the latest installment of the Granite Series! The Granite Poncho is so chic, cozy, and warm, and I hope you are inspired to make one for yourself or for a friend!
![]()
I thought I would show you another styling idea! We snapped these photos right after I was done the crocheting and before we added fabric pockets. You could cinch the poncho it at the waist with a skinny belt to provide more shaping! The Granite Poncho looks very stylish when worn like this, and it’s nice having this option so you can wear it either loose and open or more sleek and defined with a belt!
![]()
The free pattern for the Granite Poncho can be found in this blog post HERE! Once again, the KIT containing all the required yarn and pattern can be found on the Lion Brand Yarn website HERE!