***You can purchase an INEXPENSIVE AD-FREE PDF of this pattern on Etsy HERE and on Love Crafts HERE! This beautifully formatted PDF includes ALL the step-by-step photos, graphics and special bonus Christmas accessories (hat for bear and headband for bunny) and is a total of 11 pages including the cover page! You can also check out my All About Ami Amigurumi Bundle HERE as it includes ALL my amigurumi designs at a discounted price!
***Note that this is the step-by-step tutorial with process photos! The free pattern with all the detailed numbers, round counts, and shaping graphics can be found HERE!
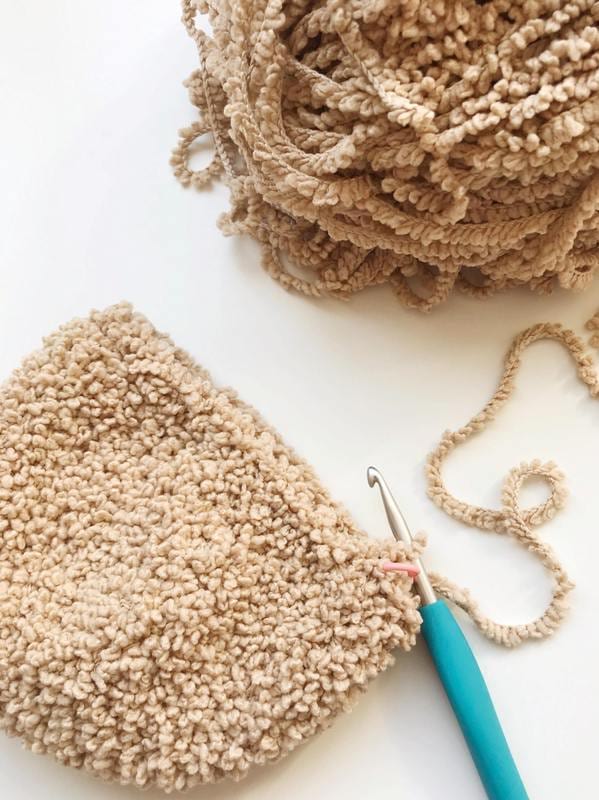
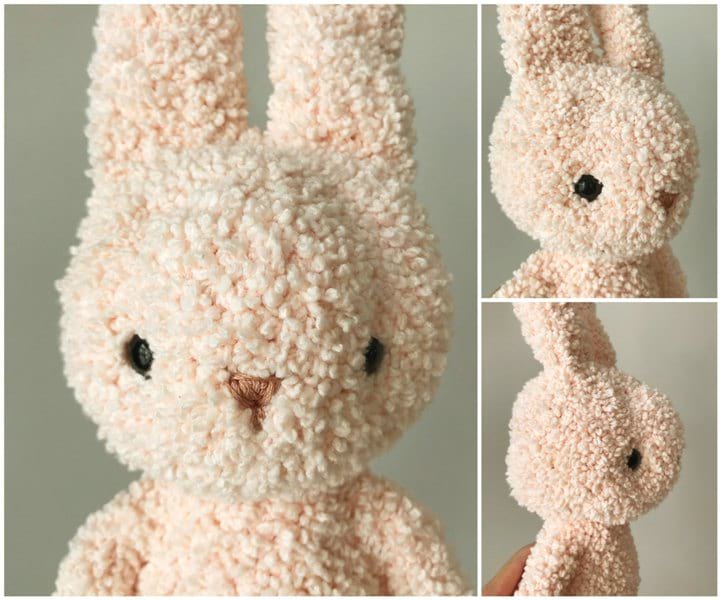
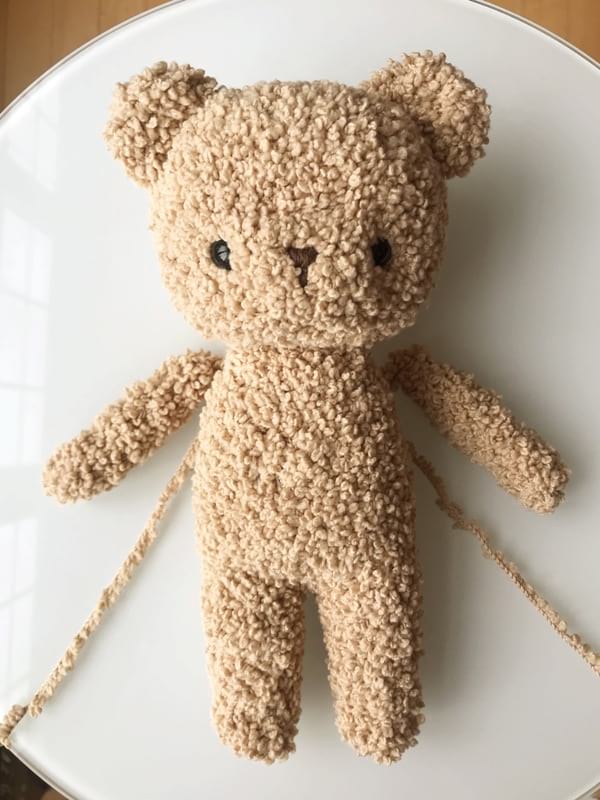
Ever since I got my hands on some Baby Soft Boucle yarn, I knew that it would make such an amazing teddy bear amigurumi with its unique texture and perfect tan color! Boucle yarn is a special type of yarn where at least two strands of yarn are combined: one strand is the anchor while the other loose strand forms loops. You can see a close-up of Baby Soft Boucle in the picture below with the anchor strand and the tiny little loops attached to it. Boucle and fuzzy yarns can be challenging to work with as you cannot see your stitches – you need to feel for the next stitch as you insert your hook into the next space. I do not recommend using boucle and fuzzy yarns as a beginner as you need some previous crochet and amigurumi experience working in a round. I have other tips for working with fuzzy yarn in my pattern HERE! The overall result of crocheting with this special yarn is amazing as all the stitches become blurred and looks like a teddy bear fabric! This also means that this yarn is more forgiving since you cannot easily see mistakes. I used my 4.5 mm Clover Amour hook to crochet all the different parts.
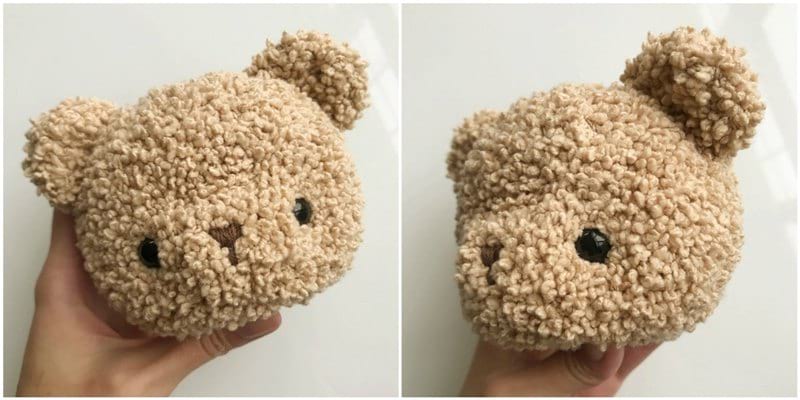
To begin, I crocheted the head and ears, and Ryan embroidered the nose (see my “Amigurumi Nose Tutorial” HERE) and indented the safety eyes. You can read about this special technique we used to pull back the eyes to give the face more depth in the pattern post! We have used this technique for our previous amigurumi as well, and it gives such a neat look. Ryan also trimmed the little loops of the boucle yarn around the safety eyes so that the eyes could be more visible!
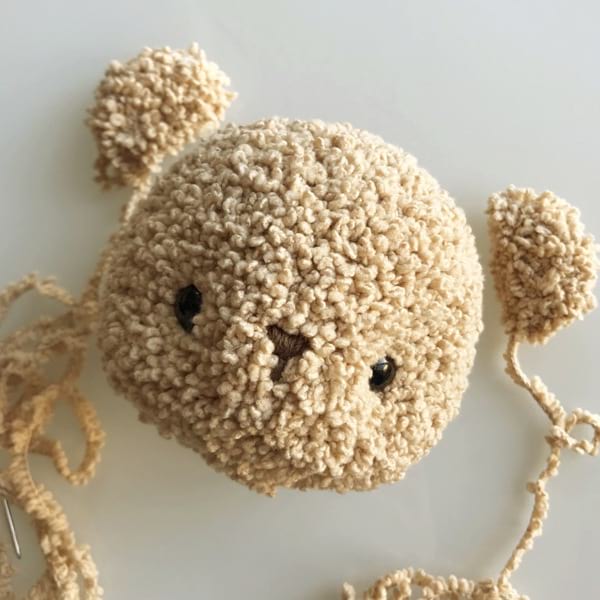
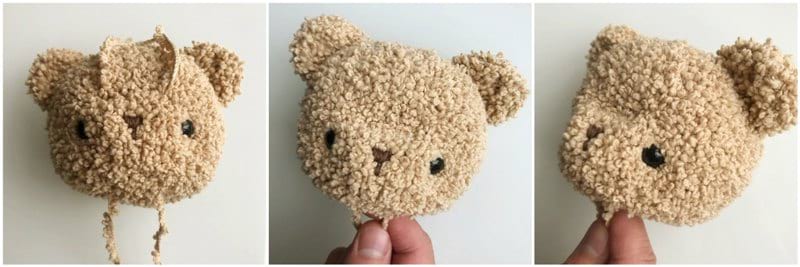
Since this boucle yarn can be tricky to work with, you’ll notice that I used very basic shapes for this pattern (e.g. a simple sphere for the head) and did not use complicated or uneven decreases and increases. To help shape the head, Ryan thought of some new techniques that we have never tried before, and they are applied AFTER the head has been crocheted! You can read about them in detail in the pattern post, but this picture below shows the creation of the snout. Ryan inserted a strand of yarn through the head as shown below, pulled tight and then tied knots. Isn’t it amazing how this technique immediately gives the face more definition as the snout is pushed out? Note that this technique works with this yarn as the strand becomes invisible as it blends in with the rest of the yarn of the head due to the texture. If you were to use regular yarn, the strand above the eyes would be visible.
It may appear as though this adorable head was created with complicated increases and decreases, but it was in fact made with some neat head shaping tricks!
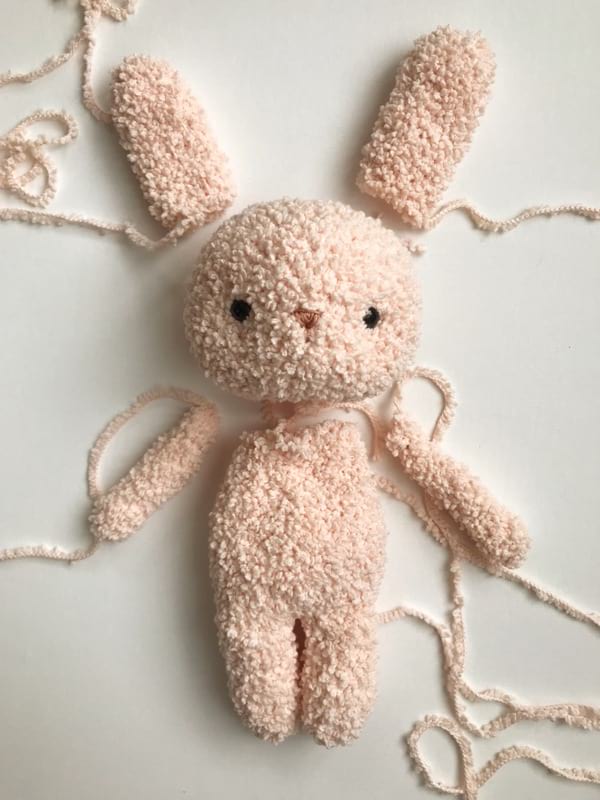
For the bunny, Ryan shaped the head differently: rather than creating a snout, he protruded the forehead to give this beautiful contoured shape!
For the legs, I used a similar technique that I have used previously in my Dragon and P.J. Teddies patterns. I crocheted two separate legs, joined them together, and then continued crocheting upwards to create the body. I love how this technique allows us to create the legs and body in one piece (yay for no extra seaming!) and gives an adorable standing look to the amigurumi.
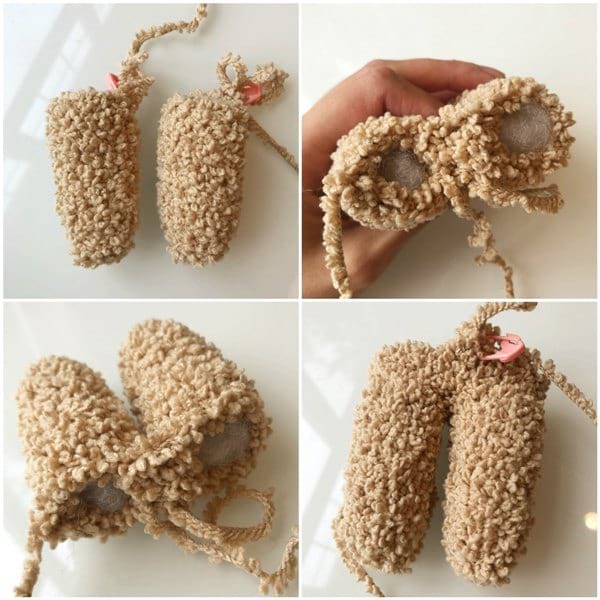
Note that the chains used to join both legs together will inevitably leave some holes between the legs. Use the yarn tail from the first leg to seam any holes or gaps shut.
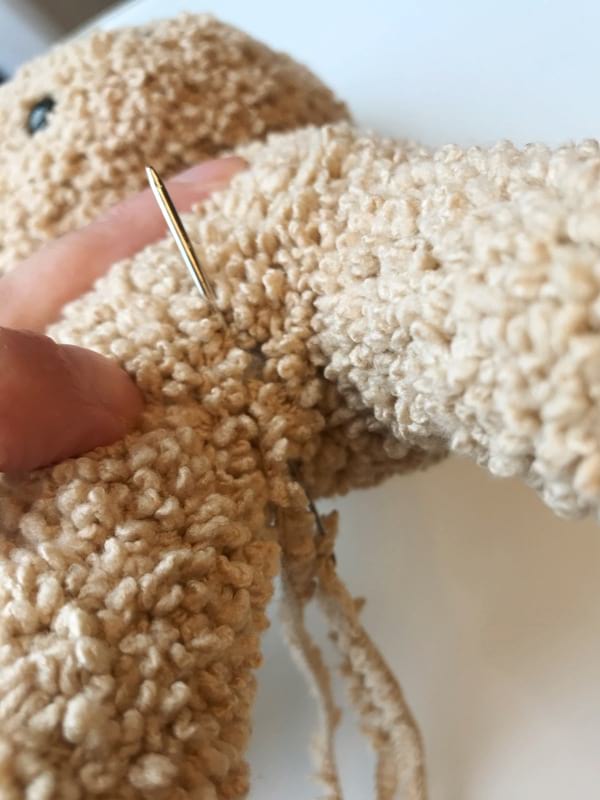
How adorable is this little body? I love the shape as it is kind of rounded towards the bottom (where the belly is) and tapered towards the top. After the body is done, you will attach it to the head!
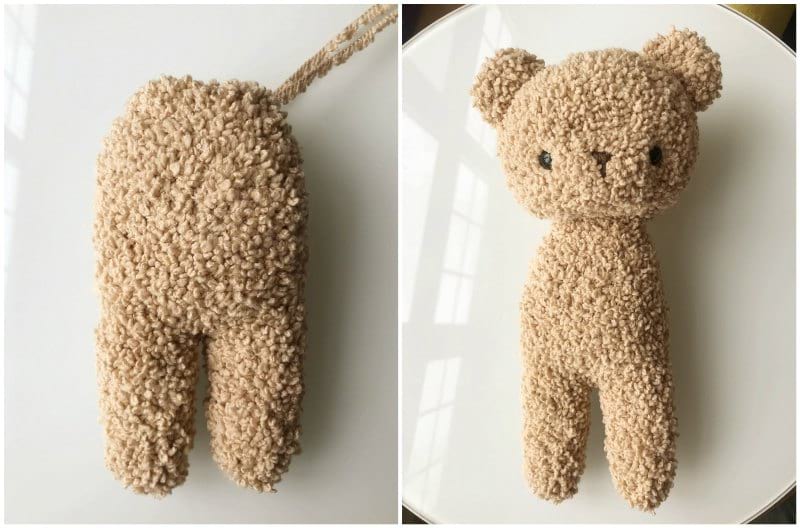
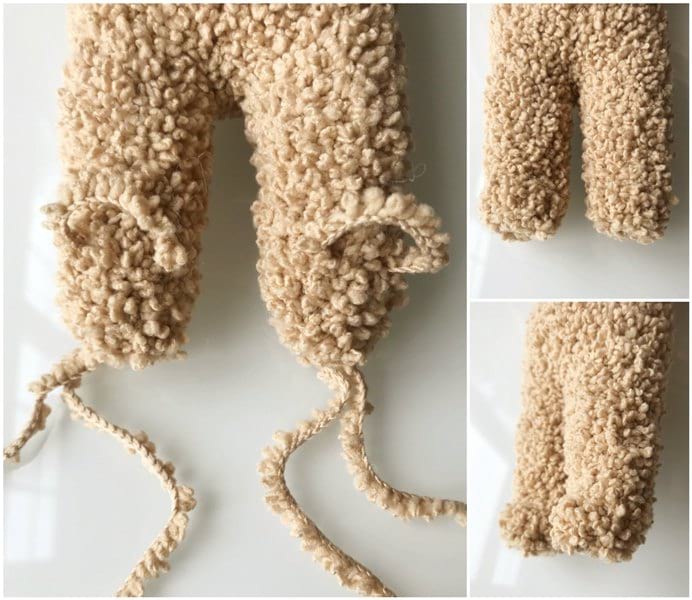
Once again, we used some more shaping techniques to help define the foot! Ryan inserted a strand of yarn through each leg, pulled tight, tied knots and created two adorable feet.
Lastly, we just needed to crochet two arms! We did not stuff them, and we attached them to the sides of the body. We made the teddy bear for our older daughter Myla and the bunny for our younger daughter Brielle! We asked them if they wanted their stuffed animals to have tails: Myla did not want a tail for her bear, but Brielle wanted a tail for her bunny!
Here are all of Bunny’s different pieces before assembly! I always think amigurumi look so cute at this stage as you see all their different parts before they are seamed together!
I hope you enjoyed seeing all the process photos of our sweet teddy bear and bunny! We are thrilled with how they turned out as the boucle yarn gives such a neat effect for amigurumi. They would make such lovely and precious gifts as these classic teddy bears and bunnies are timeless!
You can find the free detailed crochet pattern including all the face shaping graphics HERE! The PDF can be found in my Etsy store HERE and it includes all these process photos! Thank you for reading through the step-by-step tutorial, and I hope you found it helpful!